

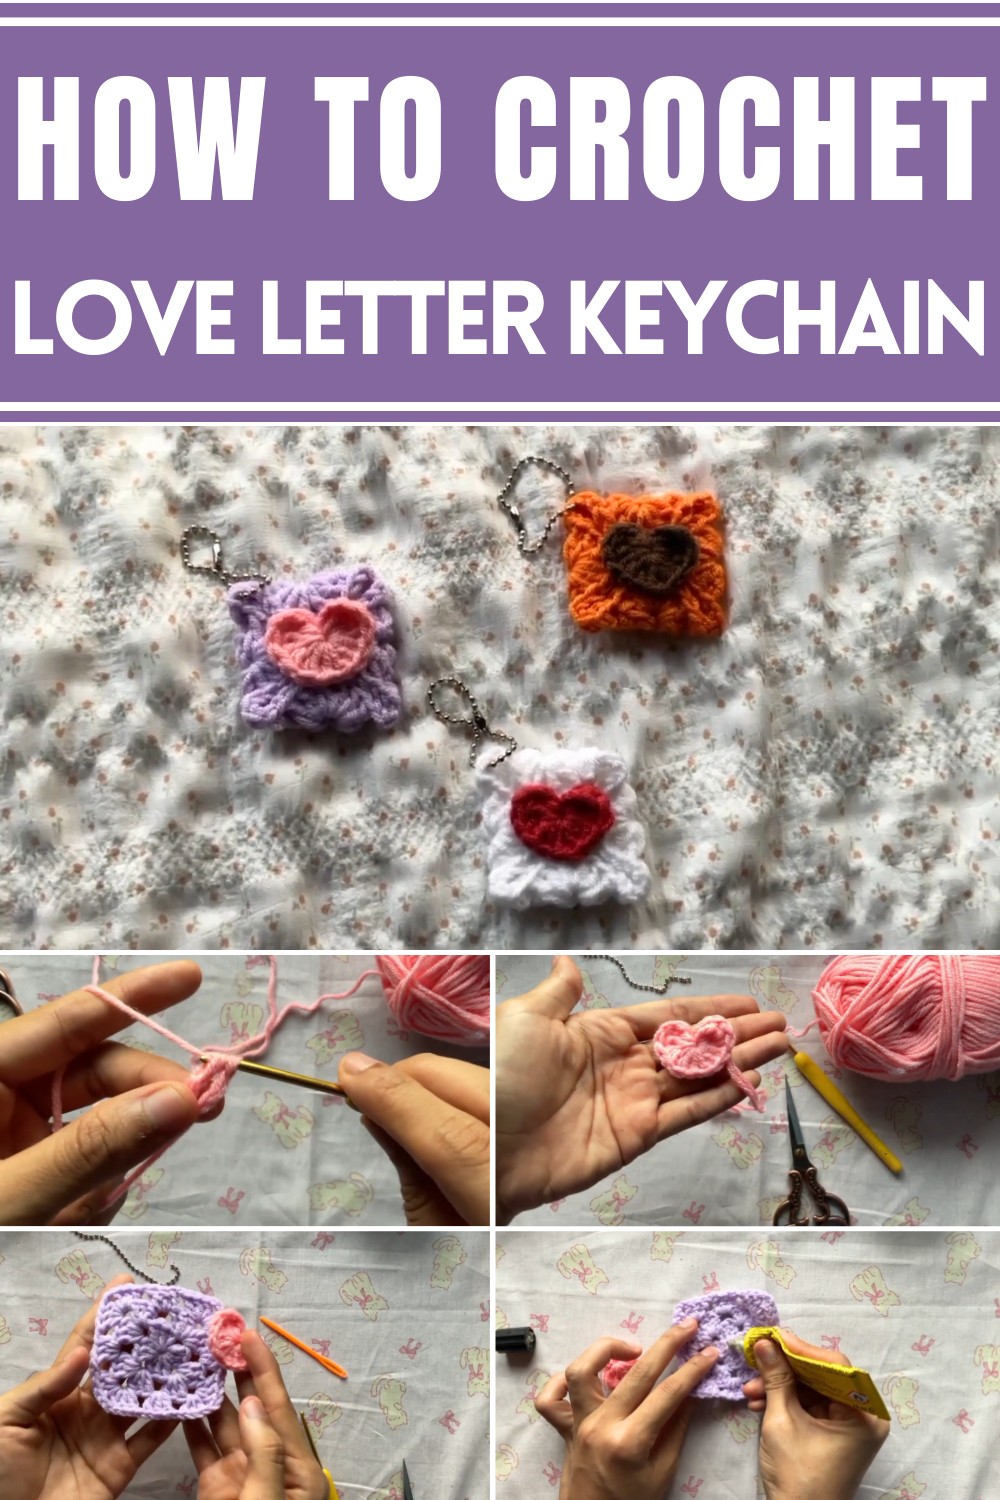
Bring charm to your keys or bags with a heartfelt crochet love letter keychain, perfect as a thoughtful gift or a personalized handmade accessory.
A thoughtful gift or personal accessory can speak volumes, and the crochet love letter keychain pattern is a delightful way to share a heartfelt message. This charming design combines practicality and sentimentality, making it an ideal keepsake for loved ones or a meaningful addition to your own collection. Shaped as a miniature envelope, the keychain can symbolize messages of love, friendship, or encouragement, all while serving as a stylish ornament for your bag or keys.
Crochet love letter keychain |Tutorial|
Its compact size ensures it’s versatile for everyday use, letting you carry a touch of warmth wherever you go. Whether you're using it to brighten someone’s day or to infuse your daily routine with a personalized touch, the love letter keychain is easy to customize with different colors and yarns to match any personality or occasion.
Beyond aesthetics, this pattern serves as a wonderful way to use leftover yarn, turning scraps into a treasure. Simple and fun to make, it’s perfect for gifting or selling as thoughtful handmade goods. Small, yet full of charm and meaning, this crochet keychain brings a playful twist to both creativity and sentimentality, proving that even the tiniest creations can spark joy.
Introduction
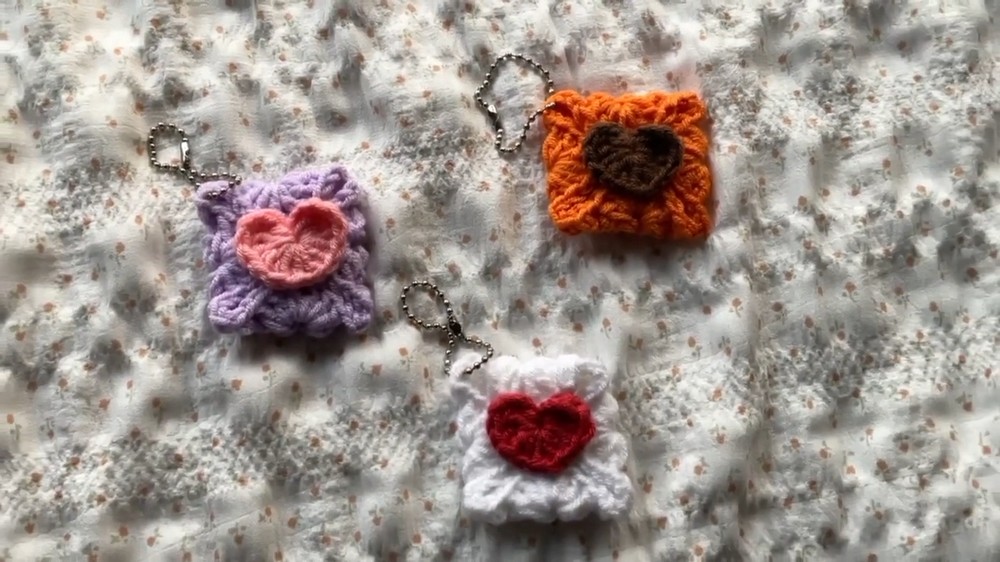
In this pattern, the creator demonstrates how to crochet a charming and practical Love Letter Keychain a perfect handmade gift for your loved ones. Using basic crochet techniques, the project combines a small heart with a folded granny square to create the look of a love letter. This project is easy to follow, beginner-friendly, and can be customized in terms of colors and size. By the end of this pattern, you will have a unique keychain that can also be a thoughtful keepsake for anyone.
1. Materials Needed
For this project, gather the following items:
- Yarn in two colors (one for the heart and one for the granny square love letter).
- 3 mm Crochet Hook
- Tapestry Needle (optional for weaving in ends).
- Stitch Marker (optional to mark stitches).
- Key Ring (metal or any type you prefer).
- Scissors
- Glue or adhesive (for folding and attaching the heart).
 1234
1234
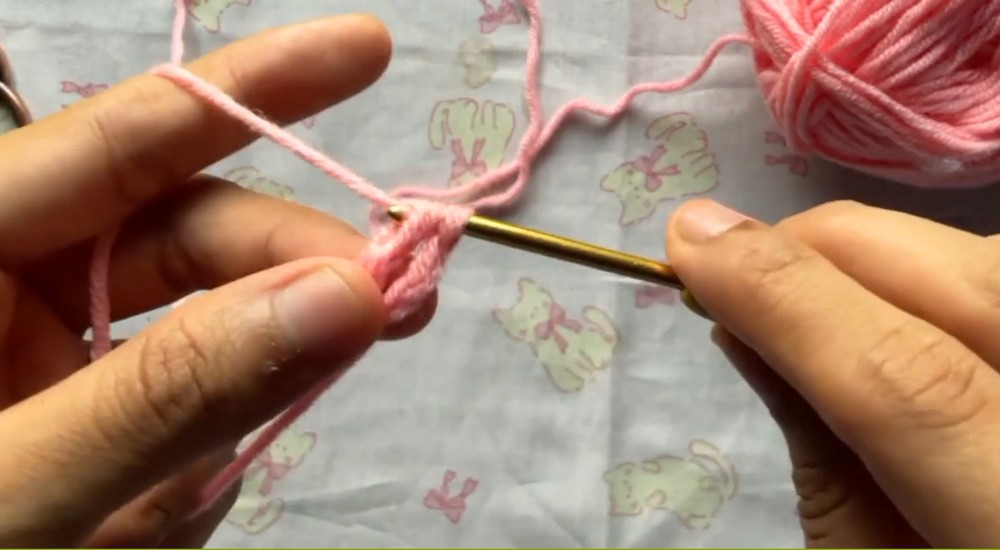
2. Making the Crochet Heart
Steps:
- Create a Magic Ring: Start by making a magic ring.
- Chain 3: Yarn and pull through three chains (counts as triple crochet).
- Make 3 Triple Crochets: Yarn over twice for each triple crochet into the magic ring (pull through two loops three times).
- Make 3 Double Crochets: Follow the same technique but only pull through two loops twice for each double crochet.
- Customization Tip: To make a smaller heart, use 3 double crochets instead of triple crochets, and 3 half double crochets instead of double crochets.
- Chain 1: After the double crochets, chain one for the next step.
- Make Another Cluster:
- 3 Double Crochets.
- 3 Triple Crochets into the magic ring.
- Close the Heart:
- Chain 3, then slip stitch into the magic ring.
- Cut the yarn and pull it out. Tie a simple knot at the back to secure the yarn tail.
- Close the Magic Ring Tight: Adjust the circle and tighten the magic ring to finish the heart.

Your heart is now completed and ready for attachment.
3. Creating the Granny Square Love Letter
Steps:
- Set Up the Base:
- Make a magic ring and chain three (counts as double crochet).
- Form the first cluster by making 3 total double crochets into the magic ring.
- Chain 2.
- Complete Round 1:
- Repeat (3 double crochets, chain 2) to form a total of 4 clusters (three double crochets per cluster).
- Close the magic ring tight and make a slip stitch into the third chain from the start.
- Round 2:
- Chain 4 and into the chain-2 space, make a cluster (3 double crochets) followed by chain 2 and another cluster.
- Chain 1 between clusters.
- Repeat for each chain-2 space in the round.
- Finish with a slip stitch into the third chain.
- Round 3:
- Chain 3 and proceed by creating clusters (3 double crochets) into chain-1 spaces. For corners (chain-2 spaces), work one cluster, chain 2, one cluster.
- Chain 1 between corner clusters.
- Repeat until all spaces are worked.
- Finish round 3 with a slip stitch and cut off the yarn.
- Final Round (Optional):
- Continue the granny square for four rounds total, repeating the pattern for chain-spaces and corners.
- Weaving Ends:
- Thread the yarn tails through a tapestry needle and weave them into the stitches. This hides the loose ends and ensures a clean finish.
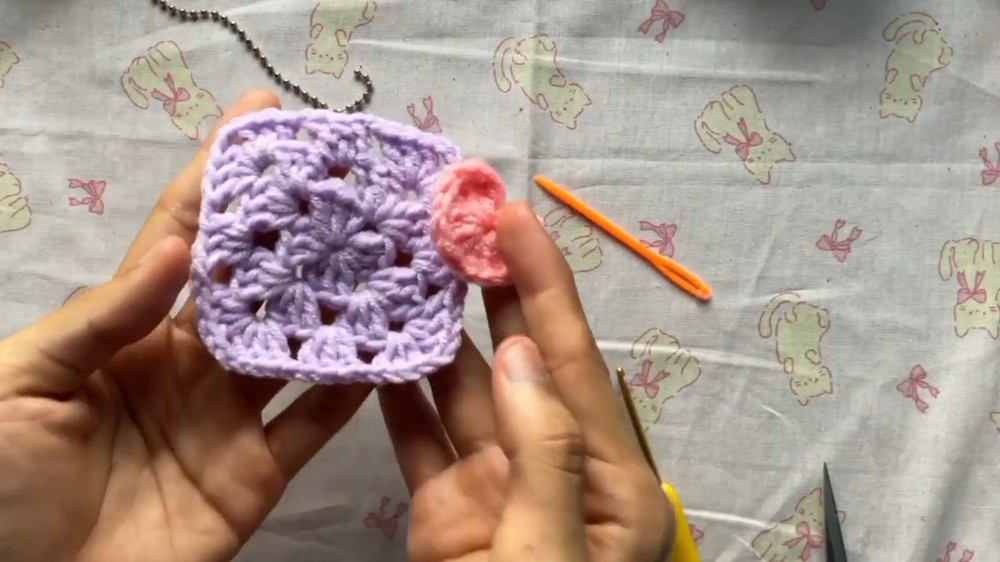
4. Assembly: Folding the Love Letter
Steps:
- Prepare the Granny Square:
- Fold the granny square into four equal sections by bringing the corners together. This makes it resemble a folded envelope or letter.
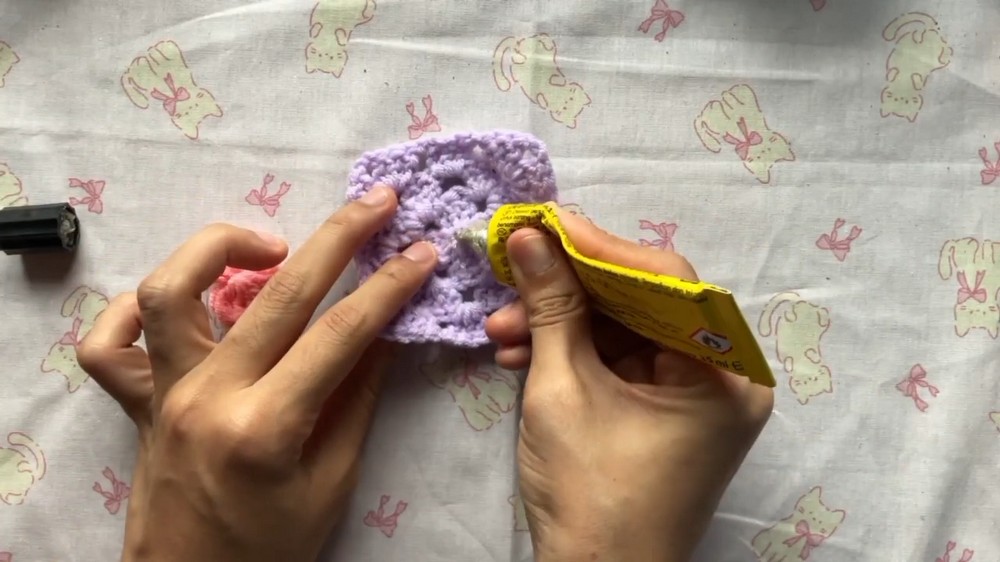
- Apply Glue:
- Using glue, attach the corners together to hold the "envelope" structure.
- Allow each part to dry before continuing.
- Attach the Heart:
- Apply glue to the back of the crochet heart.
- Position the heart on the front center of the folded granny square and press gently to secure it in place.
5. Adding the Key Ring
Steps:
- Select the corner of the folded granny square where you want the key ring to be attached.
- Slide the key ring through and adjust it securely. Metal key rings work well for durability, but you can use other designs depending on your preference.
Conclusion
The Love Letter Keychain is an adorable handmade project that lets you express creativity and heartfelt sentiment. By combining a crochet heart with a granny square, you get a gift that’s functional and decorative. Whether you keep it for yourself or gift it to someone special, the customization options (such as adjusting heart size or colors) make it unique for every crocheter.
Leave a Reply