

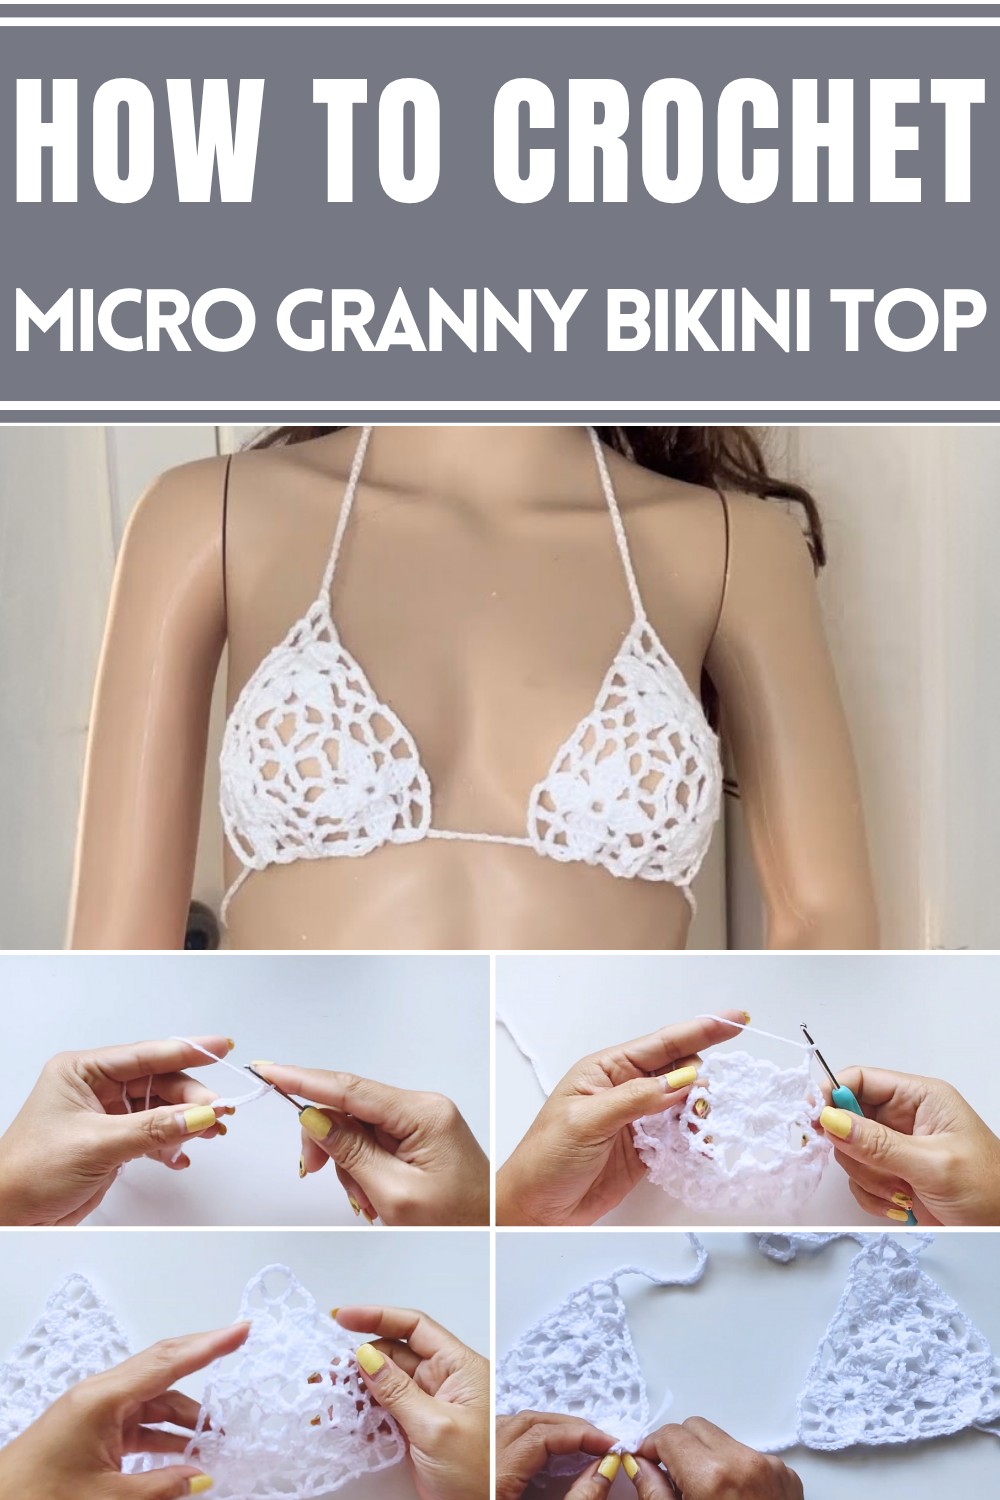
Sparkle at the poolside with a chic crochet micro granny bikini top pattern, featuring trendy granny squares and sleek, customizable straps!
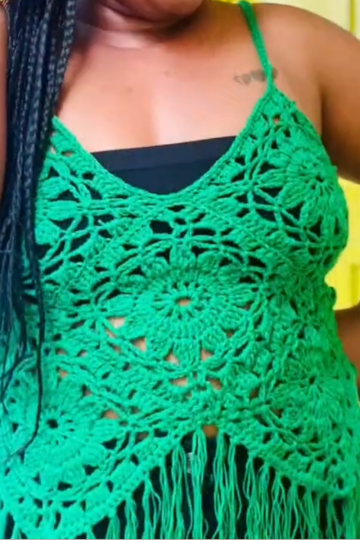
Swimwear meets artistry with a design that transforms traditional granny squares into a striking fashion statement for summer. The crochet micro granny bikini top delivers the perfect fusion of vintage charm and contemporary styling with its intricate patterns and minimalist structure. Its lightweight, breathable design makes it ideal for poolside lounging, sunny beach days, or festival looks with a creative twist.
Crochet Micro Granny Bikini Top Pattern For Swim
Offering more than aesthetics, this bikini top stands out for its versatility. Customizable options for size, color combinations, and straps ensure it caters to every body shape and personal preference. Whether leaning toward bold, vibrant tones or understated elegance, it’s easy to adapt this piece to match your unique style.
Its texture provides comfort while making a statement, blending practicality with one-of-a-kind artistry. Perfect for layering under summer outfits or worn solo by the water, it transitions effortlessly between casual looks and glamorous vibes. The crochet micro granny bikini top is more than swimwear—it’s a celebration of individuality, giving every wearer the freedom to shine with confidence.
Introduction
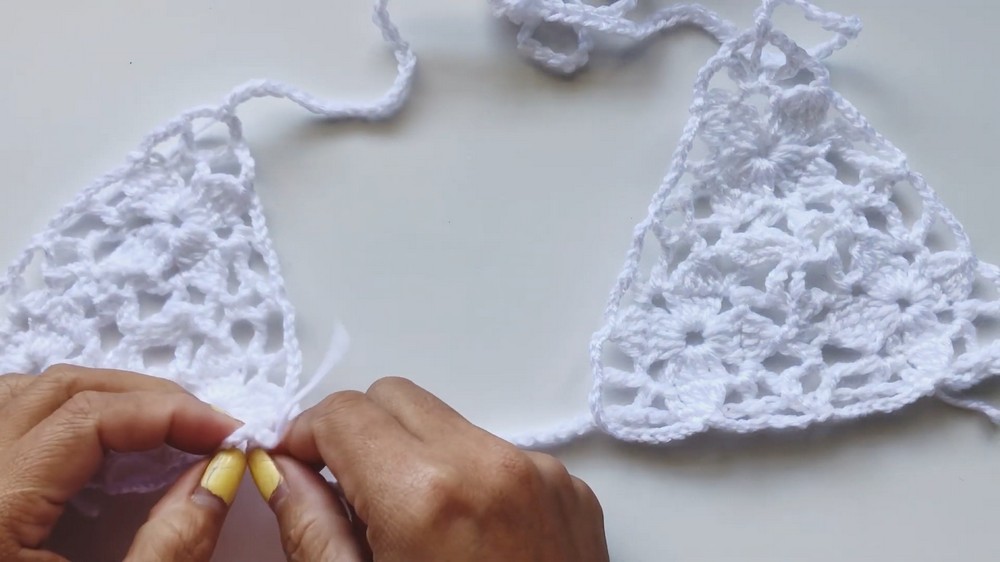
The pattern walks you through the process of creating a unique and stylish crochet micro granny bikini top. This pattern uses three granny squares connected into a triangular shape, which is then complemented by straps and cords for a fully functional bikini top.
Materials Needed
- Yarn: 8-ply acrylic yarn (white in the tutorial)
- Crochet Hook: 3mm (4mm for straps)
- Scissors
- Mannequin (optional for fitting)
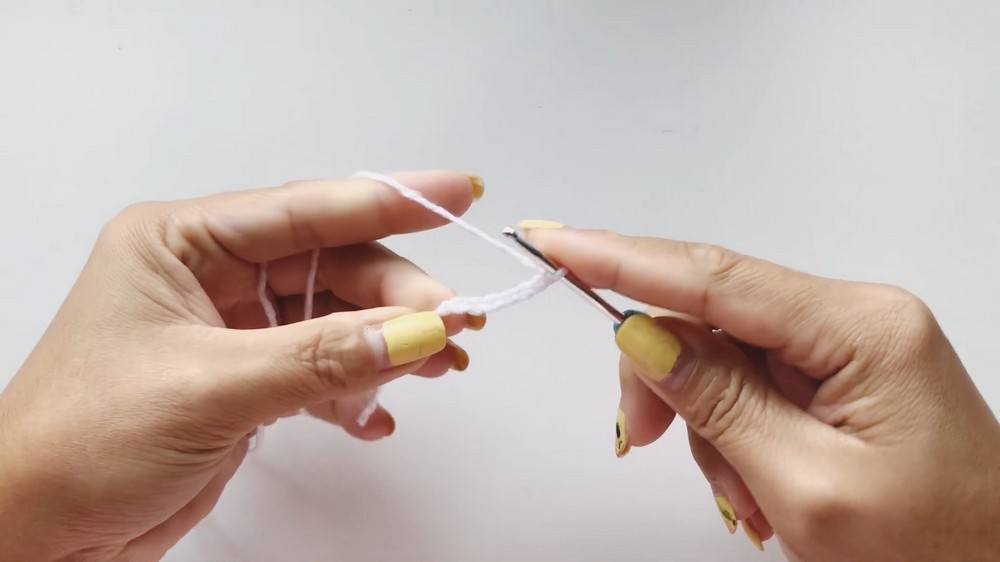
Step 1: Creating the First Granny Square
- Start: Make a slip knot and chain 7.
- Form the Ring: Slip stitch into the first chain to create a magic ring.
- First Row of Granny Square:
- Chain 3 (counts as the first double crochet).
- Add 3 double crochets, creating a total of 4 double crochets.
- Chain 3 for the first corner.
- Repeat the process of 4 double crochets and chain 3 to create three more corners.
- Slip stitch into the top of the initial chain 3 to join the round.
- Second Row of Granny Square:
- Chain 3 again (starting the row and counting as a double crochet).
- Create clusters of 4 double crochets together, and chain 4 between them.
- At each corner, work 1 triple crochet, chain 6, and another triple crochet to make the corner design.
- Continue the process for all corners and join the round by slip stitching into the starting chain 3. Fasten off.

Result: You now have your first granny square.
Step 2: Connecting the Second Granny Square
- Create the Second Granny Square:
- Follow the same steps as above for the first row.
- In the second row, begin connecting the second granny square to the first.
- Connecting Process:
- At each corner that needs connecting, replace chain 6 with chain 3, insert into the corner of the first granny square (using a single crochet), and chain 3 to return to the working square.
- Chain 2 to connect the edges of the squares where required (instead of chain 4) and insert into the corresponding spaces of the first granny square using single crochet.
- Continue the second row’s pattern, connecting both squares at one side during the process.
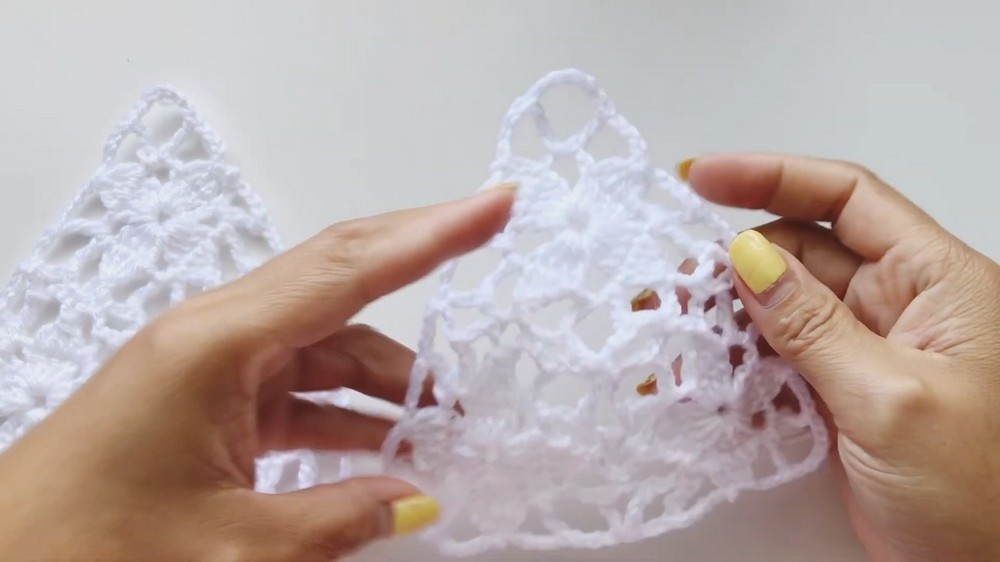
Step 3: Adding the Third Granny Square
- Repeat: Create the first row of the third granny square as per previous steps.
- Connecting Two Sides:
- The third granny square is connected to both of the existing squares to form a triangular pattern.
- Use the same method: chain 3 for corners, insert into the corresponding corner with single crochet, chain 3 to finish the corner.
- Connect edges with chain 2 and single crochet in between the squares to ensure the proper alignment.
Step 4: Creating the Neck Strap
- Switch to a 4mm Hook: For creating stronger and thicker straps.
- Make a Long Chain: Chain approximately 100 stitches (or adjust based on your preferred strap length).
- Single Crochet Back: To reinforce the strap and create a neat edging, single crochet across the chain, working into the back loops.
- Attach the Strap: Connect the strap to the top of the triangle, ensuring symmetry on both sides.
Step 5: Adding the Bottom Cord Strap
- Create a Long Chain: Construct a chain cord long enough to go around your back.
- Optional Reinforcement: Single crochet back along the chain for added durability.
- Insert the Cord:
- Use the cord to weave through the bottom part of the granny squares.
- Insert in and out through the spaces at the base of the triangles.
- Final Adjustment: Tie the cord securely at the back, leaving enough extra space for adjustment or styling.
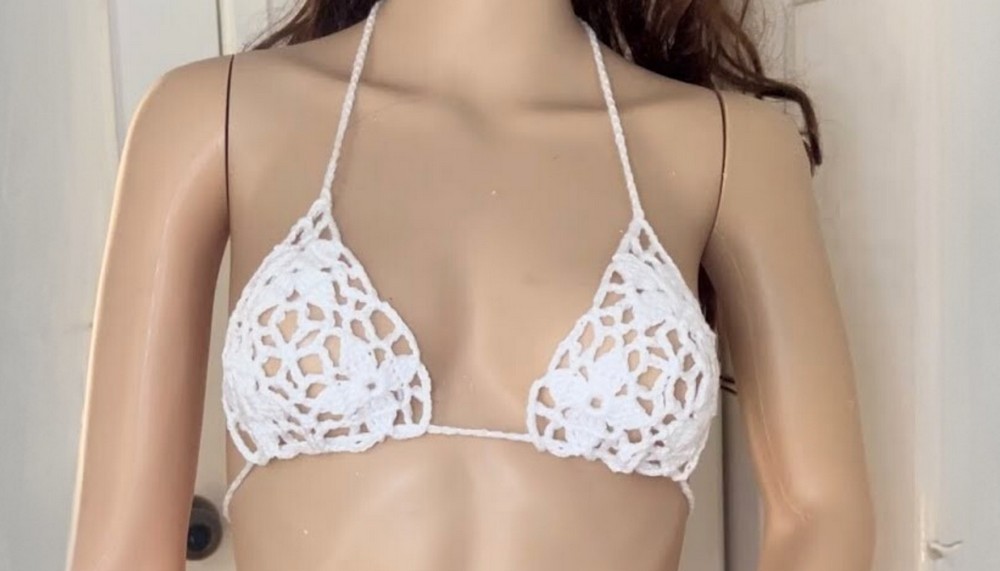
Step 6: Final Touch and Fitting
- Mannequin Display (Optional): Place the bikini top on a mannequin for styling and checking proper fit.
- Finishing Matching Pieces: Optionally, create matching bikini bottoms using similar techniques described.
Conclusion
By following these steps, you can create a gorgeous crochet micro granny bikini top that is lightweight, stylish, and perfect for any summer outing. The use of simple granny square motifs makes this project beginner-friendly but allows for creative customization with different yarn colors and strap designs. Whether you create this for yourself or as a unique handmade gift, this pattern will surely stand out.
Leave a Reply