

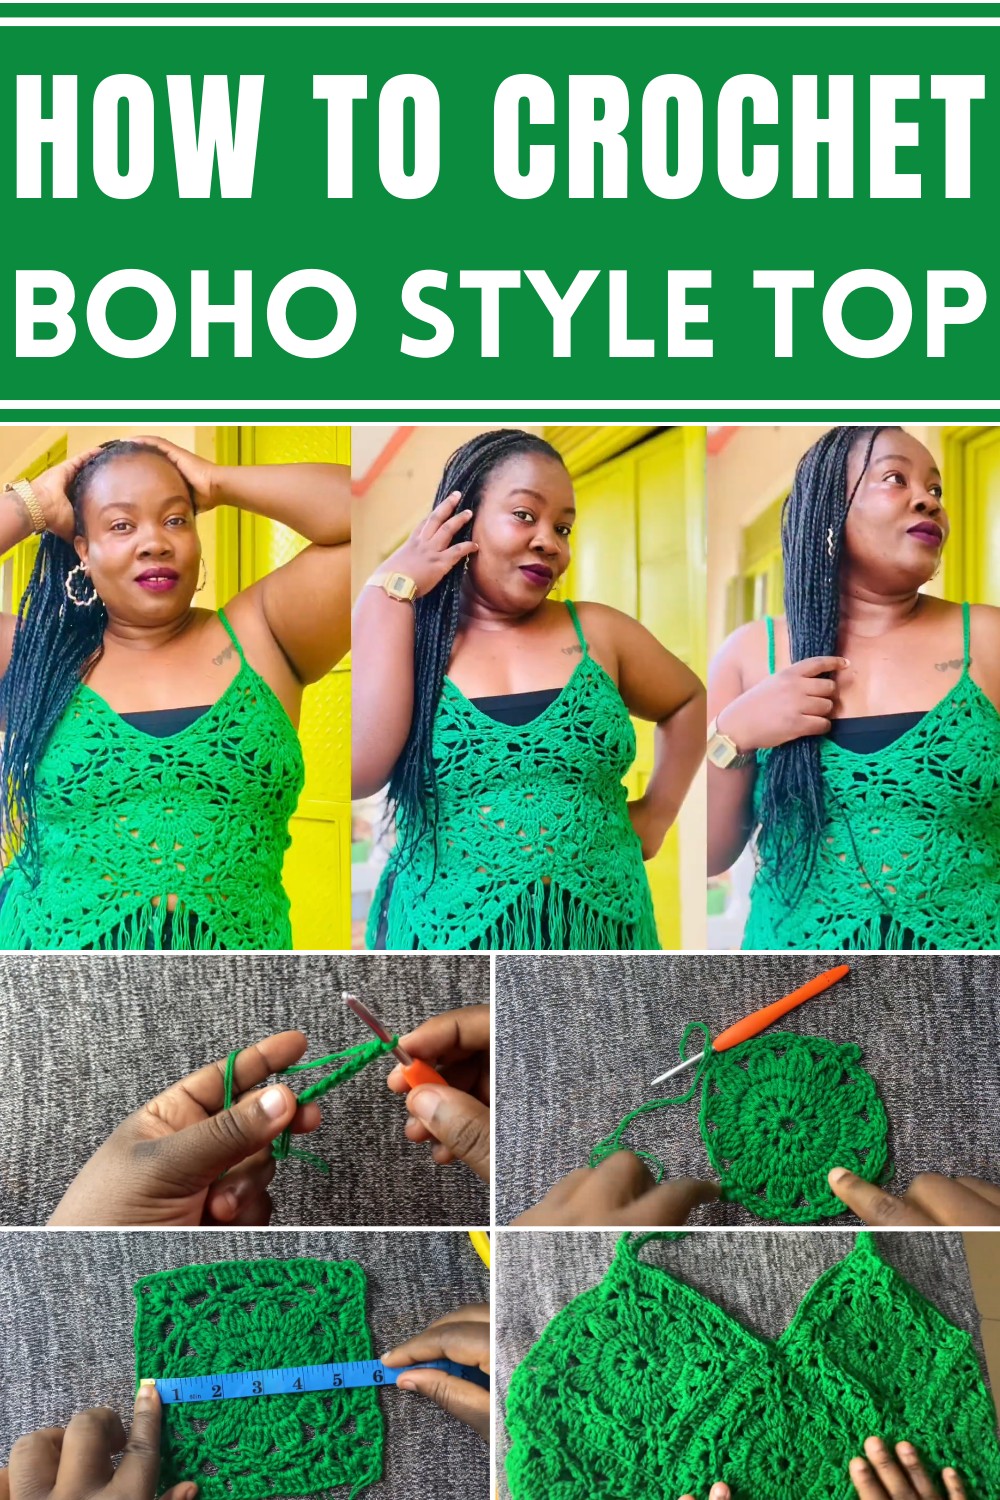
Open the door to effortless summer fashion with this Crochet Boho Style Top Pattern—perfect for creating a breezy, chic look you'll adore!
Beautiful summer days call for clothing that’s both stylish and comfortable. A crochet boho-style top offers the perfect combination of breezy elegance and casual charm, making it an ideal choice for warm weather wardrobes. Designed to suit a variety of occasions, this top is versatile enough for a beach outing, a summer festival, or a casual day spent with friends. Lightweight and airy, it provides unmatched comfort while highlighting bohemian aesthetics with its delicate stitch details and optional fringe accents.
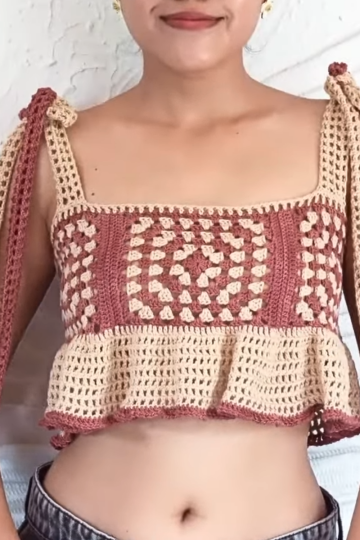
Customizable Boho Crochet Top Pattern for All Sizes
Tailored for crafters of any skill level, this pattern allows you to personalize your creation to fit your unique style. Its timeless design ensures that your finished piece complements everything from jeans to flowy skirts. Aside from its visual appeal, the practical benefits of choosing a handmade crochet top are undeniable. The breathable texture keeps you cool even during hot summer afternoons, while the intricate style adds sophistication to your look.
Perfect for expressing individuality, the boho-style top also encourages sustainable fashion through handmade techniques. Whether dressing down or accessorizing for a chic statement, this garment is bound to become a standout piece in your collection. It doesn’t just elevate your fashion game—it enhances your wardrobe in ways that combine comfort and effortless style.
Materials You’ll Need
- Yarn (thin yarn doubled for better coverage)
- Crochet hook (4.5 mm)
- Measuring tape
- Scissors

Step-by-Step Details
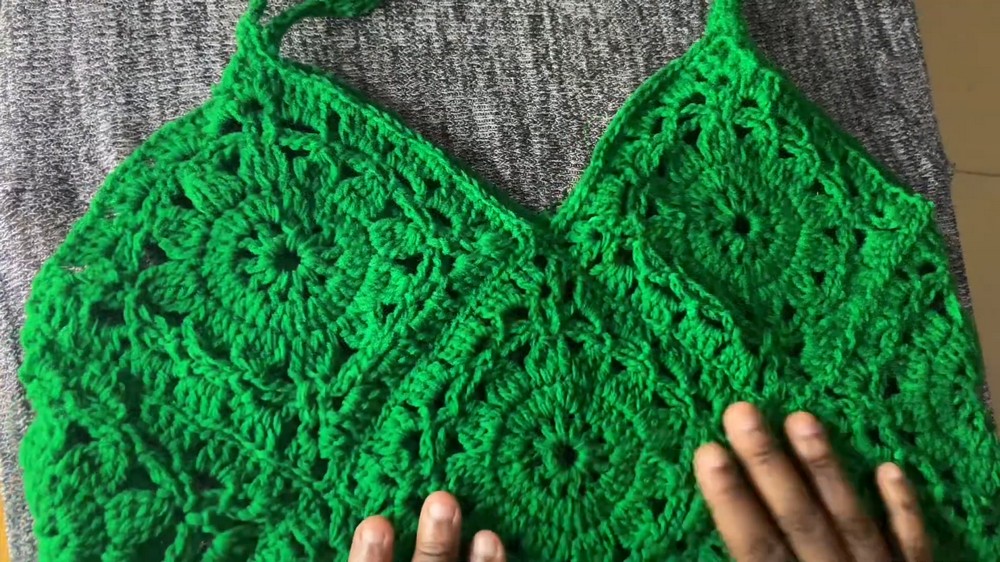
1. Making the Granny Square (Base of the Design)
- Begin by creating a slip knot and chaining seven.
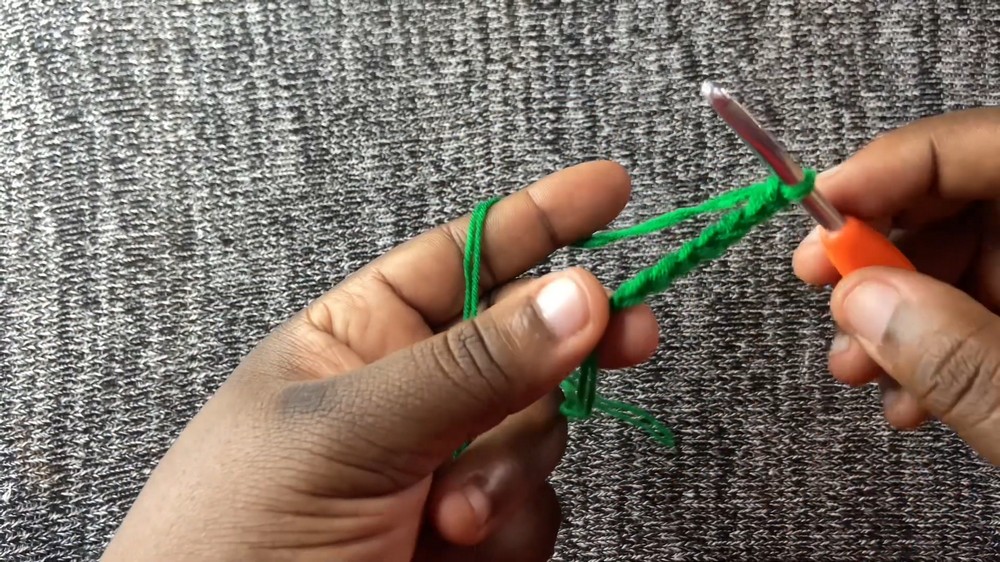
- Slip stitch in the first chain to form a ring.
- Chain three (counts as a double crochet and chain one), and continue with 12 double crochets in the ring.
- Slip stitch to join the round after completing the double crochets.
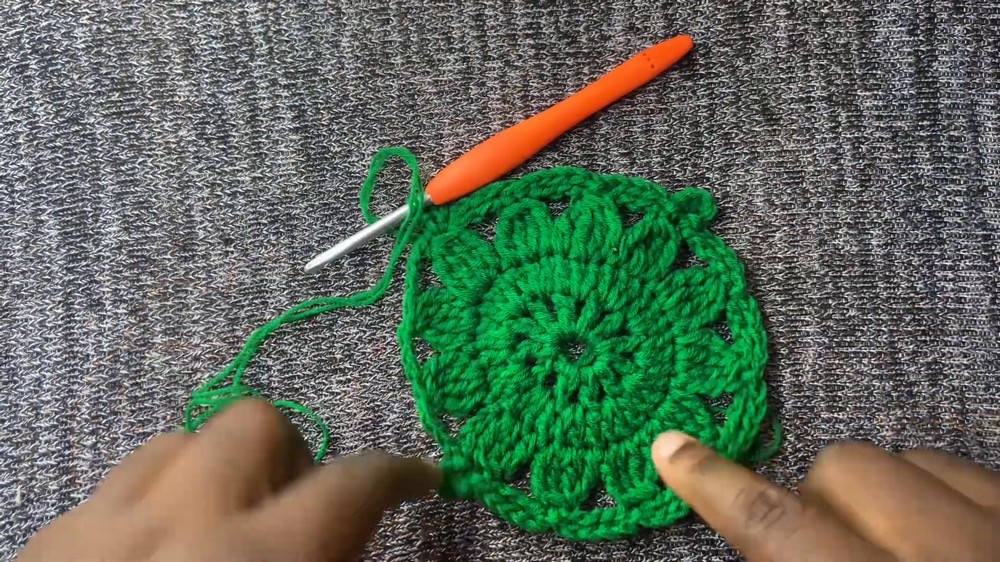
- For the second row, make two double crochets in each chain space and one double crochet in the stitch—all around the ring.
- Finish by slip stitching on top of the last stitch.
- Follow these steps to make a total of 8 granny squares for the crop top.
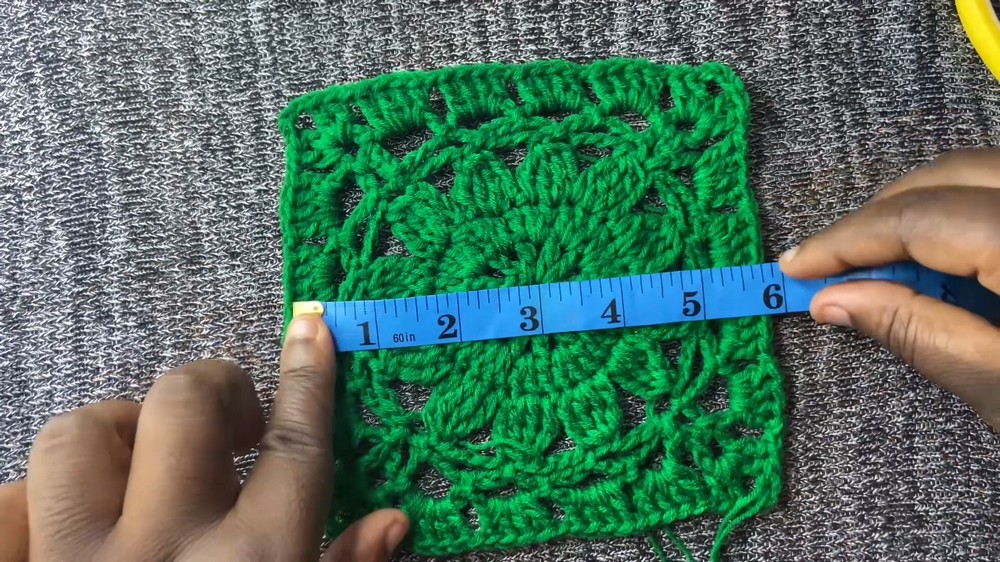
2. Creating the Corners of the Granny Squares
- Chain five and slip stitch into the top of each petal to create loops.
- On each side of the granny square, form three loops followed by a corner formed by chaining five and slip stitching at the same location.
- Complete this process for all granny squares.
3. Extending the Granny Squares
- Slip stitch to the top loop of the first corner.
- Chain five and stitch into the middle loops to expand the square.
- Continue with chain-5 loops around the edges of the granny square and repeat for all squares.
4. Assembling the Squares
- Arrange the granny squares in the desired pattern (refer to the tutorial’s layout).
- Use a crochet needle or single crochet stitches to join the pieces edge-to-edge.
- Once assembled, the squares will form the base of the crop top.
5. Adding Fringe
- Cut yarn into equal-length strands for fringe.
- Fold 3 strands and attach them by pulling through the edges of the top.
- Space the fringe evenly, approximately 3 stitches apart, to ensure a neat finish.
6. Creating Sleeves and Edging
- For the sleeves, chain 50 and slip stitch to attach each sleeve on either side of the top.
- Clean the edges with single crochet stitches for a polished appearance.
- Add single crochets around the chain stitches to reinforce and thicken their structure.
Special Features
- Fringe Details: Add charm and motion.
- Sleeves: Provide modest coverage while maintaining elegance.
- Customizable Fit: Adjust the number of granny squares for sizing needs (e.g., add squares for larger tops).
Level of Difficulty
This project is rated as intermediate, requiring familiarity with basic stitches like double crochet, slip stitch, and chain stitch. Beginners with persistence may also learn from these methods.
Tutor’s Suggestions
- Double up thin yarn to achieve greater thickness and better coverage.
- Carry yarn endings along with your stitching to avoid tedious weaving at the end.
- Use measuring tools to ensure consistency in fringe lengths.
Uses and Benefits
This crop top is versatile, ideal for casual hangouts, festivals, and summer outings. The handmade nature adds uniqueness and allows for a personalized fit. Additionally, crocheting promotes relaxation and mindfulness while producing wearable art.
Tip
When assembling the granny squares, ensure the pieces align symmetrically. This helps achieve a balanced and professional appearance for the finished crop top.
Conclusion
This crochet crop top tutorial combines creativity, style, and practicality in one engaging project. With detailed steps and room for customization, this top is an excellent addition to your crochet repertoire. Whether for personal use or gifting, the end result will be a beautiful and functional piece designed with love.
Leave a Reply