

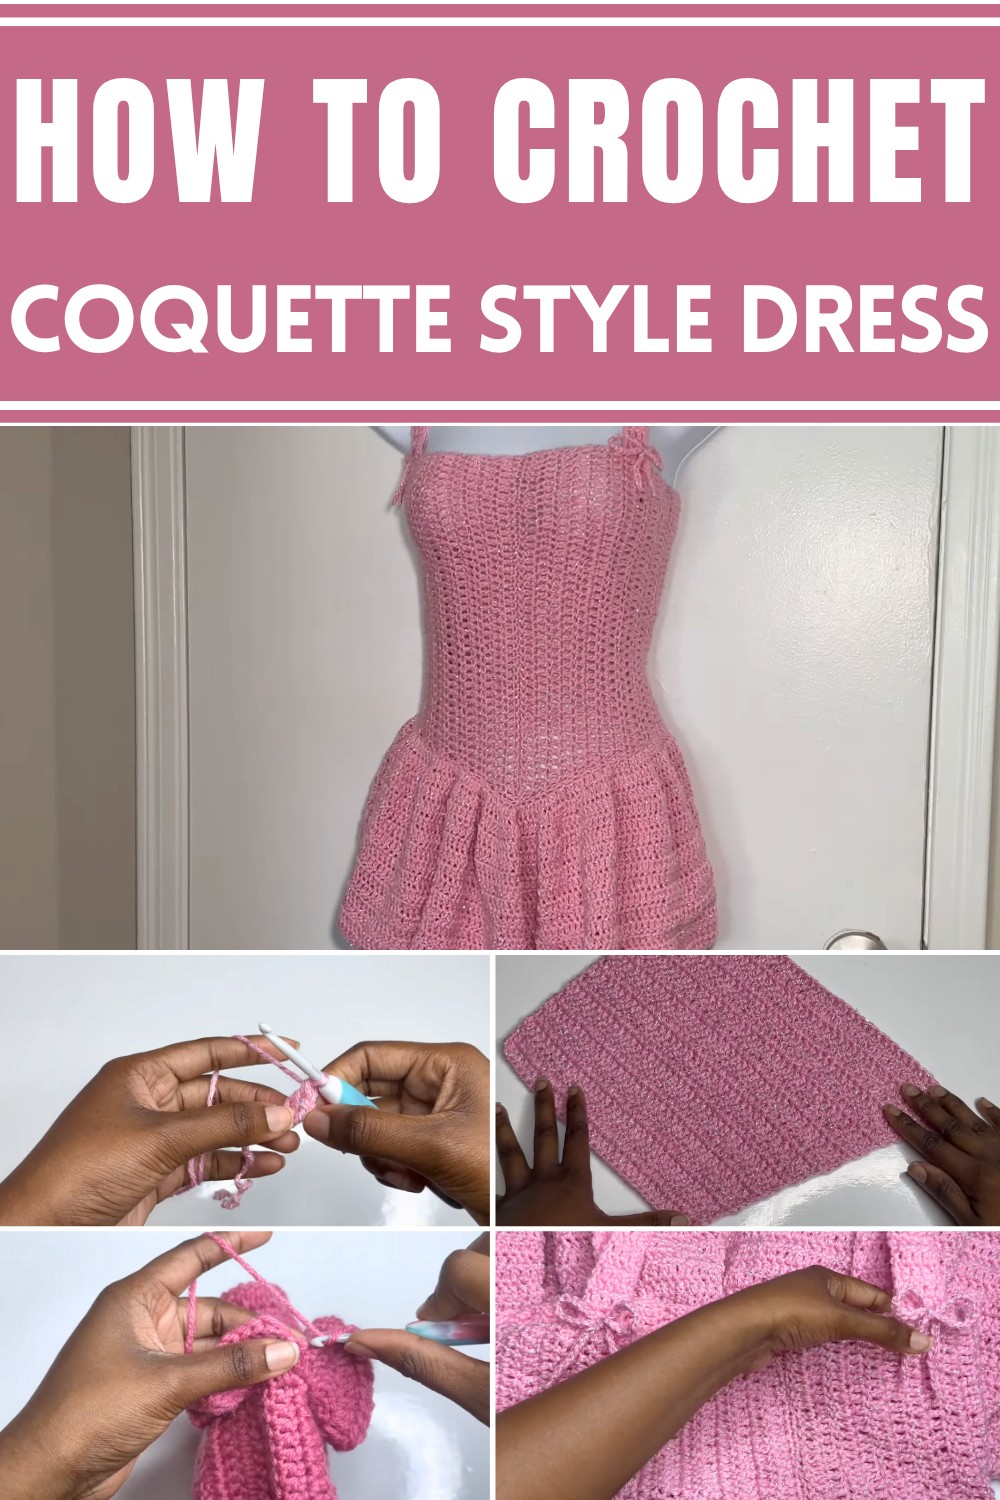
Stitch your way to fashion flair with this luxury crochet coquette dress pattern—perfect for stylish trendsetters ready to dazzle with handmade charm!
Who says luxury can’t be handmade? The crochet coquette dress pattern redefines elegance, weaving charm into every detail. It’s a showstopper designed for those who love turning heads, whether at a swanky soirée or a casual brunch with friends. An outfit that’s not only a reflection of your style but also a testament to the time and care poured into every stitch.
Flirty & Fun Crochet Coquette Dress Pattern For Chic looks
Perfectly suited for all seasons, its thoughtful design balances sophistication with comfort, ensuring you look stunning without compromising on ease. The beauty of this pattern lies in its versatility dress it up with pearls and heels, or keep it chic with boots and a statement bag. You’re not just making a dress you’re bringing your personality to life in wearable art.
With its flattering silhouette and customizable features, this pattern offers more than just a garment it’s a confidence boost for any occasion. Showcasing the rich tradition of crochet with a contemporary twist, it guarantees a wardrobe staple unlike any other. Whether gifting it to someone special or building a unique look for yourself, the finished dress speaks volumes about love, creativity, and individuality.
Materials Required
- Yarn: Any yarn of your choice.
- Hook: 5mm crochet hook.
- Darning Needle: For sewing panels and finishing.
- Scissors: To cut yarn.
- Stitch Markers: To guide placement during assembly.

Step-by-Step Process
1. Making the Front Panels (Rows 1–19)
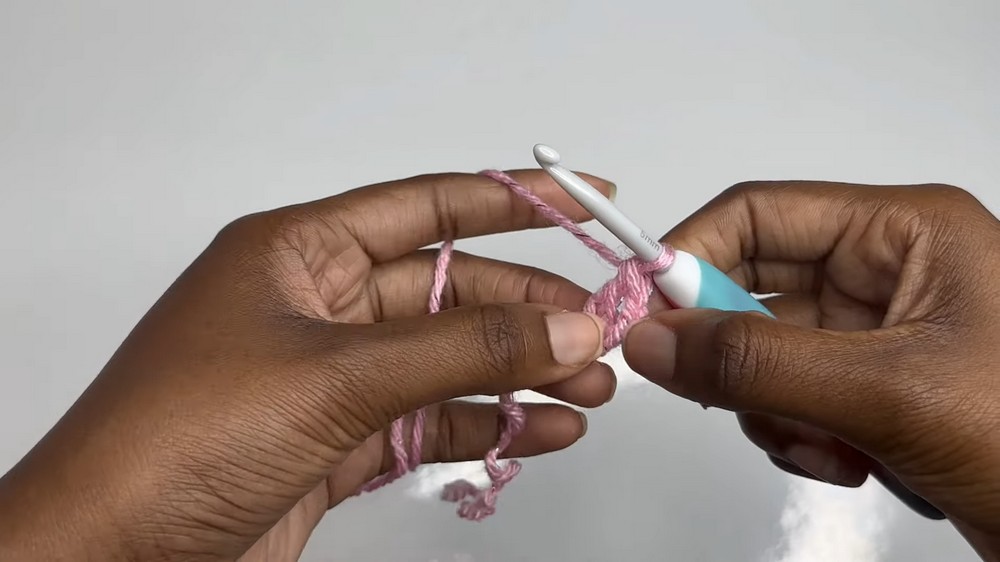
- Foundation Double Crochet:
- Start with a slip knot.
- Chain 3, then use back bump chaining to pull loops and create stitches.
- Repeat until you have 35 foundation double crochet stitches. Alternatively, chain 36 and work into the second chain for the same result.
- Rows 2–3 (Regular Double Crochet):
- Chain 2, turn your work, skip the first stitch, and work double crochets all the way down for two rows.
- Rows 4–15 (Increasing Alternately):
- On even rows: Perform increases on the side with the tail by placing 2 double crochet stitches into the chain 2 space.
- On odd rows: Work regular double crochets without increasing.
- Continue this alternating increase pattern until row 15.
- Rows 16–19 (Different Increase Pattern):
- Increase at the ends of every row (both even and odd rows) from row 16 to row 19 to create a sharper point.
- Complete each panel and leave a long tail to sew the panels together.
- Repeat the process for the second panel.

2. Sewing the Panels
- Combine Panels:
- Use a mattress stitch to join the two front panels together down the middle for a seamless look. Alternatively, use single crochet or slip stitches if preferred.
- Leave a gap halfway up the sides for armholes to get in and out comfortably.
- Adding the Back Panel:
- Create the back panel using double crochet rows (approximately 18–20 rows).
- Attach the back panel using the mattress stitch.
3. Starting the Skirt
- Attaching Yarn for Skirt:
- Use a slip knot and start at the middle of the back piece to make the seam less noticeable.
- Work a base row with alternating 2 single crochets in one stitch and 1 single crochet in the next. Repeat around.
- Increasing Rows for Ruffles:
- Row 1: Work 2 double crochets in every stitch.
- Row 2: Alternate 2 double crochets in one stitch and 1 double crochet in the next.
- Row 3: Alternate 9 single double crochets followed by 2 double crochets in the 10th stitch.
- Row 4 and Beyond: Stop increasing and work regular double crochet rows until the skirt reaches your desired length (recommended length: 27 rows or longer for full coverage).

4. Adding Straps
- Placing Straps:
- Use stitch markers to identify strap placement based on personal fit and bra strap alignment.
- Chain and double crochet in rows for straps, continuing this pattern for about 28 rows.
- Attaching Straps to the Back:
- Use slip stitches to attach each strap securely to the back panel.
- Ensure proper alignment and adjust for fit before fastening off.
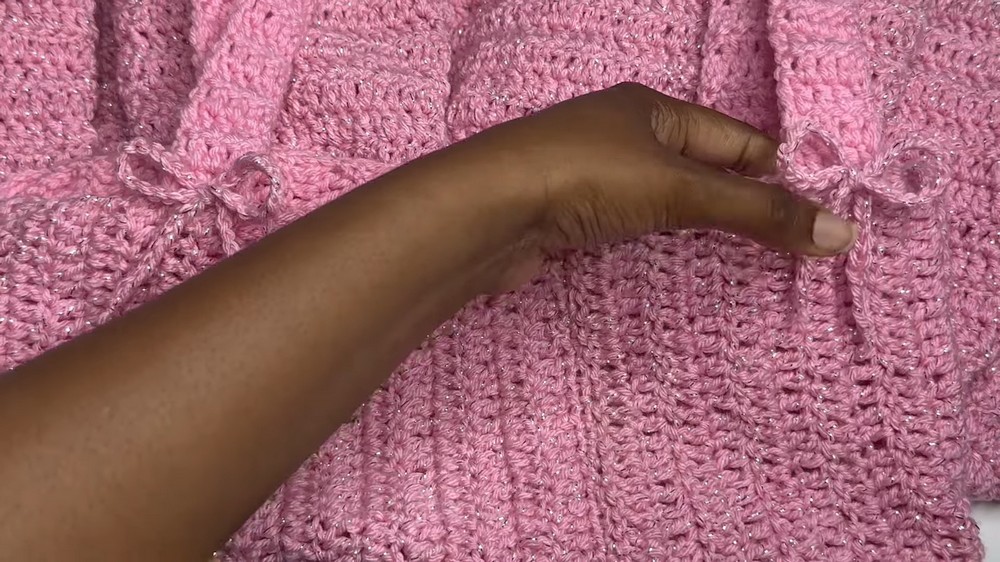
5. Adding Bows and Final Adjustments
- Making Bow Chains:
- Chain 52 and tie two loops together in a bunny-ear style for adjustable bows.
- Attach bows to the back panel as decorations using simple knots.
- Adding the Back Tie:
- Make a chain long enough to crisscross through the top back portion for added security and design appeal.
- Make a chain long enough to crisscross through the top back portion for added security and design appeal.
Conclusion
This crochet dress pattern combines functionality with customization, allowing you to make a stylish piece that's tailored for your preference. From constructing the fitted panels to creating the ruffled skirt and delicate straps, every step ensures detail and elegance. The addition of bows and ties makes the piece unique while also enhancing its fit. Whether you wear it as a top or a flowing dress, this creation is sure to make a statement.


Leave a Reply