

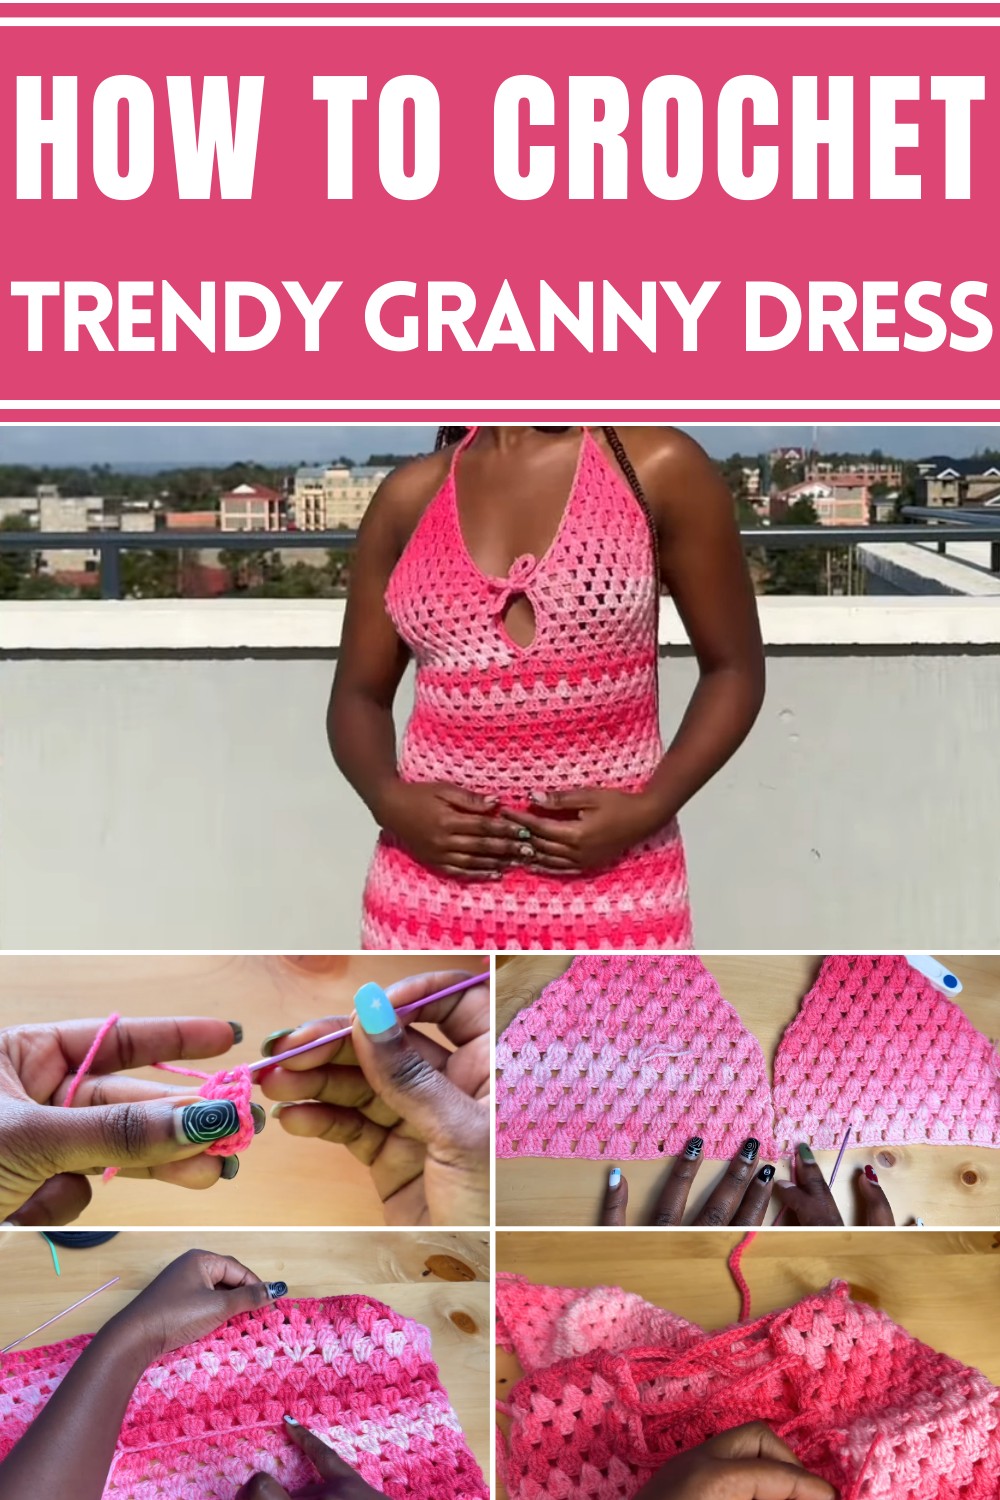
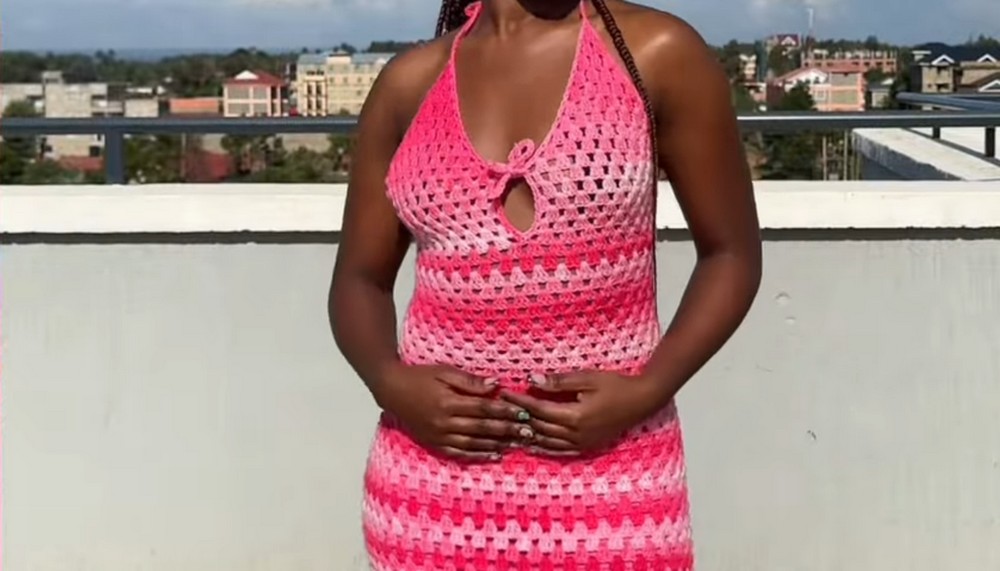
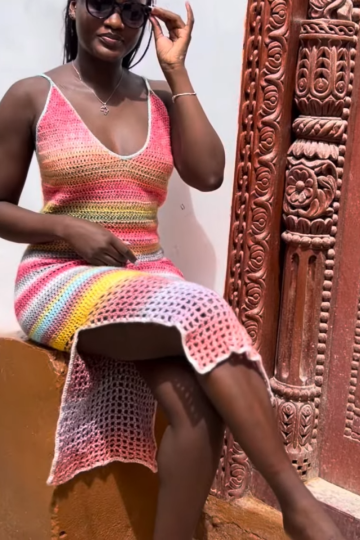
Raise your crochet game with the Crochet Granny Stitch Dress Pattern easy, customizable, and perfect for creating a stylish handmade outfit.
From time-honored traditions to modern trends, the crochet granny stitch dress pattern bridges generations with style and charm. Inspired by vintage granny stitch designs, this pattern brings new life to a beloved classic by offering a smaller, chic version perfect for casual outings, or baby outfits. Its intricate yet beginner-friendly stitch work makes it an approachable choice for both newcomers and seasoned crochet enthusiasts.
Chic Crochet Granny Stitch Dress – Perfect Outfit Idea
This dress pattern is loved for its versatility you can adjust the colors, fit, and length to match your personal taste or specific needs. Whether used as a heartfelt handmade gift, a cute addition to your wardrobe, or even as practice for honing your crochet skills, this project brings a sense of accomplishment with every stitch.
The crochet granny stitch dress is lightweight yet visually stunning, making it suitable for all seasons depending on the materials you choose. Its nostalgic design adds a touch of warmth and individuality, turning a simple outfit into something memorable. With its endless opportunities for customization and practical uses, this pattern is not just a beautiful project it's an expression of creativity and tradition that fits seamlessly into today’s world.
Introduction
The Granny Stitch Dress Pattern offers clear, detailed steps for crocheting a stunning dress using the popular granny stitch technique. This pattern is beginner-friendly and versatile, catering to a range of sizes and preferences. It features a structured approach that begins with measuring your bust and progresses to creating panels, joining them, and forming a dress that can be customized for any body type.
1. Materials Required
- Yarn (100g, 360m/395 yards; at least 3 balls recommended)
- 2.5mm crochet hook
- Tape measure
Step-by-Step Instructions
2. Starting the Granny Stitch Pattern
- Begin by measuring your bust from the top to the bottom to determine the coverage length.
- Create a slip knot and chain 6.
- On the sixth chain from the hook, make three double crochets in the same stitch followed by one chain.
- Complete the row by adding a treble double crochet in the same stitch.

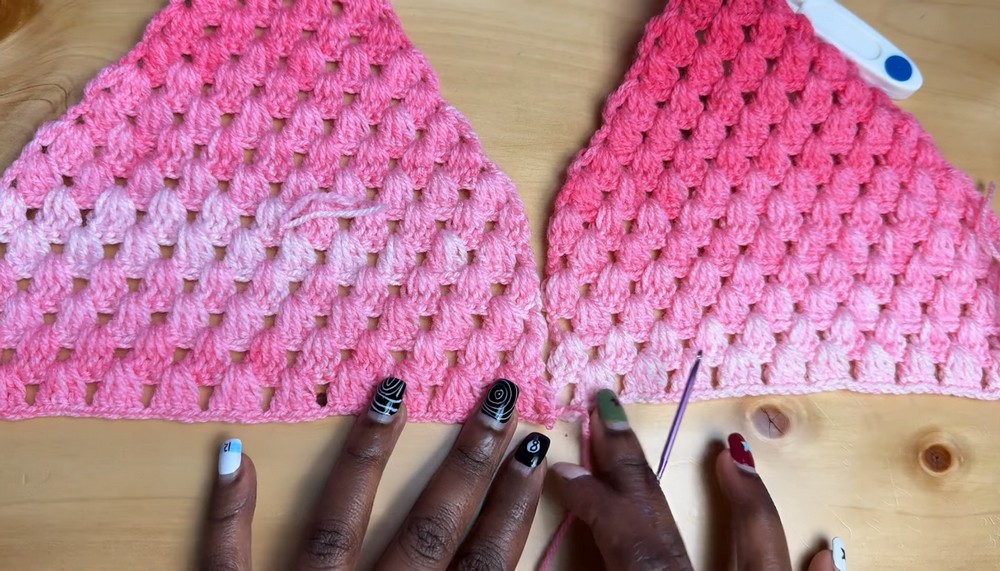
3. Building Rows for the Bust Section
- For Row 2, chain 5 and turn your work. Place three double crochets in the chain-1 space, followed by chaining one and repeating the same stitch sequence. End the row with a treble double crochet.
- Continue increasing your stitches in each row. Repeat this process until you have completed 10 rows.
4. Adjusting for Bust Width
- Measure your work to ensure it adequately covers your bust. Add as many rows as necessary for larger bust sizes to achieve proper coverage.
5. Creating the Other Panel
- Follow the same steps used to complete the first panel. Make sure both panels have an equal number of rows.
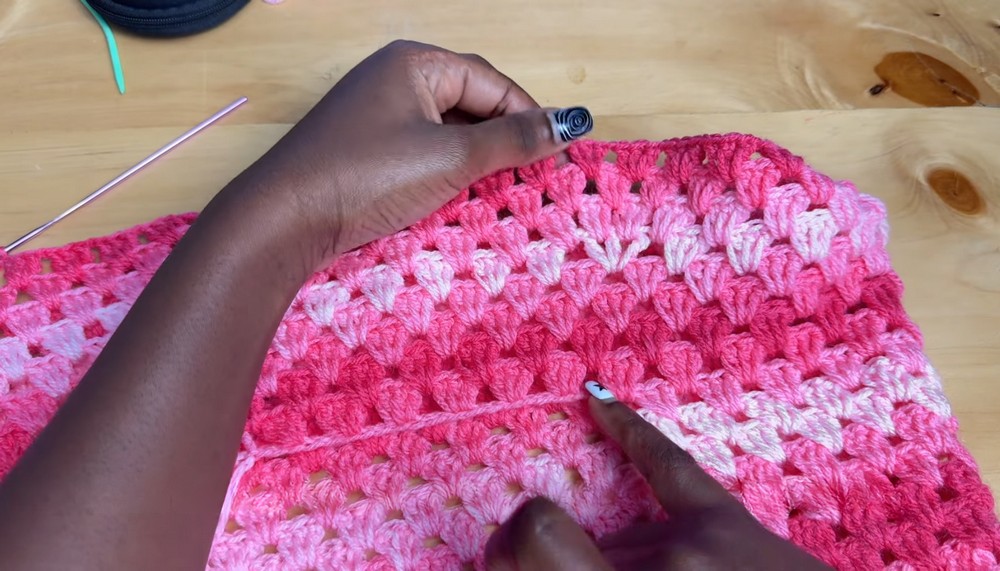
6. Joining the Panels
- With equal rows in both panels, join them at the middle using slip stitches. Chain 1 to secure the connection.
7. Extending the Granny Stitch for the Dress Body
- Start working in circles, chaining 3 and placing three double crochets in each chain-1 space. Follow the same granny stitch pattern for successive rows.
- For the hip area, measure your hips and start incorporating increases by placing additional chain-1 spaces where needed. Continue until the work stretches comfortably to your hip measurement.
8. Completing the Body Length
- Once the hip area is complete, continue adding rows without increasing or decreasing. Repeat the granny stitch pattern until the dress reaches your desired length. For a maxi dress, crochet up to 55 rows; for a mini version, stop earlier.
9. Creating Straps for the Neck Area
- Attach the yarn at the top corner of your work and make a chain of 100 stitches.
- Slip stitch along the chain and secure it back to the dress. Repeat this on the other side to form neck straps.
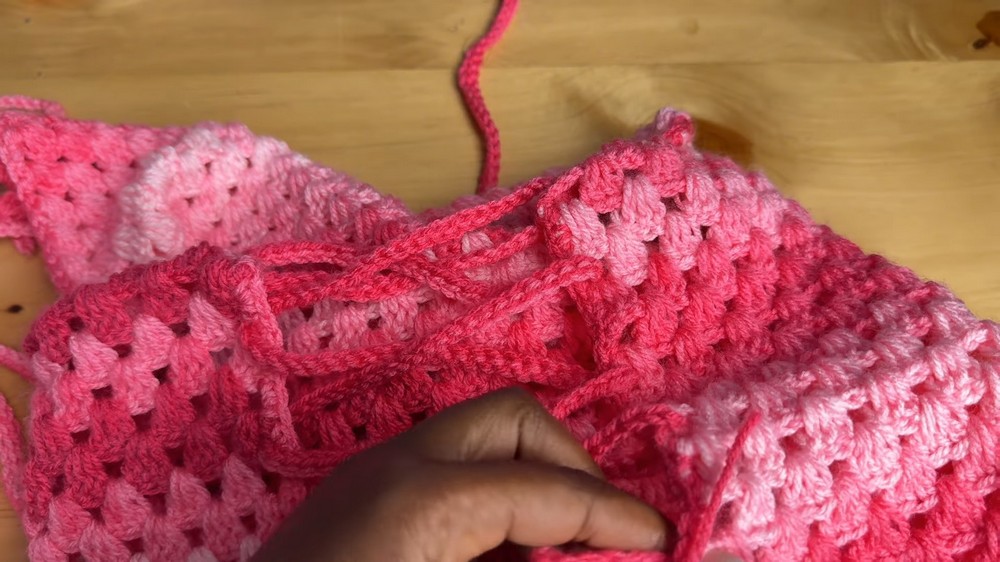
10. Adding the Adjustable Back Cinch
- Crochet a chain of about 250 stitches. Crisscross the chain through the back of the dress, weaving it in and out of stitches to create a fitted look. Adjust the fit by tying the chain securely once worn.
Conclusion
This Granny Stitch Dress combines functionality and aesthetics, offering a customizable design suitable for various sizes and styles. By following the step-by-step tutorial, you can tailor the length, bust coverage, and fit to create a flattering, handmade piece. Its adjustable cinch and delicate granny stitch detailing make it an elegant yet practical addition to any wardrobe. Whether you're crafting a mini dress or a maxi gown, this tutorial empowers you to create a unique garment that’s as stylish as it is comfortable.


Leave a Reply