

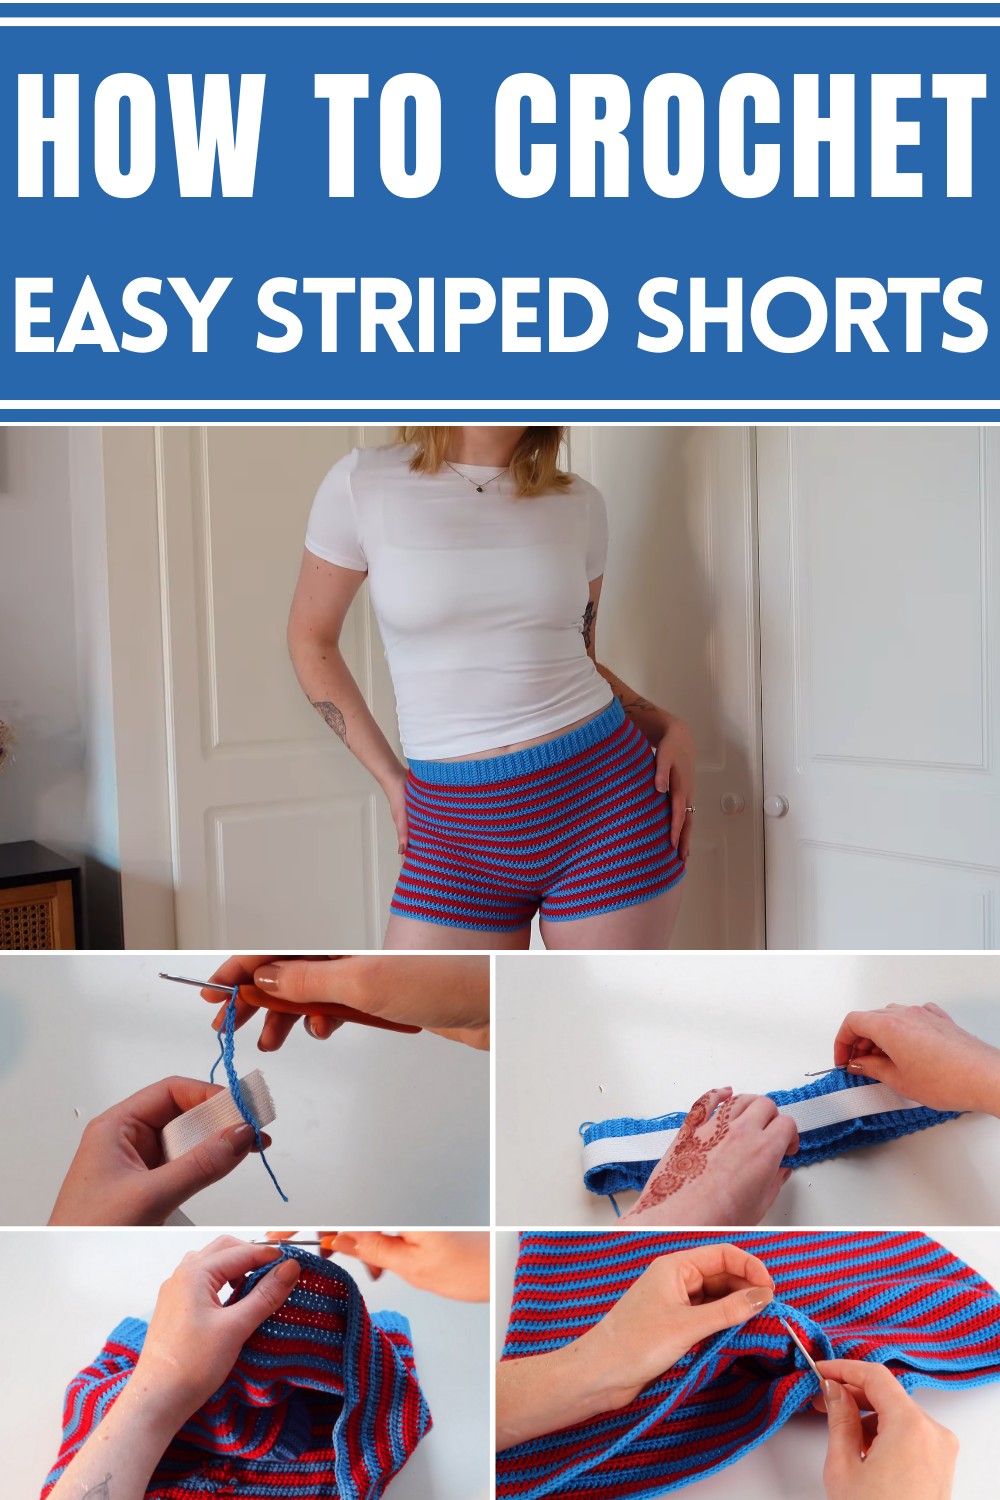
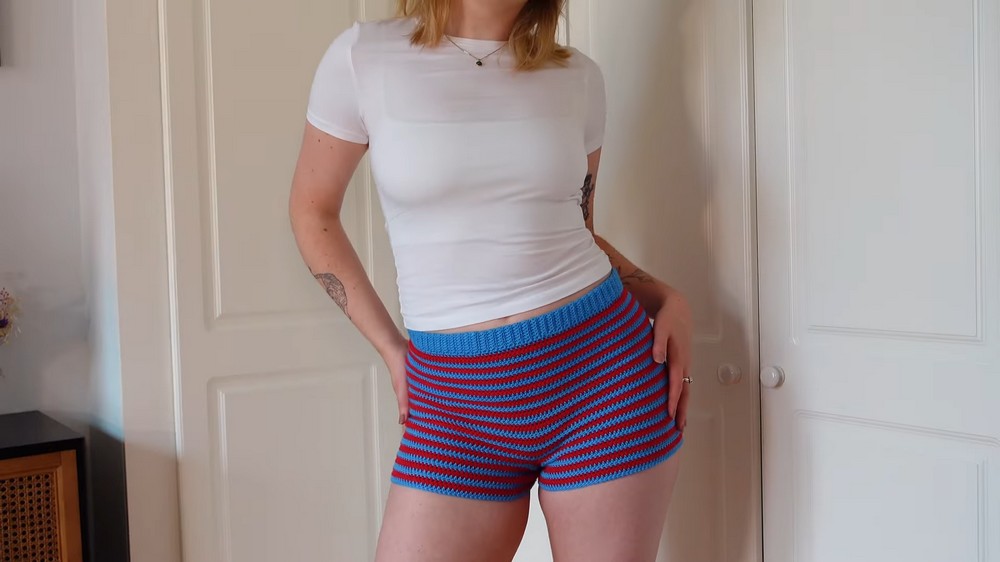
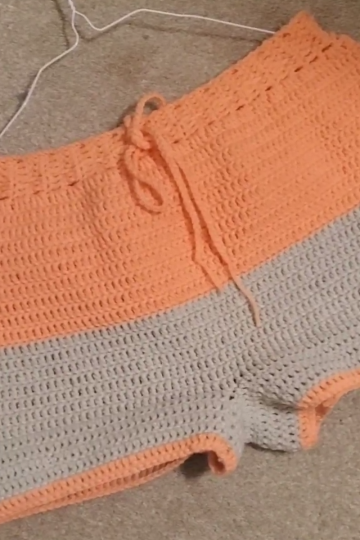
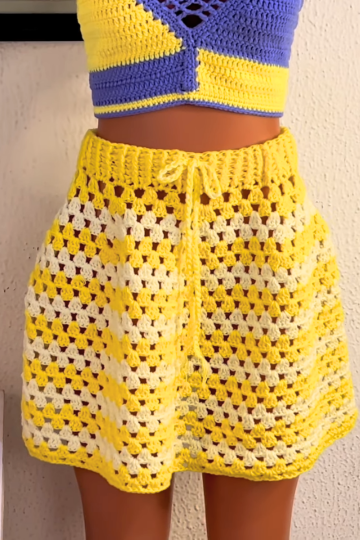
Uplift your summer wardrobe with a free crochet striped shorts pattern. Stylish, and comfy, perfect for showcasing creativity and sustainable fashion.
Handmade clothing has taken a significant role in sustainable fashion, offering individuals a chance to express their creativity while reducing waste. The free crochet striped shorts pattern fits perfectly into this thoughtful approach to style. These colorful shorts bring a fresh twist to casual summer wear, blending comfort with practicality. Designed for everyday use, they are perfect for relaxing at home, enjoying sunny outdoor moments, or adding a playful touch to beachwear.
Simple & Easy striped crochet shorts Pattern
The striped design allows endless customization, letting you experiment with a multitude of color combinations to suit your taste. Beyond their aesthetic benefits, these shorts represent conscious living by promoting slow fashion and reducing reliance on mass-produced garments. Crocheting them provides not only a finished product but also hours of peaceful, rewarding activity.
Lightweight and breathable, they offer comfort on the hottest days while showcasing unique craftsmanship. Whether made for personal use or as a thoughtful handmade gift, these striped crochet shorts inspire a balance between creativity and sustainability in modern wardrobes.
Introduction:
Crochet shorts are a stylish and lightweight wardrobe addition, perfect for warm weather or as a creative handmade project. This tutorial walks you through customization options, from adjusting the rise and length to selecting colors and patterns. Whether you’re using stripes or a single color, simply adapt these steps to fit your measurements and preferences.
Materials Needed:
- Yarn: Lightweight cotton yarn is recommended. The pattern uses Hobie Friends cotton yarn in two colors: blue and red.
- Crochet Hook: Size 3 mm crochet hook.
- Elastic: For the waistband (length depends on where you want the shorts to sit).
- Tape Measure: To ensure accurate sizing.
- Stitch Markers: Helpful for marking specific points, such as the crotch area.
Crochet Shorts: Step-by-Step Guide
Step 1: Take Measurements
To ensure your shorts fit perfectly, measure the following:
- Largest part of your lower body: Determines waistband size for easy pull-on and off.
- Waist to crotch: Indicates how high-waisted or low-waisted the shorts will be.
- Crotch downwards: Determines the desired length of the shorts.
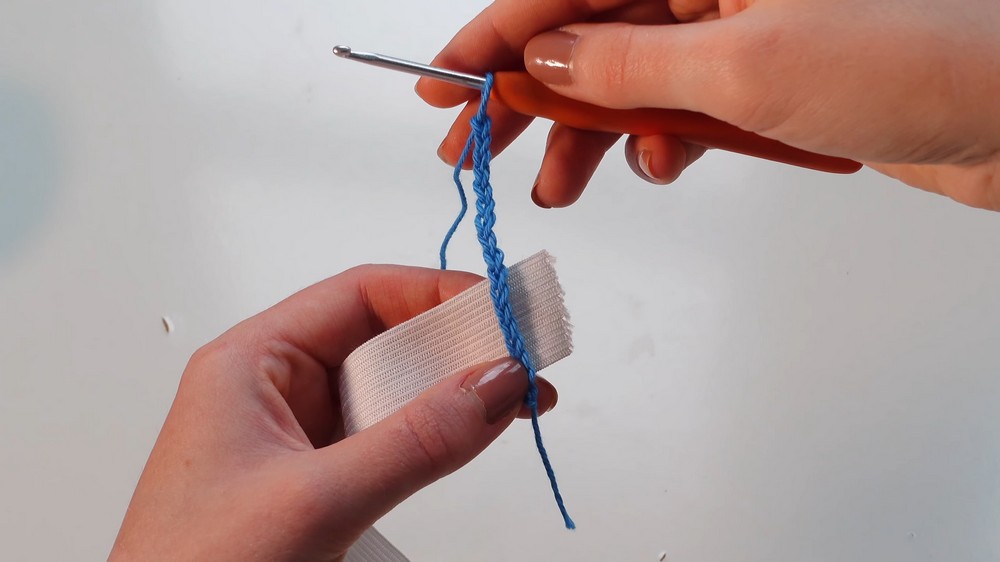
Step 2: Create the Waistband
- Start with a chain of 17 stitches (or longer, depending on width preferences).
- The chain should be wide enough to fold over and encase elastic.
- Single crochet the first row, then chain 1 and turn your work.
- Begin working the rib stitch:
- For the first and last stitch of every row, do a complete single crochet.
- For the remaining stitches, single crochet in the back loop only to create a ribbed look.
- Repeat this process until the waistband matches the length of the largest part of your lower body.
- Important: Do not crochet the waistband to match your waist size—it must fit over your hips.
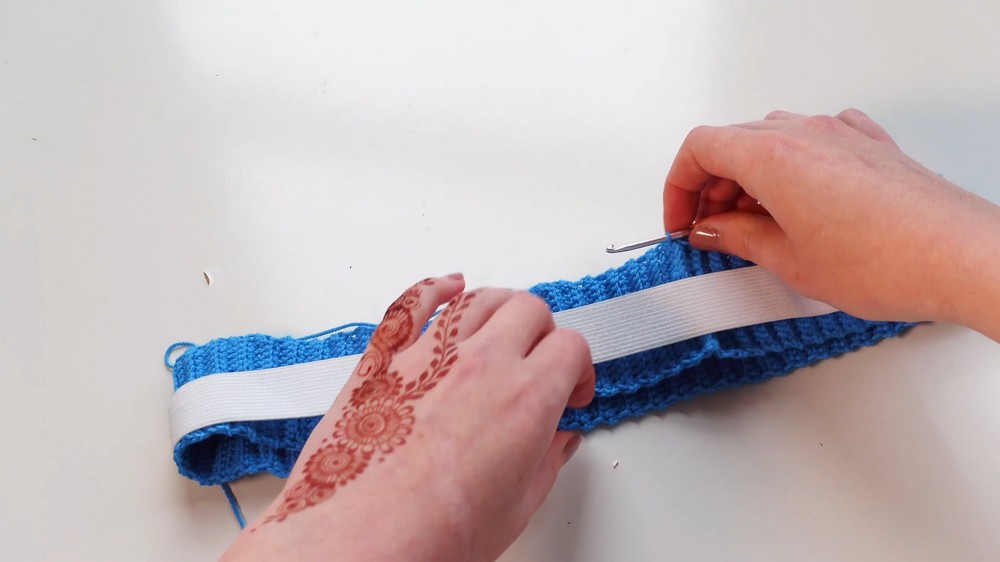
Step 3: Insert Elastic and Close Waistband
- Sew the elastic into a loop, slightly stretching it as you measure for a snug fit.
- Fold the ribbed waistband around the elastic.
- Use single crochet stitches to stitch the folded waistband together, encasing the elastic inside.
- Slip stitch the first row to the last row to close the waistband.
Step 4: Begin the Main Body of Shorts
- Attach your next color (if using stripes) or continue with the same yarn.
- Use half double crochet stitches to create the rows for the shorts.
- Work in continuous rounds, slip stitching the last stitch to the first stitch to close each round.
- Chain up and turn your work for each new round.
- Optional: Add increases for extra backroom.
- Work 2 half double crochets into one stitch at evenly spaced intervals (e.g., every 10 stitches).
- Place increases on the back side of the shorts, near the seam.
Step 5: Customize Length and Fit
- Continue crocheting rounds in alternating colors (or single color) until you reach the desired shorts length before adding the crotch section.
- Try the shorts on frequently or reference measurements for accuracy.

Step 6: Create the Crotch Section
- Place a stitch marker halfway around the waistband to indicate where the crotch will go.
- Begin a new round, stopping at the stitch marker to create the crotch split:
- Chain 25–45 stitches (depending on your measurement for the crotch length) and slip stitch the chain back to the back seam.
- Half double crochet along the chain to form the first leg hole round.
- Repeat this process for the second leg hole.
Step 7: Finish the Legs
- Attach yarn to the crotch section of the first leg and begin half double crochet rounds.
- Alternate colors for stripes, if desired.
- Decide the preferred length:
- Add more rounds for longer shorts or fewer rounds for shorter ones.
- Complete the other leg hole in the same manner.

Step 8: Weave in Loose Ends
- Secure all knots.
- Use a darning needle or crochet hook to weave in any yarn tails for a polished finish.
Conclusion
This crochet shorts pattern is adaptable, allowing you to create a unique piece perfectly tailored to your style. From the stretchy ribbed waistband to custom-fit legs, the process is both fun and rewarding. Whether you add stripes, experiment with colors, or adjust the fit, these handmade shorts are sure to become a favorite in your wardrobe.
Leave a Reply