

Amplify your style game with a bespoke crochet ribbed sweater merge warmth and sophistication into a creation that’s as unique as you are.
Soft layers of texture meet practicality with the crochet ribbed sweater pattern, a design that offers stretch, comfort, and style in one cohesive piece. The ribbed detailing not only adds a touch of elegance but also ensures flexibility, making every sweater crocheted with this pattern both fashionable and functional. Perfect for chilly days, this sweater delivers warmth while maintaining breathability, making it ideal for layering or wearing solo during transitional seasons.
DIY Crochet Ribbed Sweater for Everyday Comfort

One of its standout features is its adaptability the pattern can be adjusted to suit various sizes, styles, and preferences, creating a truly tailored garment. Beyond its aesthetic appeal, the practicality shines through as a wardrobe staple that pairs effortlessly with casual jeans, skirts, or even more structured pieces for a blend of relaxed sophistication. Additionally, working on this pattern offers a fulfilling pastime, combining creativity with comfort as the end result is both personal and functional.
With a focus on timeless design and the charm of ribbing, this sweater becomes more than apparel it evolves into a reliable companion for cold evenings, brisk outings, or cozy indoor moments. Thoughtfully made and impeccably versatile, it represents a perfect balance between usability and personal expression.
Introduction
The crochet ribbed sweater pattern is a versatile and stylish design that combines comfort and elegance, perfect for all seasons. In this pattern, you'll learn how to crochet the back panel, front panel, sleeves, neckline ribbing, and optional body ribbing using easy-to-follow techniques. This pattern is suitable for all sizes, with modifications provided for your preferred fit. Grab your materials, follow this guide, and create your masterpiece!
Materials Needed
- Yarn: Red Heart Super Saver (Medium Thyme or any yarn of choice, #4 weight recommended)
- Crochet Hook: Size 4mm
- Scissors
- Yarn Needle
- Stitch Markers

Step-by-Step Details
1. Starting the Back Panel
- Create a slip knot.
- Chain (loosely): For size medium, chain 82 (sizes listed in the description box).

- Row 1 (Double Crochet Foundation Row):
- Double crochet into the third chain from the hook.
- Continue double crocheting into every chain across the row. You should end with 80 stitches.
- Row 2 (Slip Stitch Row):
- Chain 1, turn your work, and back-loop slip stitch into each stitch in the row.
- Row 3 and 4: Repeat the slip stitch row.
- Row 5 (Double Crochet): Chain 2, turn your work, and back-loop double crochet into the slip stitches from the previous row. This row forms the ribbed texture.
- Repeat Rows 2–5 for the back panel until you have 101 rows (or specified rows for your chosen size).
- After completing the last row, leave a long yarn tail for sewing later.

2. Making the Front Panel
- Start with the same number of chains as the back panel (e.g., 82 for medium size).
- Repeat the same steps as the back panel for Rows 1–5.
- Work additional rows for the neckline shaping:
- Row 6: Turn and chain one, leaving nine stitches unworked for shaping. Reduce stitches accordingly.
- Continue slip stitch rows and back-loop double crochet rows while creating gradual decreases to shape the neckline.
- After finishing the neckline section, repeat Rows 1–5 to match the length of the back panel.
- Leave a long tail of yarn for sewing.
3. Creating the Sleeves
- Cuff Start:
- Chain 69 (or as specified for size).
- Slip stitch into the second chain from the hook and create 12 slip stitches for the cuff section.
- Sleeve Body:
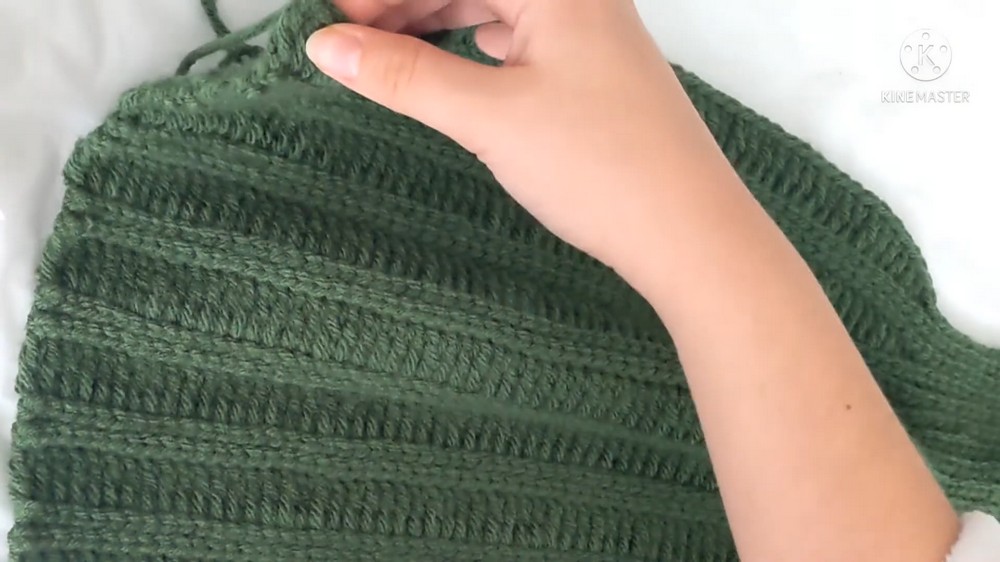
- After finishing the cuff, alternate between rows of back-loop slip stitches and back-loop double crochets to complete the sleeve body.
- For medium size, work up to 57 rows, ending with a back-loop double crochet row.
- Stitch the sleeve seam for both sleeves, ensuring they are flipped inside out for hidden seams.
4. Assembling Panels and Sleeves
- Place the front and back panels together, aligning the right sides.
- Use stitch markers to ensure proper alignment.
- Sew the shoulder seams using a yarn needle.
- Attach the sleeves:
- Align the sleeve cuff to the body panels, ensuring even placement.
- Sew the sleeve seams and attach them to the side of the panels.
5. Adding the Neckline Ribbing
- Create a slip knot and chain 7 for the neckline ribbing.
- Slip stitch into the second chain from the hook, continuing into each chain.
- Repeat the back-loop slip stitch rows until the ribbing length matches the neckline opening.
- Sew the ribbing onto the neckline using the same sewing technique as the panel assembly.

6. Optional Body Ribbing
- Chain 9 for the body ribbing.
- Slip stitch into the second chain from the hook, continuing into each chain (total of 8 stitches per row).
- Repeat back-loop slip stitch rows until the ribbing matches the length of the sweater hem.
- Sew onto the sweater using the same sewing technique as the neckline ribbing.
Final Touches
Once all parts are assembled, flip the sweater inside out to ensure seams are hidden. Block or wash the sweater gently (preferably hand-wash or delicate cycle) to tighten stitch work and enhance its texture.
Conclusion
Congratulations! You've just completed a cozy and stylish crochet ribbed sweater, perfect for any occasion. This pattern highlights simple techniques, designed for beginners to intermediates, offering a rewarding DIY project. Personalize the sweater by adjusting sizes or colors to suit your fashion taste. Whether worn casually or dressed up, your handmade sweater will surely be a standout piece in your wardrobe.


Leave a Reply