

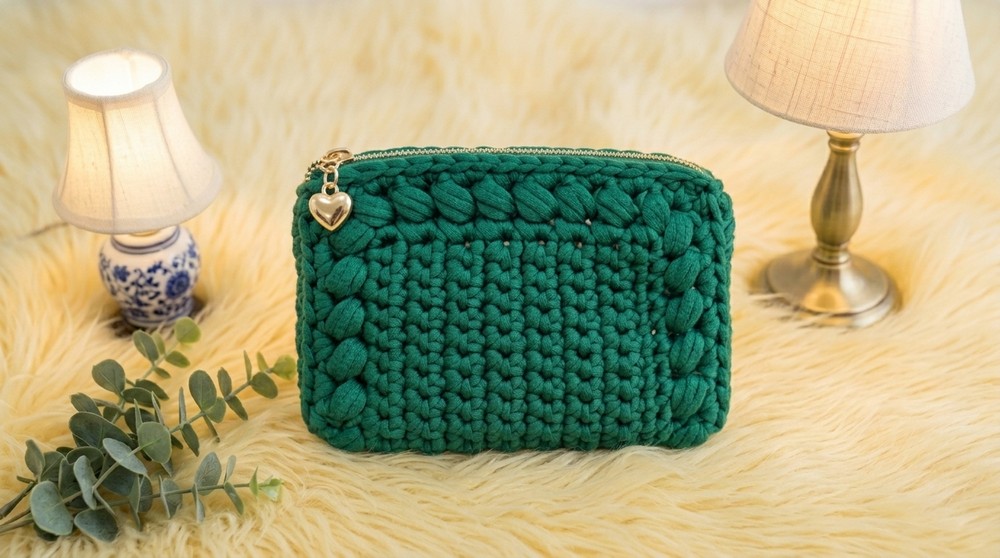
Try this free crochet puffy coin purse pattern that is quick to make and perfect for adding a sweet touch to your collection.
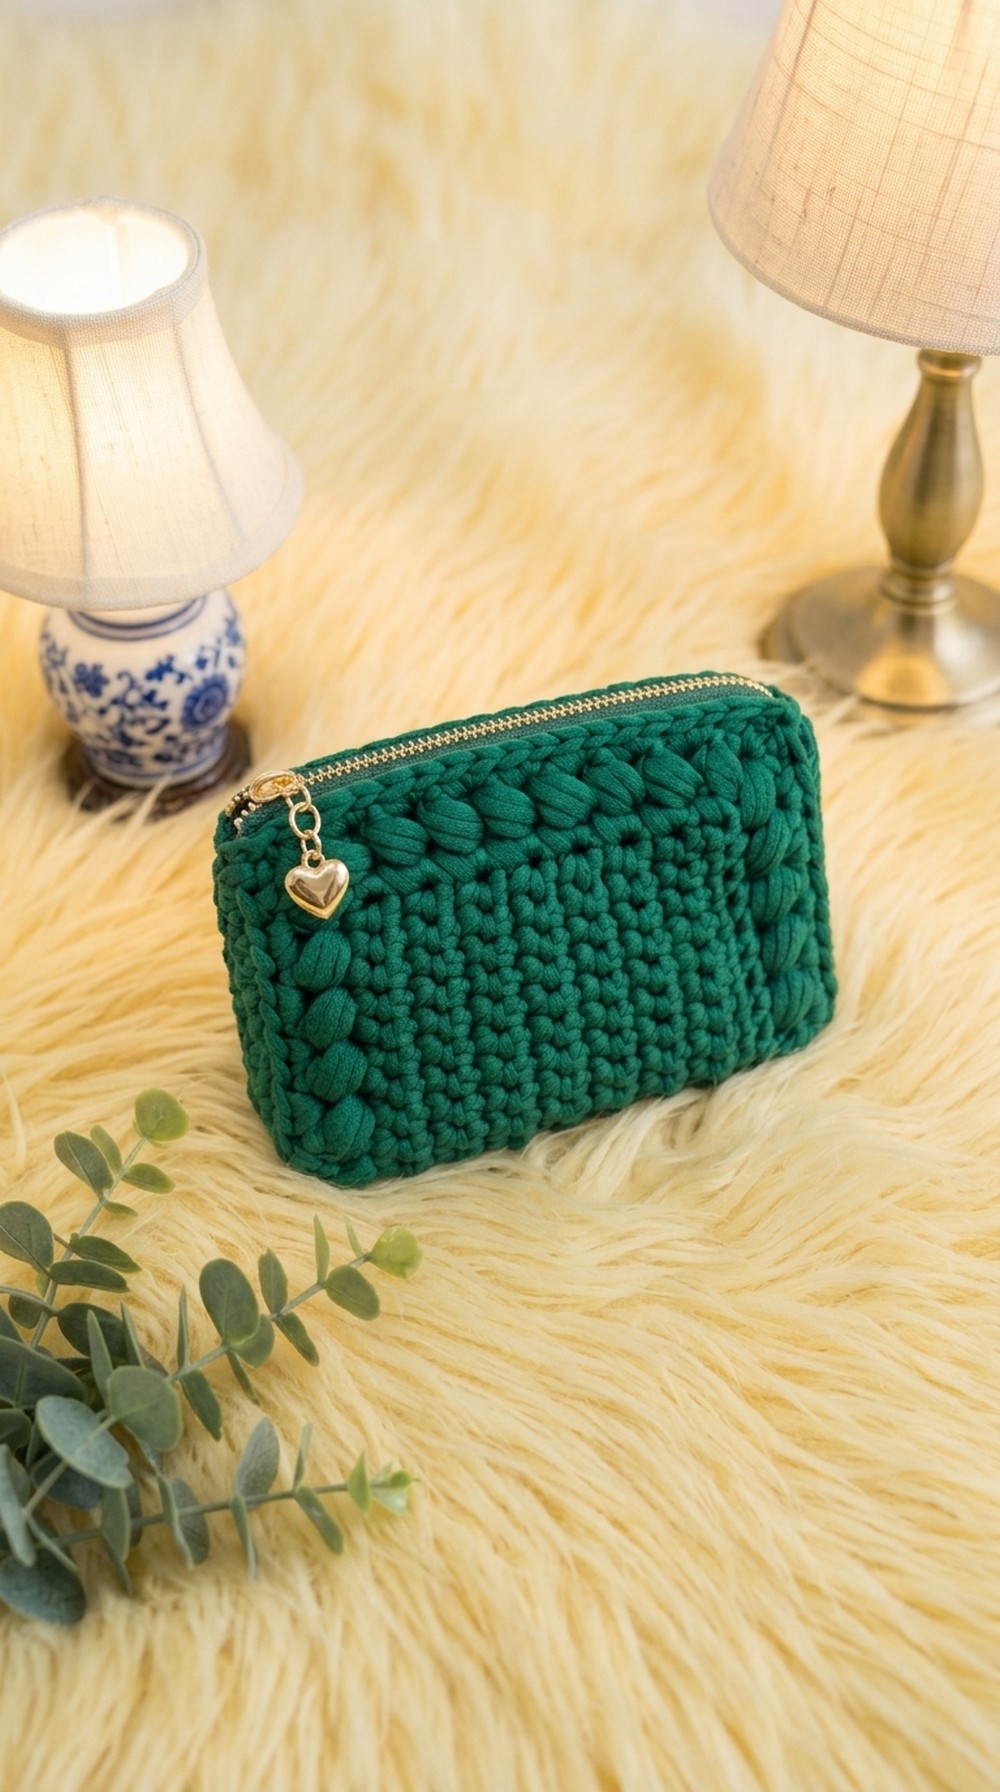
Looking for a cute and practical project? The free crochet puffy coin purse pattern is just the thing to add a little handmade charm to your day. This project creates a small, squishy pouch that’s perfect for holding coins, lip balm, or other little essentials. Its standout feature is the delightful puffy texture, achieved through a combination of puff stitches that give the purse a plush, almost cloud-like feel.
Free Crochet Puffy Coin Purse for Coins and Cards
The shape is compact and rounded, making it easy to slip into a handbag or pocket. Its style is both playful and elegant, thanks to the soft, bumpy surface that catches the eye. This coin purse suits everyone, from beginners who want a manageable project to experienced crocheters looking for a quick, satisfying make. Plus, there’s room to customize the size by adjusting your yarn weight or hook size, allowing you to create anything from a tiny coin holder to a slightly larger pouch.

Construction-wise, the purse is worked in rounds using puff stitches combined with basic crochet techniques. For best results, using a smooth, sturdy yarn helps highlight the puff stitch texture, giving the surface extra definition without being too stiff. I was inspired by the idea of combining function and fun, creating something both cute and useful that could brighten up everyday moments.
These purses make lovely handmade gifts for birthdays, holidays, or just because, and you can personalize them with different colors or decorative buttons. Don’t hesitate to experiment with your favorite yarns and color combos, creativity is what makes this pattern truly special.
Crochet Coin Purse Pattern with Crossed Puff Stitch Border
This pattern guides you through making a stylish and functional crochet coin purse featuring a rectangular center panel bordered with a textured crossed puff stitch edging. The pattern covers working the center panel, adding the decorative border, installing a zipper, creating side panels, and finishing with a metal handmade tag embellishment. Clear step-by-step instructions and tips on stitch techniques ensure your project turns out professional-looking while being enjoyable for intermediate crocheters.
Pattern Notes
- The purse is worked flat, beginning with a rectangular center panel.
- The edging uses a crossed puff stitch for a textured, decorative border.
- Zipper installation techniques are demonstrated to achieve a neat finish.
- The side panels are crocheted separately and attached to complete the shape.
- Stitch markers are used to mark corners and rounds for accuracy.
- This pattern is worked using US crochet terminology.
- The purse uses medium-weight cotton tube yarn suitable for stitch definition and durability.
- Embellishments include a metal “handmade” tag attached at the end.
- Tight tension is recommended to give the purse structure without distortion.
- All rounds and rows are worked continuously unless otherwise stated.
Skill Level
Intermediate
Skills needed:
- Working into the back ridge (back bump) of foundation chain.
- Single crochet (sc).
- Increasing stitches (3 sc increase in corner).
- Puff stitch and crossed puff stitch.
- Color changes (if desired).
- Basic sewing and zipper installation techniques.
- Use of stitch markers.
- Joining pieces with slip stitches.
Materials
- Approx. 50 g Cotton tube yarn (medium weight, size 4) – 68% cotton, 32% nylon.
- Crochet hooks: 5 mm (for foundation chain), 4 mm (for main stitches).
- Continuous #5 zipper tape, at least 16 cm long.
- #5 zipper slider.
- Metal handmade tag embellishment.
- Ball head pins.
- Sewing thread and needle.
- Darning needle.
- Stitch markers.
- Scissors.
Measurements / Sizing
- Final purse dimensions: approximately rectangular panel size with side gussets for depth.
- Zipper length: minimum 16 cm.
- Size may vary slightly depending on yarn tension.
Gauge and Stitch Pattern
- Gauge is not critical but recommended consistent tension for uniform stitches.
- Stitch pattern: mostly single crochet in rows and rounds.
- Edging includes crossed puff stitches spaced evenly for textured border.
Stitch Abbreviations (US Terms)
| Abbreviation | Meaning |
|---|---|
| ch | chain |
| sc | single crochet |
| inc | increase (multiple single crochets in one stitch) |
| dec | decrease (crochet stitches together) |
| sl st | slip stitch |
| st(s) | stitch(es) |
| puff | puff stitch (multiple loops pulled up into one st) |
Special Stitches
- Back Ridge (Back Bump) of Chain: Crocheting into the back bump of foundation chains for a neater edge.
- Crossed Puff Stitch Border: A textured stitch combining puff stitches and chains to create a decorative edge crossing over stitches.
- Three Single Crochet Increase: Three sc worked into one stitch to form strong corner increases.
- Stacked Double Crochet in Corners: A cluster of sc and dc in corner space for enhanced shaping.
The Crochet Pattern
Part 1: Center Panel
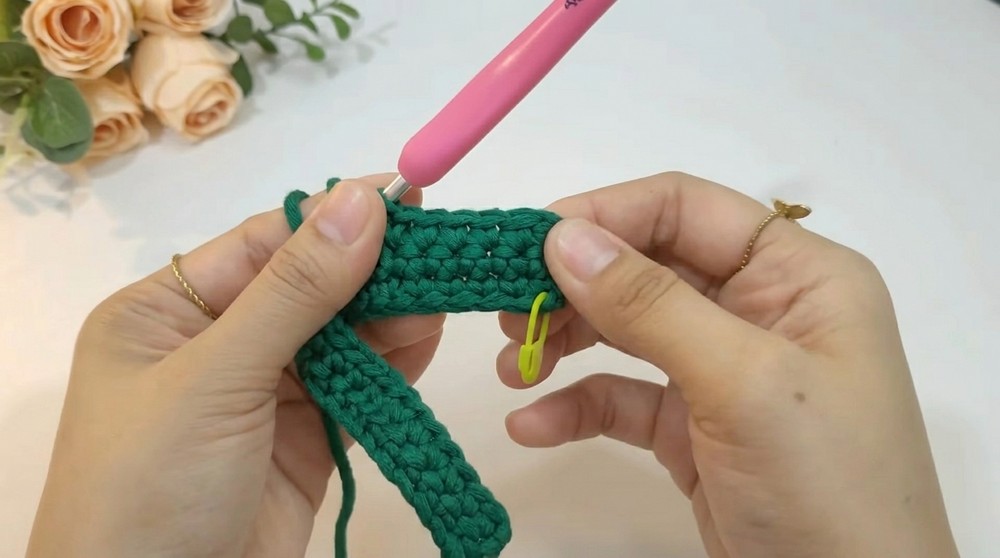
- Foundation Chain: Using 5 mm hook, make a slip knot and chain 23.
- Switch hook: Change to 4 mm hook for tighter stitches.
- Row 1:
- Work into the back ridge (back bump) of the foundation chain to create neater edges.
- Skip the first chain, then sc in the back ridge of the second chain and every chain across.
- Total stitches: 22.
- Mark first and last stitches: Place stitch markers for reference.
- Rows 2 to 14:
- Turn work.
- Pull up working loop slightly.
- Sc in every stitch across.
- Use stitch markers to indicate first stitch of each row.
- Repeat rows until you have completed 14 rows of single crochet.
Part 2: Edging and Crossed Puff Stitch Border
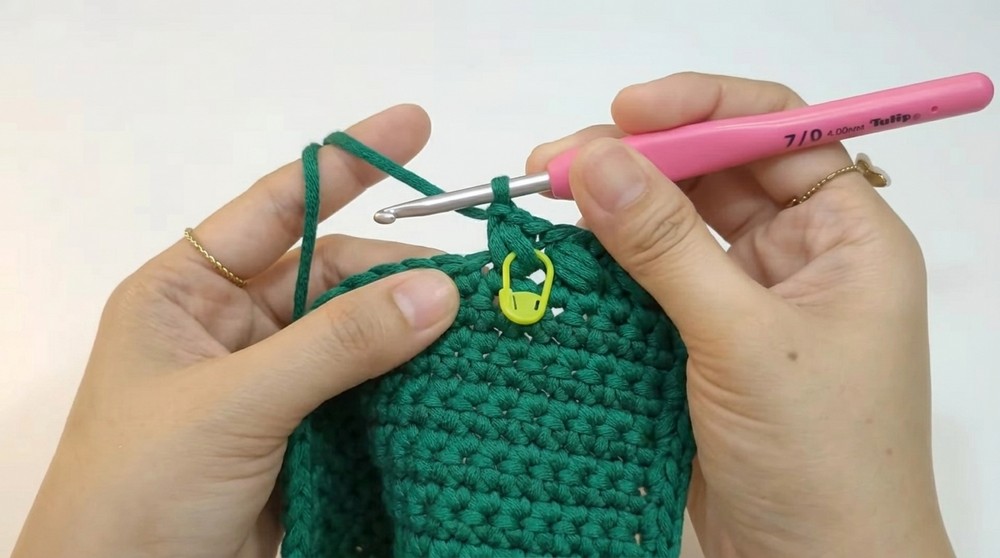
Round 1: Single Crochet Edging and Corner Increases
- Turn work and sc evenly around the panel edge:
- Work 21 sc along the long side.
- Place stitch marker at first sc of this round for corner counting.
- At corners, work 3 sc increases in the same stitch for shaping.
- Between corners, work 2 sc on top of each ridgeline stitch (these ridgelines appear as dotted lines every second row).
- Continue sc around panel, repeating corner increases and ridgeline sc until round is complete.
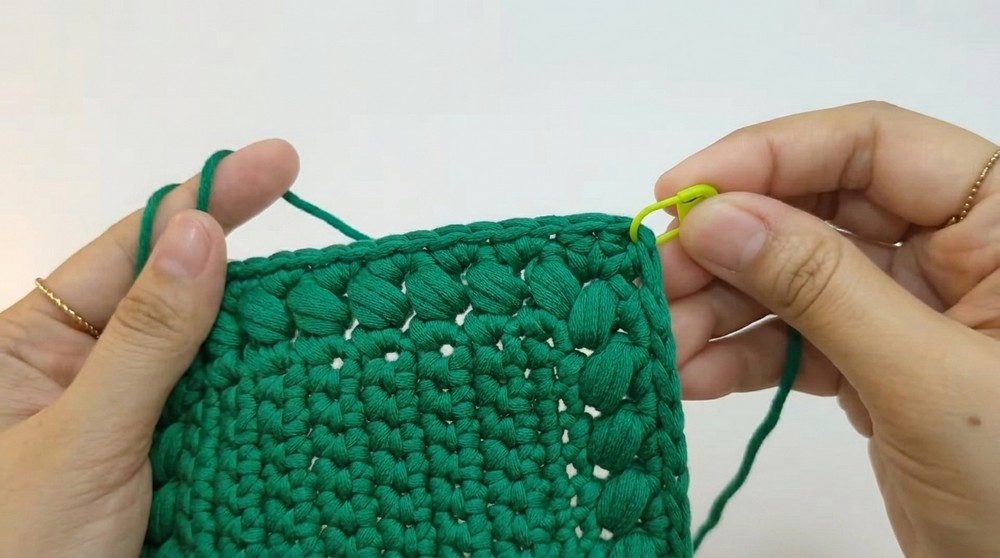
Round 2: Crossed Puff Stitch Border
- Start on a long side:
- Sc in next stitch.
- Make puff stitch in the marked corner stitch (do not remove the marker). Puff stitch: yarn over, insert hook into stitch, pull loop, repeat twice more, yarn over and pull through all loops, chain 1.
- Skip 1 stitch, sc in next stitch.
- Puff stitch in skipped stitch, chain 1.
- Repeat this crossed puff stitch pattern until 11 puff stitches finished on long side.
- At corner (after final puff stitch), skip 1 stitch and make puff stitch in corner, totaling 12 puff stitches on long side.
- Turn corners clockwise without skipping stitches, maintaining pattern:
- On short sides, do 7 crossed puff stitches with appropriate corner puff stitches, marking corner stitches with stitch markers.
- Repeat for all four sides, maintaining the crossed puff stitch texture, edge increases, and corner shaping.
Round 3: Stacked Double Crochet Corners and Further Edging
- Turn work to the back side.
- Work a stacked double crochet cluster into each corner space:
- Sc, then sc again in same corner space, then dc. This completes each corner cluster.
- Between corners, work 2 single crochets into each crossed puff stitch space.
- Continue pattern around, marking corners with stitch markers.
- Slip stitch into first stitch to join round.
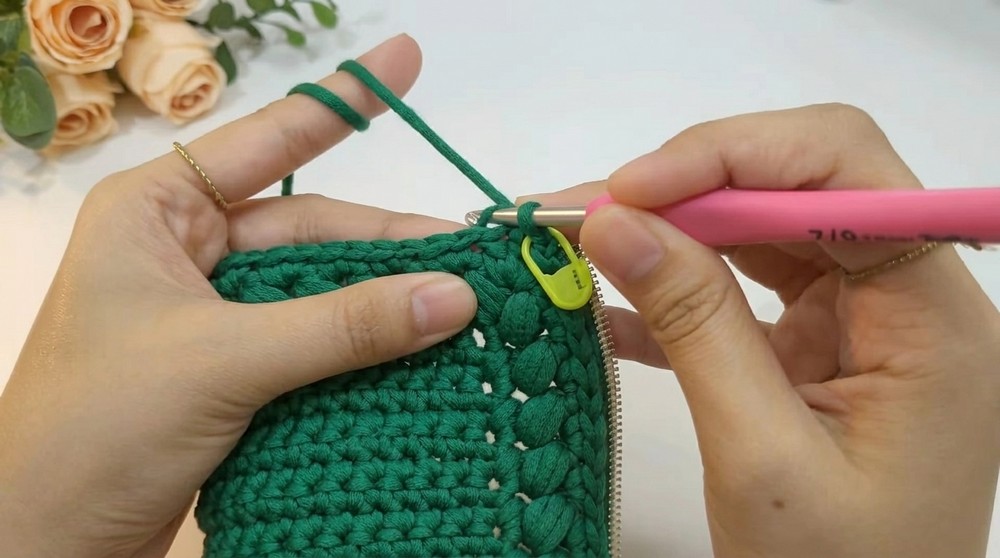
Part 3: Zipper Installation
- Turn panel to wrong side (inside).
- Flip zipper half over to wrong side and align along panel edge. The zipper teeth should be visible only on the right (outside) side.
- Pin zipper centered along edge, securing center first, then pin left and right sides.
- Bend zipper sides carefully to create curved corners aligning with panel edges; fold and pin excess fabric to lie flat without zipper teeth showing externally.
- Using a running stitch and sewing needle, sew along the bottom edge of the zipper tape from wrong side, ensuring the seam allowance allows zipper slider movement.
- Continue sewing around corner and up side edges, keeping stitches discreet and avoiding working loops.
- Repeat zipper installation on opposite side of panel.
- Optionally seal zipper ends with lighter to prevent fraying.
Part 4: Side Panels (Make 2)
- Chain 1, sc into first stitch.
- Mark first stitch; then work 9 sc stitches in back loop only for stretch control.
- Work regular sc in first and last stitch to maintain structure.
- Decrease over next 3 stitches to form corner shaping.
- Repeat steps to create a rectangular side panel with decreased corners.
- Turn work to wrong side and fold panel in half.
- Join edges of folded side panel with slip stitches to create side seam.
- Cut yarn and weave in ends neatly.
Assembly and Final Finishing
- Attach zipper slider carefully to stabilized zipper tape.
- Attach side panels to center panel, sewing edges together securely.
- Attach metal “handmade” tag to purse center and secure with back attachment plate internally.
Assembly & Finished Size
- Center rectangular panel approx. 23 chains wide, 14 rows tall.
- Border formed with crossed puff stitches creating textured edged border all around.
- Zipper length minimum 16 cm, sewn flush along center panel edges.
- Side panels create depth with folded seams.
- Finished purse sized to accommodate coins and small valuables.
- Handmade metal tag enhances elegance.
Notes
- Maintain even tension throughout for a neat finish.
- Use stitch markers to track corners and round starts for precision.
- Work slowly on zipper installation for smooth functionality.
- Check placement of metal tag before final stitching.
- Weave in all ends securely.
- This detailed, step-by-step crochet coin purse pattern combines functional zipper techniques with decorative puff stitch borders to produce a beautiful and practical accessory suitable for intermediate crocheters looking to enhance their skills.
- This coin purse is suitable as a gift or personal stylish accessory.




Leave a Reply