

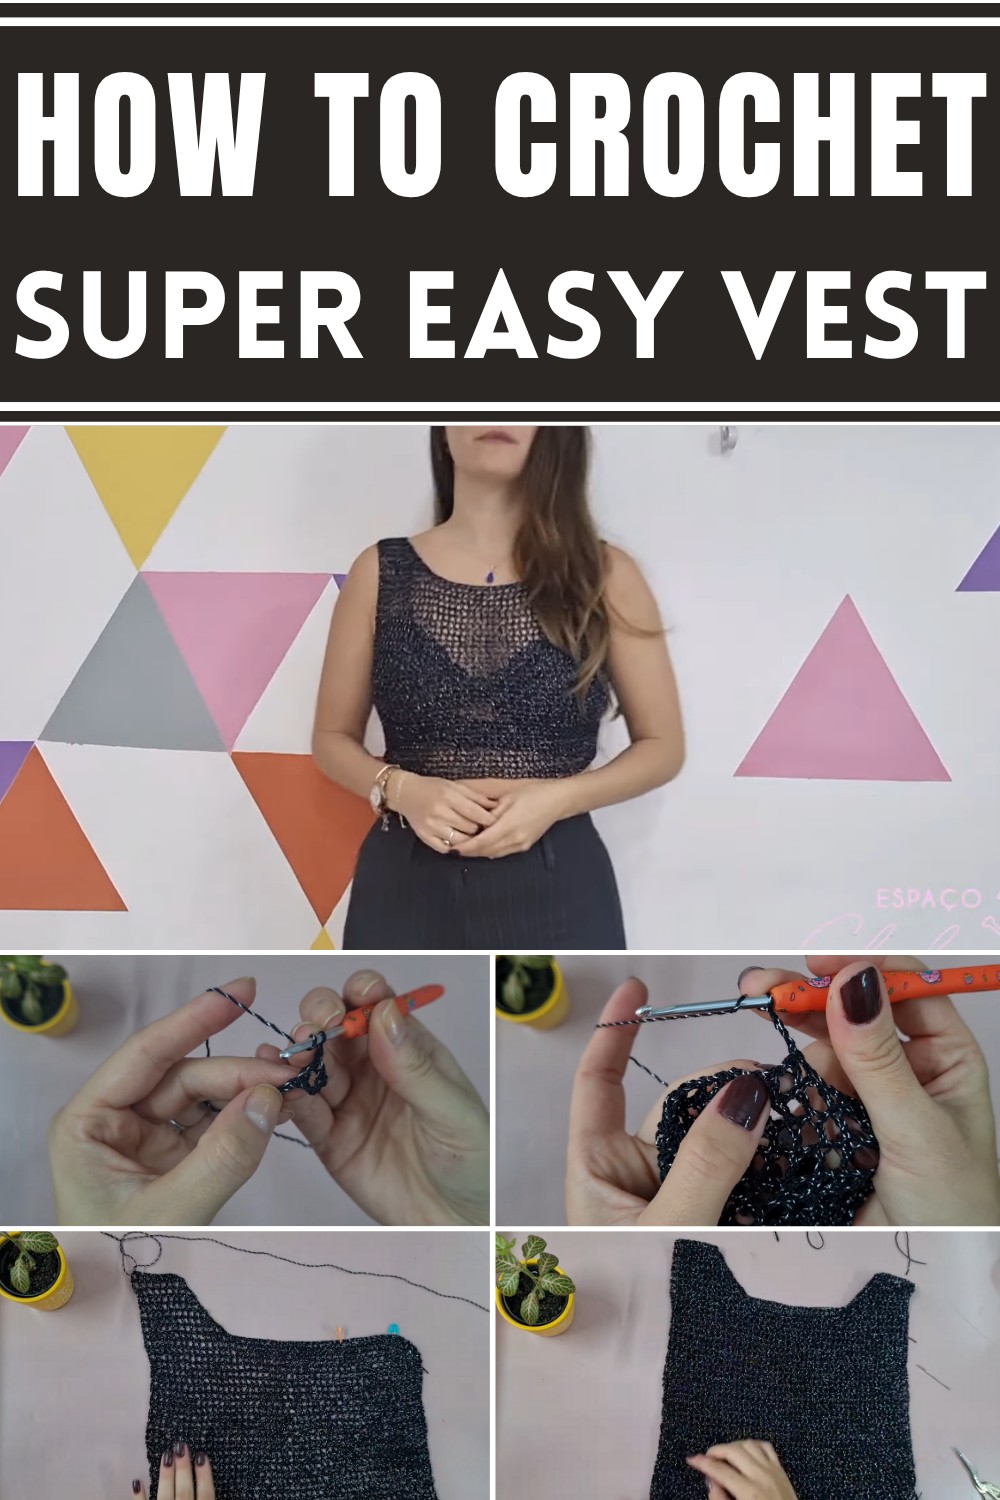
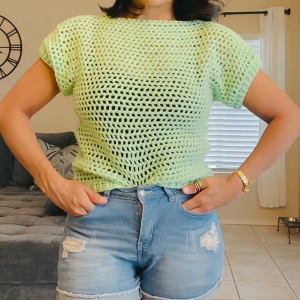
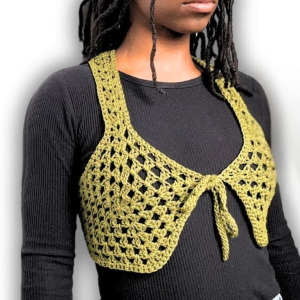
Learn how to make a stunning crochet vest with this free pattern perfect for beginners and create a stylish simple and affordable piece to enhance your outfit.
Sometimes the simplest crochet projects become the most enjoyable ones to make. That’s exactly how I felt working with this free crochet vest pattern. It started as a way to use up some extra yarn, but soon I found myself excited for every row, watching the fabric take shape beneath my hands.
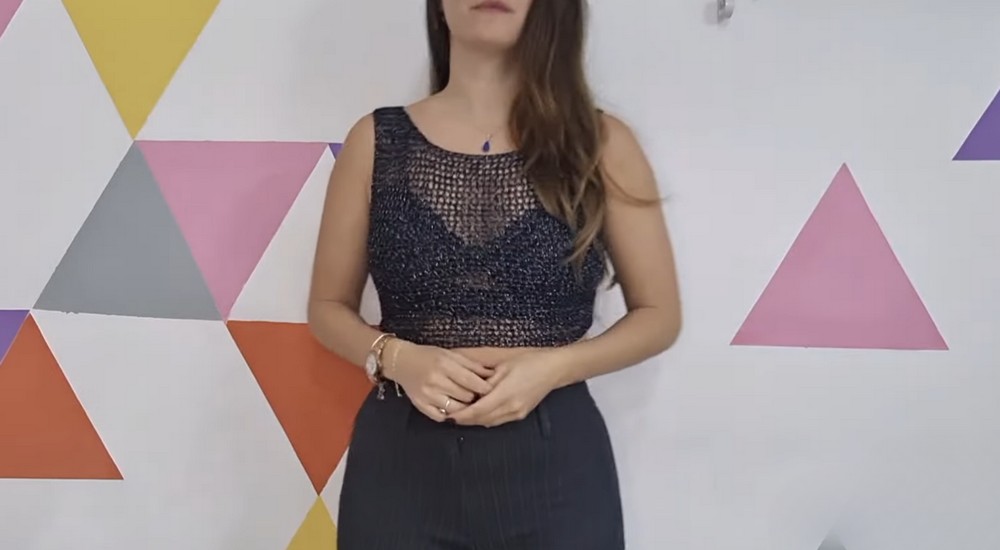
This vest isn’t complicated, but it’s beautiful in its openness and style. As I crocheted, I loved seeing the airy texture come together a mix of double crochet stitches and gentle spaces that make the piece light and comfortable. The shiny yarn added just the right touch of glamour, and the classic shape meant it would fit perfectly with almost anything in my wardrobe.
Free Crochet Vest Pattern with Simple Steps
I remember laying out the two panels side by side, carefully matching the lengths for the straps and neckline, just like you’d do for a favorite handmade garment. Stitching them together felt so satisfying, especially knowing I was making something personal and unique. With each seam, the vest transformed from a collection of stitches into a piece I could actually wear.
What I like best is the feeling of accomplishment when you slip on a vest you made yourself. Whether for a night out or a casual day, the vest fits and flatters, showing off your handiwork. It’s simple, quick to make, and perfect for anyone wanting to try their hand at garments without stress.
Crocheting this vest reminded me that beauty really does come from simplicity, and that sometimes the most memorable pieces are the ones you never expected to love so much. If you’re thinking about picking up your hook and yarn, this pattern is a wonderful adventure waiting for you.
Simple Shimmery Crochet Vest Pattern (Step-by-Step)
Create a chic and classic crochet vest perfect for evenings and special events! This project is beginner-friendly, uses basic stitches, and delivers an elegant finished look with just one skein of shimmering yarn. Follow the guide below to ensure a seamless result.
Before You Start
- Read the full pattern once before crocheting.
- Select a shimmery yarn for a glamorous effect, or any DK/light worsted yarn for a more casual look.
- Take bust and torso measurements to ensure a personalized fit.
- Prepare stitch markers; these are crucial for marking handle placement.
- Have a tape measure handy to check your progress.
- Block or steam your finished vest for the smoothest drape.
Pattern Notes
- The vest is worked in two identical rectangles with a simple mesh pattern, then sewn at the shoulders and sides.
- Size is adjustable by changing the starting chain length and the number of rows.
- Handles/straps are shaped with built-in decreases after finishing the body portion.
- Stitch markers help precisely place and shape the handles.
- All seams are sewn using a tapestry needle for an invisible join.
- Always check sizing as you go for a tailored fit.
How I Made the Crochet Pattern?
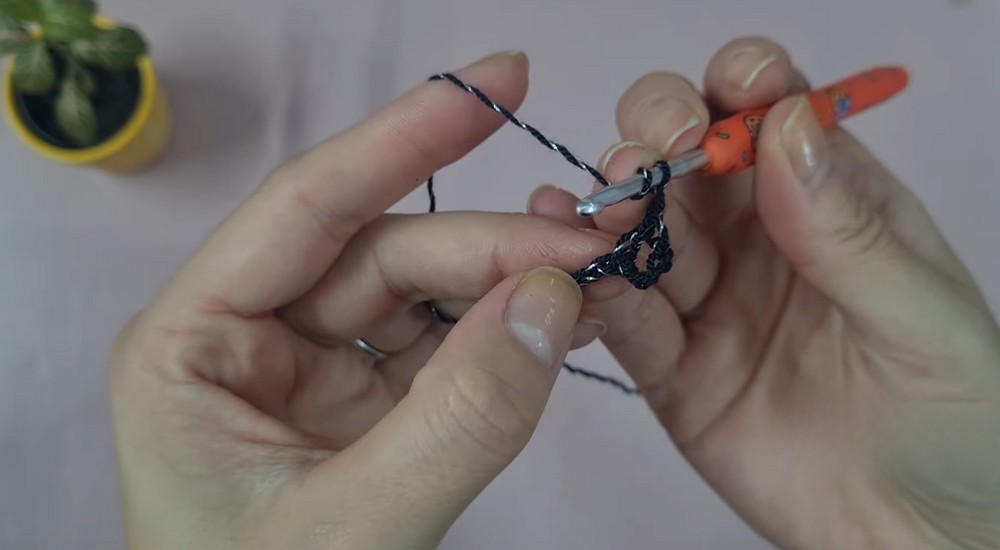
- I started with a foundation chain based on the bust measurement.
- Worked simple mesh stitch (double crochet and chains) in rows for length.
- Marked handle placements, then decreased within mesh repeats to form armholes/handles.
- Repeated for a second panel, then joined at shoulders and sides.
- Blocked my vest for an even and professional appearance.
Skill Level
Beginner/Advanced Beginner
You need basic knowledge of chains, double crochet, turning rows, and simple seaming.
Finished Size
- Easily adjustable for S, M, or L.
- Example sizes:
- S: 35 cm wide, 26 cm long before straps
- M: 40 cm wide
- L: 50 cm wide
- Armhole depth and handle width can be customized.
Materials
- 1 skein of Bris Star or similar shimmery yarn (about 100g/350m)
- 3.0 mm crochet hook
- Scissors
- Tapestry needle for seaming
- Stitch markers
- Tape measure
Measurements / Sizing
- Width: Choose based on bust measurement (add 2–4 cm for ease if desired).
- Length: Sample is 26 cm before handle shaping; adjust as desired.
- Handles: Adjust by marker placement (see below).
- Side seam: Sew about 20 cm, leaving 15 cm armhole.
Gauge (and Stitch Pattern)
- Mesh pattern: [dc, ch 1, skip 1] repeat—gives a light, open fabric.
- 10 x 10 cm = 16 dc or mesh reps x 8 rows (after light blocking)
Stitch Abbreviations
| Abbreviation | Meaning |
|---|---|
| ch | chain |
| dc | double crochet |
| st | stitch |
| sp | space |
| sl st | slip stitch |
| rep | repeat |
Special Stitches
- Mesh Stitch: dc, ch 1, skip 1 ch or st, dc in next st.
- Decrease in Mesh: When shaping handles, omit the ch 1 and do dc-to-dc for a joined/straight edge.
The Pattern!
Step 1: Make the First Rectangle
1. Foundation Chain:
- Measure bust (or desired width).
- S: chain to 35 cm.
- M: chain to 40 cm.
- L: chain to 50 cm.
- Count your chains (should be an even number plus 1).
- Example: Ch 81 for S.
2. Row 1:
- Skip 4 ch (counts as dc + ch-1), dc in 5th ch from hook.
- [Ch 1, skip 1 ch, dc in next ch], rep to end.
- Turn.
3. Row 2 and All Rows Until Desired Length:
- Ch 4 (counts as dc + ch-1).
- [Dc in next dc, ch 1, skip 1 ch], rep across.
- (Always dc into dc, ch 1 over space.)
- Repeat for 35 rows (or desired length—sample is 26 cm).
- Do not cut yarn.
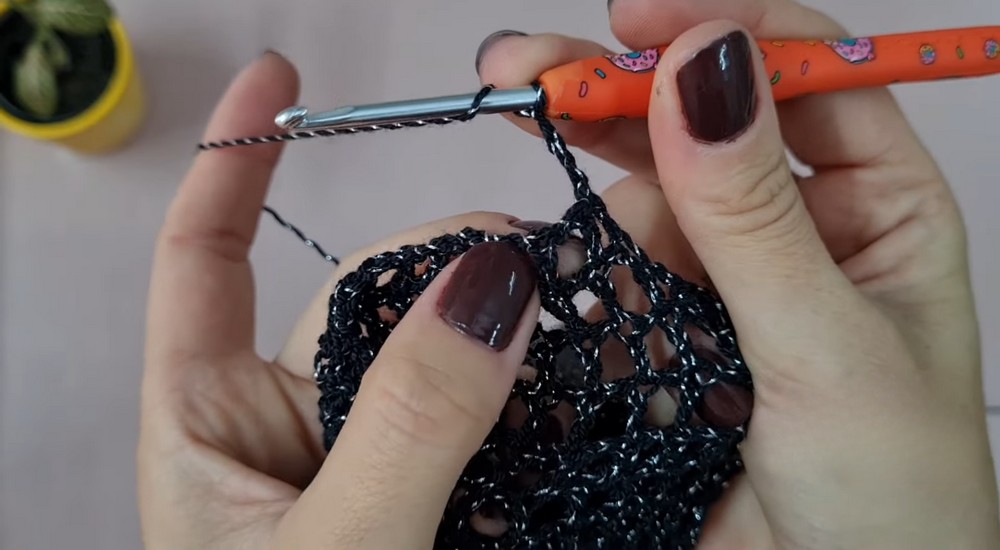
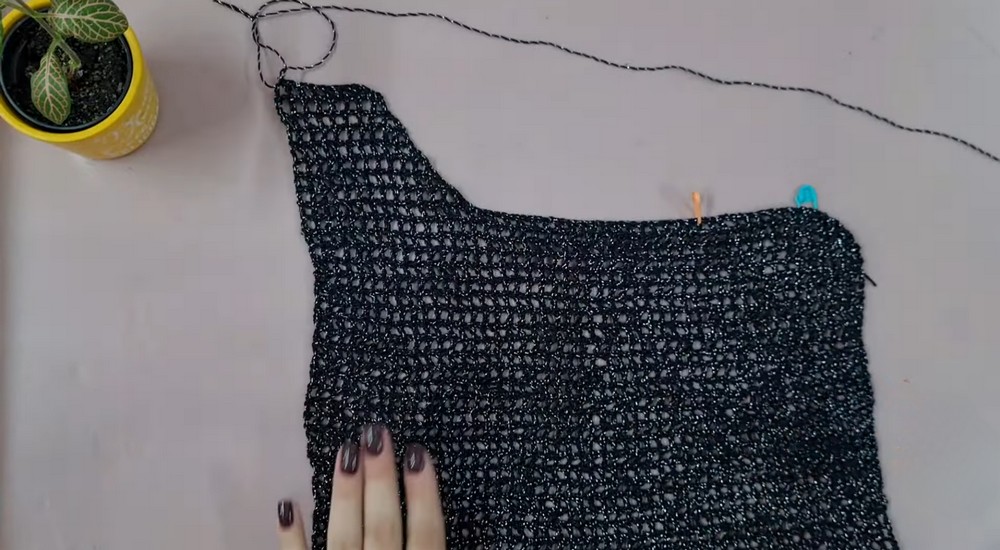
You now have a mesh rectangle. This is the foundation of your vest! For non-pattern readers: Make a flat rectangle with holes (dc and chains) until it's long enough to reach from your shoulder to the bottom of the armhole.
Step 2: Mark and Work Handles
1. Mark Handles:
- For S, count 15 dc reps at each end and place a marker (M: 18, L: 21).
- The center section will become the handle (space between markers).
2. Handle Shaping:
- Without cutting yarn, work mesh pattern across to the first marker.
- At the marker:
- Work no ch-1 space at the edge for a joined edge (handle base).
- Ch 3 (turning for next row, skip ch-1).
- Skip the first mesh rep; dc in next dc. Continue mesh over the handle section only.
- At each handle row edge, do not work a ch-1 between the first/last two dc; this applies for 7 rows to shape and decrease.
- After 7 rows, you will have reduced to about 9 mesh stitches for the center strap.
- For the final handle row, just work normal mesh pattern across.
- Cut yarn, leaving a long tail for sewing later.
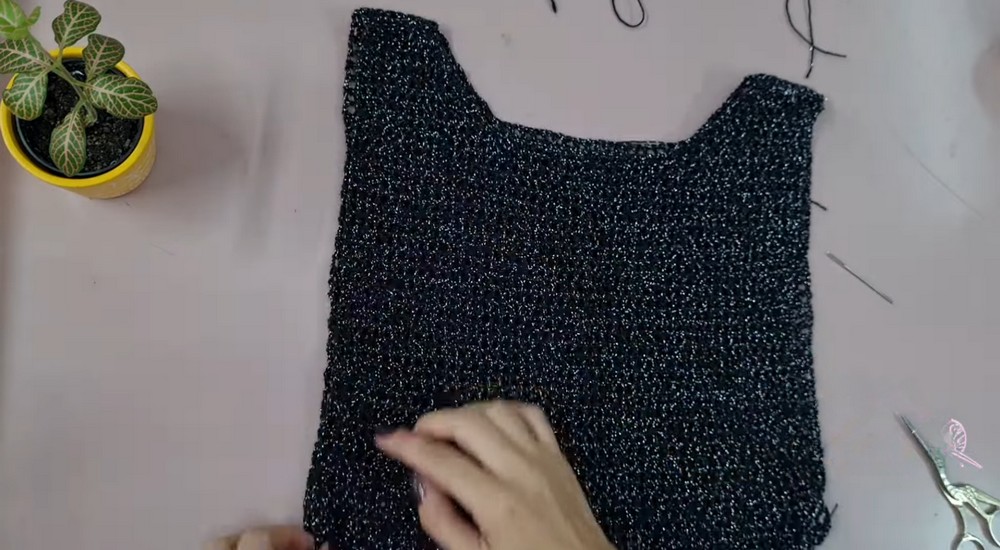
Step 3: Make Second Rectangle
- Repeat steps 1 & 2 for the second panel.
- For the second strap, start at your marker, work 4 ch for turning (3 for dc, 1 for space), and continue as for the first handle, mirroring the shaping.
You now have two identical vest panels, each with built-in straps/handles.
Step 4: Assembly & Finishing
- Lay panels with right sides facing.
- With tapestry needle and yarn, whip stitch or mattress stitch shoulder seams (strap ends).
- Match edges for a neat finish.
- Sew side seams from lower edge, leaving 15 cm (or size needed) for armholes.
- Use markers to keep sides even.
- Weave in all ends. Steam block or gently shape your vest if desired.
For Those Who Don’t Read Patterns
- Make two flat rectangles to fit your bust and desired length, with a mesh of double crochet and chains.
- On each, mark sides for handles, and build handle/strap into center by working rows in just that center part, decreasing at edges.
- Sew together at the tops (shoulder straps) and down each side, leaving room for your arms.
Solution of Problem
Problem: Straps or body are too long/short.
Solution:
- Adjust chain count for width and row count for length to suit your fit.
- Double check handle placement with markers before shaping straps.
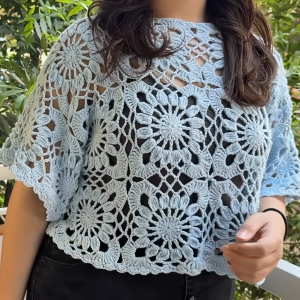
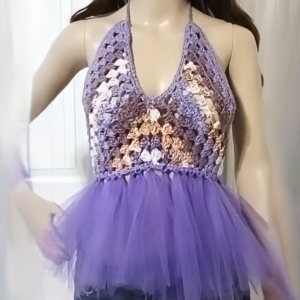
What you can make by using these stitches
- Mesh-style vests, simple tops, or long tunics
- Summer market bags (with mesh stitch)
- Festival cover-ups and shimmery evening tops
- Lightweight ponchos using the same panels
- Scarves or shrugs in mesh stitch
Final Thoughts
This beginner vest is simple, elegant, and versatile. You can glam it up with metallic thread or keep it casual with cotton. Alter dimensions and colors for endless looks—share your creations, and enjoy this new addition to your handmade wardrobe.
Leave a Reply