

Brighten your projects with crochet bead mushroom pattern, featuring clear guidance to design delightful and one-of-a-kind creations effortlessly.
Complex and time consuming crochet projects aren’t for everyone. That’s where the free crochet bead mushroom pattern comes into play, beautifully blending simplicity with creative flair. These charming designs, adorned with beads, inject a touch of whimsy into your decor, accessories, or handmade gifts.
Delightful Crochet Beaded Mushroom Pattern

Perfect for both novices and seasoned crochet enthusiasts, the pattern offers a fun way to enhance your skills while incorporating beads for added texture and visual appeal. These lightweight and versatile mushroom creations serve wonderfully as keychains, decorative ornaments, or playful accents for themed occasions. You're not bogged down by intricate techniques or costly materials with this pattern.
Using basic tools and easily accessible supplies, you can achieve stunning results. Enjoy the soothing process of crocheting while relishing the satisfaction of completing such delightful pieces. Whether for personal enjoyment or as thoughtful handmade gifts, the free crochet bead mushroom pattern offers an innovative path to meld practicality with artistic beauty.
Introduction
The pattern outlines how to scale up a miniature mushroom design using thicker yarn and larger beads to make it more accessible for beginners. The pattern offers a delightful opportunity for crocheters to create a unique, decorative piece that can also be downsized with practice.
Materials Needed
- Size 6 beads in two colors (ideally Czech beads)
- Sport weight yarn (e.g., Paton's Beehive Baby Sport)
- 3.25 mm crochet hook
- Big eye beading needle
- Stitch marker
- Tapestry needle
- Stuffing

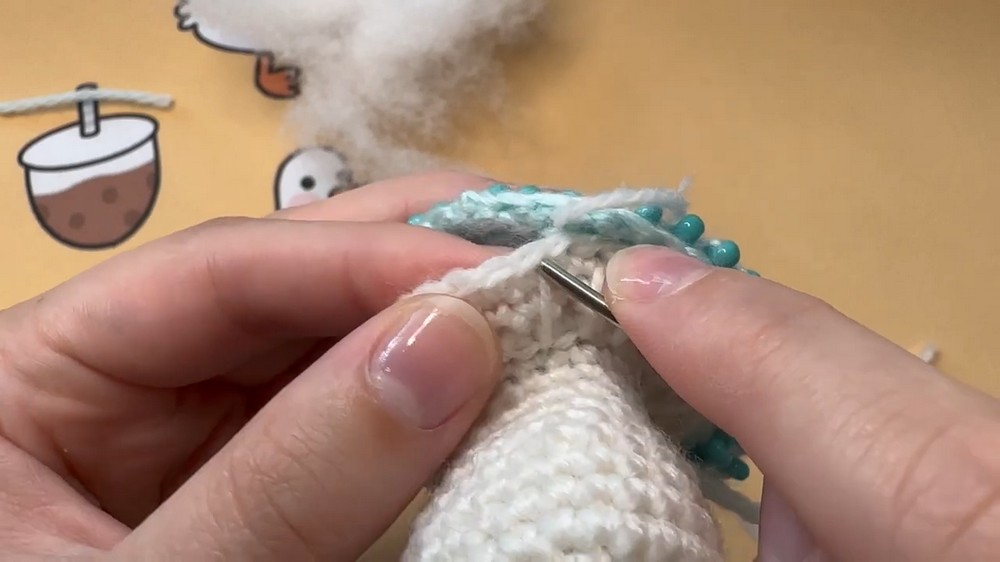
Bead Preparation
- Stringing Beads:
- Use a cup to hold your beads, and thread them using a big eye beading needle.
- Follow the order of the beads listed per round starting from round nine and ending at round one.
- Organizing Beads:
- Place a piece of paper to mark the end of each round’s beads on the yarn for accuracy and error-checking.
Crocheting the Mushroom Cap
- Magic Circle:
- Create a magic circle with your yarn, leaving a long tail for adjustments.
- Crochet seven single crochets with beads pulled into the circle.


- Invisibility Join for Rounds:
- Use the invisibility join method for smoother transitions between rounds, ensuring no visible gaps.
- Rounds with Increases:
- Work increases across multiple rounds till the cap shape is defined (Round 1-5 with increases in every second, third, etc., stitch as guided).
- Finishing the Cap:
- End with single crochet in the front loop only and slip stitch to finalize.

Crocheting the Mushroom Stem
- Starting the Stem:
- Form a magic circle and single crochet six stitches for the base.
- Continuous Rounds:
- Work the stem in continuous rounds, beginning with simple increases.
- Defining Shape:
- Further sculpt the shape with standard and invisible decreases.
- Final Rounds:
- Conclude by transitioning to front loop single crochet before fastening off.
Assembly
- Creating Gills:
- Use leftover yarn to create gills by stitching through the gaps made during the back loop crochet round.
- Stuffing:
- Insert stuffing into the cap and stem before joining.
- Attaching Stem to Cap:
- Use a whip stitch to attach the stem to the cap using the inside loops for neatness.
- Finishing Touches:
- Securely finish by knotting the loose ends and hiding yarn tails within the mushroom for a clean look.
Conclusion
This bead crochet project introduces an engaging approach to creating delightful miniatures with practical steps and materials. While beginners are encouraged to practice with bigger beads and testers, the adaptable design promises creative opportunities for varying skill levels.

Leave a Reply