

Grow your skills and bring cuteness to life with our Crochet Baby Heart Cardigan Pattern, perfect for making cozy, heart-filled outfits for little ones!
Handmade baby clothes hold a special kind of charm, offering warmth and care in every stitch. The Crochet Baby Heart Cardigan Pattern provides a delightful way to make cozy, heart-adorned outfits for little ones. Perfect for all skill levels, it allows beginners to practice their skills and experienced crocheters to add a personal touch. The adorable heart motif makes it a standout choice for baby showers, first photoshoots, or simply dressing up for a cozy day.
Baby Heart Cardigan Pattern - For the Little Love in Your Life
Lightweight yet snug, this cardigan is ideal for layering during transitional seasons or chilly evenings. It can be tailored easily with color choices to suit the personality or preferences of the little bundle of joy it’s made for. Beyond its functional use, the crocheting process itself offers a calming hobby, bringing a sense of accomplishment and mindfulness with every completed row.
The final product isn't just clothing it becomes a heartfelt keepsake that can be treasured for years. Whether gifting to a loved one or making it for your own child, this cardigan blends practicality and personality effortlessly, leaving a lasting impression with its thoughtful design and handmade care.
Introduction
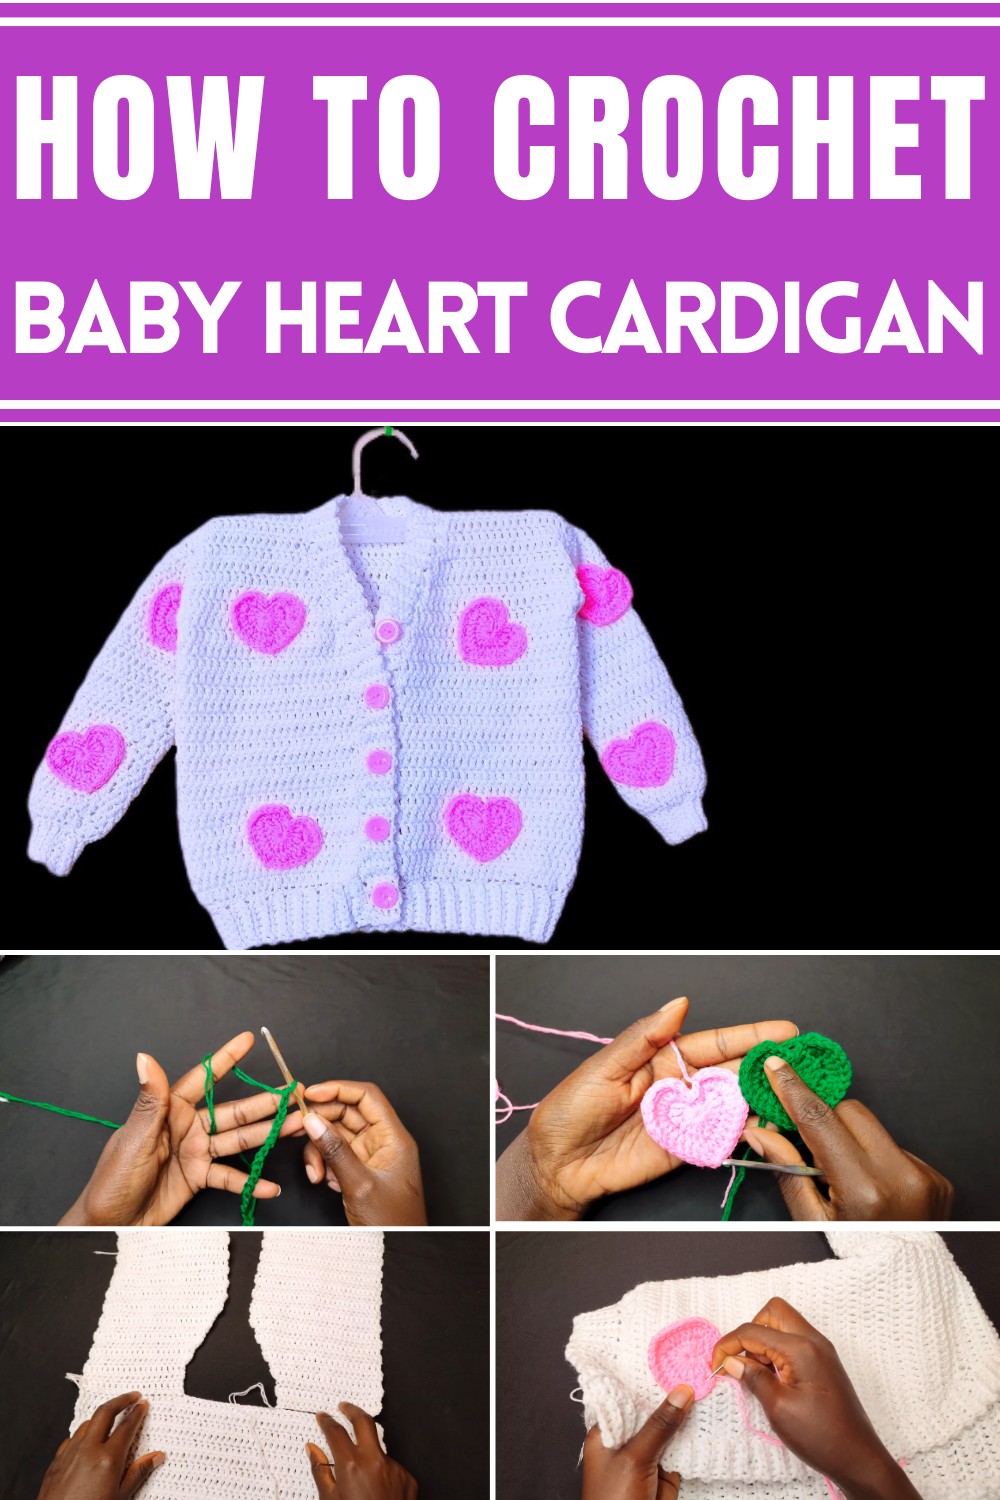
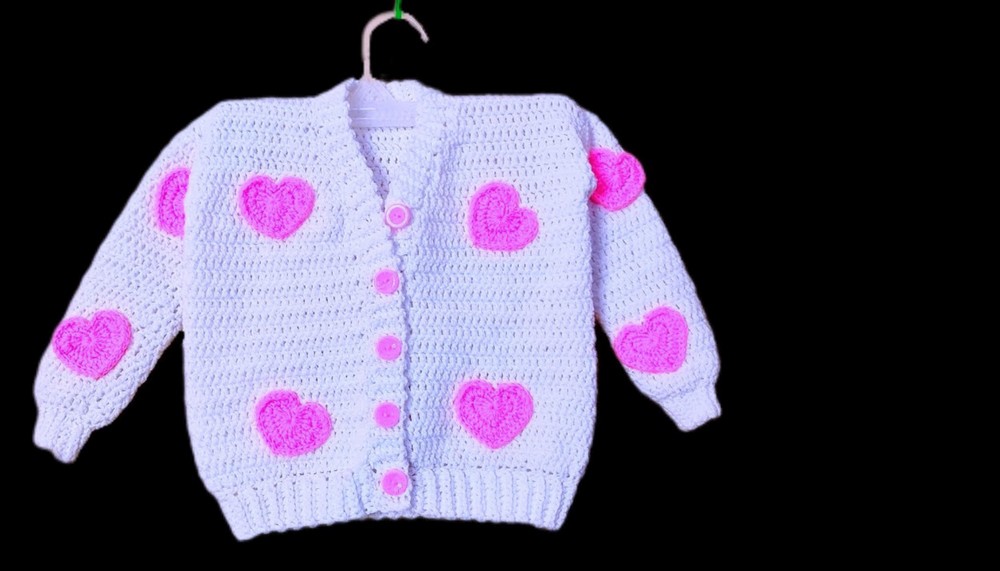
This detailed crochet cardigan pattern is designed for a three-year-old child, focusing on creating a beautiful and functional cardigan step by step. It features multiple components, including two front panels, a back panel, sleeves, ribbing sections, and decorative heart-shaped appliqués. The pattern also incorporates two main colors of yarn (white and baby pink) for visual appeal. This guide walks you through each step, providing clarity and ensuring results that are both stylish and practical.
Step-by-Step Details
1. Materials Needed
- 4.5 mm crochet hook
- Pair of scissors
- Darning needle (for weaving ends and assembly)
- Stitch markers
- Buttons
- Tape measure
- Two colors of yarn:
- White: For the main cardigan
- Baby Pink: For decorative accents
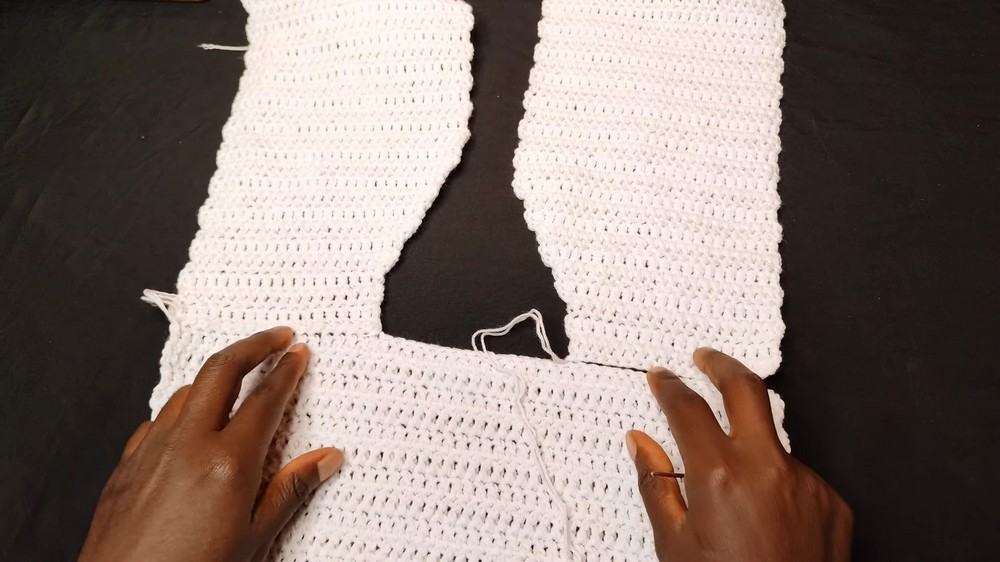
2. Front Panels
- Measurements:
- Length: 13 inches
- Width: 6.5 inches
- Steps:
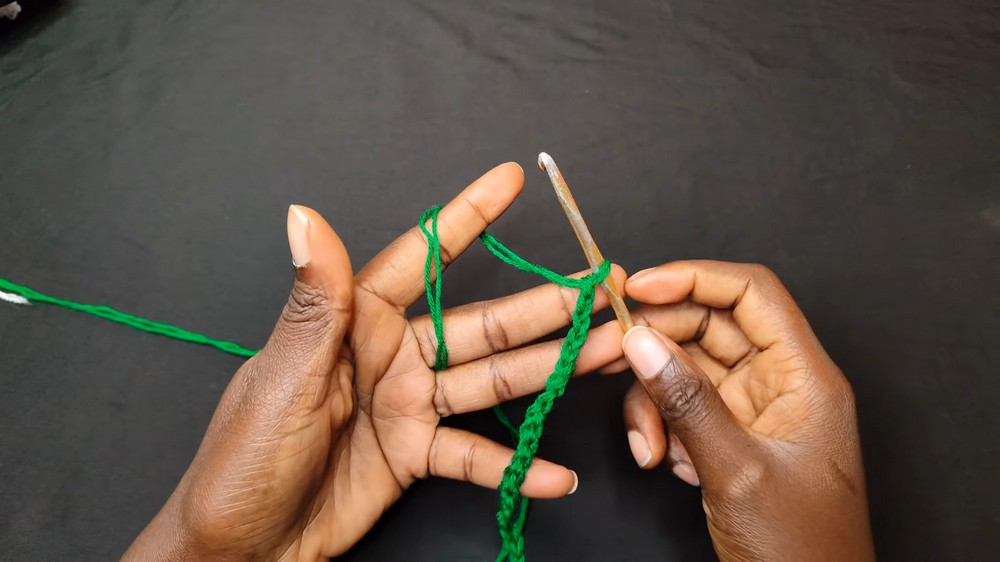
- Create a slip knot and chain 26.
- Add 2 turning chains and work one double crochet (DC) into the third chain from the hook. Continue with one DC in each stitch across.
- Repeat this step for 18 rows to build the panel shape.
- Starting from Row 19 to Row 28, perform decreases on one side by following this method:
- Chain 2, turn, yarn over, and pull through the first two stitches to create a decrease at the start of each row.
- Alternate between rows with and without decreases.
Finish two identical front panels using these instructions.
3. Back Panel
- Measurements:
- Length: 13 inches (equal to the front panels)
- Width: 13 inches
- Steps:
- Start with 52 chains (double the front panels' width).
- Add 2 turning chains and begin working DC into the third chain from the hook, repeating to complete the first row.
- Continue building the panel by repeating DC rows until you have 28 total rows. This panel forms a square shape.
4. Sleeves
- Measurements:
- Length: 9.75 inches
- Wrist Width: 5 to 6 inches (widest part at the shoulder).
- Steps:
- Start with 25 chains, adding 2 turning chains for the first row.
- On the second row, increase:
- Add 2 DC into the first stitch, and SC into each subsequent stitch.
- Alternate rows between increasing and no-increase rows until the sleeve takes shape.
- Make two identical sleeves for the cardigan.
5. Ribbing Sections
There are four ribbing types included in this project:
5.1 Wristbands
- Steps:
- Chain 7 stitches, begin with a slip stitch, and continue slip stitching through each row.
- Ensure you’re working in the back loops only for the classic ribbed effect.
- Continue until the band measures 3.25 inches unstretched (5.5 inches stretched).
- Make two wristbands for the sleeves.
5.2 Waistband
- Measurements:
- Unstretched: 20 inches
- Stretched: 27 inches
- Steps:
- Chain 8 stitches.
- Work SC back-loop-only rows until the waistband measures 20 inches (unstretched).
5.3 Front and Neck Ribbing
- Measurements:
- Length: 32 inches unstretched, up to 42 inches stretched.
- Steps:
- Chain 6 stitches and begin back-loop-only SC rows.
- Add buttonholes every eighth row by working a skipped stitch and chain one.
- Continue until six buttonholes and the desired ribbing length are completed.
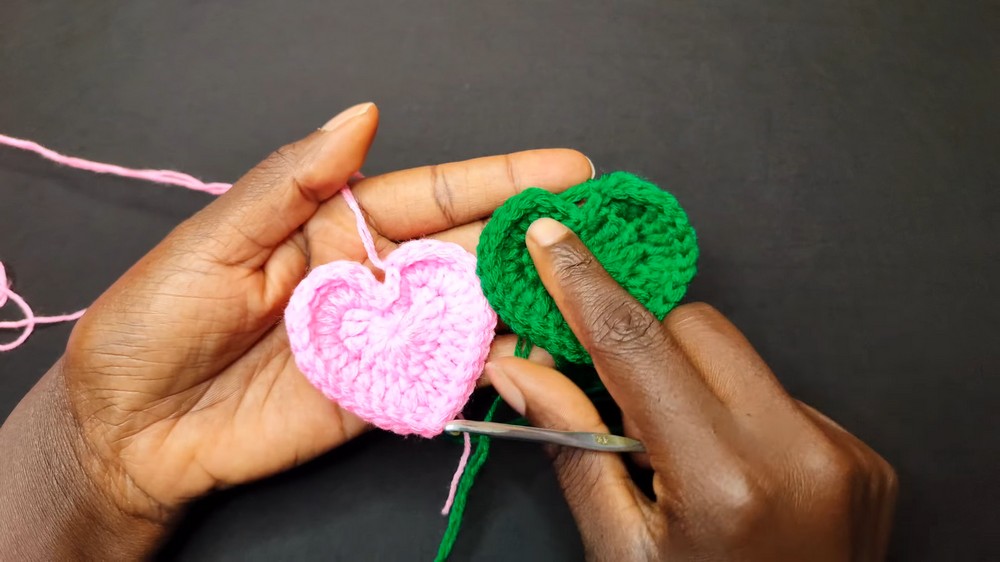
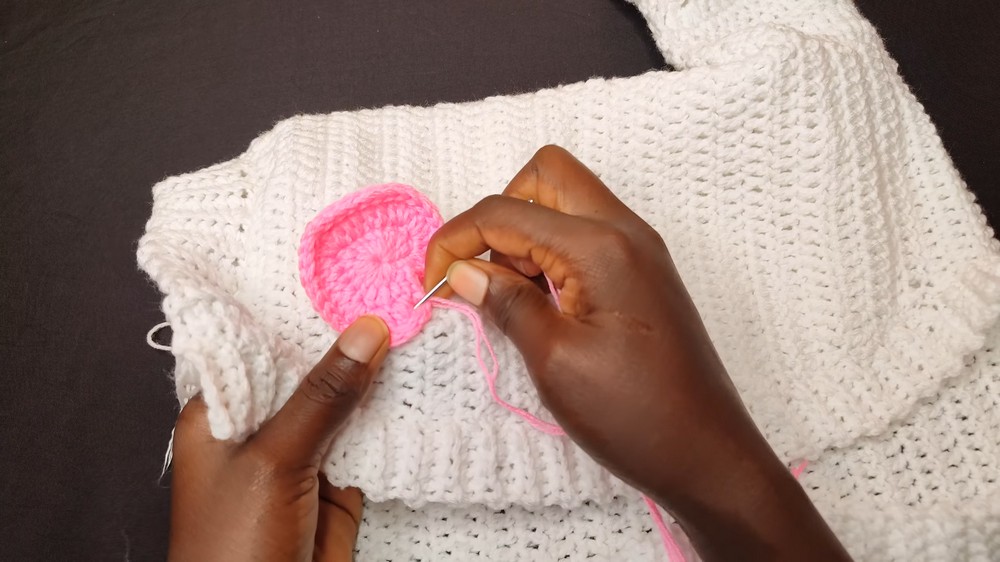
6. Decorative Hearts
Make 11 crochet hearts using a smaller crochet hook (3.5mm) for tighter stitches.
- Steps:
- Begin with a magic ring and chain 3.
- Work triple crochets (TC), DCs, and slip stitches into the ring to form the heart shape.
- Add detailed edging with slip stitches around the completed heart.
7. Assembly
- Step 1: Attach Panels
- Join the front panels with the back panel at the shoulders using a darning needle.
- Ensure equal stitch counts on both sides for symmetry.
- Step 2: Attach Sleeves
- Align the sleeves evenly with the armhole and sew them in place using the darning needle.
- Step 3: Attach Ribbing
- Sew on the wristbands, waistband, and front ribbing.
- Ensure smooth alignment when adding the ribbing to the cardigan body.
- Step 4: Add Buttons
- Attach buttons opposite the buttonholes on the front ribbing for easy closing.
- Step 5: Add Decorative Hearts
- Place and sew the crochet hearts in desired spots for a charming finish.
Conclusion
This crochet cardigan is a delightful project that allows beginners and intermediate crocheters to practice essential techniques like double crochet, ribbed stitching, and seamless assembly. With its thoughtful design, practical ribbing, adorable decorative hearts, and cozy texture, this cardigan is as functional as it is beautiful.
Leave a Reply