

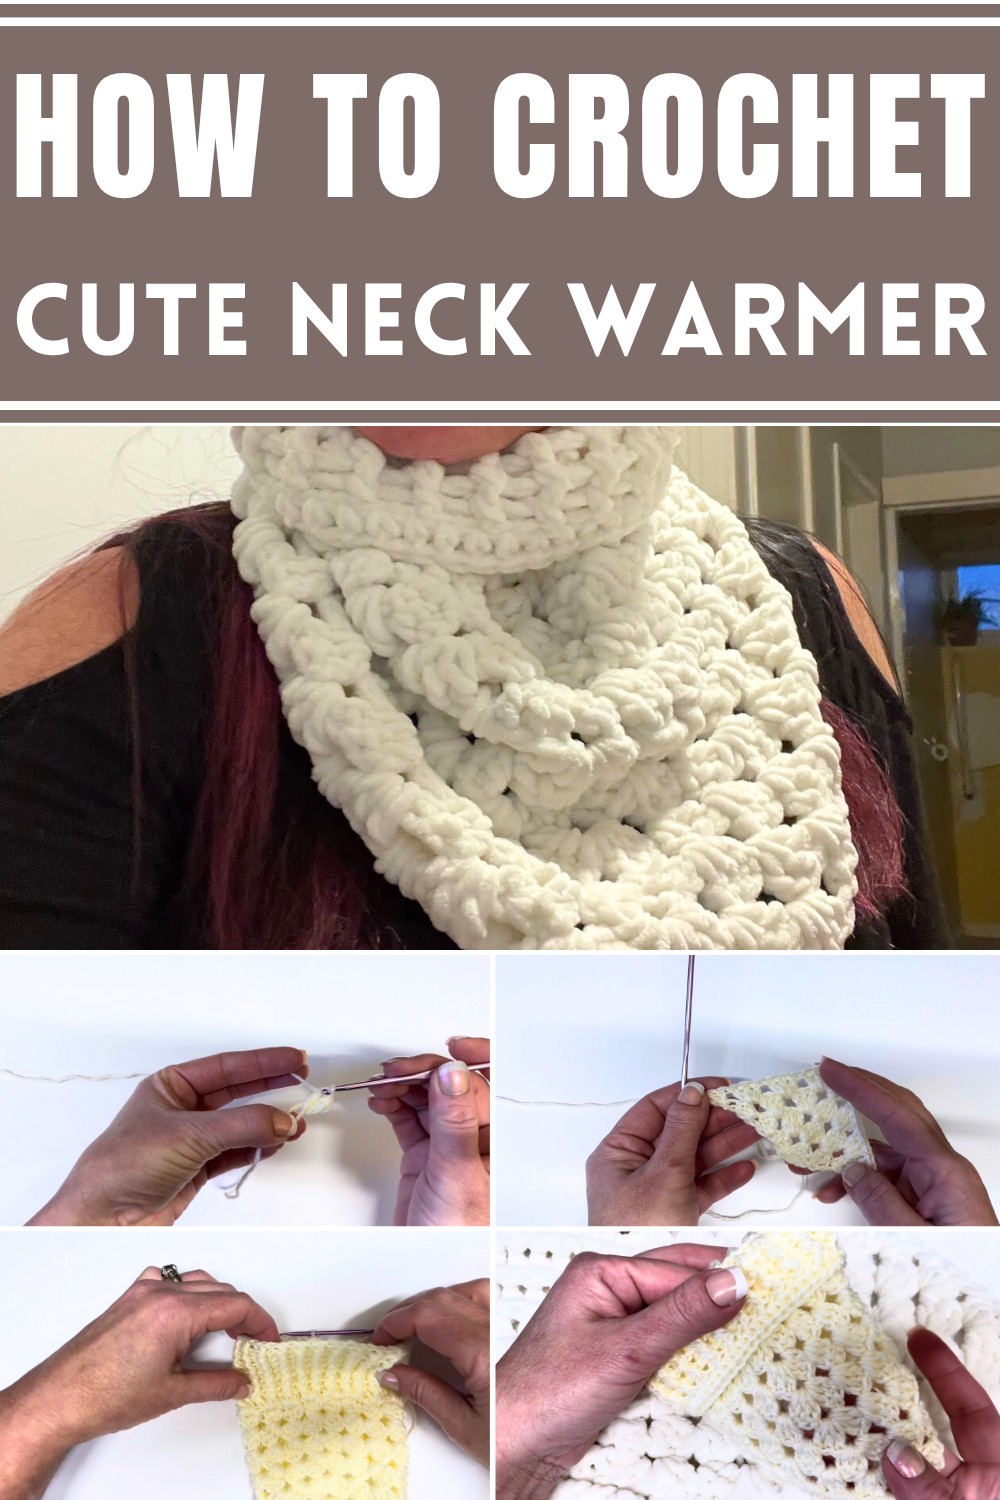
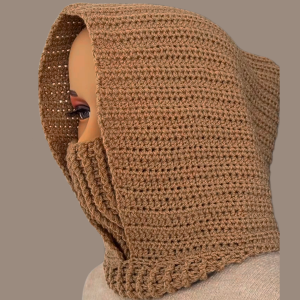
Remain cozy and chic with our stylish crochet neck warmer, expertly crafted to add warmth and elegance to your cold-weather wardrobe.
Keeping warm during chilly days doesn’t have to mean compromising on style, and the crochet neck warmer proves this effortlessly. This versatile accessory adds both warmth and flair to your wardrobe, making it a practical yet fashionable choice for colder months. Soft and lightweight, it wraps comfortably around your neck, offering excellent protection from icy winds without feeling bulky or heavy.
Warmth in Style Crochet Neck Warmer for Effortless Chic
Perfect for adding a touch of elegance to everyday outfits or enhancing formal looks, this neck warmer fits seamlessly into any setting. Its intricate design showcases attention to detail, making it as visually stunning as it is functional. Beyond keeping you warm, it adds a stylish edge that makes a statement wherever you go.
Ideal for layering, it works well with jackets, sweaters, or even coats, bringing both comfort and charm to your ensemble. Whether you’re heading out for errands or preparing for a chilly evening, the crochet neck warmer is a must-have accessory that balances coziness with sophistication. Versatile, durable, and timeless, it’s the perfect companion for your cold-weather adventures, keeping you snug while elevating your style effortlessly.
Introduction to the Pattern
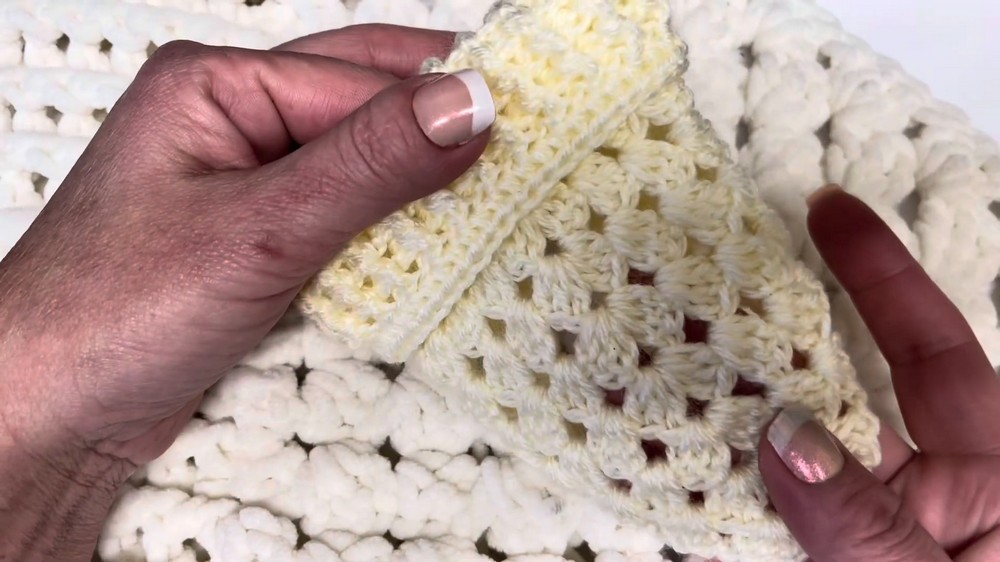
This crochet pattern, Guides viewers through making a stylish and functional V-shaped cowl. Perfect for keeping warm during cold weather, this versatile pattern can be customized as either a turtleneck or roll neck and works well for both humans and pets.
Step-by-Step Instructions
Materials Needed
- Yarn:
- Super Chunky Yarn for an adult-sized cowl.
- Worsted/Double Knitting (DK) Yarn for small sizes (e.g., pets).
- Crochet Hooks:
- 3.5 mm hook for the V-neck section.
- 3 mm hook for the collar section (optional for tighter stitches).
- Scissors.
- Tapestry needle for finishing and sewing tails.

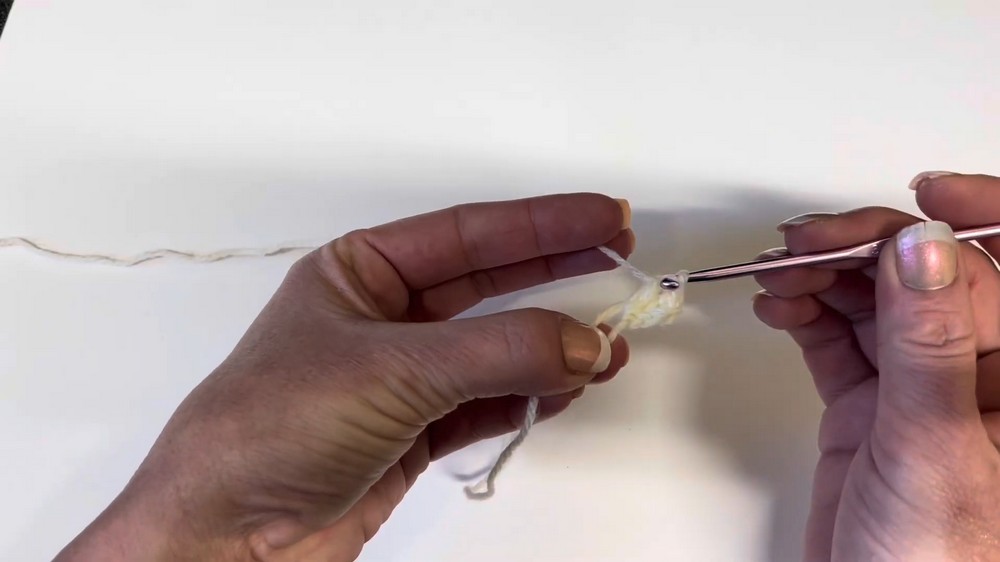
Step 1: Start With a Magic Circle
- Create a magic circle:
- Hold the yarn tail with your thumb and finger.
- Wrap the working yarn around your tail, securing it with your pinky.
- Go under the first yarn strand (the tail strand) and pull the working yarn through, creating a loop.
- Chain 3, which will count as your first double crochet (DC).
Step 2: Crochet Row 1
- Add 2 more double crochets into the magic circle.
- You should now have 3 double crochets (including the chain 3).
- Chain 2, then work 3 more double crochets into the magic circle.
- Pull the magic circle’s tail to tighten the loop.
Step 3: Crochet Row 2
- Chain 3, turn your work, and make 2 double crochets at the base of the chain 3.
- Into the chain 2 space, work:
- 3 double crochets,
- Then chain 2,
- Followed by 3 more double crochets.
- At the end of the row, work 3 double crochets in the 3rd chain of the chain-3 section from the previous row.
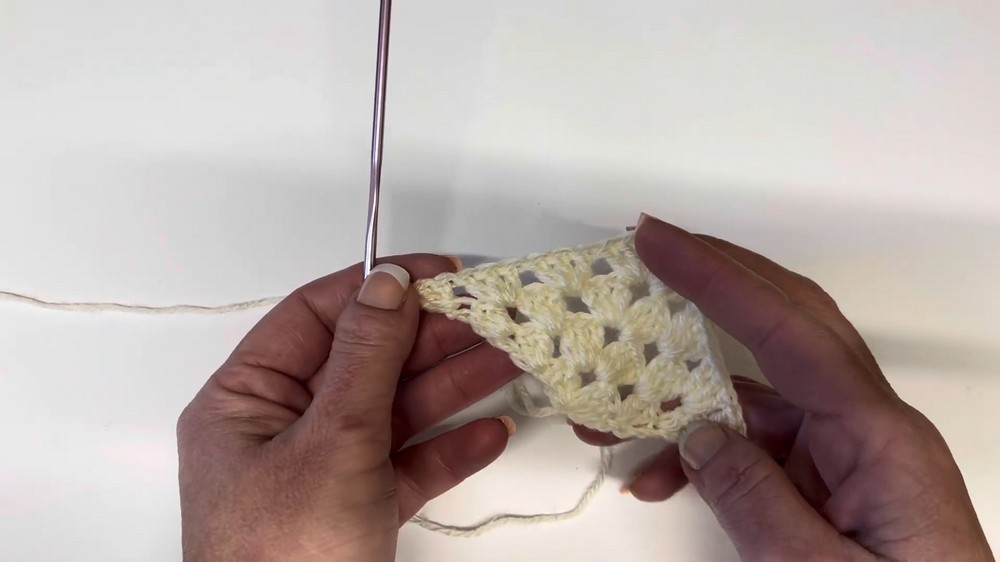
Step 4: Continue Building Rows
- For Row 3:
- Chain 3, turn your work, and add 2 double crochets into the base of the chain 3.
- In the gaps between previous clusters (sets of 3 double crochets), work 3 double crochets.
- In each chain 2 space:
- Add 3 double crochets, chain 2, and 3 double crochets.
- Continue working back to the top of row clusters and completing with 3 double crochets at the edge.
- Repeat this process for additional rows to widen the triangle until the cowl reaches your desired width.
- Base the width on the neck and head circumference for an adult or pet.
Step 5: Join the Edges
- Slip stitch the two corners of your cowl together.
- Locate the top of the double crochet stitch at the opposite corner.
- Secure the V-shape by slip stitching into the top of the cluster, joining both sides.
Step 6: Start the Collar
- Switch to the smaller hook (3 mm) for the collar section.
- Chain 3 and work along the flat upper edge of the cowl (the shorter edge).
- Work 3 double crochets under each stitch or edge cluster until you complete the row.
- If desired, crochet over the tail yarn for additional security and trim it off.
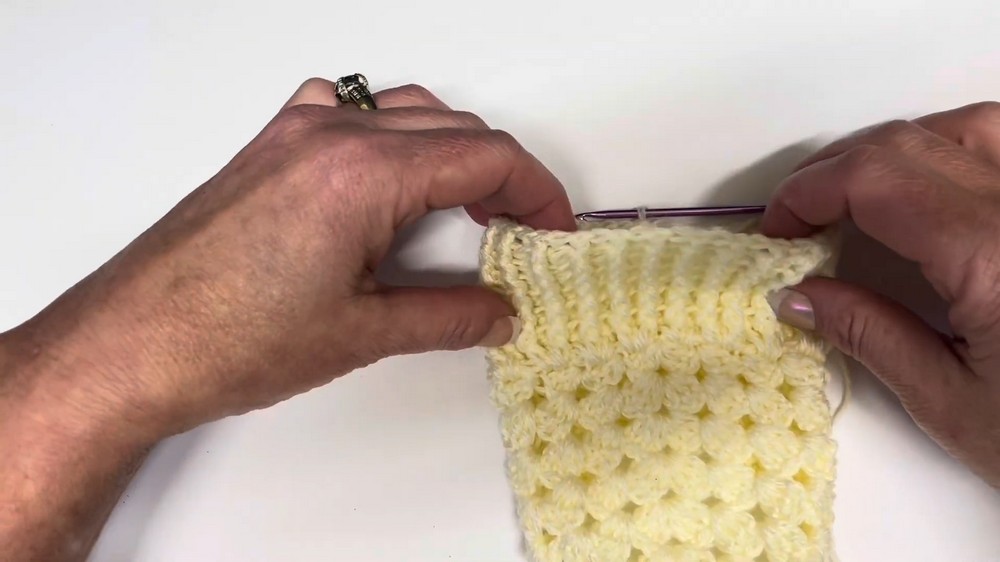
Step 7: Build the Collar with Post Stitches
- Begin the next row by chaining 2 and working front post double crochets and back post double crochets alternately:
- For a front post double crochet:
- Yarn over, insert your hook from right to left around the post of the stitch, yarn over, and complete the double crochet as usual.
- For a back post double crochet:
- Yarn over, insert your hook from back to front around the post of the stitch, yarn over, and complete the double crochet as usual.
- For a front post double crochet:
- Alternate front post and back post double crochets to create texture throughout the row.
- At the end of the row, slip stitch to the top of the first post stitch (not the chain 2).
Step 8: Continue Building Length
- Repeat the textured front and back post double crochets for several rounds.
- Adjust the collar length based on how you want the cowl to sit:
- Short collar for basic neck coverage (e.g., 3 rounds).
- Long collar for turtleneck or fold-over style (e.g., 8 rounds or more).
Step 9: Add the Final Row
- Finish the collar by chaining 1 and working half double crochets (HDC) into every post stitch to create a clean edge.
- Slip stitch to the first half double crochet, snip off your yarn, pull it through, and sew in all loose ends.
Conclusion
This V-shaped cowl is perfect for those chilly days, offering warmth, style, and versatility. Whether you're making it for yourself or a furry friend, the customizable length and textures allow for plenty of personalization. The addition of the textured collar gives this project a professional, polished finish.

Leave a Reply