

Turn a simple project into festive decor with this Crochet Christmas Tree pattern perfect for adding cozy holiday charm to your home.
If you're looking to add a charming and eco-friendly touch to your holiday décor, this delightful project is just the thing. The Crochet Christmas Tree Pattern featured by DIY Yarn Crafts offers a creative way to celebrate the festive season with a handmade ornament that exudes warmth and nostalgia. This pattern is thoughtfully designed to be beginner-friendly and uses simple materials, making it an accessible project for anyone eager to bring a cozy vibe into their home during the holidays.
Adorable Crochet Christmas Tree Free Pattern To Add Holiday Charm
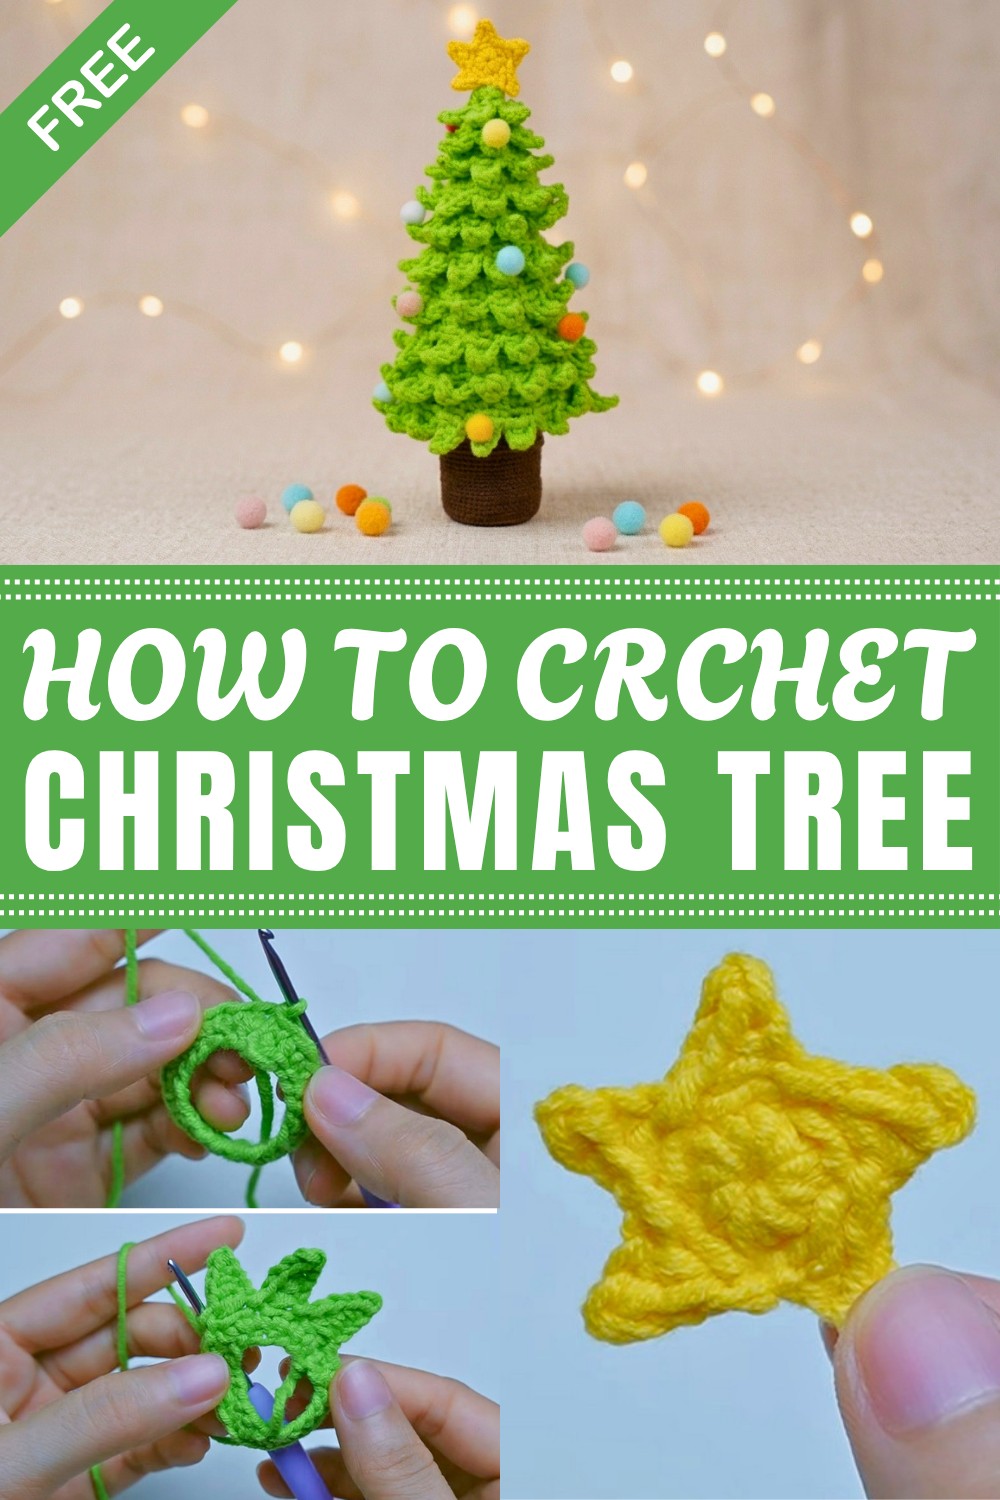
Perfect for the Christmas season, this decorative tree can brighten up mantels, tabletops, or even your workstation, adding a splash of green and festive cheer. Its versatile size and adorable shape allow it to be paired beautifully with classic holiday decorations, such as string lights, pinecones, or miniature gift boxes, creating a harmonious and inviting atmosphere. Beyond the traditional holiday setting, this crochet tree also makes a heartfelt gift that friends and family will appreciate for its unique charm.

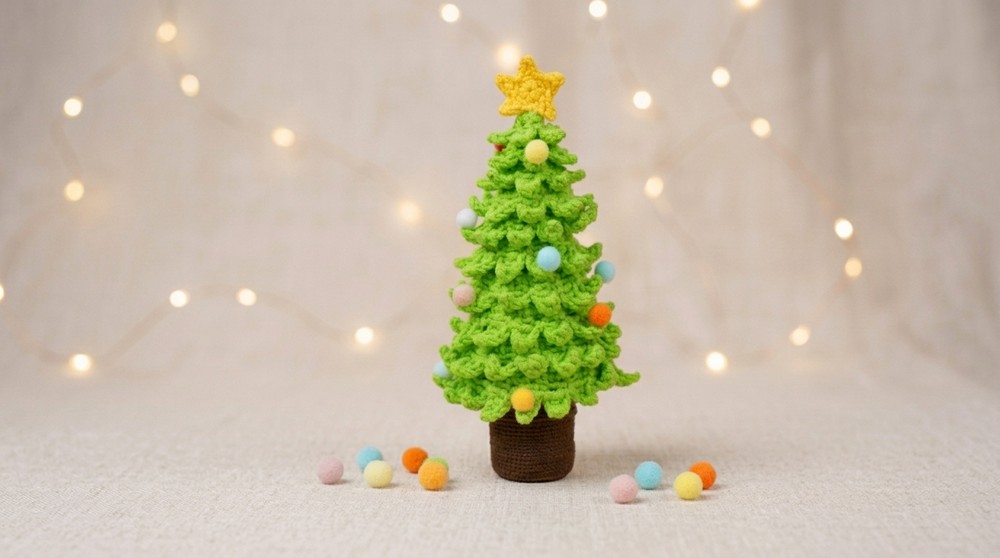
The texture of this Christmas tree is soft and inviting, thanks to the use of milk cotton yarn, which combines the breathability of cotton with the gentle stretch of acrylic. This yarn choice adds a subtle sheen and a pleasant hand feel, making the tree both visually appealing and tactilely delightful. Highlighting the design are delicate leaf rings that elegantly mimic pine branches, layered to create a full, dimensional look. The addition of a petite star atop completes the tree with a classic holiday flourish that truly stands out.
If you want to infuse your home with festive spirit and a touch of handmade beauty, exploring this Crochet Christmas Tree Pattern will inspire you to create a lasting holiday keepsake. Dive into the complete tutorial to discover how each element comes together to form this enchanting seasonal decoration.
Eco-Friendly Crochet Christmas Tree Free Pattern
This festive crochet Christmas tree offers a charming décor accent for the holiday season. Using simple stitches, easy-to-source materials, and upcycled components, this project brings a warm, handmade touch to your home. The combination of green leaf rings, a textured trunk, and a bright star at the top provides visual appeal and rustic style. With step-by-step instructions, even beginners can assemble this delightful centerpiece. Highlight your mantel, table, or shelf with something soft and seasonal. Personalize your tree with color variations or add embellishments for a unique look. Share your finished piece to inspire friends or family this holiday.
Quick Overview Of Pattern
- Make the tree form: Construct a cone from cardstock and a trunk from a toilet paper tube wrapped in yarn.
- Crochet leaf rings: Create several rings of “leaf points” in graduating sizes with green yarn.
- Top the tree: Crochet a small crown and add a yellow star at the top.
- Assemble: Stack and glue the rings onto the cone, then add the crown and star to complete the tree.
Notes
- You may use any color of yarn you wish, but green and brown help create a classic look.
- The size of your rings will depend on how wide your cone is. Measure your cone as you crochet to ensure a snug fit.
- This pattern is very adaptable; increase or decrease the number of leaf rings to make a taller or shorter tree.
- Hot glue is used for ease and stability, but strong craft glue will work in a pinch.
Skill Level
Beginner – Easy
(No complex shaping or advanced techniques, only basic stitches and simple assembly required.)
Materials
- Yarn: 5-ply milk cotton yarn (color A: green for the leaves, color B: brown for the trunk, color C: yellow for the star)
- Crochet Hook: 2.5 mm
- Base Supports:
- Toilet paper tube (for the trunk)
- Cardstock (for the cone)
- Tools: Hot glue gun (or strong craft glue), scissors, stitch marker
Measurements / Sizing
Finished Dimensions (approximate):
- Height: 5–7 inches, adjustable based on number of leaf rings and cone size
- Base Diameter: determined by the cone width you make
Note: You can adjust the size of your cone and rings as desired.
Gauge
- Gauge is not critical for this project, but if you want your rings to fit precisely, create a small swatch in single crochet and check the fit around your cone before proceeding.
Stitch Abbreviations
- ch: chain
- sl st: slip stitch
- sc: single crochet
- hdc: half double crochet
- MR: magic ring
Special Stitches
- Magic Ring (MR): Form a ring by wrapping yarn around your fingers and working stitches into the loop for a tight, adjustable center (used for the tree top and star).
The Crochet Pattern
Tree Base & Trunk Prep
Cardstock Cone
- Cut the cardstock into a semi-circle or triangle shape wide enough to roll into a cone the height you want your tree to be.
- Roll the cardstock tightly into a cone. Overlap the edges as needed, then secure with hot glue along the seam.
- Let the glue cool and set aside.
Trunk Base
- Take your toilet paper tube and apply hot glue to one end.
- Begin wrapping the brown yarn (Color B) around the tube. For a neat finish, ensure each round of yarn is snugly beside the previous wrap, slightly overlapping.
- Cover the entire tube, gluing at the end to secure.
Assembly
- Apply a generous amount of hot glue to the bottom tip of your finished cardstock cone.
- Set and press the cone firmly onto one end of the wrapped trunk, letting it cool and set upright.
Leaf Rings (Make Multiple Sizes)
You will crochet several rings to slip over the cone from bottom to top. Each ring should fit snugly around the cone at varying heights: start with a wider ring for the base and make smaller rings as you move up.
Tip: Place each ring on the cone as you go to check the fit.
Foundation Round (for EACH ring):
- Make a slip knot with green yarn.
- Chain enough stitches to form a circle that snugly fits the desired layer of your cone. (This number will vary; typically 24–40 ch depending on your cone size and preferred fullness.)
- Join with a sl st into the first chain to form a ring.
- Ch 1, then work 1 sc in each chain around the ring.
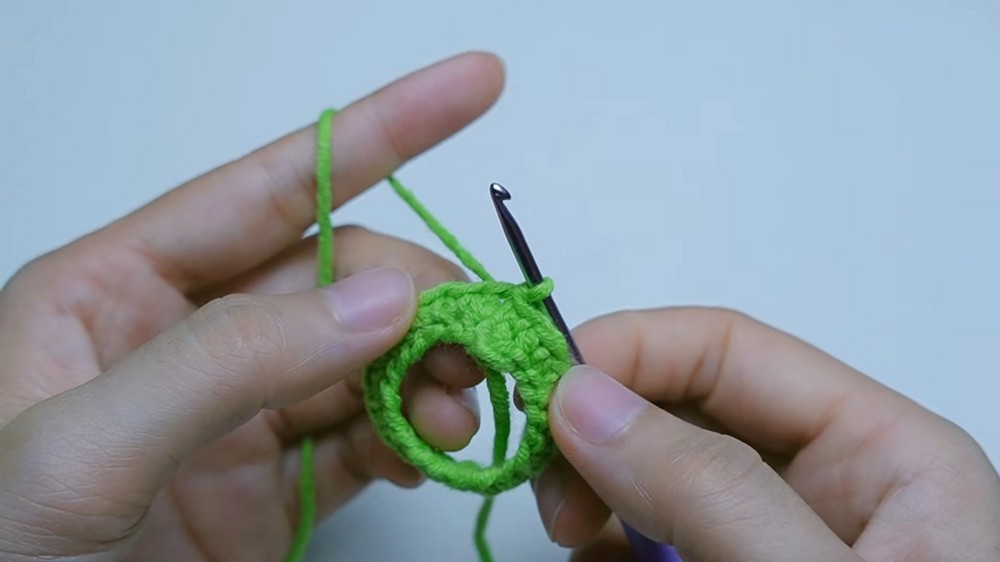
- Join with a sl st to the first sc.
Leaf Point Pattern Round:
Repeat the following sequence around the entire ring:
- Ch 5.
- Sl st in the 2nd chain from the hook.
- 1 sc in the next chain.
- 1 hdc in each of the remaining 2 chains.
- Skip 1 st on the base ring, sl st into the next stitch.
Continue this around until you reach the end of the ring. If you have one or two stitches left over, simply sl st into the last stitch.
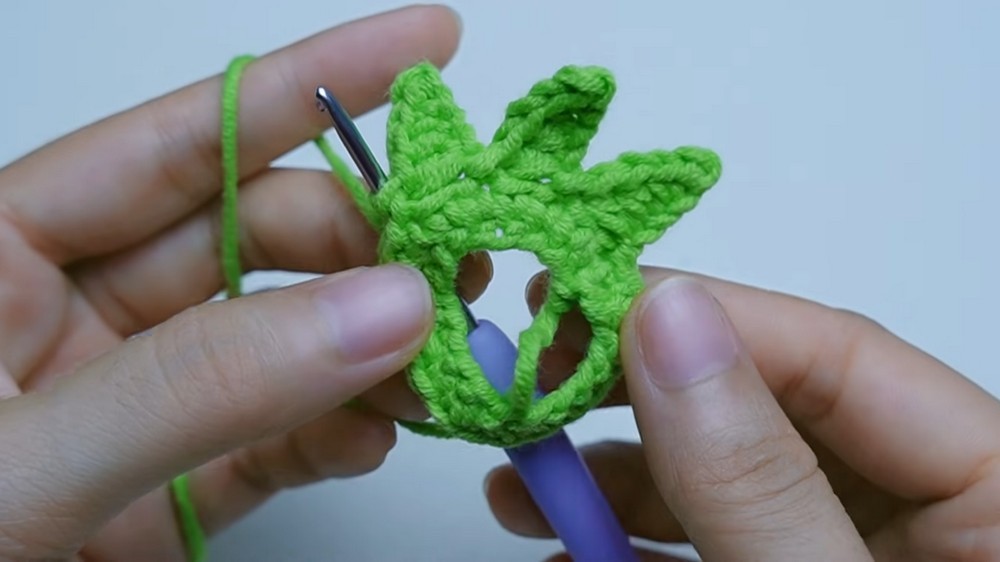
- Ch 1 to fasten off and cut the yarn.
Repeat for each ring, making the rings smaller as you go up the tree.
Christmas Tree Top
Base Round:
- Form a magic ring (MR) with green yarn.
- Ch 1 (to start; not counted as a stitch).
- Work 5 hdc into the magic ring.
- Mark the first stitch with a stitch marker.
- Pull the yarn tail to close the ring tightly.
- Sl st into the first (marked) hdc to join.
Top Leaf Points Round:
Repeat around all 5 stitches:
- Ch 4.
- Sl st in the 2nd chain from the hook.
- 1 sc in each of the last 2 chains.
- Sl st into the next stitch on the base ring.
At the end, sl st into the last stitch, ch 1 to fasten off, and cut the yarn.
Top Star
Center Ring:
- With yellow yarn, form a magic ring.
- Work 10 sc into the magic ring.
- Mark the first stitch with a stitch marker.
- Pull yarn tail tightly to close the magic ring.
- Insert hook into the first sc and sl st to join.
Star Points Round:
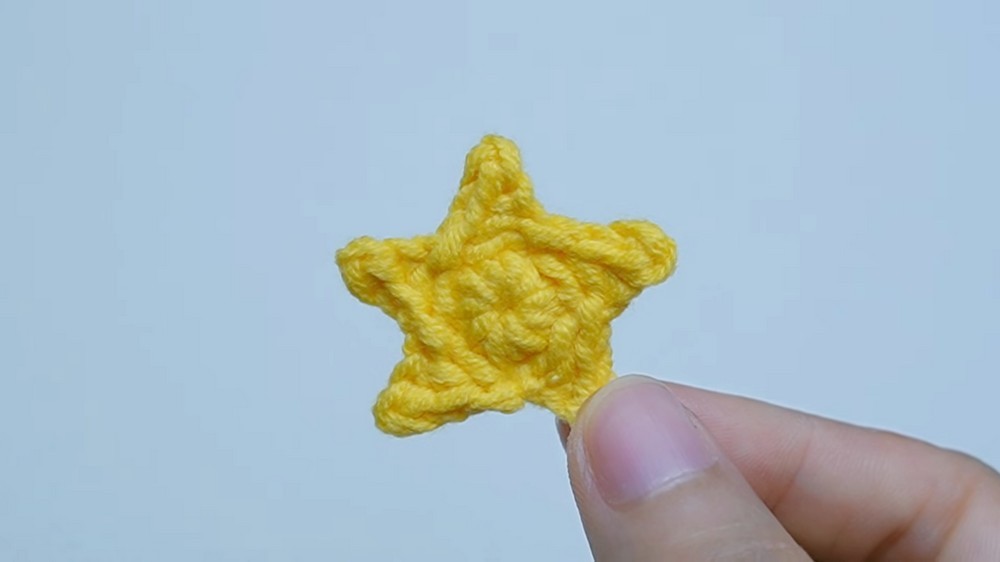
Repeat the following star point sequence 5 times around:
- Ch 3.
- Sl st in the 2nd chain from the hook.
- 1 sc in the last chain.
- Skip one stitch on the center ring, sl st into the next stitch.
At the end, sl st into the last stitch, ch 1 to fasten off and cut the yarn.
Assembly & Finished Size
- Starting with the largest, slide each green leaf ring over the cone, stacking them from the base upward, and secure with hot glue if needed.
- Add progressively smaller rings until you reach the top of the cone.
- Glue the crochet “tree top” piece you made over the apex of the cone.
- Finally, attach the yellow star securely to the very top, finishing your tree.
Conclusion
A small, cheerful Christmas tree made by hand adds a cozy element to your winter decorating. This project uses simple techniques and recycled items, making it accessible and sustainable for all skill levels. Display your completed tree on a tabletop, windowsill, or anywhere needing holiday spirit. Adjust the height, add ornaments, or try new colors for creative customization. Share the finished tree as a thoughtful gift or keep it as a yearly tradition. The approachable steps and materials invite everyone to participate, turning ordinary supplies into festive décor that leaves a lasting impression throughout the holidays.




Leave a Reply