

Light up your festive projects thanks to a free crochet Santa Claus pattern blending fun details and approachable techniques for holiday cheer.
Holiday decorations often bring a special kind of joy, and a handmade Santa Claus adds a cozy, nostalgic touch to any space. The Free Crochet Santa Claus Pattern lets you make a charming figure that perfectly captures the festive spirit. Many crocheters enjoy this project because it combines familiar stitches with fun details, resulting in a heartfelt decoration that’s both eye-catching and full of character.
This Santa Claus stands out with his classic red suit, fluffy white beard, and cheerful expression. The texture feels delightful thanks to a mix of simple crochet stitches and thoughtful embellishments that mimic the softness of fur and fabric. Its compact shape makes it versatile—ideal for tabletop displays, mantelpieces, or even as a unique gift topper. You can personalize your piece by experimenting with colors, adding tiny accessories, or adjusting the size by changing your yarn or hook.
Santa Claus: Fun Crochet Pattern for Holiday Projects
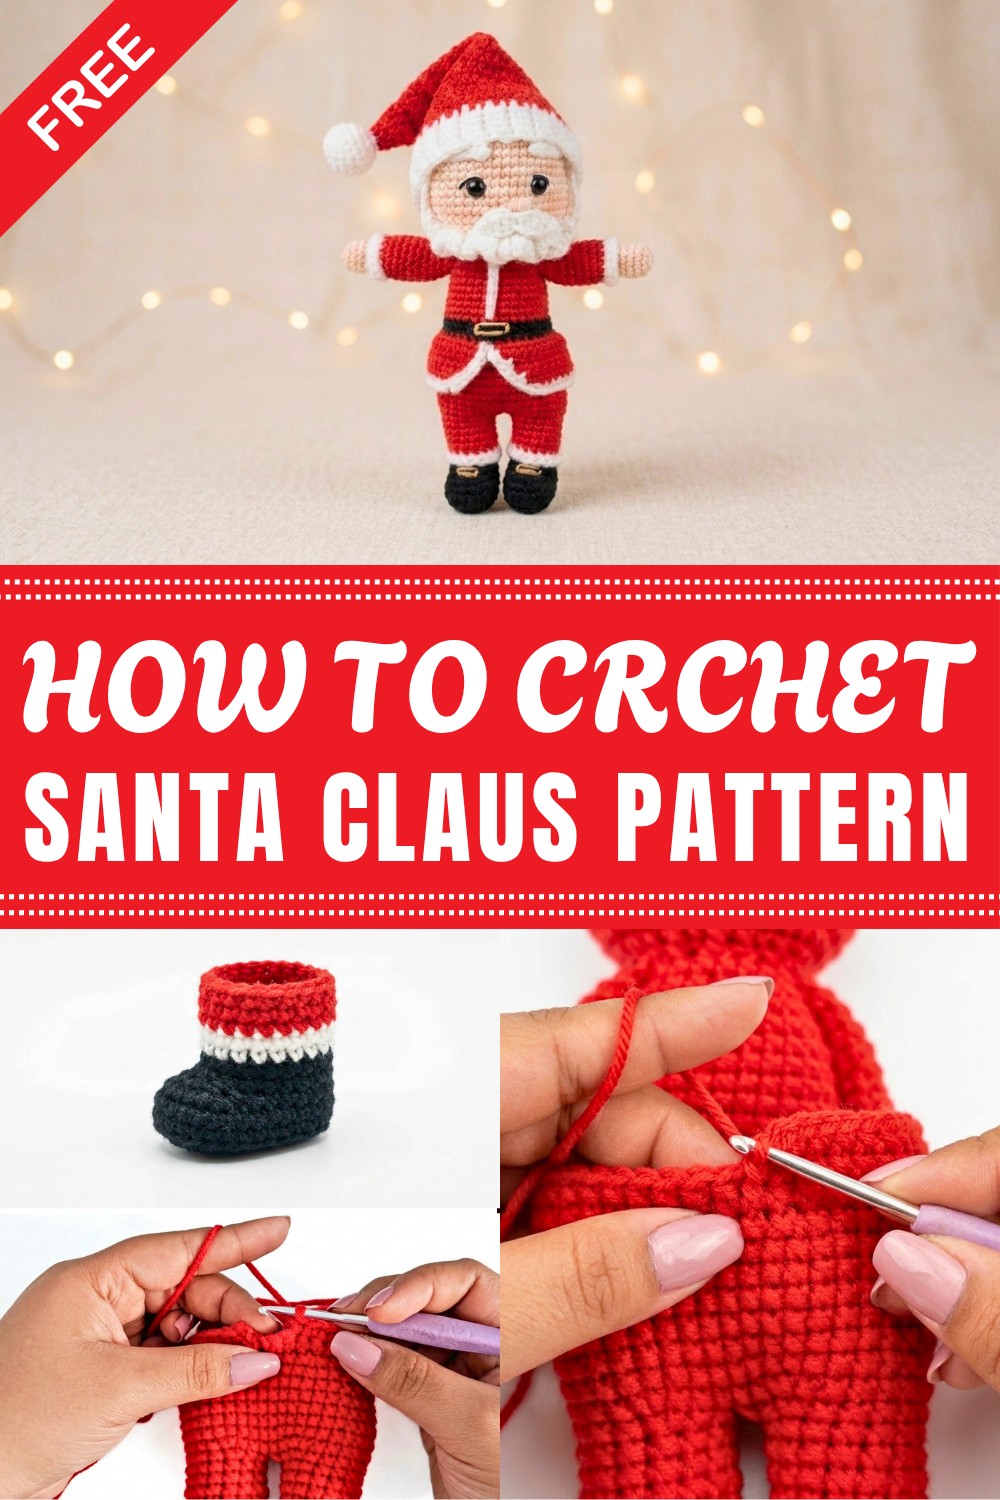
Designed mainly for intermediate crocheters, the pattern offers a great chance to practice working in rounds and changing colors seamlessly. You’ll also develop skills in shaping and attaching small details that bring your Santa to life. Those comfortable with basic crochet will find this project rewarding without being overwhelming, providing a cozy introduction to amigurumi techniques.
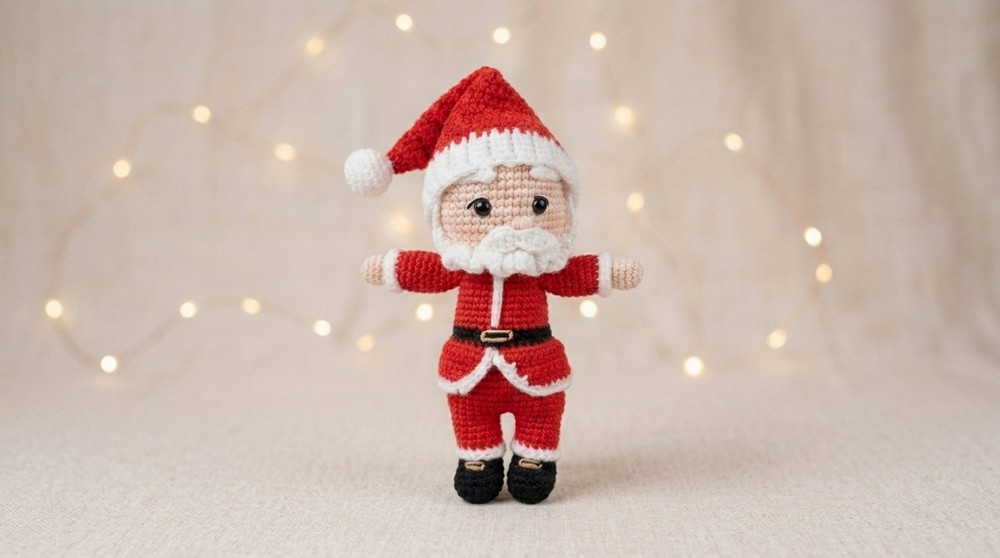
Whether you want to brighten up your holiday décor or share a handmade treasure with loved ones, this Free Crochet Santa Claus Pattern provides a fun and satisfying way to add a little handmade magic this Christmas season.
Crochet Santa Claus Amigurumi Pattern
Welcome to this detailed crochet pattern for a charming Santa Claus amigurumi! Crafted step-by-step, this pattern walks you through creating Santa’s leg, foot, and arms with attention to detail and color changes. Using worsted weight yarn and a 3 mm crochet hook, you will develop a cuddly figure that’s perfect for holiday gifting or decoration. Whether you're new to amigurumi or building your skills, this comprehensive guide will help you complete this adorable project with ease.
Quick Overview of Pattern
- Work from the bottom up starting with Santa’s foot using black yarn
- Incorporate single crochet (sc), increases (inc), and decreases (dec) to shape parts
- Use color changes to create the leg and boot details (black, white, red)
- Crochet arms separately using similar techniques and colors
- Include strategic stuffing and shaping to craft a three-dimensional form
- Finish by weaving in ends and attaching parts securely
Notes
- This pattern emphasizes gradual shaping through increases and decreases
- Color changes add visual interest and define Santa’s clothing and skin
- Markers are recommended to keep track of round beginnings and decreases
- For stuffing, add fiberfill lightly throughout to shape parts without stiffness
- Weave in loose yarn ends during crocheting where possible to ensure a neat finish
- Silicone glue or sewing is used to attach fabric pieces or details carefully
Skill Level
Intermediate: Suitable for crocheters comfortable with:
- Creating magic rings and foundation chains
- Working single crochet (sc), increases (inc), and decreases (dec) in the round
- Changing colors seamlessly
- Crocheting amigurumi parts with shaping
- Joining and finishing techniques
Materials
- Worsted weight yarn in black, white, red, and skin-tone colors such as beige or peach
- 3 mm crochet hook
- Fiberfill or polyfill stuffing material
- Stitch marker
- Yarn needle for weaving ends and sewing parts
- Small scissors
- Optional: silicone glue for attaching fabric pieces
Measurements / Sizing
- Size varies depending on tension and yarn used; Santa’s leg and foot will be approximately 10–12 cm tall
- Arms proportionate in size for amigurumi style handcrafts
Gauge and Stitch Pattern
- Gauge: Not strictly critical but consistent tension produces better shaping
- Main stitch used: single crochet (sc) worked in continuous or joined rounds
- Color changes at designated rounds form Santa’s clothing and skin sections
Stitch Abbreviations
| Abbreviation | Full Name | Description |
|---|---|---|
| ch | Chain | Yarn over, pull through loop |
| sc | Single crochet | Insert hook, yarn over, pull through both loops |
| inc | Increase | 2 single crochet in one stitch |
| dec | Decrease | Single crochet decrease over two stitches |
| sl st | Slip stitch | Insert hook, yarn over, pull through loops |
Special Stitches
- Decrease (sc2tog): Insert hook into stitch, yarn over, pull through, insert into next stitch, yarn over, pull through, yarn over pull through all loops on hook. Used to shape decreases for legs and arms.
- Increase: Work two single crochet (sc) stitches into one stitch.
The Crochet Pattern!
Santa’s Leg and Foot (Black to Red Transition)
Foundation
- Start with black yarn. Make a slip knot.
- Chain 5 stitches (ch 5).
Round 1: Starting the Foot
- In the second chain from hook, work 3 single crochets (3 sc) in the same chain (increase).
- Crochet 2 single crochets (2 sc), one in each of the next two chains.
Round 2: Increasing the Foot
- You have a small oval base with 7 stitches. Continue as follows:
- Crochet 2 single crochets (2 sc) into the first stitch (increase).
- Crochet 2 single crochets (2 sc), one in each of the next two stitches.
- Crochet 4 single crochets (4 sc) in the last stitch (increase).
Round 3: Shaping and Continuing
- Crochet 2 single crochet (2 sc) stitches in the next two stitches to secure yarn tails and shape the base.
- Work increase (inc) of 1 stitch by crocheting 2 sc in one stitch and then 2 single crochets (2 sc).
- Repeat increases evenly spaced on top of previous increases to continue shaping foot oval.
Round 4: Further Shaping
- Crochet 2 single crochets (2 sc) in each of the next stitches with increases spread as:
- Crochet increase (inc) in one stitch, followed by single crochet (sc) stitches in others.
- Repeat increases three times followed by two single crochet (sc) stitches until round is complete.
Round 5: Completing Foot Base
- Continue with alternating increases (inc) and single crochets (sc), maintaining oval shape.
- Aim for around 22 stitches for the base, preparing to start the leg portion.
Round 6: Begin Leg Portion – Working in Back Loops
- Crochet single crochet (sc) in the back loop only (BLO) of each stitch around to create texture and define leg shape.
- Maintain 22 stitches, mark beginning of round with stitch marker.
Round 7-12: Forming Leg Length
- Crochet single crochet (sc) stitches evenly (one per stitch) for 6 rounds to lengthen leg.
- Stuff lightly with fiberfill as you go to maintain shape.
Round 13-14: Decreasing for Ankle
- Crochet 7 single crochet (7 sc) stitches.
- Work 4 decreases (4 dec) evenly distributed:
- Perform decrease (dec) by crocheting two stitches together.
- Finish with 7 single crochet (7 sc) stitches.
- Repeat for next round with 6 single crochet (6 sc), 3 decreases (3 dec), and then 6 single crochet (6 sc) to taper ankle.
Round 15-19: Continue Leg Shaping
- Crochet single crochet (sc) for 15 stitches per round without changes to lengthen leg.
- Use markers to track rounds and stitch counts.
Color Change to White (Leg Trim)
Round 20: Change yarn to white
- Crochet single crochet (sc) in back loops only (BLO) all around (15 sc) for texture resembling fur trim.
- Weave in yarn ends securely during work.
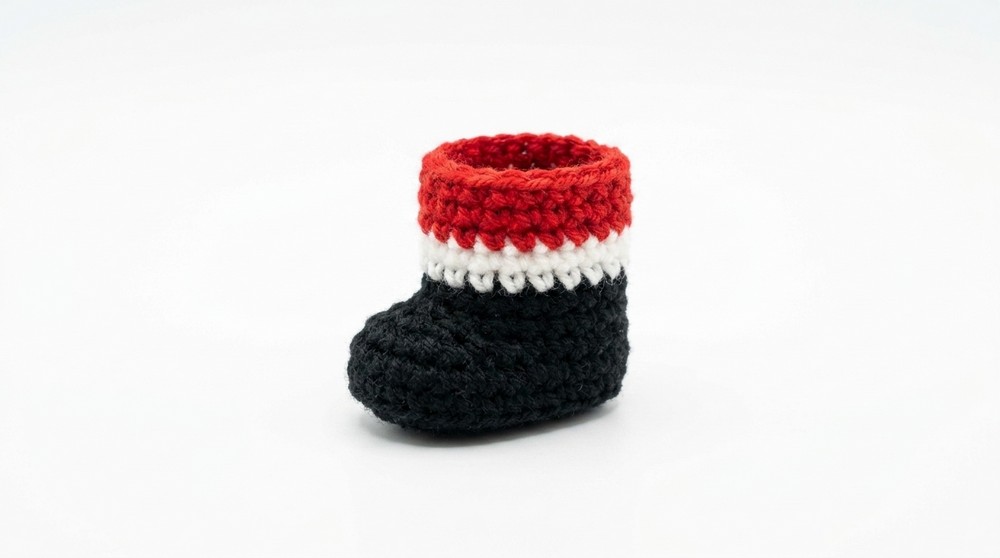
Color Change to Red (Leg Body)
Round 21-26: Continue Crocheting Leg
- Switch yarn to red for leg body portion.
- Crochet single crochet (sc) stitches without increasing for 6 rounds.
- Continue stuffing lightly for shape.
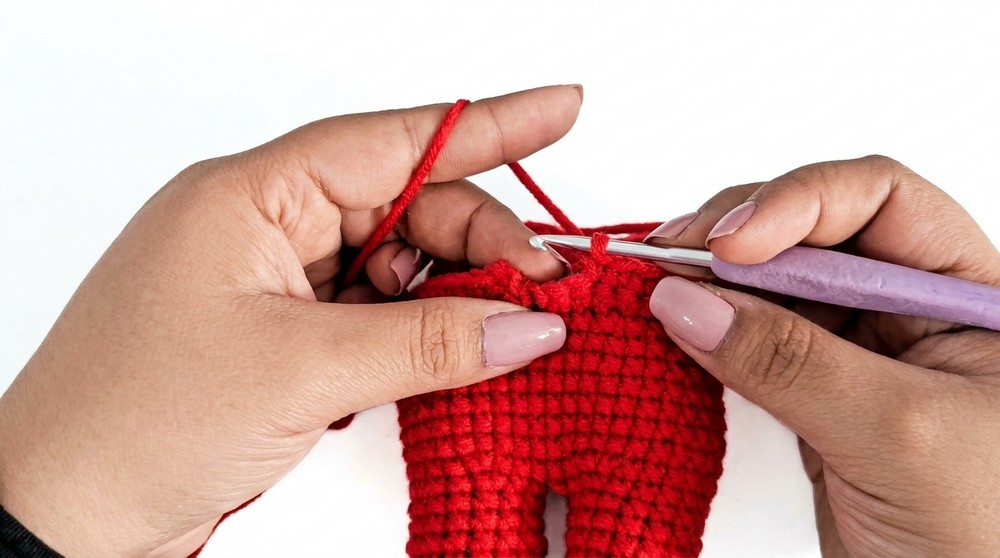
Foot Detail and Embroidery
White Embroidered Cuff Detail
- Using white yarn, embroider half double crochets (hdc) evenly around foot cuff for fur appearance.
Gold Thread Embellishment
- Optionally, use gold or yellow embroidery thread to add decorative accents for festive sparkle.
Santa’s Arms (Skin Tone and Red)
Starting the Arm
- Begin with skin-tone yarn; start with a magic ring.
- Crochet 5 single crochets (5 sc) inside the ring, then close ring tightly.
Round 2: Increase Arm Diameter
- Crochet 5 increases (5 inc) (2 sc in one stitch) evenly around (total 10 stitches).
Round 3: Continue Arm Body
- Crochet 10 single crochets (10 sc) for two rounds to lengthen arm.
Round 5: Forming Hands
- Crochet 3 single crochets (3 sc) into one stitch to widen hand area.
- Repeat increases spaced evenly.
Round 6-7: Continue Arm Body
- Crochet evenly for 2 rounds with single crochet (sc) stitches.
- Switch yarn color to red for sleeve portion.
- Crochet single crochet in back loops only (BLO sc) for texture on sleeve.
Round 8-13: Sleeve Length
- Work 6 rounds of single crochet (sc) in each stitch to finish sleeve length.
- Add fiberfill stuffing as needed.
Assembly & Finished Size
Stuffing
- Lightly stuff legs, feet, and arms with fiberfill to form soft, rounded shapes.
Joining Parts
- Sew feet to legs firmly using yarn needle.
- Attach arms securely to body with yarn and sewing needle.
Finishing
- Weave in all loose ends on the inside for neatness.
- Embroider details such as eyes, nose, or buttons in later steps.
Approximate Size
- Legs and feet measure about 10–12 cm tall.
- Arms sized proportionally to body.

Conclusion
This comprehensive Santa Claus amigurumi leg and arm pattern offers step-by-step guidance for shaping and color changes ensuring an adorable, well-formed holiday figure. From foundation stitches and increases to textured trims and embroidery accents, this pattern combines technique and festive charm. Continue following the series for Santa’s full assembly and final touches.



Leave a Reply