

Welcome heavenly charm through Free Crochet Angel Horse Pattern featuring graceful wings gentle beauty magical spirit and adorable cuddly appeal.
Last holiday season, I wanted to make something a bit different—something soft and sweet, but with a little whimsical charm. That’s when I stumbled upon the Free Crochet Angel Horse Pattern, and honestly, it quickly became one of my favorite projects to work on. There’s just something so satisfying about stitching together a tiny horse with gentle wings and a peaceful presence. It’s the kind of piece that brightens any room, whether it’s perched on a shelf or tucked into a nursery.
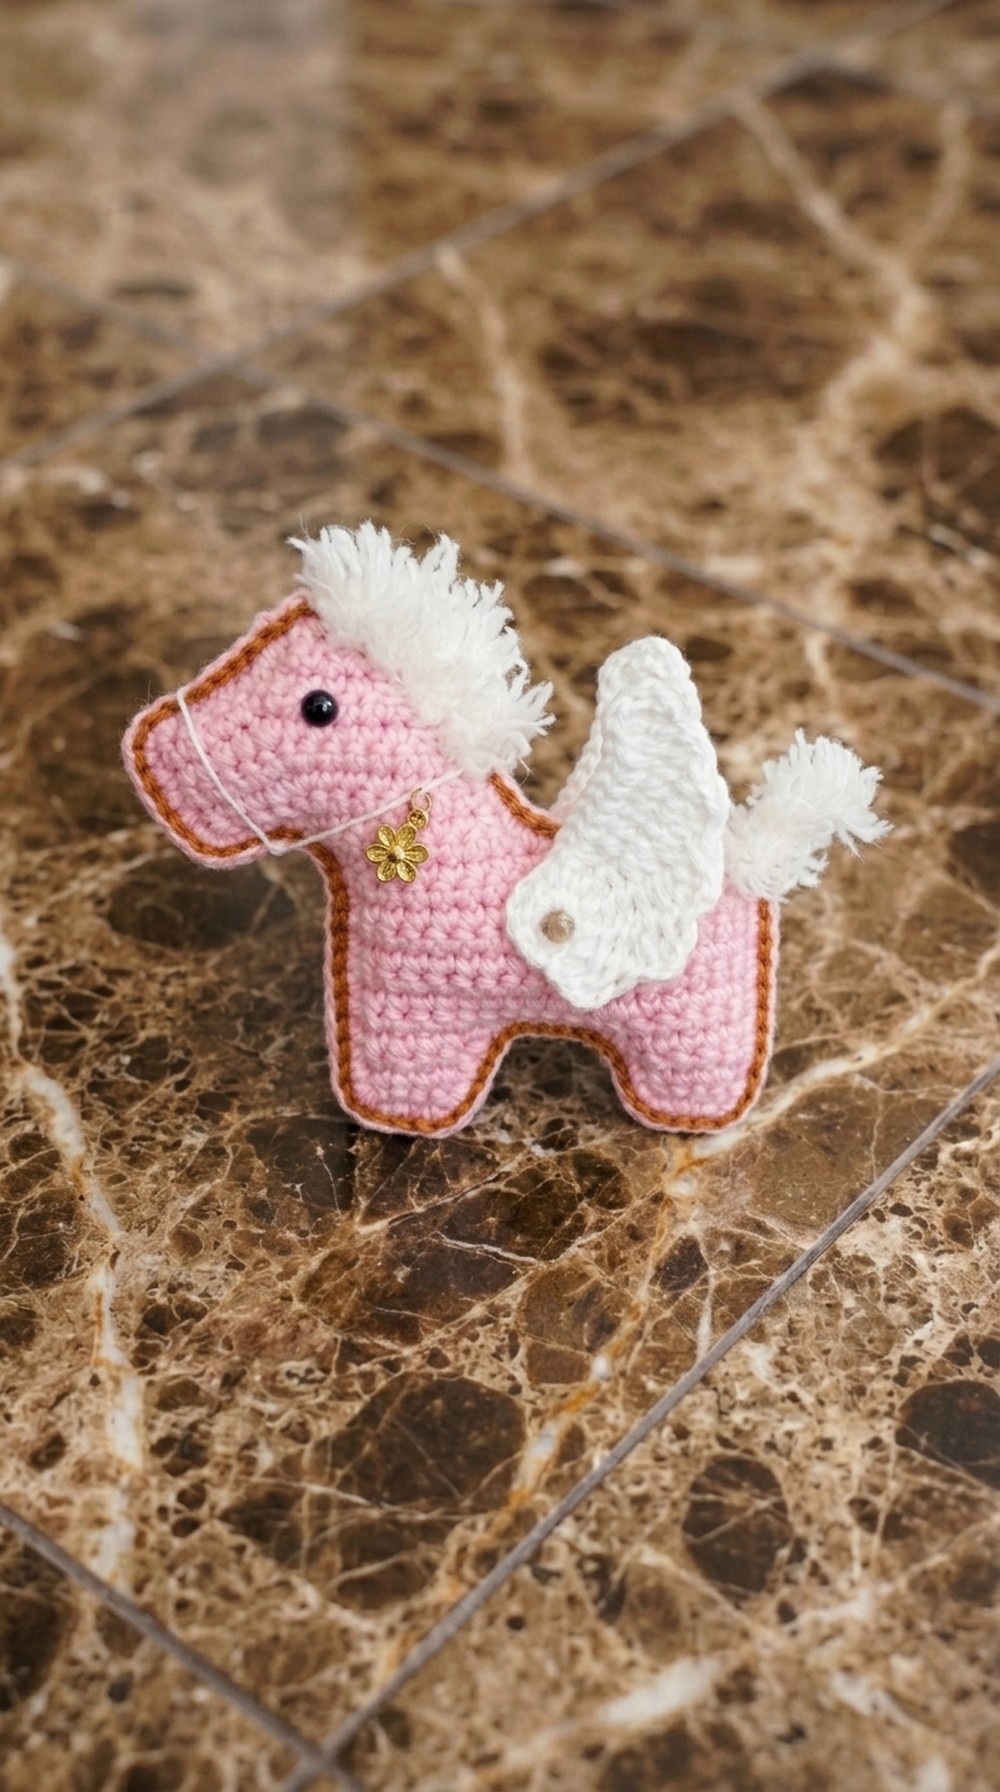
The finished angel horse turns out with a smooth, neat texture from the tight stitches, making it both sturdy and cuddly. I loved how its rounded body and flowing mane balance perfectly with those delicate, fluttery wings—such a thoughtful design that feels both graceful and approachable. It’s more than just decor; it’s a little character, full of personality and charm.
Handmade Free Crochet Angel Horse Pattern for Kids and Beginners
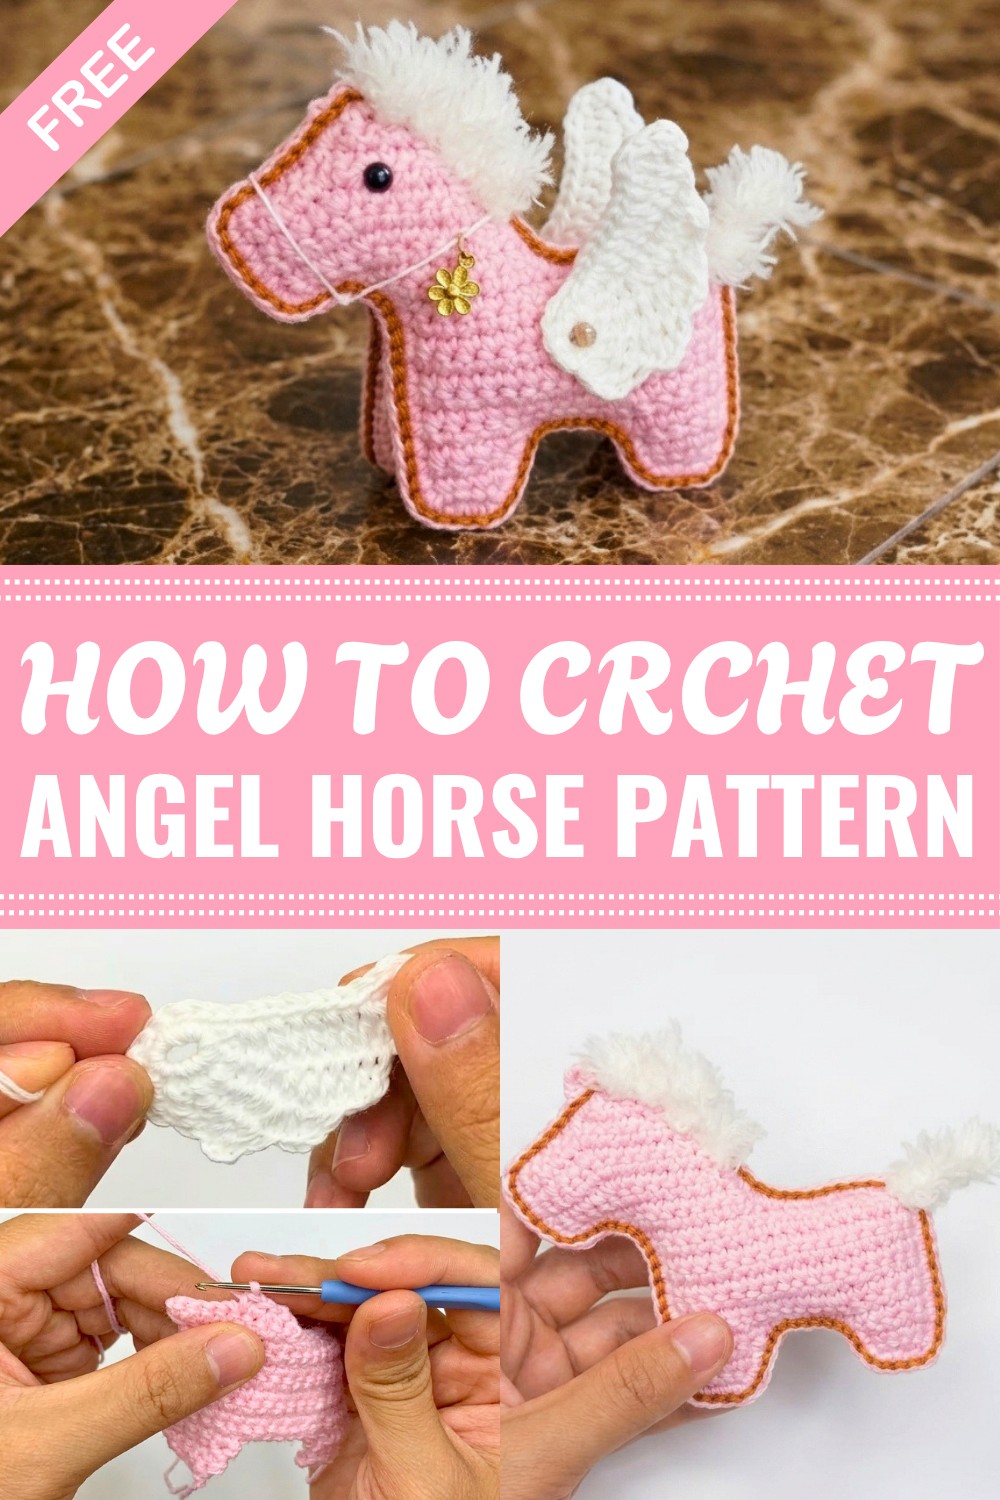
What made this project even more enjoyable was the freedom to experiment with colors. I stuck mostly with soft pastels and creamy whites for that classic angel look, but I can already imagine how fun it would be to try brighter shades or even add tiny embroidered stars on the wings. For me, intermediate crochet skills fit this pattern nicely, but if you’re determined and comfortable with shaping and joining pieces, beginners can absolutely take it on.
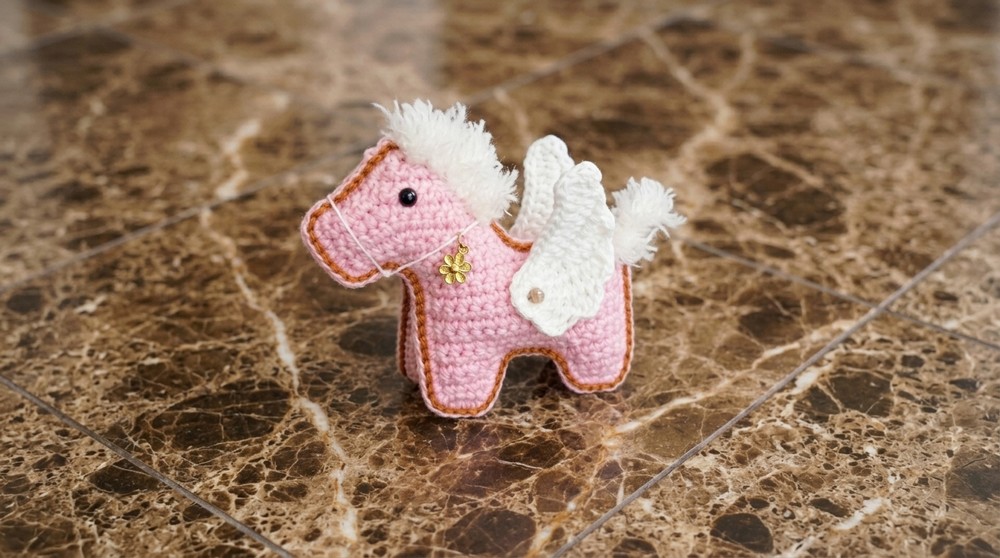
Through the process, I sharpened my abilities with crocheting in the round, managing neat color changes, and sewing on those delicate wings just right. This Free Crochet Angel Horse Pattern isn’t just about making a cute figure—it’s a cozy, calming project that feels like a little crochet hug when it’s done. It’s definitely one I’ll be revisiting every holiday season!
Angel Horse Amigurumi Crochet Pattern
Introduction
Welcome to this detailed Angel Horse amigurumi pattern made using beautiful Vietnamese cotton yarn. This darling piece features delicate angel wings and a charming horse body with a fluffy mane and tail. With comprehensive step-by-step instructions, this pattern is designed for hobbyists who want to create a stunning crochet project.
Skill Level & Terminology
- Skill Level: Intermediate
- Terminology: US crochet terms
- The pattern involves techniques such as magic ring, single crochet (SC), double crochet (DC), half-completed stitches, chains (ch), slip stitch (sl st), and increases and decreases. Basic sewing and finishing skills are also used.
Materials & Tools
- Yarn: Vietnamese cotton yarn recommended; white for wings, pink for horse body, brown for the decorative border
- Fluffy yarn: For mane and tail
- Crochet Hook: 2.0 mm (double yarn used)
- Fiberfill stuffing
- Small beads or black yarn for eyes
- Tapestry needle
- Craft glue (hot silicone preferred)
- Scissors
Gauge
- Gauge is flexible; however, stitches should be tight to keep the structure firm and stuffing hidden.
- Using double yarn on a 2.0 mm hook yields a compact fabric suitable for amigurumi.
Abbreviations
| Abbr. | Meaning |
|---|---|
| MR | Magic Ring |
| SC | Single Crochet |
| DC | Double Crochet |
| ch | Chain |
| sl st | Slip Stitch |
| inc | Increase (2 SC in same stitch) |
| dec | Decrease |
Special Stitch Instructions
- Magic Ring (MR): Adjustable loop to begin crocheting in the round.
- Half-completed stitches: Sometimes referred to as stopping before finishing a double crochet or half double crochet to shape wings.
- Skipping stitches: Used intentionally to create open work for delicate wing patterns.
- Double yarn: Two strands held together for thicker, stronger stitches.
Finished Size
- The completed angel horse stands approximately 12-15 cm (5-6 inches) tall.
The Pattern
1. Angel Wings (Make 2)
Instructions are for one wing; repeat to make the second.
Row 1: Foundation
- Create a Magic Ring (MR).
- Work 10 Single Crochet (SC) into the ring.
- Pull ring tight, leaving a small hole.
Row 2
- Chain 4.
- Skip 1 stitch in the foundation round.
- Work unfinished double crochets (also called incomplete double crochets) in stitches as designated (pull through once or twice, but do not complete fully).
- Chain 2 between unfinished double crochets to create open loops.
Row 3
- Chain 4.
- Skip 2 stitches.
- Work unfinished double crochets in next two stitches.
- Keep chains and stitches loose enough to allow threading yarn needle comfortably later.
Row 4
- Chain 4.
- Skip first two stitches.
- Work one double crochet.
- Continue with unfinished double crochets and unfinished half double crochets, alternating as indicated.
- End row with single crochet in base stitch.
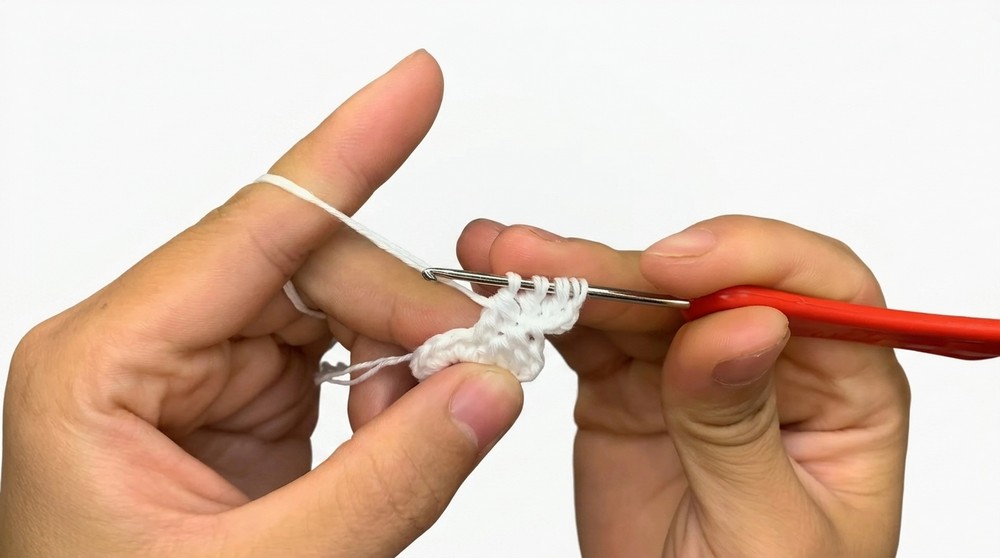
Row 5
- Chain 4.
- Work 5 unfinished single crochets.
- Skip 2 stitches.
- Work 5 double crochets unfinished.
- Followed by unfinished half double crochets and unfinished single crochets as per reference.
Row 6
- Chain 3.
- Skip 2 stitches.
- Work 7 half double crochets followed by 1 single crochet.
- Pull stitches taut but not tight to maintain wing shape.
Row 7: Final Row
- Chain 3.
- Work 2 completed double crochets.
- Slip stitch around all remaining edges and loops to create smooth border finishing.
- Fasten off and weave in the yarn ends.
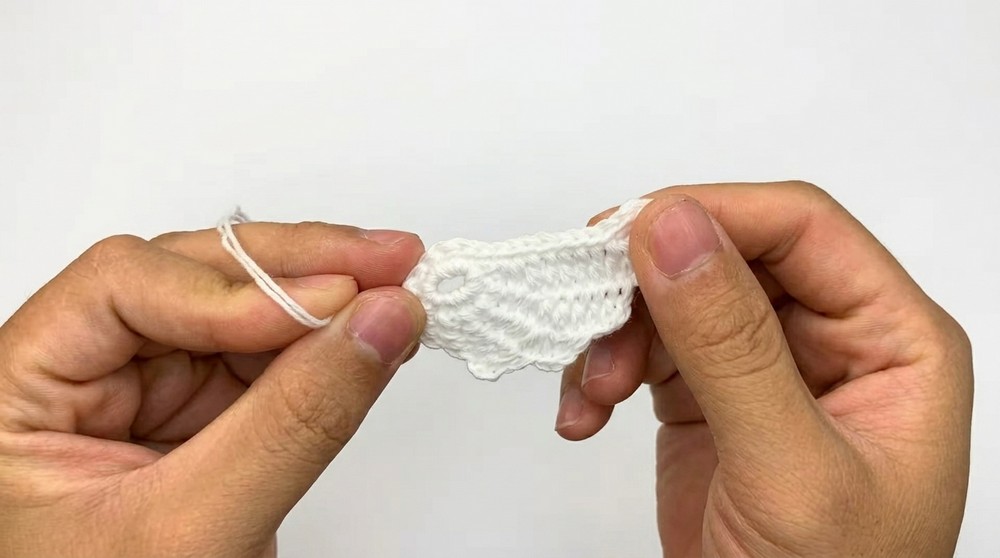
Summary for Wings:
Your wings are complete when you have worked a lacy shaped panel of layered chains and half-finished stitches, finished by a slip stitch border. Make two identical wings.
2. Horse Body (Make 2 pieces)
Leg Foundation and Legs
- Row 1: Chain 5.
- Row 2: Starting from second chain from hook, SC in next 4 chains. (4 stitches)
- Row 3: Chain 1, turn, SC in 4 stitches each row (create rectangular leg).
- Row 4: Chain 1, turn, SC in 4 stitches each row (create rectangular leg).
- Row 5: Chain 1, turn, SC in 4 stitches each row (create rectangular leg).
Repeat same process for second leg. Do not fasten off.
Joining Legs and Building Body
- Join legs by crocheting across edges connecting both legs:
- Chain 1, turn, SC across first leg edge, across bottom joining both legs, and up the other leg edge.
- You should have approximately 18 stitches joined.
Row 6: Body Build
- Work SC evenly around the joined legs edges to extend body height.
- Chain 1 to turn at start of each row.
- Maintain 18 single crochet stitches per row, building up the rectangular torso.
Row 7: Body Build
- Work SC evenly around the joined legs edges to extend body height.
- Chain 1 to turn at start of each row.
- Maintain 18 single crochet stitches per row, building up the rectangular torso.
Row 8: Body Build
- Work SC evenly around the joined legs edges to extend body height.
- Chain 1 to turn at start of each row.
- Maintain 18 single crochet stitches per row, building up the rectangular torso.
Row 9: Body Build
- Work SC evenly around the joined legs edges to extend body height.
- Chain 1 to turn at start of each row.
- Maintain 18 single crochet stitches per row, building up the rectangular torso.
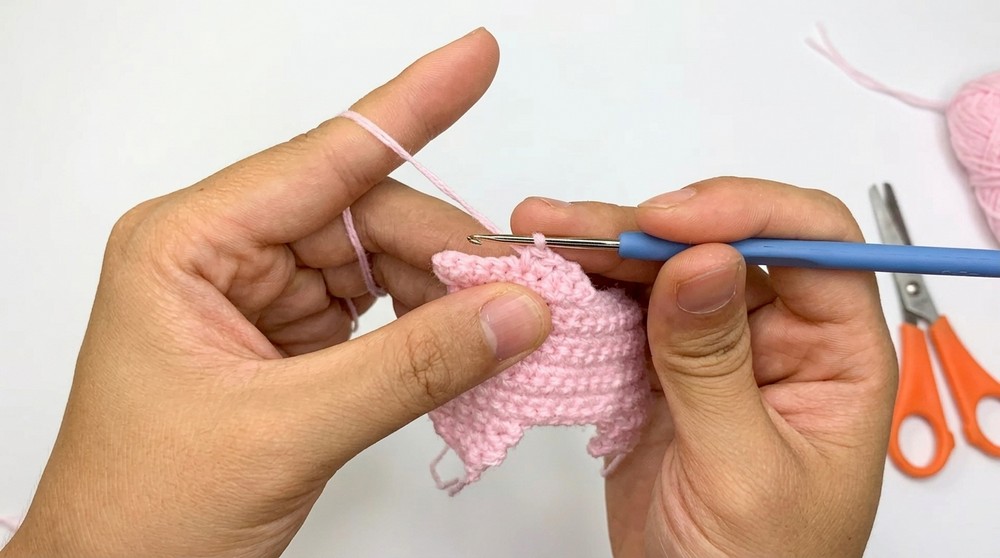
Row 10: Body Build
- Work SC evenly around the joined legs edges to extend body height.
- Chain 1 to turn at start of each row.
- Maintain 18 single crochet stitches per row, building up the rectangular torso.
Row 11: Body Build
- Work SC evenly around the joined legs edges to extend body height.
- Chain 1 to turn at start of each row.
- Maintain 18 single crochet stitches per row, building up the rectangular torso.
Rows 12 to 24: Shaping Body
- Row 12: Chain 1, SC for 16 stitches, then perform one decrease (dec) on last 2 stitches.
- Row 13: Chain 1, SC 14 stitches, then perform one increase (inc).
- Row 14: Chain 1, SC evenly with decreases and increases shaping neck and back; follow shaping carefully to ensure symmetry.
- Row 15: Chain 1, SC evenly with decreases and increases shaping neck and back; follow shaping carefully to ensure symmetry.
- Row 16: Continue shaping with precise decreases and increases to sculpt horse’s neck, back, and head contour.
- Row 17: Continue shaping with precise decreases and increases to sculpt horse’s neck, back, and head contour.
- Row 18: Continue shaping with precise decreases and increases to sculpt horse’s neck, back, and head contour.
- Row 19: Continue shaping with precise decreases and increases to sculpt horse’s neck, back, and head contour.
- Row 20: Continue shaping with precise decreases and increases to sculpt horse’s neck, back, and head contour.
- Row 21: Continue shaping with precise decreases and increases to sculpt horse’s neck, back, and head contour.
- Row 22: Continue shaping with precise decreases and increases to sculpt horse’s neck, back, and head contour.
- Row 23: Continue shaping with precise decreases and increases to sculpt horse’s neck, back, and head contour.
- Row 24: Continue shaping with precise decreases and increases to sculpt horse’s neck, back, and head contour.
Final Body Rows (Row 25+)
- Taper work with decreases to complete shoulder and neck shape.
- Cut yarn leaving a tail for sewing. Do not cut on second piece yet.
3. Assembly & Finishing
Joining Body Halves
- Align the two body pieces carefully, raw edges matching exactly.
- Using the yarn tail and a tapestry needle, join both pieces with single crochet stitches around all edges.
- Leave a small opening at the back to stuff the body.
Stuffing
- Firmly stuff legs, torso, and back section with fiberfill.
- Stuff ears with fiberfill later before final closure.
- Continue sewing body closed after stuffing.
Decorative Border
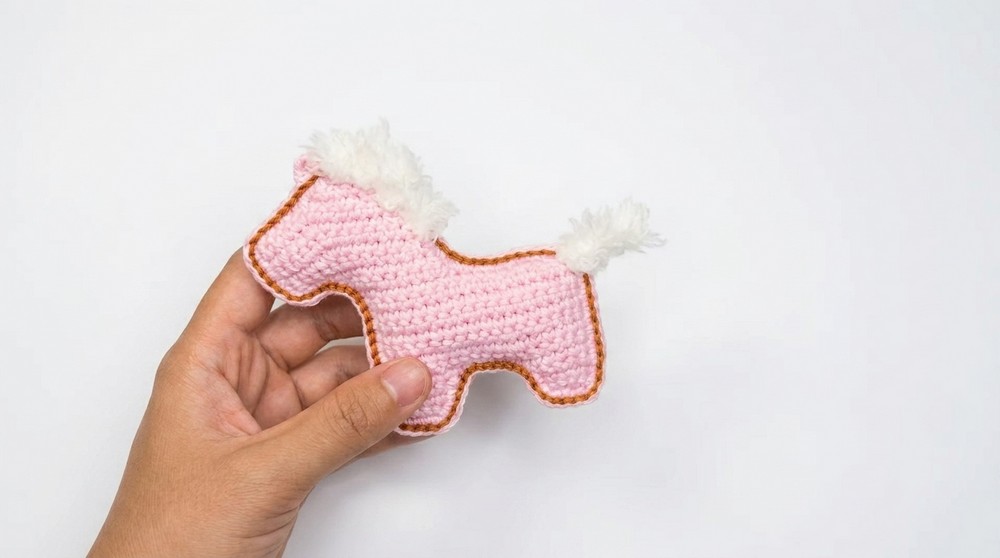
- Using one strand of brown yarn, work a slip stitch border evenly around the horse body edges.
- This adds contrast and neat finishing.
Mane and Tail
- Cut lengths of fluffy yarn for mane and tail.
- Twist fluffy yarn and thread onto a needle.
- Attach yarn securely on the horse’s neck and rear in spiral or row-wise fashion.
- Fluff and trim as desired to create volume.
Attaching Wings
- Position wings symmetrically on horse’s back.
- Attach using hot glue for secure placement; allow glue to dry fully.
- Alternatively, sew wings into position if preferred.
Adding Eyes and Strap
- Sew or glue on small beads for eyes. Use black yarn to embroider if beads are unavailable.
- Create a loop strap from yarn on the head for hanging if desired.
Final Summary
You have now completed your angel horse amigurumi combining textured, airy angel wings with a compact, sculpted horse body. The mane, tail, and decorative border add personality and charm, while securely glued wings transform it into a beautiful cherubic figure.
Adjust yarn colors or sizes as you prefer, and enjoy this handcrafted treasure.
Quick Recap for Non-Pattern Readers
- Make two airy angel wings using a magic ring and combinations of chains and partial double crochets.
- Crochet two identical horse body halves, beginning with legs joined to form torso and neck, incorporating increases and decreases for shaping.
- Sew body halves together, stuff firmly, and add decorative edging.
- Attach fluffy mane and tail yarn, glue or sew angel wings to the back, then sew or glue on eyes.
- Finish with a hanging loop if desired.'
Leave a Reply