

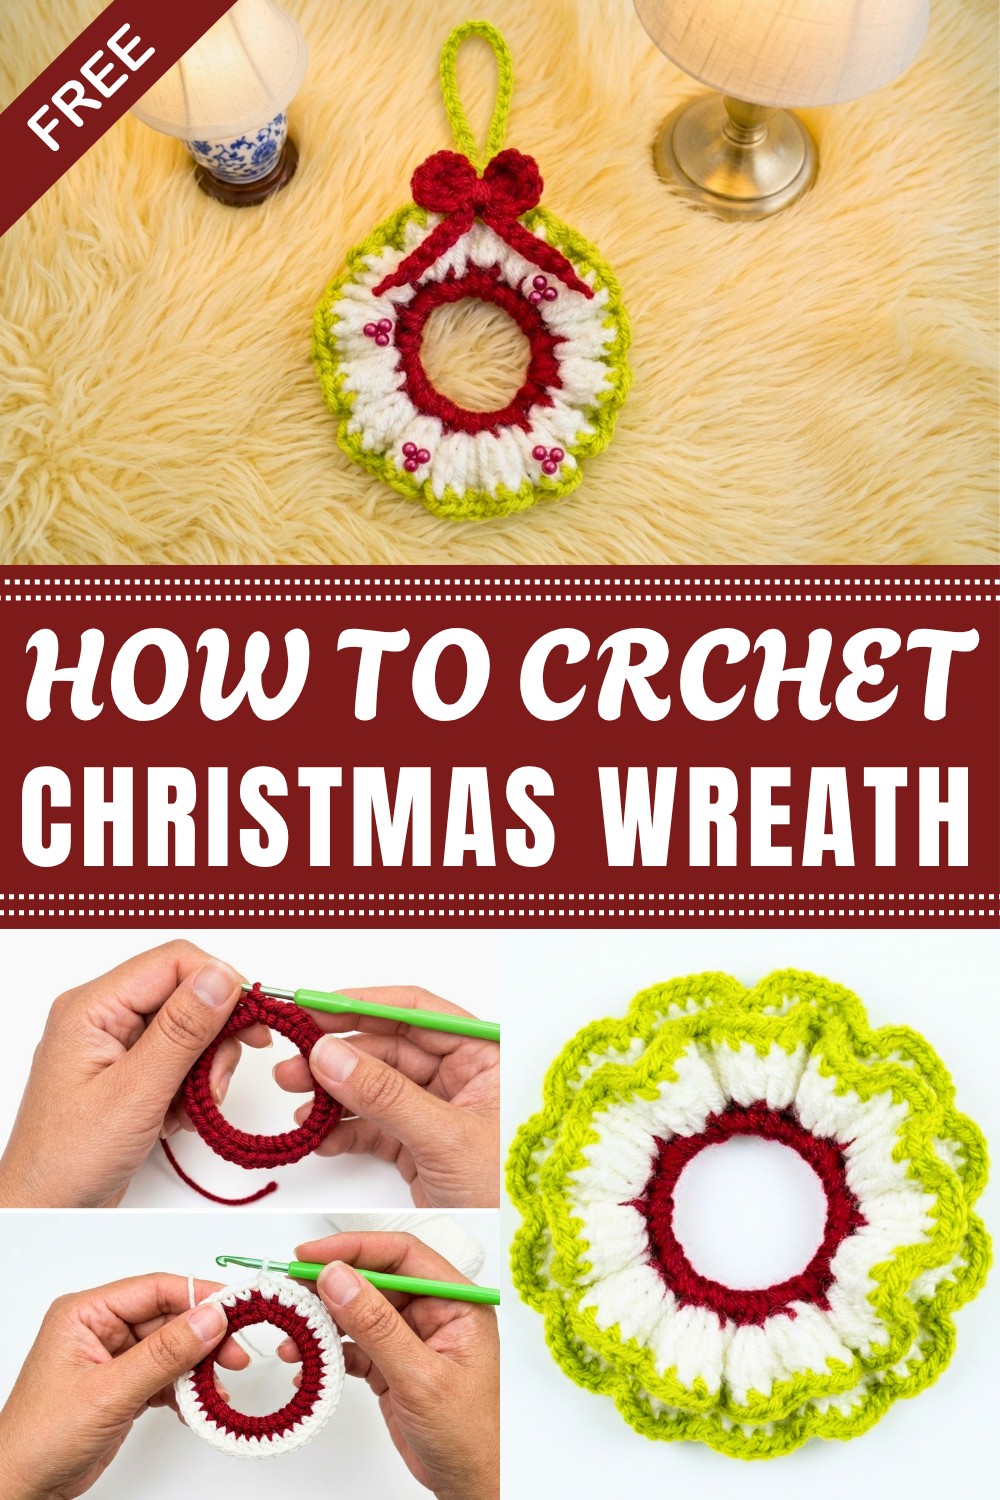
Brighten holiday entryways with a free crochet Christmas wreath pattern offering simple instructions for charming festive décor perfect for any home.
The holiday season is such a perfect time to bring handmade touches into your home, and nothing says festive charm quite like a beautifully crocheted wreath. This Free Crochet Christmas Wreath Pattern is a wonderful project that helps you create a warm, inviting decoration that stands out with its cozy texture and classic shape. Many crocheters enjoy making wreaths because they add a personal flair to holiday décor and can be proudly displayed each year, giving your home a handmade, heartfelt look.
The finished wreath features a full, circular shape reminiscent of traditional holiday greenery but made soft and tactile with yarn. Its texture comes from layered crochet stitches that add depth and a rich, three-dimensional feel. One of the best parts about this wreath is its versatility—choose traditional reds and greens, mellow neutrals, or even modern metallic shades to match your style. You can also decorate it further with crocheted berries, bows, or tiny stars, making the wreath uniquely yours. Plus, its lightweight nature makes it easy to hang on doors, walls, or mantels without hassle.
Free Crochet Christmas Wreath for Front Doors
This project is great for crocheters with some basic experience who are comfortable following stitch patterns and shaping projects. Through this pattern, you’ll pick up useful techniques to create texture and evenness, helping you make a professional-looking wreath that feels rewarding to complete.

If you’re looking to add a cozy, handmade centerpiece to your holiday decorations, this Free Crochet Christmas Wreath Pattern offers clear guidance and charming results. The pattern and enjoy crocheting a festive wreath that brings warmth and cheer to your home this season.
Mini Christmas Wreath Crochet Pattern
Introduction
Celebrate the holidays by creating a beautiful mini crochet Christmas wreath! This charming project uses simple stitches worked around a sturdy base and is finished with a cute bow and optional decorations. Perfect for beginners, this wreath can adorn your tree, door, car mirror, or even be worn as a pendant.
Skill Level & Terminology
- Skill Level: Beginner-friendly
- Terminology: This pattern uses US crochet terminology.
Materials & Tools
- Yarn: 100% Acrylic, Medium C (Worsted weight) in Red, White, and Green
- Crochet Hook: 3.5 mm (E/4 US)
- Other Tools: Tapestry needle, scissors, and optionally hot glue
- Wreath Base: A sturdy circle for shaping the wreath, such as a plastic ring or wire circle (a hair tie is shown but not recommended for finished piece)
Gauge
Gauge is not critical for this project, but consistent tension will ensure an even and polished finish.
Abbreviations List
| Abbreviation | Meaning |
|---|---|
| ch | Chain |
| sc | Single crochet |
| dc | Double crochet (aka “high point”) |
| sl st | Slip stitch |
Special Stitch Instructions
- Double Crochet (dc): Yarn over, insert hook into stitch or space, yarn over again, pull through (3 loops), yarn over pull through first 2 loops, yarn over pull through last 2 loops.
- Magic Ring: Loosely loop the yarn around your fingers, hook the yarn, pull loops through the center creating an adjustable small ring — perfect for starting circular pieces with no hole in the center.
Finished Size
Approximately 3 to 4 inches in diameter, depending on the wreath base size. The hanging chain length is adjustable according to preference.
The Pattern
Round 1: Cover the Wreath Base with Single Crochets
- Attach wine yarn to your wreath base (a sturdy circle such as a plastic or wire ring).
- ch 1 (does not count as stitch).
- Work 45 single crochet (sc) evenly distributed all around the ring to cover it completely. The number of stitches may vary if your ring is larger or smaller—just be sure to evenly cover the base without gaps or visible backing.
- Join round with a slip stitch (sl st) to the first single crochet.
- Cut yarn and optionally weave in the tail between stitches.
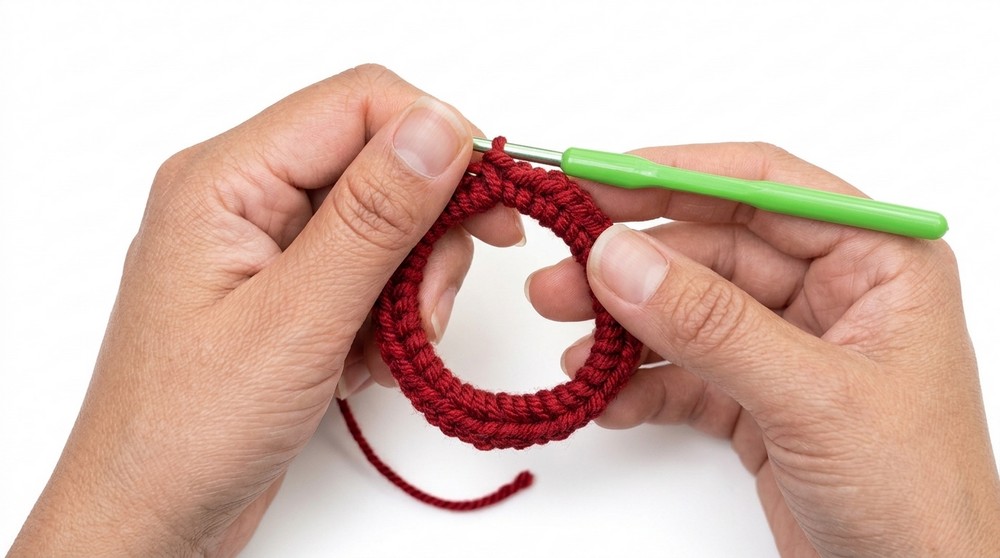
Explanation: This first step completely encloses your wreath base with a solid green row of single crochets, giving it a neat and firm foundation.
Round 2: Work White “Wave” Clusters Around the Wreath
- Join white yarn by inserting your hook into any space between stitches of the previous round; pull yarn through.
- ch 3 (counts as first dc).
- In the same space, work 2 dc — now you have a group of 3 double crochets.
- Move to the next space and work another 3 dc group.
- Continue making 3 dc clusters in each space around the wreath.
- Join round with a sl st to the top of the beginning chain 3.
- Cut yarn.

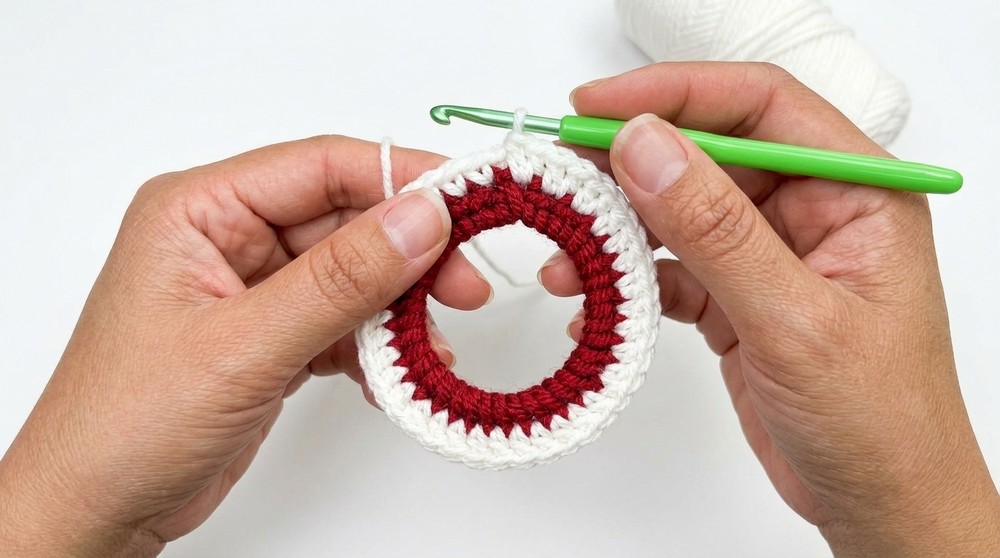
Explanation: These double crochet clusters create the "waves" or ruffled texture of the wreath that symbolizes pine branches or holly leaves.
Round 3: Add a Green Edge with Single Crochets
- Join green yarn in any stitch or space of the previous round.
- Work 1 single crochet (sc) in each stitch/space around the wreath, creating a clean edging.
- Join round with a sl st to the first single crochet.
- Cut yarn.

Explanation: The green edging frames your white clusters and refines the wreath’s shape and detail.
Round 4: Make a Chain Loop for Hanging
- Attach green yarn at your preferred hanging point.
- Chain 15 to 20 chains, depending on how long you want the hanging loop.
- Attach the end of the chain back to the same stitch on the wreath base with a slip stitch (sl st).
- Cut yarn and weave in ends securely.
Explanation: This chain loop allows you to hang the wreath on hooks, handles, or nails easily.
Round 5: Make the Red Bow
- Using red yarn, create a magic ring.
- ch 3 (counts as first dc), work 2 more dc inside the magic ring.
- Chain 3.
- Finish this half of the bow with a slip stitch (sl st) into the magic ring.
- Repeat: ch 3, 2 dc, ch 3, sl st into the magic ring for the other half of the bow.
- Pull the magic ring to tighten and leave a long yarn tail for assembly.
- Using the same tail, chain 16 chains for the hanging tails of the bow (adjust length as desired).
- Cut yarn and weave in ends.
Explanation: This creates a simple, elegant bow with two loops and dangling tails to adorn your wreath.
Assembly and Shaping the Bow
- Fold the bow loops in half towards the center.
- Wrap the long yarn strand tightly around the middle to secure the bow’s shape.
- Position the bow on the wreath where you want it (top center is common).
- Sew the bow to the wreath with a tapestry needle, picking up stitches securely.
- Tie off yarn and weave in all tails neatly.
Explanation: Securing the bow attaches your focal decoration, adding visual interest and polish to the project.
Final Touches: Decorating Your Wreath
- Arrange the “waves” on the wreath for fullness and neatness.
- Optional: Sew or glue pearls, colored beads, or holiday balls onto your wreath for extra sparkle.
- Adjust and fluff the bow and petals to your liking.
Explanation: These finishing touches personalize your wreath with festive embellishments and make it entirely your own.
How to Start This Pattern
Start by attaching yarn to your chosen sturdy wreath base. Work single crochets all around to cover it fully. Change colors and switch to double crochets in clusters for texture. Finish rounds with single crochet edging, create a hanging loop, then craft and attach a bow.
Stitches Used in This Pattern
| Stitch | Description |
|---|---|
| Chain (ch) | Creates foundation and spaces |
| Single Crochet (sc) | Makes dense, firm fabric to cover and edge wreath |
| Double Crochet (dc) | Forms decorative “wave” clusters |
| Slip Stitch (sl st) | Joins rounds and secures parts |
Tips for Success
- Keep your tension even for consistent shape and stitch size.
- When sewing on the bow, pick up only the outer loops for a clean seam.
- Customize the chain loop length and bow size according to your preference.
- Consider using a smaller hook for firmer fabric that holds shape well.
Summary
This mini Christmas wreath is a quick and beginner-friendly crochet project. It brings festive charm with its simple construction, textured clusters, and bright red bow accent. Customize and decorate it as you like for a personal holiday touch!





Leave a Reply