

Stitch an adorable gnome with this Free Crochet Gnome Amigurumi Pattern, a fun and creative way to add charm to your home decor or gift collection.
If you love making cute little toys with yarn, then this free crochet gnome amigurumi pattern is just right for you! It's a fun and easy project where you can create your very own tiny gnome friend. Gnomes are these tiny, funny characters that look like they come from a magical garden, and making one with crochet is a wonderful way to bring a bit of magic into your home.
Free Crochet Gnome Amigurumi Pattern to Enjoy Crocheting

This gnome looks super cute, with a big pointy hat, a round nose, and a fluffy beard. You can choose different colors for the hat and clothing to make your gnome unique. Maybe a bright red hat or a soft blue one! The size of your gnome can also change depending on the yarn and hook you pick—smaller yarn makes a tiny gnome, and thicker yarn makes a bigger one. It’s soft to hold and makes a lovely toy, decoration, or even a gift for someone special.
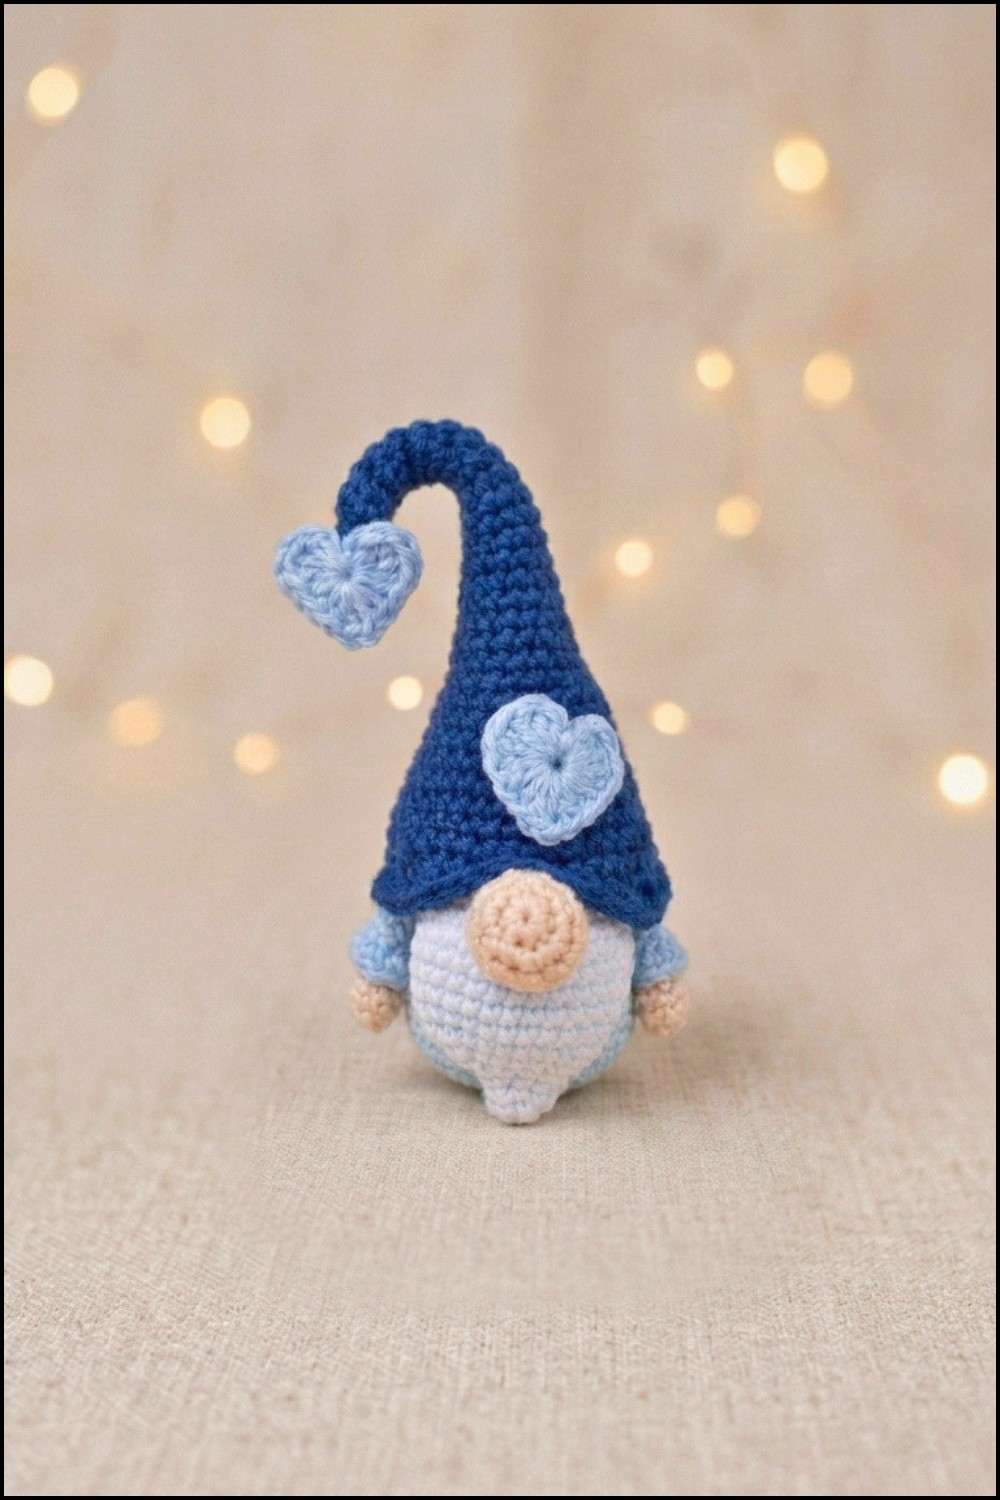
The pattern mainly uses the single crochet stitch, which is perfect for beginners and kids because it’s simple and easy to learn. You work in rounds to slowly build up the shape of the gnome’s body, hat, and nose. Filling the gnome with soft stuffing makes it squishy and cuddly.
You can use this free crochet gnome amigurumi pattern to make lots of different things—a little friend to sit on your shelf, a Christmas ornament, or a decoration for your room. It’s a delightful way to practice crochet and create something magical with your own hands. So grab your yarn and hook, and start making your very own gnome today.

Crochet Gnome Rubber Bands with Heart – Detailed Pattern
This project, inspired by Joselyn’s tutorial, creates charming little gnomes that can stand upright—perfect for decorations, gifts, or playful accessories. The design features options for both male and female gnomes, with detailed instructions covering two kinds of hats, cute noses, arms, beard or braids, and decorative hearts. This pattern is suited for anyone with basic amigurumi knowledge who wants to make a unique, heartfelt creation.
Pattern Basic Points
Highlights of This Tutorial:
- Two Gnome Options: Pattern includes both a male version with a beard and a female version with braids.
- 3D Sturdy Shape: Cardboard base and pebbles inside add stability and allow the gnome to stand upright.
- Decorative Heart: Each gnome wears a heart on its hat and/or top of the hat, perfect for Valentine’s themes.
- Customizable Colors: Easily switch color for personalization or change up details.
- Soft, Squishy Body: Stuffed with synthetic filling for a charming, huggable texture.
- Accessory Option: Attach rubber band, keychain, or use as home decor.
Special Notes
- Written in US crochet terms.
- Work with small, tight stitches to minimize stuffing show-through for amigurumi.
- A “V single crochet” (sc in V) is a slightly looser single crochet achieved with the yarn above the hook; use it as noted for clothing/hat sections for added drape.
- Hearts, beard, and braids are sewn after main assembly; some hand sewing required.
- Pattern includes advice on substituting brands and materials depending on your country and availability.
- All steps are explained in detail; read through once before starting.
Skill Level
Advanced Beginner to Intermediate
- Basic experience with working in the round (magic ring), increasing/decreasing, color changes, and simple sewing.
- Exposure to amigurumi techniques (firm fabric, sewing pieces together) is helpful.
Materials
- Yarn: 100% cotton, 2 mm (or similar DK weight)
- Body: light blue (or pink for female, or color of choice)
- Hat: darker blue
- Beard: white
- Arms, nose, braids: skin color, pink (for braids)
- Optional: red/pink/white for heart
- Crochet Hook: 2.5 mm
- Stuffing: synthetic fiberfill
- Stitch markers, pins
- Wool/tapestry needle
- Scissors
- Liquid hot silicone or glue (for attaching pearls/beads, optional)
- Small cardboard or acetate (for two base circles)
- Small decorative pebbles (for base weight, optional)
- Optional: beads, pearls for finishing touches
Measurements / Sizing
- Gnome Height: About 13 cm (including hat)
- Base Diameter: As per foundation magic ring rounds (approx. 5–6 cm)
- Hearts: Approx. 2–3 cm wide
Gauge
- Gauge is not critical for amigurumi; stitches should be tight enough to prevent stuffing from showing.
Stitch Abbreviations
- MR: Magic Ring
- ch: chain
- sc: single crochet
- inc: increase (2 sc in one st)
- dec: decrease (sc two together)
- hdc: half double crochet
- dc: double crochet
- sl st: slip stitch
- st(s): stitch(es)
- FO: fasten off
Special Stitches
- sc in V: Insert hook under both top loops, yarn over and pull through, yarn above the hook, finish sc as usual—for looser, “V” shaped single crochet, mostly used on hat/clothing.
- Back Loop Only (BLO): Insert hook only in back loop of each stitch, as noted.
- Front Loop Only (FLO): Insert hook only in front loop, as noted for special texture/edging.
The Pattern Itself
BODY
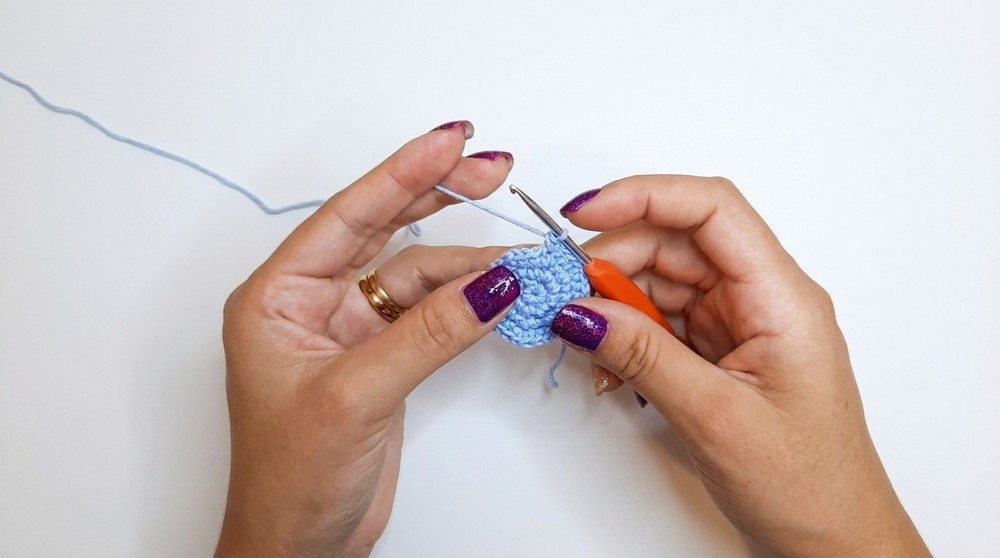
- With light blue yarn:
- Round 1: MR, 8 sc into ring. Pull tight. (8)
- Round 2: 8 inc (2 sc in each st) around. (16)
- Round 3: (1 sc, 1 inc) repeat around. (24)
- Round 4: (2 sc, 1 inc) repeat around. (32)
- Round 5: 32 sc—work in BLO. (32)
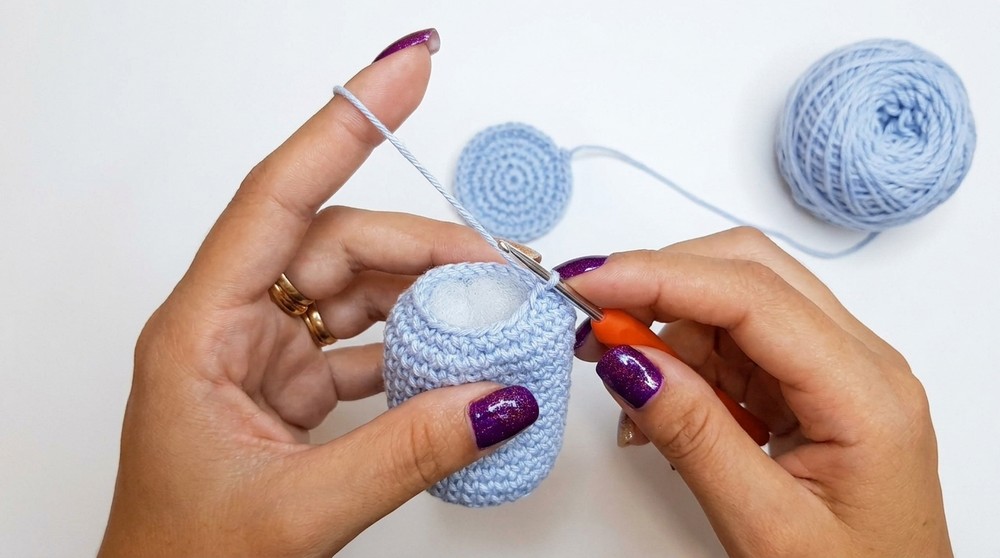
- Rounds 6–17: 32 sc in each round, working in both loops (normal sc) (32)
- Insert cardboard/acetate circles into base.
- Add pebbles for weight (optional).
- Stuff with fiberfill as you go.
- Round 18: (2 sc, 1 dec) repeat around. (24)
- Round 19: (1 sc, 1 dec) repeat around. (16)
- Add more stuffing if needed.
- Round 20: 8 dec (sc2tog) around. (8)
- Fasten off, leaving a long tail. With tapestry needle, weave through the 8 front loops and pull closed, knotting to secure and hiding the tail.
HAT
- With darker blue yarn:
- Round 1: MR, 6 sc into ring. (6)
- Rounds 2–4: 6 sc each round. (6)
- Round 5: (1 sc, 1 inc) × 3. (9)
- Rounds 6–9: 9 sc each round. (9)
- Round 10: (2 sc, 1 inc) × 3. (12)
- Rounds 11–14: 12 sc each round. (12)
- Round 15: (3 sc, 1 inc) × 3. (15)
- Rounds 16–18: 15 sc each round. (15)
- Round 19: (4 sc, 1 inc) × 3. (18)
- Round 20: 18 sc. (18)
- Round 21: (2 sc, 1 inc) × 6. (24)
- Rounds 22–23: 24 sc each round. (24)
- Round 24: (2 sc, 1 inc) × 8. (32)
- Rounds 25–27: 32 sc each round. (32)
- Round 28: (3 sc, 1 inc) × 8. (40)
- Round 29: 40 sc in FLO, use sc in V technique for looser fit.
- Round 30: 40 sc in both loops, using V-sc.
- Sl st, ch 1, leave a long yarn tail for sewing hat on.

ARMS (Make 2)
- With skin color:
- Round 1: MR, 6 sc. (6)
- Rounds 2–4: 6 sc each round. (6)
- Change to light blue yarn on last st of round 4. Tie off skin color.
- Round 5: 6 sc in light blue. (6)
- Round 6: 6 sc in BLO (6)
- Rounds 7–11: 6 sc in both loops (6)
- Slip stitch, ch 1, cut yarn leaving long tail for sewing.
- Edging: Attach light blue to arm’s BLO edge, ch 1, work sc in V in each st around, add an inc in final st for shaping; sl st, FO, hide ends.**
- Do not stuff arms. Make 2.
NOSE
- With skin color:
- Round 1: MR, 6 sc. (6)
- Round 2: 6 inc. (12)
- Rounds 3–4: 12 sc each round. (12)
- Round 5: (1 sc, 1 dec) × 4. (8)
- Slip stitch, ch 1, cut yarn leaving long tail. Add a little stuffing if desired.
BEARD (Male Gnome)
- With white yarn:
- Round 1: MR, 6 sc. (6)
- Rounds 2–3: 6 sc each round. (6)
- Round 4: (1 sc, 1 inc) × 3. (9)
- Round 5: (2 sc, 1 inc) × 3. (12)
- Round 6: (1 sc, 1 inc) × 6. (18)
- Round 7: (2 sc, 1 inc) × 6. (24)
- Rounds 8–12: 24 sc each round.
- Round 13: (2 sc, 1 dec) × 6. (18)
- Round 14: 18 sc.
- Sl st, ch 1, cut a long tail for sewing.
BRAIDS (Female Gnome – Make 2)
- With pink yarn:
- Ch 16, turn, sc in V in each ch back to start (15)
- Repeat above step 2 more times, so you have 3 strips side by side.
- Ch 1, leave a long tail for sewing.
- Braid the 3 strips; fasten ends with a bit of yarn. Two braids needed.
HEARTS (Make 2 for each gnome: one for hanging, one for hat)
- With red/pink/white yarn as desired:
- MR, ch 2, work 3 dc, 3 hdc, ch 1, 1 dc, ch 1, 3 hdc, 3 dc, ch 2 into the ring.
- Sl st into magic ring. Ch 1, cut yarn leaving tail for sewing.
- Tighten magic ring to shape heart.
Assembly & Finishing
- Fill body as you go with stuffing and pebbles for weight.
- For male gnome:
- Sew beard to lower face over the color change line.
- For female gnome:
- Sew braids on both sides at same height as where beard would go. Secure ends and braid tightly.
- **Sew arms at sides, hidden slightly behind beard/braid.
- Sew nose in the very center, right above beard (or between braids for female).
- Insert wire or pipe cleaner in hat for shaping, fold to desired shape.
- Sew hat to head, bringing hat down just above the nose and securing all the way around.
- Sew on decorative hearts:
- One on/above the hat, one hanging from the tip.
- Glue beads or pearls as desired.
- Weave in all ends.
Conclusion
Your Valentine’s gnome rubber band is complete! With sturdy structure, playful hearts, and charming personalization, this project makes a meaningful gift or festive decoration. Adjust colors, add beads, or adapt accessories to make your gnome truly one-of-a-kind.



Leave a Reply