

Consider creating something unique with this free crochet strawberry basket pattern perfect to uplift your space or give as a thoughtful handmade gift!
A charming addition to any crochet enthusiast’s collection, the strawberry basket pattern is both delightful and practical. Designed to bring a whimsical touch to your space, this basket is shaped like a ripe strawberry, making it a standout piece for storage or decoration. Whether you're organizing small items, displaying it on a shelf, or gifting it as a heartfelt handmade present, this pattern offers a versatile option to suit various needs.
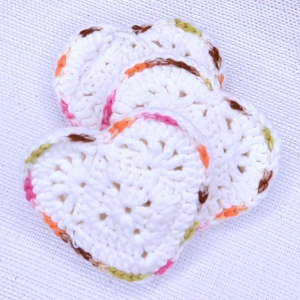
Crochet Sweat Strawberry Basket Pattern

The process is straightforward and enjoyable, catering to both beginners and seasoned crocheters. With its pleasing design and vibrant colors, the basket can brighten up a child's room, add character to your kitchen, or serve as a thoughtful storage solution for crocheting supplies or goodies. Beyond its functional uses, the strawberry basket carries the satisfaction of creating something personal and unique for your home or loved ones.
This pattern is a fantastic way to combine creativity with purpose, resulting in a piece that is not only visually appealing but also useful. Step into this fun crochet project and enjoy turning simple yarn into a cheerful, berry-inspired addition to your space, perfectly suited for functional and decorative purposes.
Introduction
This pattern demonstrates the creation of a crochet basket with adorable strawberry details. The process begins with a basic magic ring and develops into intricate techniques such as strawberries and lace edging. This step-by-step guide will walk you through each round, with clear instructions to help you complete the project.
Materials
- 4-ply cotton yarns
- 4 mm hook
- scissors
- stitch marker/pin
- needle

Step-by-Step Instructions
1. Starting the Base
Round 1:
- Begin with a magic ring.
- Chain one.
- Crochet eight single crochets into the magic ring.
- Pull the tail to close the magic ring, and slip stitch into the first stitch.

2. Increasing the Base Size
Round 2:
- Chain one.
- Crochet two single crochets into the first stitch.
- Place a stitch marker to mark your first stitch.
- In the next stitch, crochet one single stitch.
- Alternate between two single crochets and one single crochet. Repeat until the round ends.
- Slip stitch into the first stitch.
Round 3:
- Chain one.
- Alternate between one single crochet in the next stitch and two single crochets in the following stitch.
- Continue this sequence until the round ends, ensuring you have 24 single crochets.

Round 4:
- Chain one.
- Mark the first stitch.
- Crochet two single crochets in one stitch after two single crochet stitches.
- Repeat the sequence (1, 1, 2) until the round ends, resulting in 32 single crochets.
Round 5:
- Follow the same pattern as before, increasing evenly across the round.
3. Adding the Base Details
Round 6:
- Chain one.
- Work in the back loop only (BLO) for all stitches.
- Ensure you have 40 single crochets worked in the BLO at the end of this round.
Rounds 7–9:
- Chain one and work regular single crochets.
- Continue this for three rounds to create a strong base for the basket.
4. Creating the Strawberry Details
Switch to Strawberry Yarn (Pink Yarn):
- Start with a knot on your finger to secure the pink yarn.
- Insert your hook into the base loops and start crocheting the strawberry.
For Each Strawberry:
- Crochet four single crochets into the same stitch.
- Slip stitch into the first single crochet.
- Form the strawberry leaf by inserting and looping the yarn multiple times until five loops are on the hook.
- Pull the yarn through all five loops to create the leaf.
- Alternate between four single crochets and strawberries.
- By the end of the round, ensure you have eight strawberries evenly spaced around the base.

5. Transition to Cream Yarn
Round 14:
- Chain one and crochet single stitches all around, ensuring you maintain the alignment of stitches above the strawberries.
Round 15:
- Continue crocheting above the strawberries by finding and stitching into the designated single crochet spaces. Slip stitch to finish the round.
6. Adding the Lace Edging
Round 16:
- Switch to your preferred lace yarn color.
- Create a knot with the lace yarn and insert it into the first stitch of the round.
- Chain three stitches.
- Slip stitch into the next stitch.
- Repeat this process (chain three, slip stitch) for the entire round to form the lace edging.
- At the end of the round, slip stitch into the first stitch, chain one, and cut the yarn.

Conclusion
The crochet basket is now complete, adorned with charming strawberries and elegant lace edging. The pattern offers a fun and rewarding project that blends beginner-friendly techniques with more advanced stitches. Once finished, this basket makes a delightful decorative or functional accessory.

Leave a Reply