

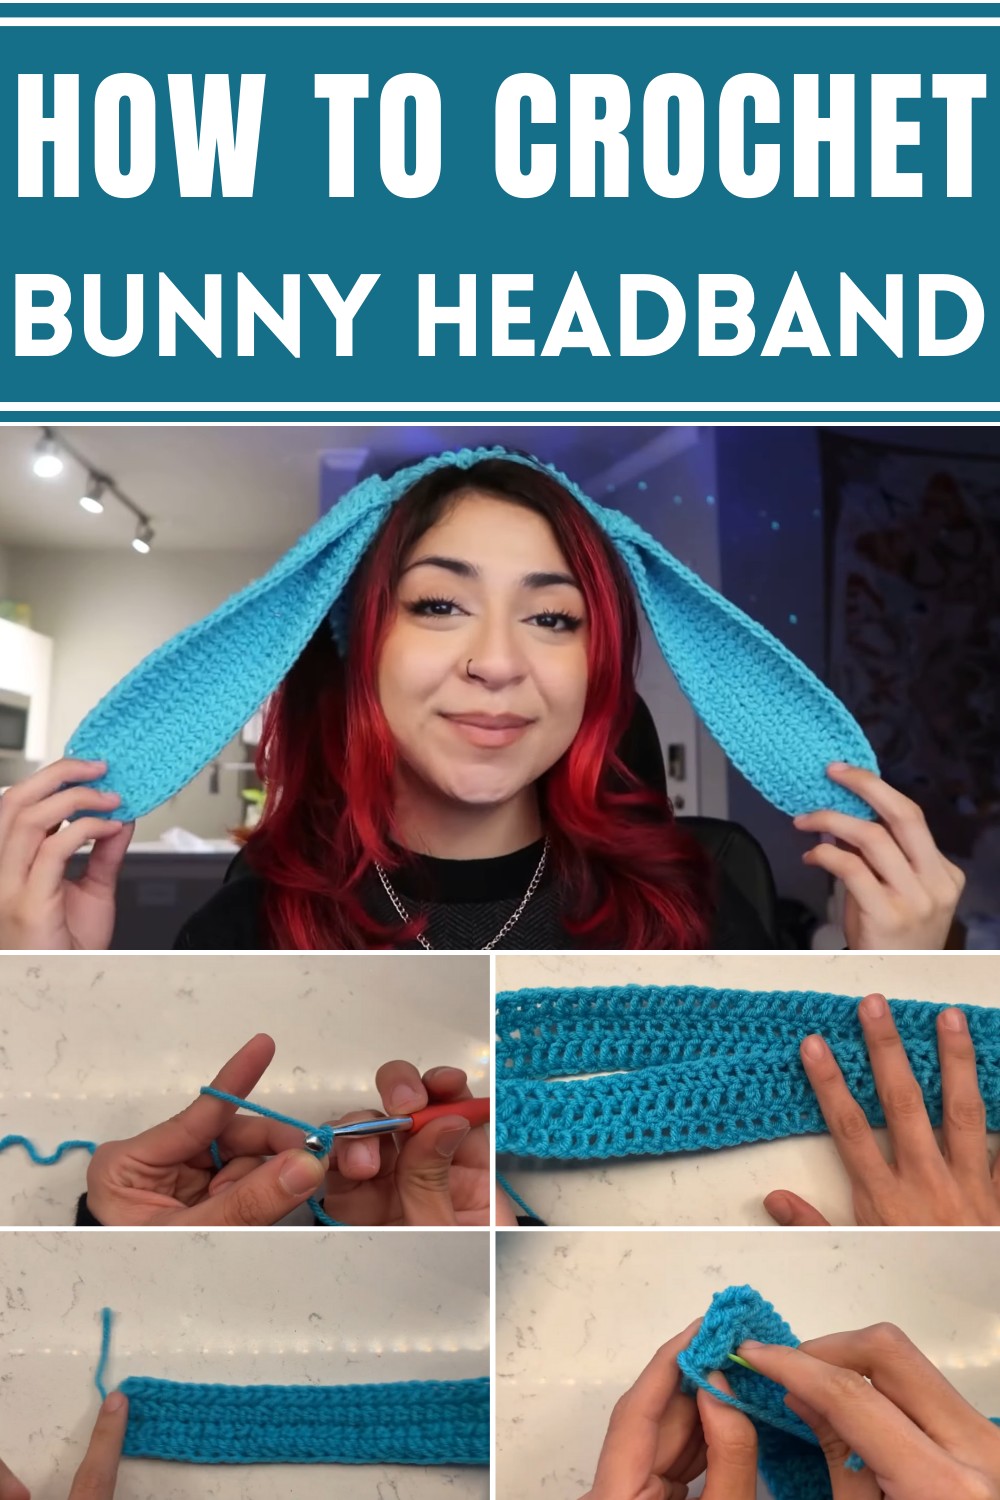
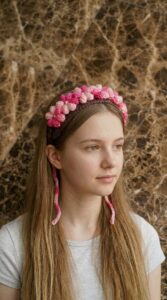
Boost your creativity with this Free Crochet Bunny Headband Pattern, perfect for adding charm to your projects or creating a unique handmade gift.
Bunny headbands surprise with their combination of playful fashion and practical utility. The Free Crochet Bunny Headband Pattern blends charm and functionality seamlessly. Ideal for Easter celebrations, spring-themed photoshoots, or everyday wear, this delightful pattern adds a soft, whimsical touch to any outfit. Made from cozy crochet stitches, it provides gentle comfort, suitable for kids and adults alike.
Playful Bunny Headband Pattern
The adorably stitched bunny ears bring fun and personality to every look, showcasing the beauty of handmade craftsmanship. Beyond aesthetics, these headbands serve practical purposes, such as keeping hair neatly tucked back during gardening, reading, or other daily activities.
Customizable in any color, they easily match various wardrobes, making them thoughtful, personalized gifts or simply satisfying projects for crochet enthusiasts. Simple yet effective, this headband enhances both style and utility, proving that even small accessories can brighten daily life in countless ways.
Introduction
In this project, Creator demonstrates how to crochet a charming bunny headband that's both stylish and functional. The headband features cute bunny ears and uses basic crochet techniques such as slip knot, chain, double crochet, and half double crochet. Designed to be an easy project, creator provides step-by-step guidance to help even beginners create this adorable accessory.
Materials Needed
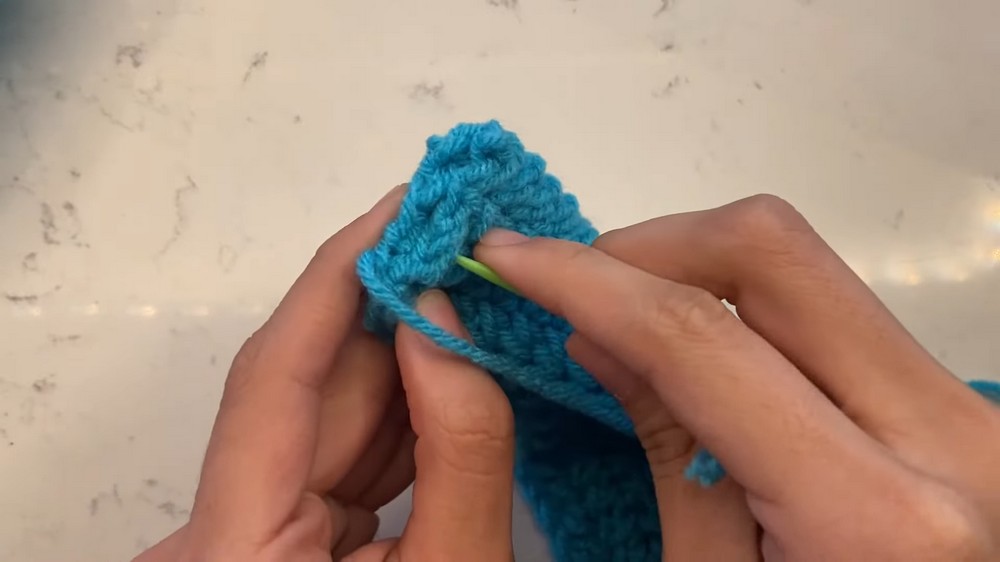
- Yarn: Red Heart brand, medium size 4, in turquoise.
- Crochet hook: Size 6mm (J hook).
- Stitch markers.
- Crochet needle.
- Scissors.

Step-by-Step Instructions
Part 1: Creating the Headband
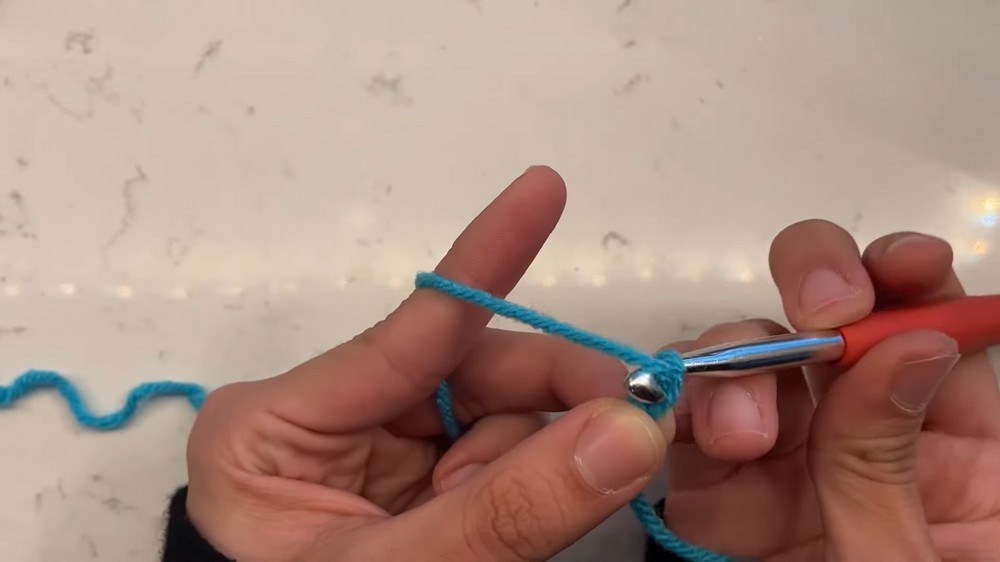
- Start With a Slip Knot
- Cross the yarn, pinch to form a loop, and pull it through to create a slip knot.
- Attach the yarn to your crochet hook.
- Chain 100 to Begin the Headband
- Wrap the chain comfortably around your head, ensuring room to tie it at the ends.
- Create 100 chains using the yarn.
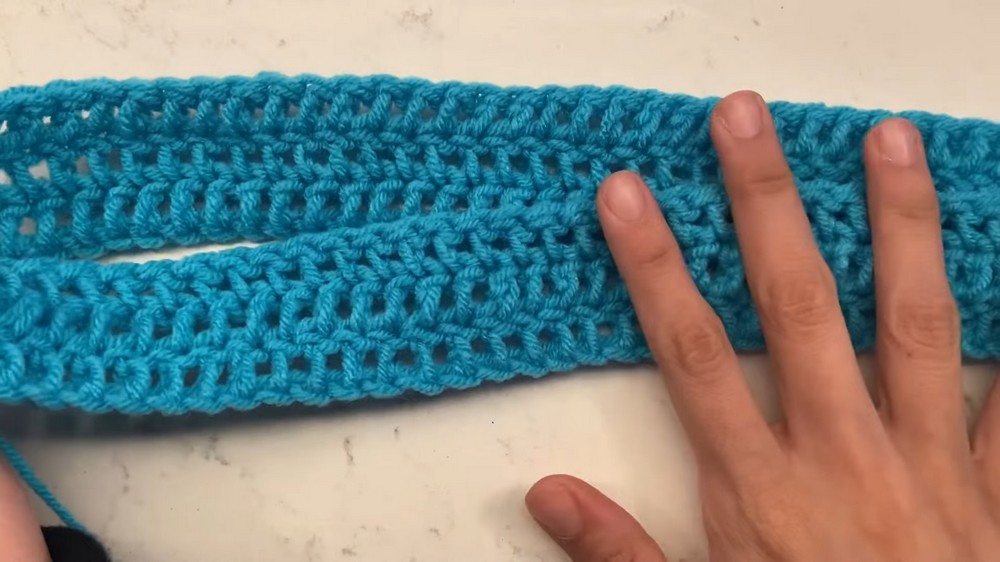
- Row 1: Double Crochet
- Yarn over, skip the first chain, and insert the hook into the next chain.
- Pull the loop through, yarn over, and pull through the first two loops.
- Then yarn over again and pull through the remaining two loops. Repeat this process for each chain until the row is complete.
- Rows 2-3: Continue with Double Crochets
- To begin a new row, chain two, flip the project over, and start double crocheting into each stitch along the row.
- Repeat this process for three rows to complete the headband base.
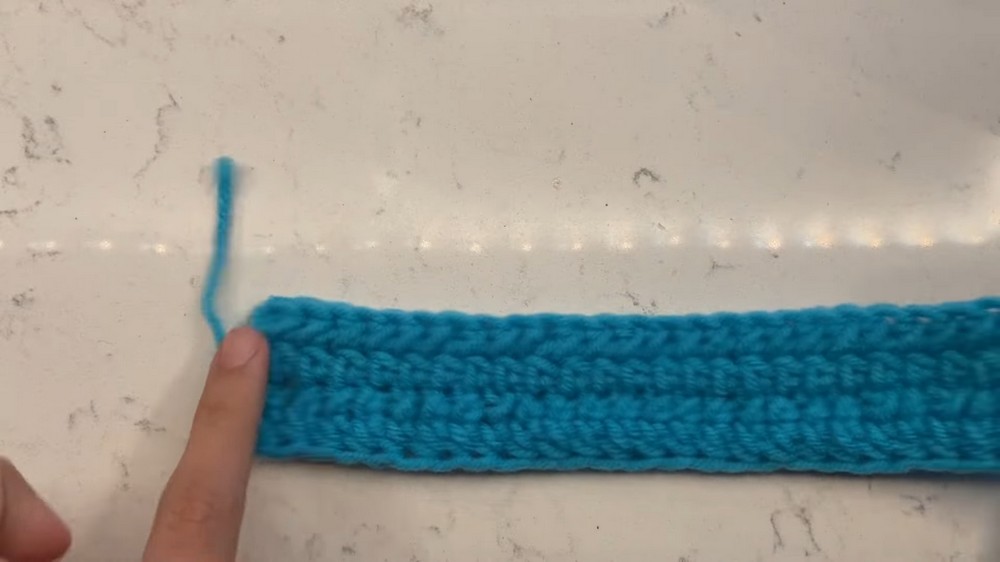
- Finish the Headband
- At the last double crochet, chain one and cut the yarn, leaving a tight knot to prevent unraveling.
- Use a crochet needle to weave in loose ends neatly.
Part 2: Making the Bunny Ears
- Starting the Bunny Ear Shape
- Begin with a slip knot and hook into the yarn. Chain 30 to create the base for the bunny ear shape.
- Row 1: Half Double Crochet
- Yarn over, insert the hook into the next chain, and pull up the loop (three loops on the hook).
- Yarn over, pull through all three loops on the hook. Repeat this process until the row is complete.
- Row 2 and Beyond: Shaping the Ear
- Chain one, flip the project over, and continue using half double crochet for each stitch.
- To create the rounded shape: At the tip of the bunny ear, insert three half double crochets into the final stitch of the row.
- Repeat Process
- Continue crocheting while maintaining the flat edge on one side and rounded shape on the other.
- Make rounds until the ear is 3 inches thick and 10.5 inches long.
- Finish the Bunny Ear
- Chain one, cut the yarn, leaving a long loop to sew the ear onto the headband.
- Fold the ear in half to create a 3D ear-like effect and sew along the folded edge using your crochet needle.
Part 3: Attaching the Bunny Ears
- Positioning the Ears
- Place the headband on your head and visually mark where you would like the ears to sit.
- Use stitch markers to pin the ears in place, leaving 10 stitches between the ears for proportion.
- Sew the Ears Onto the Headband
- Thread the crochet needle with the extra yarn.
- Sew the ears to the headband, working through both the ear and the headband, pulling the yarn tight after each stitch.
- Once secured, weave in any excess yarn to hide loose ends.
- Repeat for the Second Ear
- Follow the same stitching process for the second bunny ear to complete the headband.
Conclusion
This bunny crochet headband is a playful and customizable accessory that puts a creative spin on classic crochet projects. The step-by-step approach makes it approachable for beginners and fun for more experienced crocheters. Once completed, the headband is perfect for styling up casual outfits or gifting to loved ones.
Leave a Reply