

Level up your crochet game with this charming crochet granny square baby blanket pattern—perfect for creating cozy treasures for your little ones.
Handmade treasures have a way of turning everyday moments into something extraordinary, especially when they’re designed to comfort and cherish tiny ones. The Sweat Crochet Granny Square Baby Blanket brings that cherished charm to life. Designed with both comfort and style in mind, this blanket adds a personal touch to nurseries or stroller outings. Its versatile design makes it ideal for snuggling during story time, keeping your little ones cozy in chilly weather, or even as a memorable baby shower gift.
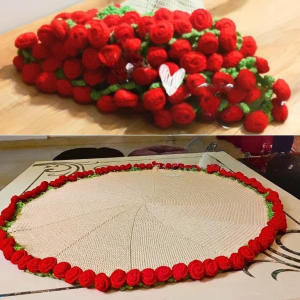
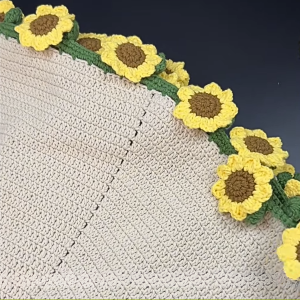
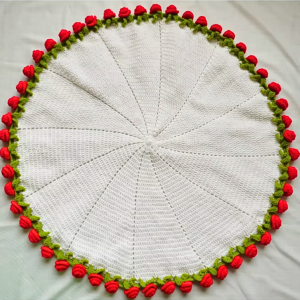
Cozy Vibes for Baby - Crochet Granny Square Blanket Pattern
Soft yarn weaves through perfectly stitched granny squares, resulting in a timeless design that blends modern comfort with vintage appeal. This blanket not only serves as a source of warmth but also as a keepsake that grows with little ones, becoming a symbol of care and thoughtfulness. Its lightweight composition ensures breathability without compromising on coziness—ideal for delicate baby skin.
Every detail speaks to the joy of making something unique, all while offering a relaxing outlet for creativity. Beyond its aesthetic appeal, the practical use shines in its versatility, making it suitable for travel, playtime mats, or crib layering. There’s no denying the charm and benefits this blanket holds it’s an heirloom that celebrates love, comfort, and the beauty of thoughtful work.
Supplies:
- Double-knit yarn (leftovers work great).
- Crochet hooks: 4.5 mm for squares and borders, 3.5 mm for joining.
- Blocking board (optional).
- Pins or alternatives such as cardboard or cushions for blocking.
- Sewing needle for weaving ends.
Step-by-Step Guide
2. Determining Blanket Size
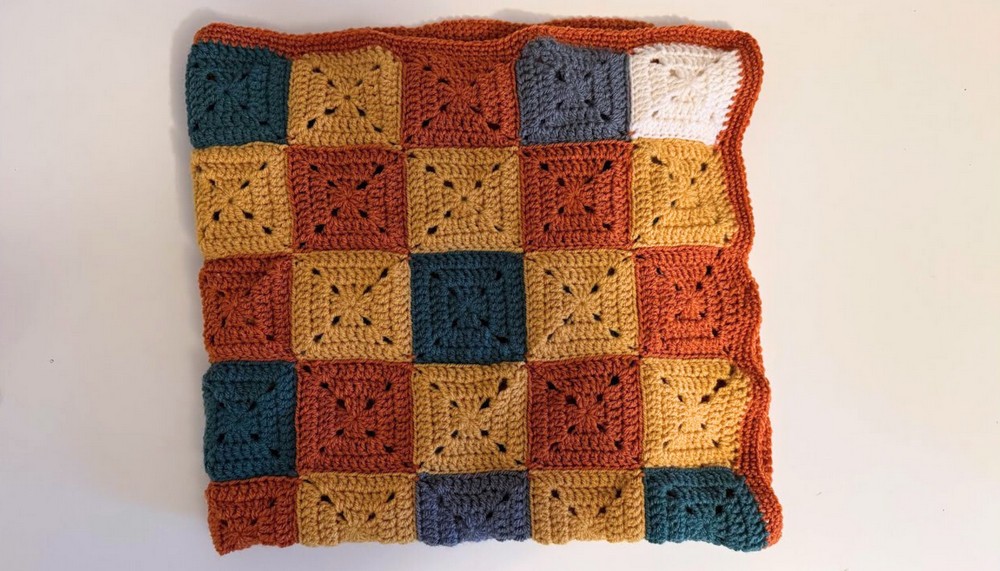
The presenter’s example aims for a 30-inch by 30-inch baby blanket. Each granny square is about 3 inches, so the goal is 9 squares by 9 squares (81 squares in total).
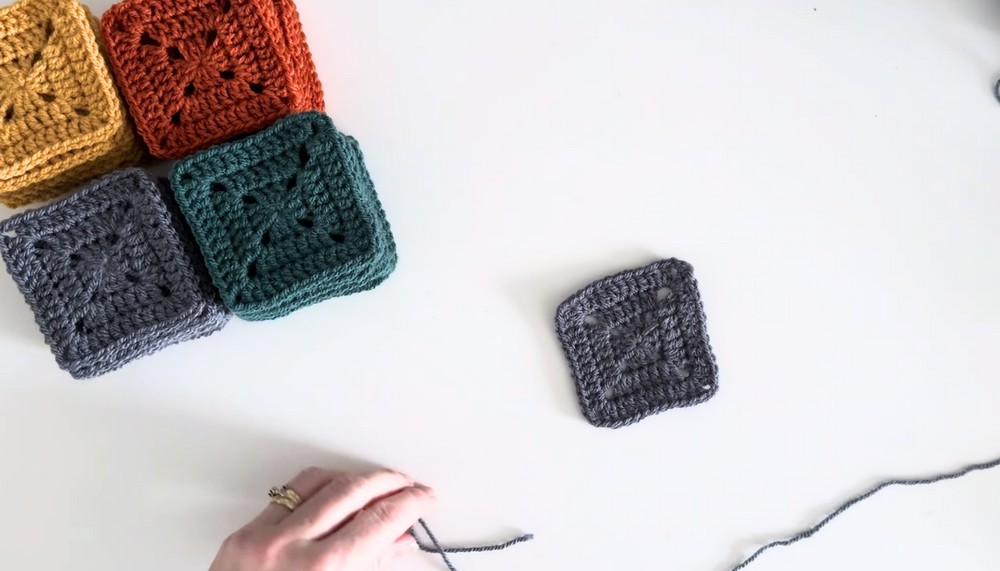
3. Creating a Solid Granny Square
Step 1: Magic Circle
- Create the magic circle by looping yarn and securing it with a pull-through stitch.

Step 2: First Round
- Chain 5 (acting as a corner and double crochet).
- Crochet 3 double crochets in the center, chain 2 for the corner, and repeat 3 more clusters of 3 double crochets with chain 2 between each.
- Complete the round by adding 2 double crochets into the final space and joining with a slip stitch.
Step 3: Additional Rounds
- Chain 5 and continue to add clusters of 3 double crochets along each side. Corners consist of 2 double crochets, chain 2, and 2 double crochets.
- Adjust the size of the square by repeating the process for additional rounds.
4. Blocking the Squares
Blocking creates uniformity in square size.
- Options:
- Use a blocking board (preferred).
- Alternatives include cardboard, cushions, or an ironing board.
- Blocking Process:
- Lightly spray or moisten the square.
- Stretch and pin each corner to the board or surface.
- Allow drying for at least 24 hours.
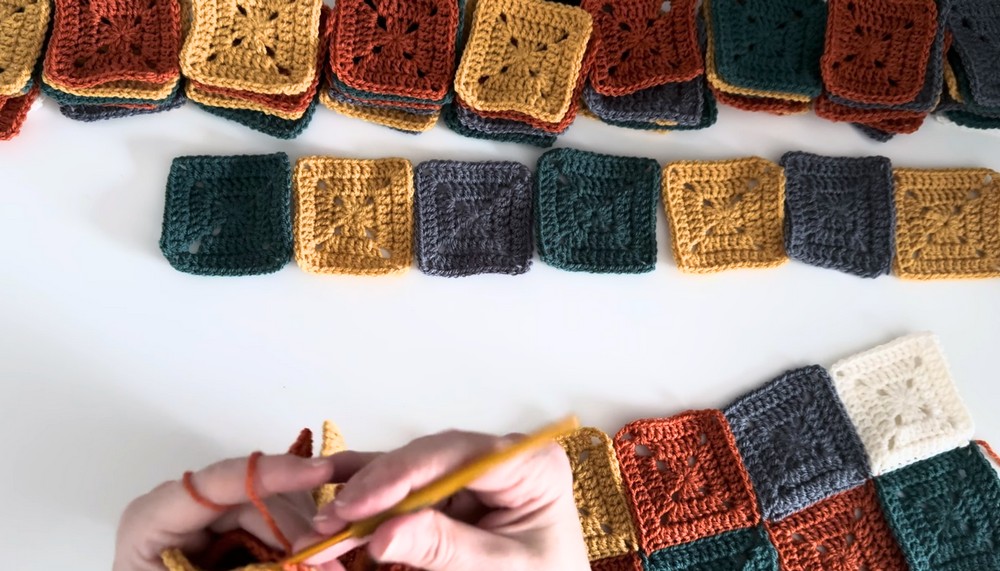
5. Arranging and Joining the Squares
Step 1: Layout Squares
- Randomly place the squares or arrange them in a specific order to suit your taste.
Step 2: Horizontal Joining
- Stack squares face-to-face and align corner to corner.
- Attach yarn and use slip stitches to join the back loops of adjacent squares for neat seams. Continue adding squares horizontally until completing the row.
Step 3: Vertical Joining
- Turn the work and repeat the slip stitch process on vertical rows.
- When you encounter joins between squares, hop over them and continue stitching back loops.
6. Adding the Border
Step 1: Single Crochet Border
- Start anywhere on the edge with 4.5 mm hook, incorporating tail ends by crocheting over them.
- Create a single crochet stitch all around the blanket’s edges.
- Add 3 single crochets at each corner for smooth turning.
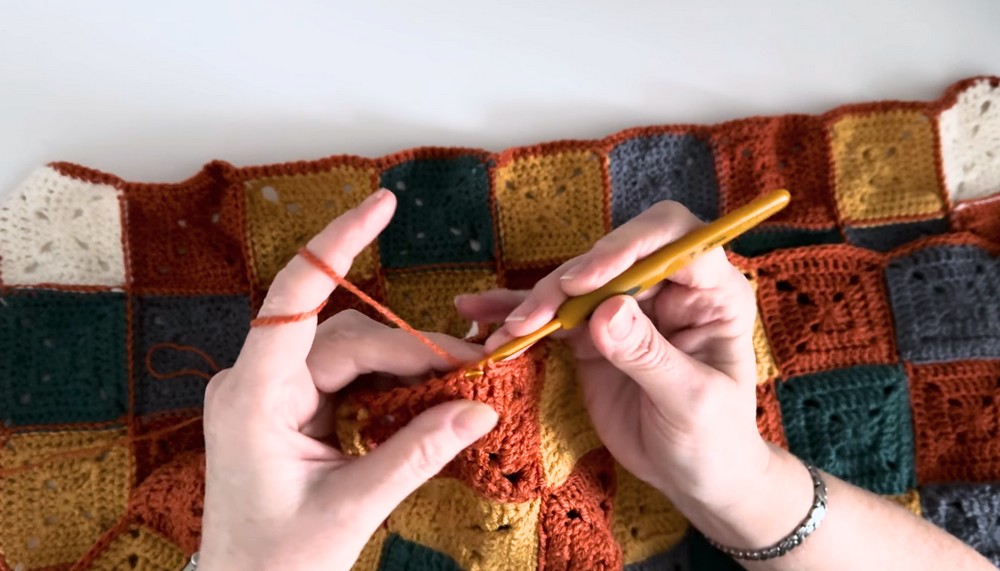
Step 2: Additional Rounds
- If desired, add multiple rows of single crochet to create a thicker border (the video example uses 3 rows for stability).
7. Weaving and Finishing Edges
Secure loose ends by weaving them through the stitches using a sewing needle. Pay attention to corner joins, ensuring they are neat and tightly woven. Cut off excess yarn.
8. Conclusion
The completed blanket is a practical and creative way to use leftover yarn in colorful patterns. You can adjust the size and color scheme according to your preferences. This project makes a thoughtful handmade gift or a cozy addition to any nursery.

Leave a Reply