

Create a unique accessory with this crochet flamingo keychain pattern, perfect for bird lovers and crochet enthusiasts looking for a charming handmade touch.
I recently picked up a fun little crochet project that quickly became one of my favorites—a tiny flamingo keychain. This cute accessory is super quick to make and sweet enough to brighten up your keys or backpack. What’s cool is that with just a few small changes in color or size, you can turn this flamingo pattern into other birds or summer-themed charms like a parrot or a swan, making it a really versatile project. The free crochet flamingo keychain pattern offers a fantastic way to create something both decorative and useful.
Crochet Flamingo Keychain Free Pattern for Decor
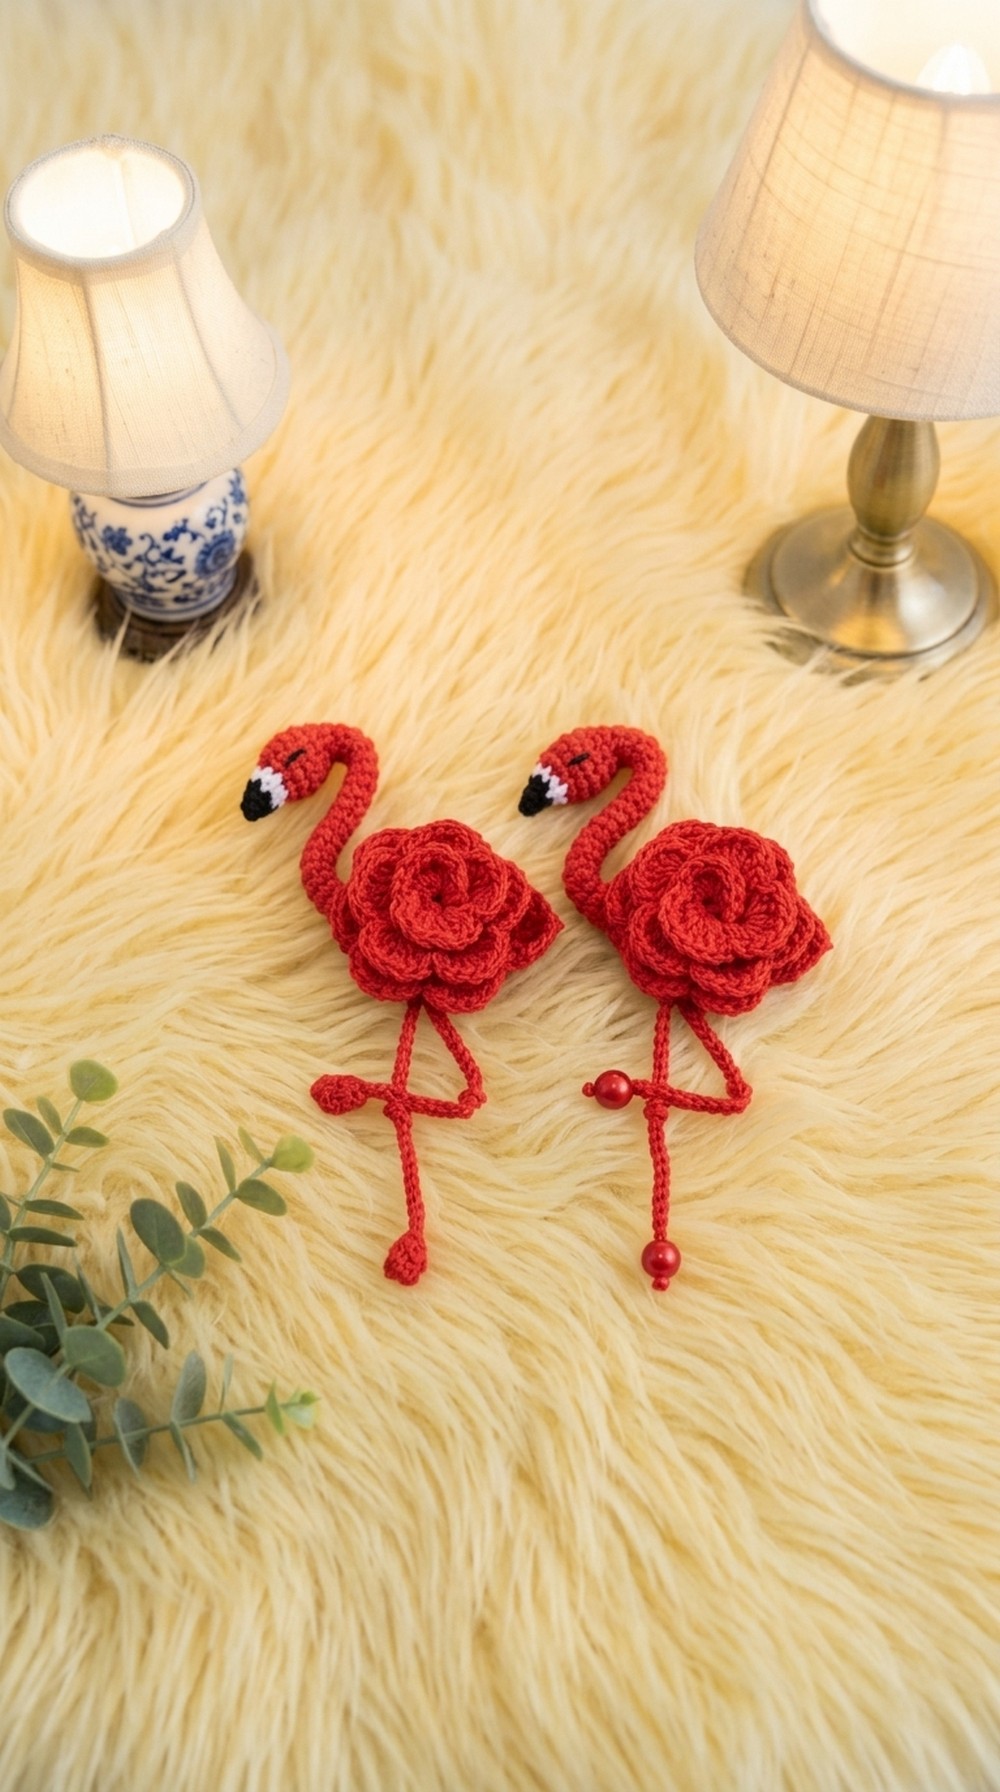
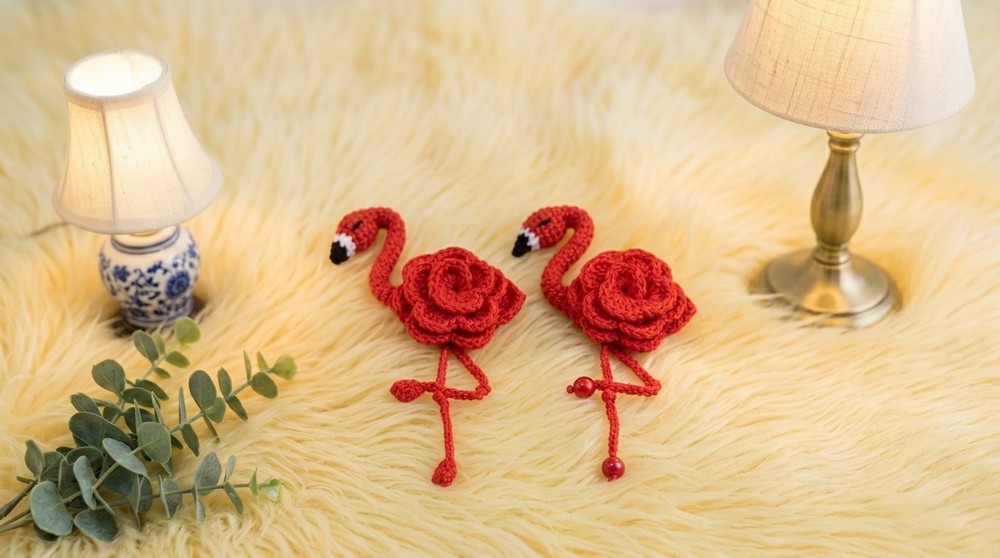
This little flamingo stands out with its bright pink body and slender shape, perfectly capturing the bird’s elegant neck and rounded body. The texture is soft but holds its form nicely, thanks to tight single crochet stitches, giving it a neat, smooth finish. Its style is playful and charming, enough to get compliments whenever you pull out your keys. The curved neck and tiny beak are simple details that really bring the flamingo to life, making it more than just a basic keychain.

You don’t need to be an expert to whip this project up. The skill level is beginner to easy-intermediate, and most of the work uses single crochet stitches, which are really friendly for anyone comfortable with basic crochet. Some shaping through increases and decreases gives the flamingo its unique look, but the pattern walks you through it clearly.
This keychain makes a thoughtful little gift for friends or family who love fun accessories or tropical themes. It’s lightweight and easy to carry, so it’s perfect as a wearable decoration or even as a collectible if you enjoy making small amigurumi figures. If you love quick, satisfying projects that add personality to everyday items, this flamingo keychain could be just the thing to try next.
Flamingo Keychain Crochet Pattern
This cheerful, playful flamingo keychain is created using amigurumi techniques and basic crochet stitches. The design uses vivid colors and a creative construction process: you’ll crochet the body, a skinny curved neck and head with a color-changed beak, a ruffled rose-inspired tail, long legs, and embroider eyes. A wire inside the neck enables you to pose your flamingo, making it a fun accessory for bags, gifts, or decor.
Pattern Notes
- All rounds are joined with slip stitches unless specified.
- Work in U.S. crochet terms.
- Crocheting tightly (amigurumi-style) will keep your flamingo’s structure.
- Wire is added to the neck to make it bendable. Mask its ends for safety.
- Color changes in the head form the beak, and the ruffled tail is assembled by rolling and sewing.
- You can glue or sew pieces for the final assembly.
- Use stitch markers as needed for easier round tracking.
Skill Level
Advanced Beginner to Intermediate
You should be comfortable working in the round, managing color changes, basic increases/decreases, and some sewing/assembly.
Materials
- Silvigurumi yarn (or equivalent) in red, black, white
- 1.8 mm crochet hook (may use smaller hook for neck)
- Galvanized wire #20 (approx. 20 cm / 8” per flamingo)
- Pickaxe or wire cutter
- Masking tape
- Sewing needle, scissors
- Optional: red beads for the legs
Measurements / Sizing
- Finished flamingo height: 8–10 cm (3–4”)
- Body size: 3–4 cm diameter (about 1.5”)
- Tail width: 2 cm (0.75”)
- Legs: 6 cm each
Gauge
- Gauge is not critical but work tightly.
- 6 sc in a magic ring should be about 1 cm across.
Stitch Abbreviations
- ch = chain
- sl st = slip stitch
- sc = single crochet
- dc = double crochet
- hdc = half double crochet
- inc = increase (2 stitches in same stitch)
- dec = decrease (2 stitches worked together)
- st(s) = stitch(es)
Special Stitches
- Magic Ring (MR): Make a loop, crochet into the ring, then pull tight.
- Increase (inc): Work 2 sc or dc in the same stitch.
- Decrease (dec): Work 2 sc together.
- Fan: 7–9 dc in same space to create a ruffled effect.
The Crochet Pattern
1. Body
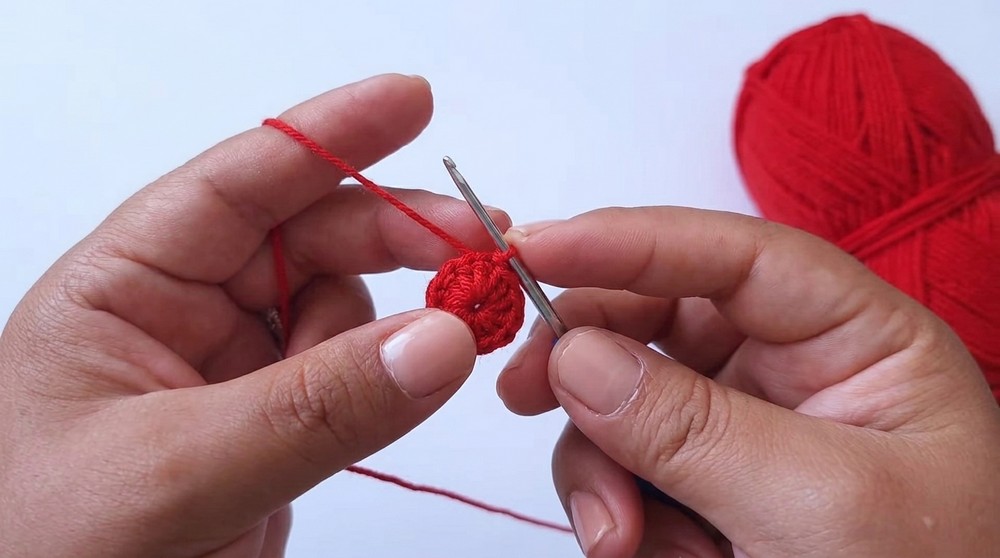
- With red, make a magic ring (MR).
- Ch 2, work 12 dc in the ring. Join with sl st to first dc, pull ring tight.
- Ch 2. Inc (2 dc in each st) in every stitch around. (24 dc total)
- Join with sl st to first dc (not chains).
- Ch 1.
2. Neck and Head
Switch to smaller hook for neck (optional).
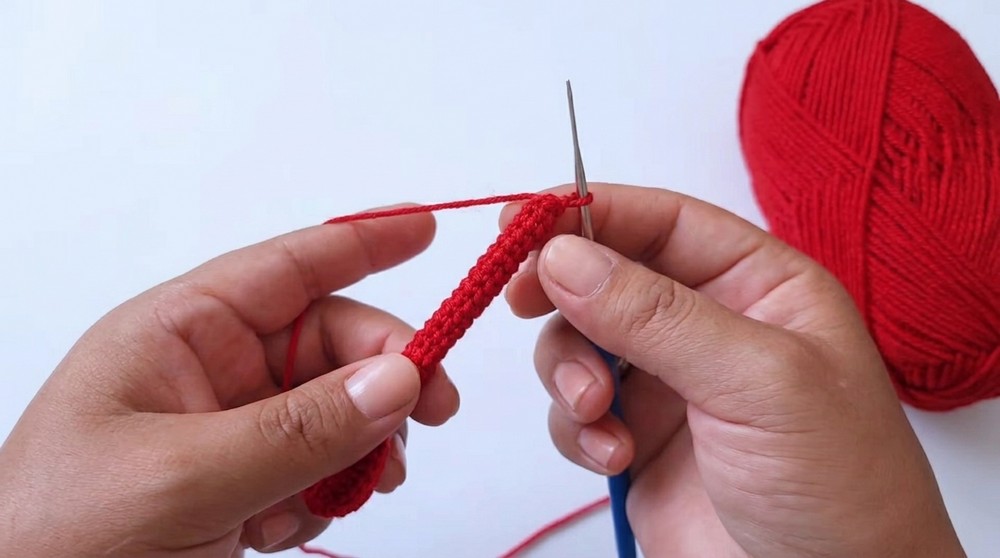
- Work in the front loops only of last body round.
a. Sc in first front strand (where the slip stitch is).
b. Sc in the next 2 front strands (3 sc total). - Turn. Work 3 sc in back strands.
- Join with sl st to first sc.
- Ch 1. Sc around for 6 sc per round.
- Complete 19 rounds total (or adjust for desired neck length).
- Round 20: [1 sc, inc] x 3 = 9 sc. Join with sl st.
- Round 21: [2 sc, inc] x 3 = 12 sc. Join with sl st.
- Round 22: Sc in each st around (12 sc). Join.
- Round 23: [5 sc, inc] x 2 = 14 sc. Join.
- Round 24: [5 sc, dec] x 2 = 12 sc. Join.
- Round 25: [2 sc, dec] x 3 = 9 sc. Join.
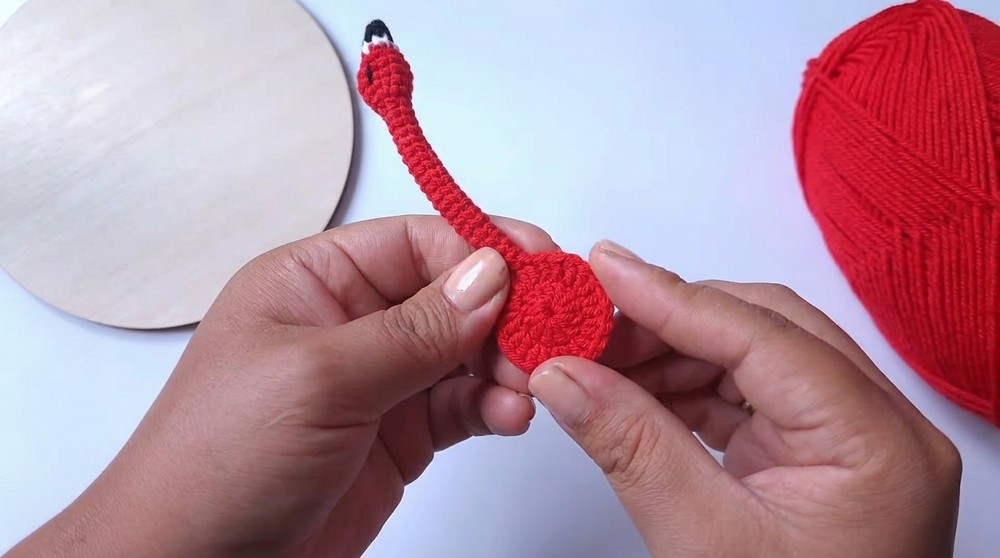
- Ch 1, change color to white (for beak), hold white tail as you crochet.
- Sc in each st around (9 sc). Join.
- Change color to black. Ch 1.
Round 27: [1 sc, dec] x 3 = 6 sc. Join. - Cut and tie loose ends, then hide inside.
- Ch 1.
Round 29: [1 sc, dec] x 2 = 4 sc (final). Leave a tail for embroidering eyes and sewing.
3. Tail/Rose
- With red, make a slip knot.
- Ch 33.
- In ch 5 from hook, hdc.
- Skip 1 ch, hdc in next, ch 2, hdc in same.
- Continue: skip 1 ch, hdc in next, ch 2, hdc in same. Repeat to end.
- Ch 1, turn. In first ch-2 space: 9 dc (first fan).
- Sc in next ch-2 space.
- In each ch-2 space: 7 dc, sc, repeat until you get 11 fans of 7 dc.
- Work tail tip (remaining spaces):
a. Sc and hdc in first space.
b. In next ch-2 space: 2 dc.
c. In same space: 2 dc.
d. Ch 1, sc at base.
e. In next space: 2 dc.
f. In same space: 1 dc.
g. In last space: 1 dc, 1 hdc, 1 sc. - Sl st to finish. Leave a long tail for sewing.

4. Legs
- With red, make slip knot. Ch 4.
- In first chain: [yarn over, insert hook, pull up loop, pull through both strands], dc for 5 times.
- Continue through next 6 strands.
- Ch 30 for leg length, fasten off with tail.
- Sew shut any second opening or gap at the end.
5. Assembly & Construction
Wire:
- Cut 20 cm wire, wrap ends with masking tape.
- Insert wire through head, neck, body (recommended: do half-way during head).
- Wire should exit at the body base.
Finishing Head and Eyes:
- Sew the beak tip securely; embroider eyes using black tail (between rounds 24 and 25).
- Hide thread in neck, optionally using silicone glue for strength.
Tail Assembly:
- Roll from fan with 9 dc, spiral and sew base to keep shape.
- Attach tail securely to back of body.
Legs:
- Tie a knot in the center of each leg for the flamingo’s knee (9 chains above); sew or glue ends.
Final Assembly:
- Sew or glue legs to the underside of the body.
- Position body, tail, and legs so flamingo is centered.
- Sew around body base and tail to keep in place.
- Bend neck to classic flamingo shape.
- Optionally, fold and glue legs for a playful pose, or add beads for decoration.
Assembly & Finished Size
- Weave in all yarn ends.
- Assemble wire, tail, legs, and bend neck as desired.
- Embroider the eyes.
- Finished flamingo approximately 8–10 cm tall, with rose-inspired tail and poseable neck.
- Ready to attach to a keyring or bag.
Quick Overview for Beginners
- Crochet the body and increase for a flat circle.
- Make a thin neck/head tube, color-change for beak, add wire to make it bend.
- Create tail with a ruffled fan pattern and spiral.
- Crochet long legs, tie a knot for knees, attach beneath body.
- Sew or glue all pieces together.
- Embroider eyes, pose the neck, and you’re done.


Leave a Reply