

Bring charm to your crochet collection with this free crochet ladybug pattern, a delightful and beginner-friendly project perfect for gifts or home decor touches.
I remember the first time I made a tiny, bright red bug with black spots out of yarn, it instantly cheered up my day. This delightful little project is a fun and easy crochet item known as the free crochet ladybug pattern. It’s perfect for anyone who loves cute and playful crochets, whether you want a decoration, a toy, or a small gift.
Cute Free Crochet Ladybug Pattern Step by Step
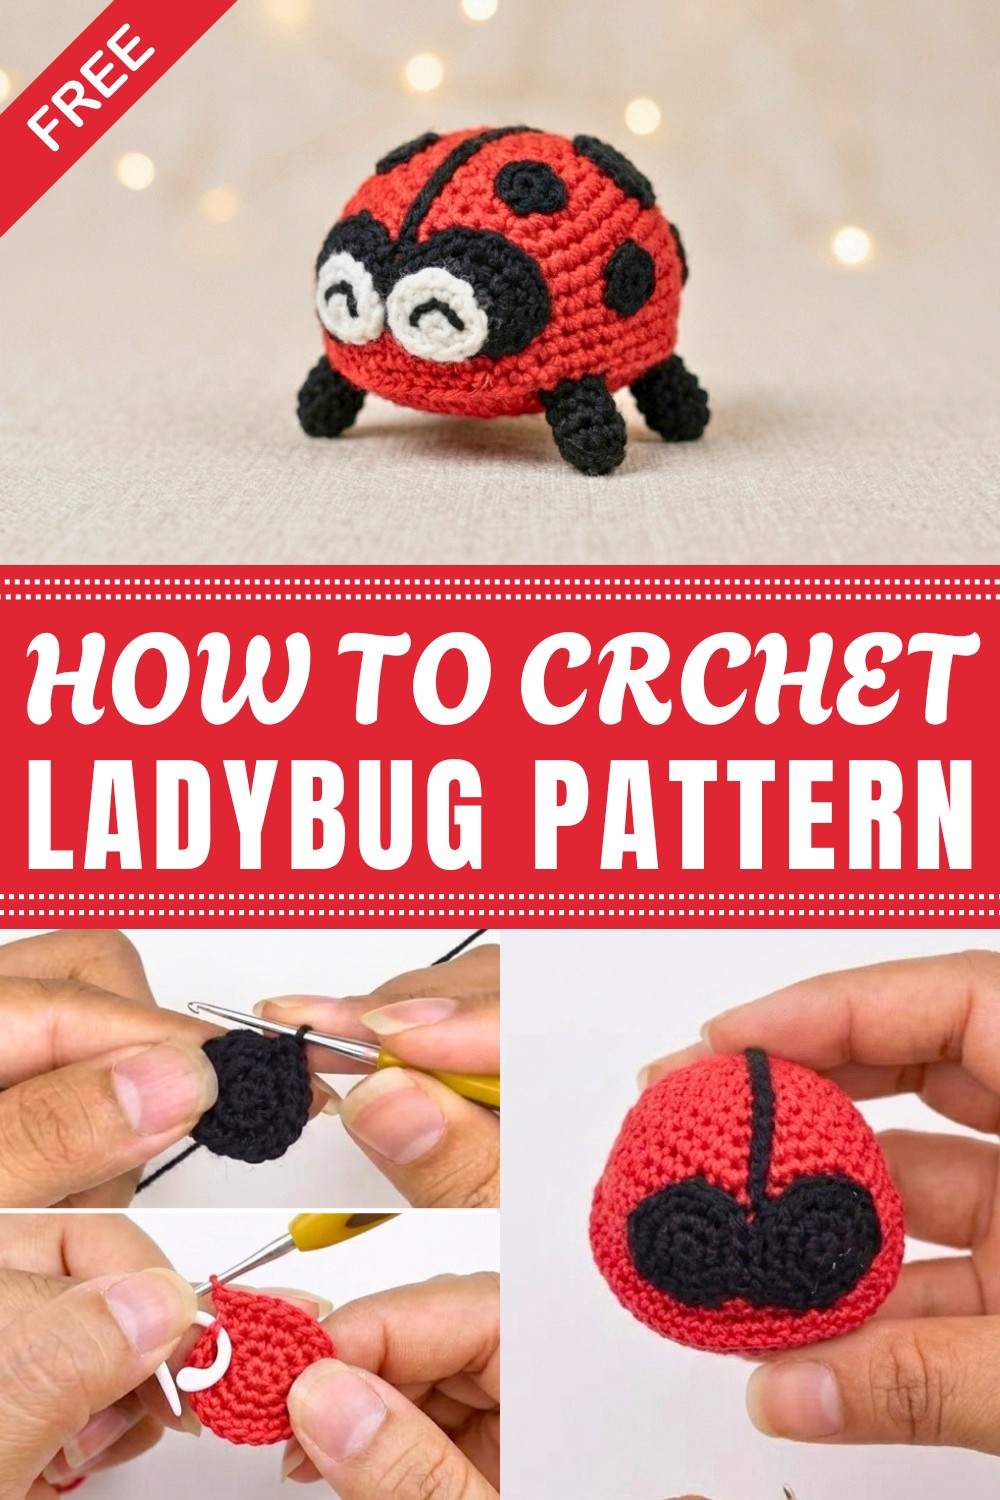
The ladybug crochet pattern is truly charming with its round shape and bold colors. Its smooth, soft texture makes it nice to hold, and the little black spots stand out on the bright red body, giving it a classic ladybug look. The overall style is simple but eye-catching, making it a wonderful piece to use as a keychain, fridge magnet, or even part of a larger crochet collection of insects or animals. Its compact size also makes it easy to display anywhere.
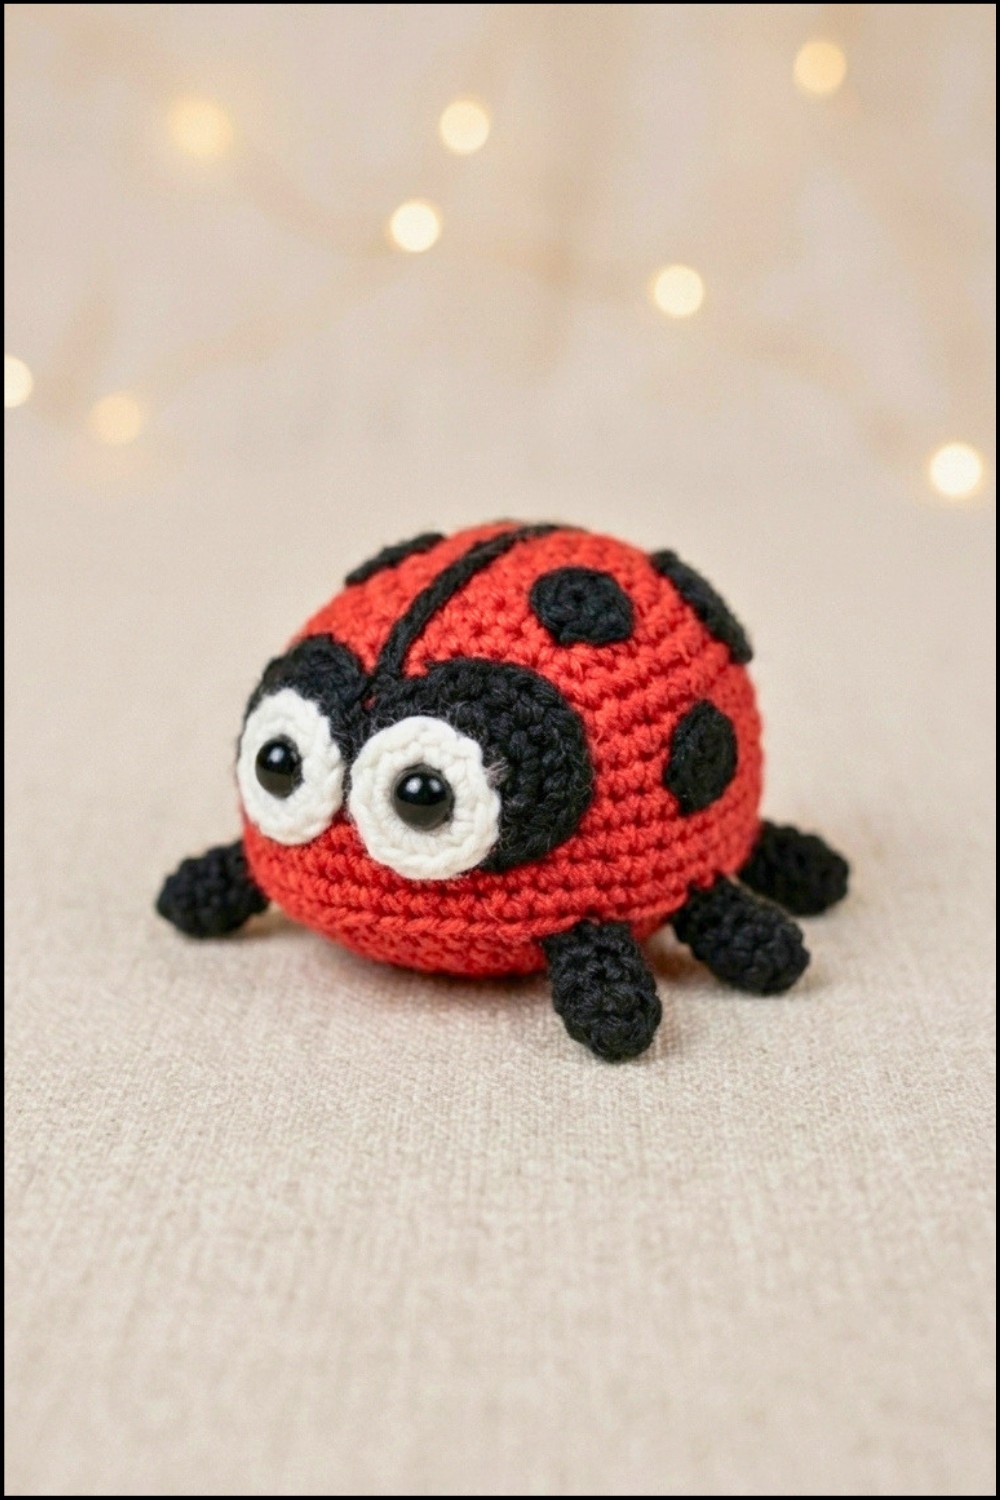
This project is great for beginners because it mostly uses the single crochet stitch, which is one of the easiest stitches to learn. You will also use simple increases and color changes to create the ladybug’s body and spots. These easy steps help you finish the project quickly while still making something very cute and neat.
Whether you want to gift it to a friend, use it as a cheerful decoration, or add a wearable charm to your bag, this crochet ladybug is a perfect little treasure. Its playful design and handmade feel make it a joyful project to crochet and enjoy every day.

Amigurumi Ladybug Pattern
This pattern will guide you step by step to create a classic ladybug—with a vibrant red shell, black spots, sweet little legs, and expressive eyes—using the traditional amigurumi technique.
Ideal as a toy, decorative piece, or gift, this ladybug is perfect for practicing your shaping, color changes, and all the fun details that make amigurumi truly magical.
Follow each round and assembly instruction, and you’ll have a lively ladybug companion in no time.
Pattern Basic Points
- Worked in continuous spirals using a stitch marker to keep track of rounds.
- Body and base made separately and then joined, creating a sturdy structure.
- Front loop only round for shell shaping contour.
- Eyes, legs, and spots created as separate appliqué pieces and attached for dimension and character.
- Light stuffing and cardboard base ensures stability.
- Glue and/or sewing used for secure attachment of small parts.
Special Notes
- Use a lap/stitch marker—pattern is worked continuously in spirals without joining rounds.
- Keep all increases and changes where indicated for accurate results.
- For small parts (spots, legs, eyes) leave a tail for sewing, unless noted to glue.
- White and black yarn should have good contrast for maximum effect on the eyes and shell.
- If preferred, substitute felt for spots or use plastic safety eyes.
- Cut all yarn tails close and weave in securely.
- Take care with glue and pins for neat finishing.
Skill Level
Beginner-Intermediate — Ideal for those with basic knowledge of amigurumi:
working in the round, increases, using a magic ring/circle, sewing pieces, and a little patience with small shapes.
Materials
- Yarn: Red, black, white (amigurumi weight/cotton recommended)
- Crochet hook (size to fit yarn, such as 2.5–3mm)
- Stitch marker or scrap yarn
- Yarn needle (tapestry needle)
- Pins
- Synthetic stuffing/polyester fiberfill
- Cardboard (for base support)
- Scissors
- Glue (craft/fabric glue, for spots and eyes)
Measurements / Sizing
- Finished ladybug measures approximately 8–12cm long (depending on yarn/hook and tension).
- Adjust size by using different yarn weights/hooks.
Gauge
Gauge is not critical, but keep stitches tight to prevent stuffing from showing through.
Stitch Abbreviations
| Abbreviation | Stitch Name |
|---|---|
| MR | Magic Ring |
| sc | single crochet |
| inc | increase (2 sc in same stitch) |
| sl st | slip stitch |
| ch | chain |
| st(s) | stitch(es) |
| FO | fasten off |
Special Stitches
- Magic Ring (MR): Wrap yarn in a circle, work stitches into center hole for a firm, closed start.
- Increase (inc): Make 2 sc in the same st.
- Front Loop Only: Insert hook in only the front loop (nearest you) of the stitch as instructed, for shaping.
Body (Red Shell)
Work in red.
- Round 1:
Make a magic ring, work 6 sc in MR. (6) - Round 2:
inc in each st (6 times) – (12) - Round 3:
(1 sc, 1 inc) around (Repeat: 6 times) – (18) - Round 4:
(2 sc, 1 inc) around (Repeat: 6 times) – (24) - Round 5:
(3 sc, 1 inc) around (Repeat: 6 times) – (30) - Round 6:
(4 sc, 1 inc) around (Repeat: 6 times) – (36) - Round 7:
(5 sc, 1 inc) around (Repeat: 6 times) – (42) - Rounds 8–12:
sc in each st (42) - Round 13:
(6 sc, 1 inc in front loop only) around (Repeat: 6 times) – (48)
(Work in FLO only for this round to make a shaping edge. You will see a ridge formed by the unused back loops.) - Rounds 14–15:
sc in each st (48)
(Finish after round 15 with a sl st, ch 1, and cut yarn leaving a long tail for sewing.)
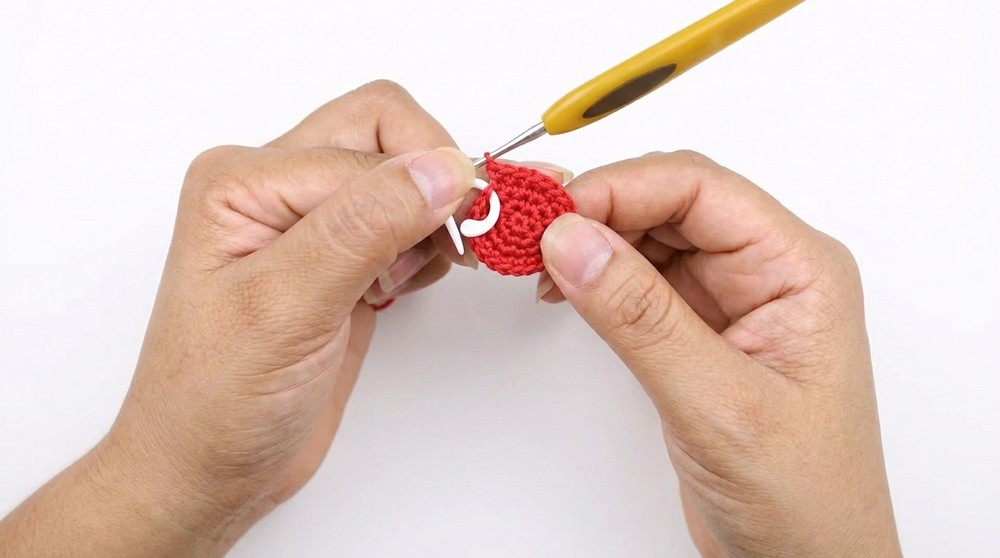
Base
Work in red.
- Round 1:
MR, 6 sc in center. (6) - Round 2:
(inc in each st) around (12) - Round 3:
(1 sc, 1 inc) around (18) - Round 4:
(2 sc, 1 inc) around (24) - Round 5:
(3 sc, 1 inc) around (30) - Round 6:
(4 sc, 1 inc) around (36) - Round 7:
(5 sc, 1 inc) around (42) - Finish with sl st, ch 1, cut a long sewing tail.
Cardboard Insert (for support)
- Trace the finished base onto a piece of stiff cardboard.
- Cut out the circle (slightly smaller than your crocheted base so it fits securely inside, but does not extend to the edges or distort shape).
- Glue the cardboard to the wrong side (inside) of the base. (Let dry before assembling.)
Legs (make 4 in black)
- Round 1:
MR, 6 sc in magic ring (6) - Rounds 2–6:
sc in each st (6) - FO. (Leave a tail for sewing.)
(Do not stuff.)

Eyes
Black part (Make 2):
- Round 1:
MR, 6 sc in magic ring (6) - Round 2:
(inc in each st – 6 times) (12) - Round 3:
(1 sc, 1 inc) around (18) - FO.
White part (Make 2):
- Round 1:
MR, 6 sc in magic ring (6) - Round 2:
(1 sc, 1 inc) around (9) - FO. (Leave a short tail—these will be glued on over the black circles.)
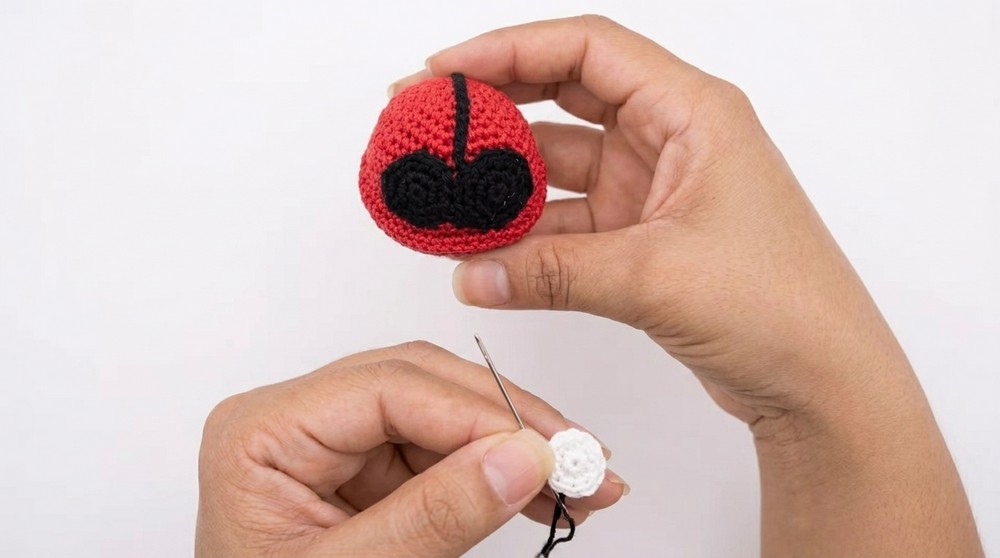
Black Spots
Large Spots (Make 2):
- Round 1:
MR, 6 sc in magic ring (6) - Round 2:
(inc in each st) around (12) - FO.
Small Spots (Make 4):
- Round 1:
MR, 6 sc in magic ring (6) - sl st to the first sc, FO. (Leave a short tail, these will be glued.)
Assembly & Finishing
- Stuff the Body:
Fill the shell with stuffing but not too firmly—leave space for the base and flattening. - Sew on Base:
Place the cardboard-backed base on the open side of the shell, pin in place.
Using the remaining long tail from the body, whip stitch the shell to the base through the front loops left from round 13. Stuff a bit more if needed before fully closing. Secure and weave in end. - Sculpt the Curve:
Thread a yarn needle with body yarn and run the thread through the foundation (magic ring) at the top and catch the inside of the shell, pull gently to curve the shell over the base. Knot and hide the tail inside. - Stripe Down the Back:
With black yarn, ch a length (about the length from the top of the ladybug to bottom, enough to reach from one edge to the other). Test fit the chain and fasten off. Using glue, attach the chain in a line exactly down the center of the back. Secure with stitches at both ends for durability if desired. - Eyes:
Use pins to mark position; sew or glue black circles to the front of the head, then glue white circles on black for the “shine” position. - Legs:
Pin and sew two legs to each side, one closer to the front, one further back. Flatten and shape as you sew. - Spots:
Use glue to attach the 2 large spots on the back end of the shell (one each side), and 2 small spots near the head and 2 more lower on the back, for a total of 6 spots. - Finishing Touches:
Check all attachments are secure, adjust shaping, and trim any loose threads. Allow all glue to dry before handling.
Conclusion
With its bright shell, dimensional spots, and whimsical eyes, this little ladybug is sure to bring a smile to all ages. This pattern lets you practice the essential amigurumi skills, shaping, working in the round, assembling and even includes fun flourishes like the shell stripe and eyes.


Leave a Reply