

Lovely and fun Crochet Santa Claus adds warmth and festive charm to your holidays with easy steps to make a cozy decoration for your home.
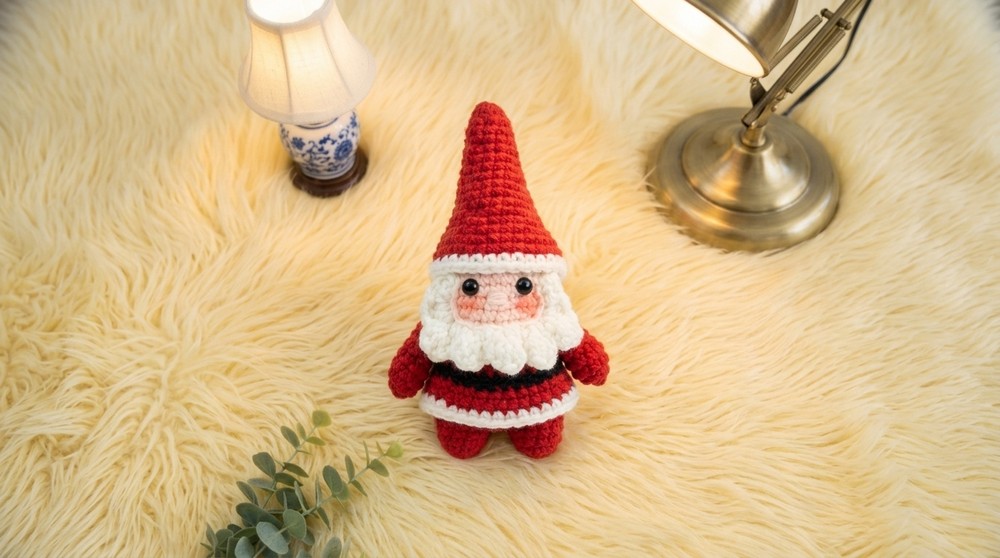
Holiday decorations are fun and warm. One nice decoration is the Crochet Santa Claus. It is a small, soft Santa made with yarn. It looks like a little Santa with a red hat, white beard, and a round belly. The face usually has a smile and bright eyes, making it look friendly and happy.
Adorable Crochet Santa Claus Free Pattern to Brighten Your Christmas Décor
The colors are bright and clear. Red is used for the hat and clothes. White is for the beard and hat edge. Black is for the boots and belt. Sometimes, green or gold adds extra color. The yarn is soft, which makes the Santa feel cozy. It is also safe for children to hold or play with.
Crochet Santa Claus is light and small. You can put it on shelves, tables, or hang it on the Christmas tree. Making or having this small Santa can be calming and fun. It is good for beginners and anyone who likes yarn work.

This little Santa can also be a nice gift. It shows you care because time and effort go into the work. The yarn is strong, so the Santa lasts a long time and can be used every year.
In short, Crochet Santa Claus is a colorful, friendly decoration. It is easy to have and adds joy to your home during holidays.
Santa Claus Holiday Mascot Amigurumi
Celebrate the holidays by crocheting your own adorable Santa Claus amigurumi! This easy-to-follow tutorial guides you step by step in creating a festive, miniature Santa with classic features and a removable hat. Perfect for gifts or home decor, this project brings cheerful holiday spirit to your handmade creations.
__________________________________________________________________________________________________________________________
Quick Overview Of Pattern
-
Project Structure: Worked in individual pieces (Legs/Body/Head continuously, Skirt Trim, Arms, Hat, and Beard) and assembled together.
-
Construction Style: Amigurumi style using single crochet rounds with color changes for the belt, skin tones, and white trims.
-
Fit & Silhouette: Standalone miniature Santa doll figure with a removable cone-shaped hat.
Notes
-
The project starts from the feet up to the head in one continuous continuous body piece.
-
Color shifts mark the transition between the boots/pants (red), belt (black), suit (red), face (skin tone), and trim details (white).
-
Use a yarn needle to hide remaining thread ends seamlessly inside the stuffed body.
__________________________________________________________________________________________________________________________
Skill Level
-
Intermediate: Requires basic amigurumi skills, color transitions, working into back/front loops, and simple piece joining.
__________________________________________________________________________________________________________________________
Materials
-
Yarn: Red, Skin Tone, Black, and White yarn
-
Crochet Hook: 2.5 mm size
-
Safety Eyes: Small to medium pair
-
Filling: Fiberfill stuffing
-
Notions: Tapestry/yarn needle, scissors, glue gun (optional for eyes/beard attachment)
__________________________________________________________________________________________________________________________
Measurements / Sizing
-
Height: Approximately 10–12 cm tall (including the removable hat).
__________________________________________________________________________________________________________________________
Gauge
-
Gauge: Not strictly critical for this project. Keep tension tight and consistent so fiberfill stuffing does not show through the stitches.
__________________________________________________________________________________________________________________________
Stitch Abbreviations
-
Magic Ring (MR): Magic Ring / Magic Circle
-
ch: Chain
-
sl st: Slip stitch
-
sc: Single crochet
-
hdc: Half double crochet
-
dc: Double crochet
-
tr: Treble (double triple) crochet
-
inc: Increase (2 single crochet in the same stitch)
-
dec: Decrease (single crochet 2 together, front loops preferred)
-
BLO: Back loop only
-
FLO: Front loop only
__________________________________________________________________________________________________________________________
Instructions
__________________________________________________________________________________________________________________________
Section 1: Legs and Continuous Body / Head
(Start with Red Yarn)
-
First Leg:
-
Round 1: Work 5 sc into a MR. Sl st to join . (5 sts)
-
Round 2: Ch 1, inc in each of the 5 sts around. Sl st to join . (10 sts)
-
Rounds 3–4: Ch 1, sc in each stitch around (10 sc per round). Sl st to join . Fasten off red yarn for the first leg .
-
-
Second Leg:
-
Repeat Rounds 1–5 same as the first leg, but do not cut the yarn at the end of Round 5
-
-
Joining Legs & Main Body:
-
Round 1: Ch 2 from the second leg, join to the first leg with a sc .
-
- Sc 11 around the first leg, sc 2 along one side of the ch-2 bridge, sc 11 around the second leg, sc 2 along the remaining loops of the ch-2 bridge . Sl st to join. (26 sts)
- Round 2: Ch 1, sc in the first 5 sts, inc in next st, sc in next 12 sts, inc in next st, sc in remaining 7 sts. Sl st to join. (28 sts)
- Rounds 3–4: Ch 1, sc in all 28 sts across Sl st to join. (28 sts)
- Round 5: Switch to Black Yarn during the slip stitch finish. In BLO, ch 1, sc 28 across Sl st to join.
- Round 6: Switch to Red Yarn . In BLO, ch 1, sc 28 across . Sl st to join.
- Rounds 7–8: Working through both loops normally, ch 1, sc 28 across per round . Sl st to join.

_________________________________________________________________________________________________________________________
-
Head (Continuous Color Shift):
- Round 9: Switch to Skin Tone Yarn.
- In BLO, ch 1, sc 28 across . Sl st to join.
- Rounds 10–15: Ch 1, working through both loops, sc 28 across per round Sl st to join.
- Round 16: Ch 1, [sc 3, dec] 5 times, sc in remaining 3 sts . Sl st to join. (23 sts)
- Round 17: Ch 1, [sc 2, dec] 5 times, sc in remaining 3 sts . Sl st to join. (18 sts)
- Round 18: Ch 1, [sc 1, dec] 5 times, sc in remaining 3 sts . Sl st to join. (13 sts)
- Stuff the body and head firmly with fiberfill at this point .
Round 19: Ch 1, dec 6 times, sc 1 in remaining st Fasten off leaving a tail to weave through front loops and cinch closed ________________________________________________________________________________________________________________________
Section 2: Coat Skirt Trim
(Attach Red Yarn to the unworked front loops of Round 5 on the body)
-
Round 1: Join Red yarn, ch 1, sc in each of the 28 FLO stitches around. Sl st to join.
-
Round 2: Ch 1, [sc 3, inc] 7 times .
-
Sl st to join. (35 sts)
-
Round 3: Switch to White Yarn
-
Ch 1, sc in all 35 sts across
-
Sl st to join, fasten off, and weave in ends.

_________________________________________________________________________________________________________________________
Section 3: Arms (Make 2)
(Using Red Yarn throughout)
-
Round 1: Work 6 sc into a MR. Do not join (work continuously in spiral). (6 sts)
-
Round 2: [sc 1, inc] 3 times . (9 sts)
-
Rounds 3–4: Sc in each of the 9 sts around. (9 sts)
-
Round 5: dec 1, sc 7 (8 sts)
-
Round 6: Sc in all 8 sts around . (8 sts)
-
Round 7: dec 1, sc 6 . (7 sts)
Fasten off leaving a long tail for sewing to the torso _________________________________________________________________________________________________________________________
Section 4: Santa Hat
(Start with Red Yarn, working in a spiral)
-
Round 1: Work 6 sc into a MR . (6 sts)
-
Round 2: [sc 1, inc] 3 times . (9 sts)
-
Round 3: Sc in all 9 sts around . (9 sts)
-
Round 4: [sc 1, inc, sc 1] 3 times . (12 sts)
-
Round 5: Sc in all 12 sts around . (12 sts)
-
Round 6: [sc 3, inc] 3 times . (15 sts)
-
Round 7: Sc in all 15 sts around . (15 sts)
-
Round 8: [sc 2, inc, sc 2] 3 times . (18 sts)
-
Round 9: Sc in all 18 sts around . (18 sts)
-
Round 10: [sc 5, inc] 3 times . (21 sts)
-
Round 11: Sc in all 21 sts around (21 sts)
-
Round 12: [sc 3, inc, sc 3] 3 times (24 sts)
-
Round 13: Sc in all 24 sts around . (24 sts)
-
Round 14: [sc 7, inc] 3 times . (27 sts)
-
Round 15: [sc 4, inc, sc 4] 3 times . (30 sts)
-
Round 16: [sc 9, inc] 3 times . (33 sts)
-
Round 17: Sc in all 33 sts around (33 sts)
-
Round 18: Switch to White Yarn .
-
Sc in all 33 sts around
-
Sl st to join, fasten off, and weave in ends.
_______________________________________________________________________________________________________________
Section 5: Beard
(Using White Yarn)
-
Foundation Row: Chain 18.
-
Row 1: Skip first ch, sc 1 in second ch, hdc 1 in next ch, sl st 1 in next ch [Work 3 dc in next st, sl st 1 in next st] repeat this group 6 times total . Hdc 1 in next ch, sc 1 in final ch .
-
Row 2: Ch 1, turn. Sl st in first st, sl st 5 across next sts . Work 3 dc in next st, sl st 3 [. Work 3 dc in next st, sl st 3
-
Work 3 tr in next st, sl st 3 . Work 3 dc in next st, sl st 3 . Work 3 dc in next st, sl st in remaining 7 sts . Fasten off
_________________________________________________________________________________________________________________________
Assembly & Finished Size
-
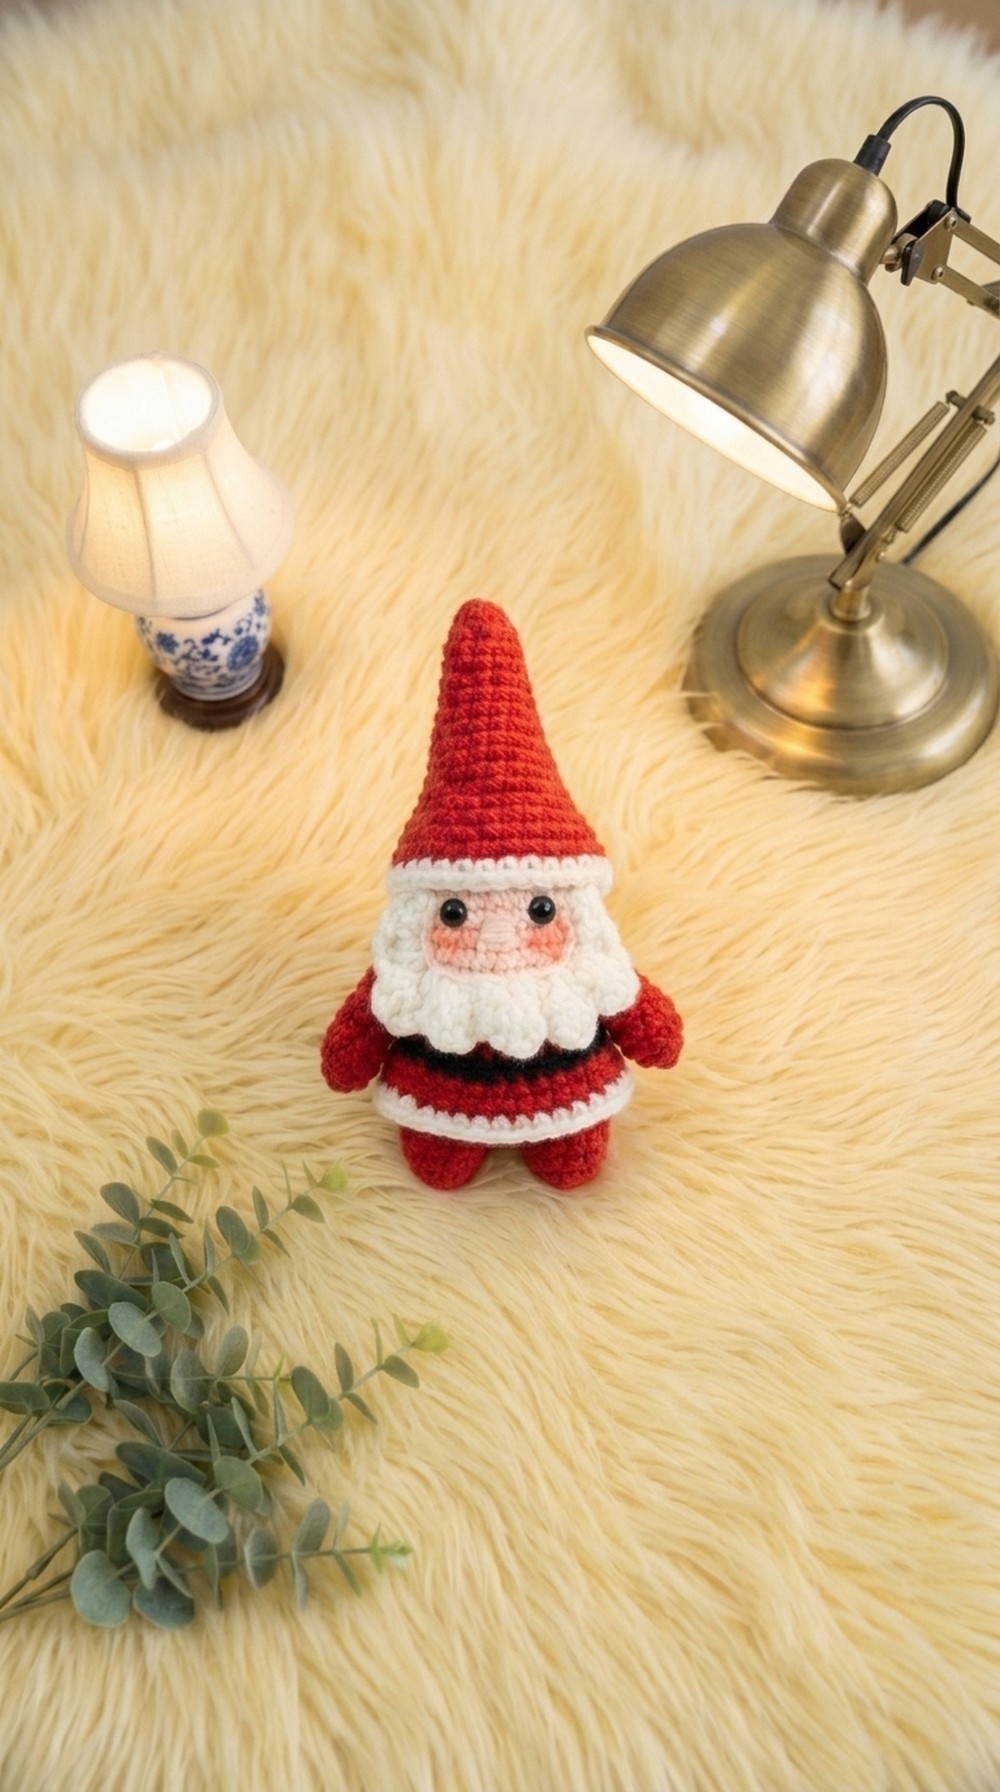
Arms: Thread yarn tail onto tapestry needle and stitch both arms securely onto the upper sides of the body
-
Beard: Position the curved beard piece centered onto the lower half of the head/face area. Sew or fabric-glue into place
-
Nose: Embroider a small nose using Skin Tone yarn right above the beard center by taking a few horizontal stitches .
-
Eyes: Insert or hot-glue safety eyes on either side of the embroidered nose
-
Hat: Place the completed Santa hat atop the head

_________________________________________________________________________________________________________________________
Conclusion and ending words
Your complete Santa Claus amigurumi figure is now fully assembled and finished! Place his cute tall hat on top to complete this festive holiday keepsake.



Leave a Reply