

Celebrate the season with a free crochet Christmas wreath pattern that brings festive charm and warmth to your home décor this holiday season.
Bringing festive cheer to your home can be both fun and fulfilling, especially when your decorations carry a personal touch. The Free Crochet Christmas Wreath pattern is a delightful project that transforms simple materials into a charming holiday accent perfect for decorating doors, walls, or windows during the festive season. This wreath’s warm, welcoming style adds joy and color to any space, making it ideal for Christmas celebrations and winter holiday gatherings.
Simple Free Crochet Christmas Wreath Pattern | Perfect for Seasonal Decor
The design beautifully balances classic holiday charm with a cozy, handcrafted feel. Its circular shape is filled with evenly spaced crochet stitches that create a rich texture, inviting both admiration and a sense of warmth. Accents such as small bells, colorful stones, or beads can be added, enhancing its festive sparkle and making it a standout piece in your holiday decor.
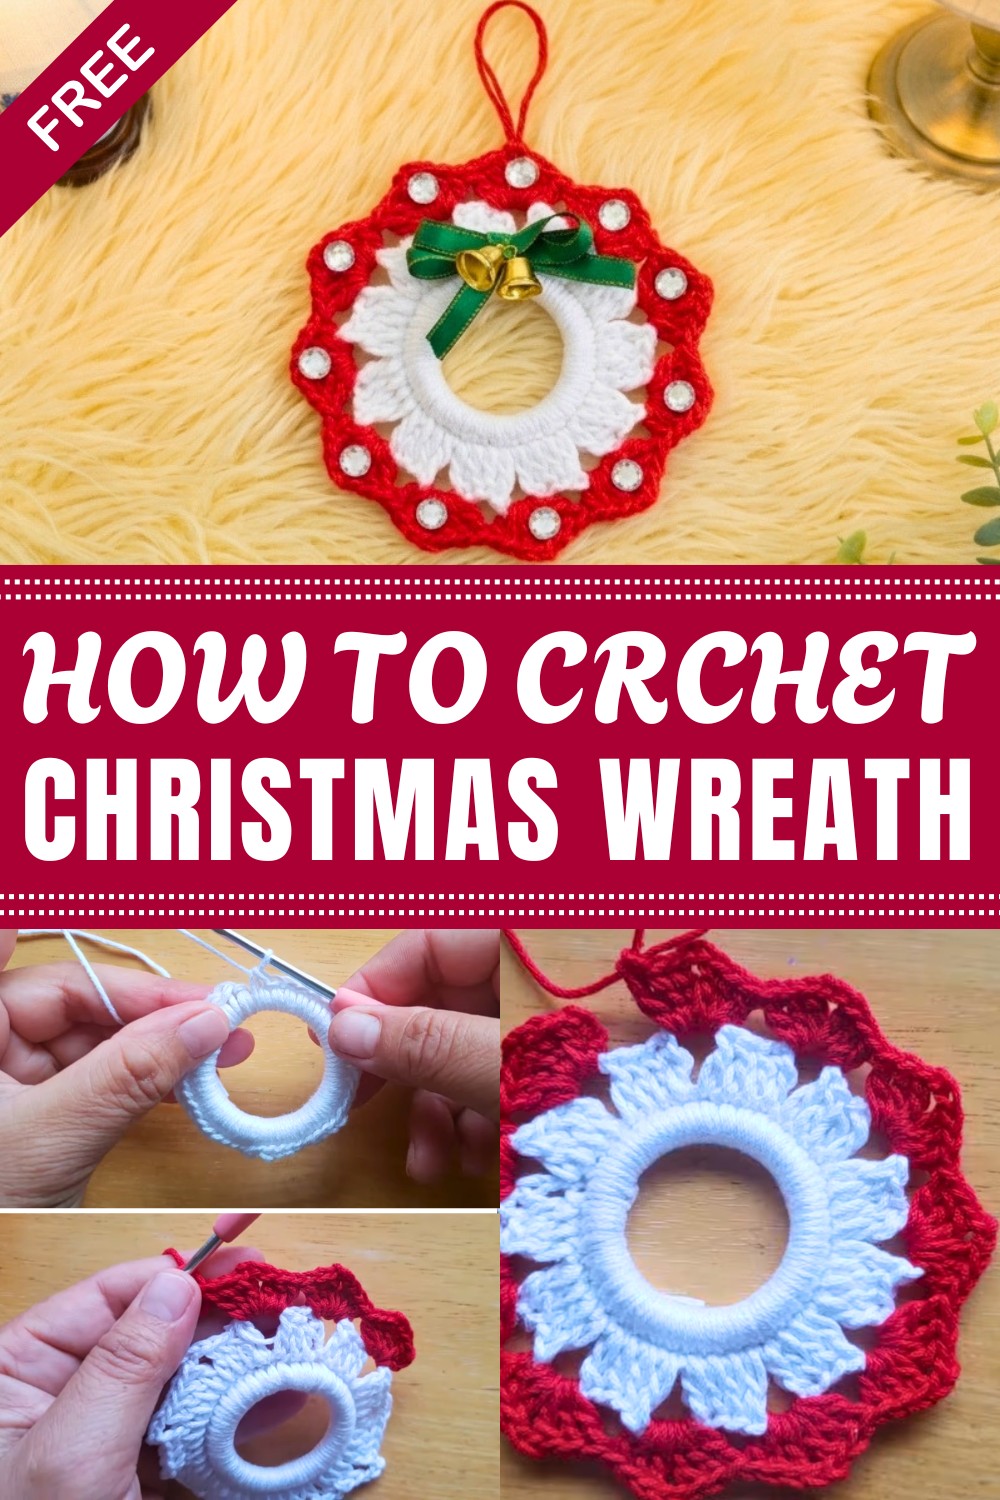
Texture plays a big role in this wreath’s appeal — a mix of single and double crochet stitches crafts a sturdy yet soft fabric that holds its shape well. The interplay of closely worked stitches and open spaces adds depth and dimension, capturing light and shadow in a subtle way. The use of a plastic ring base provides structure, ensuring durability and ease of hanging.
Perfect for gifting or personal use, this wreath allows endless customization—whether through different yarn colors or embellishments—so you can tailor it to your holiday style. This approachable project invites creativity while delivering a joyful touch to your seasonal celebrations.
Mini Christmas Wreath Crochet Pattern
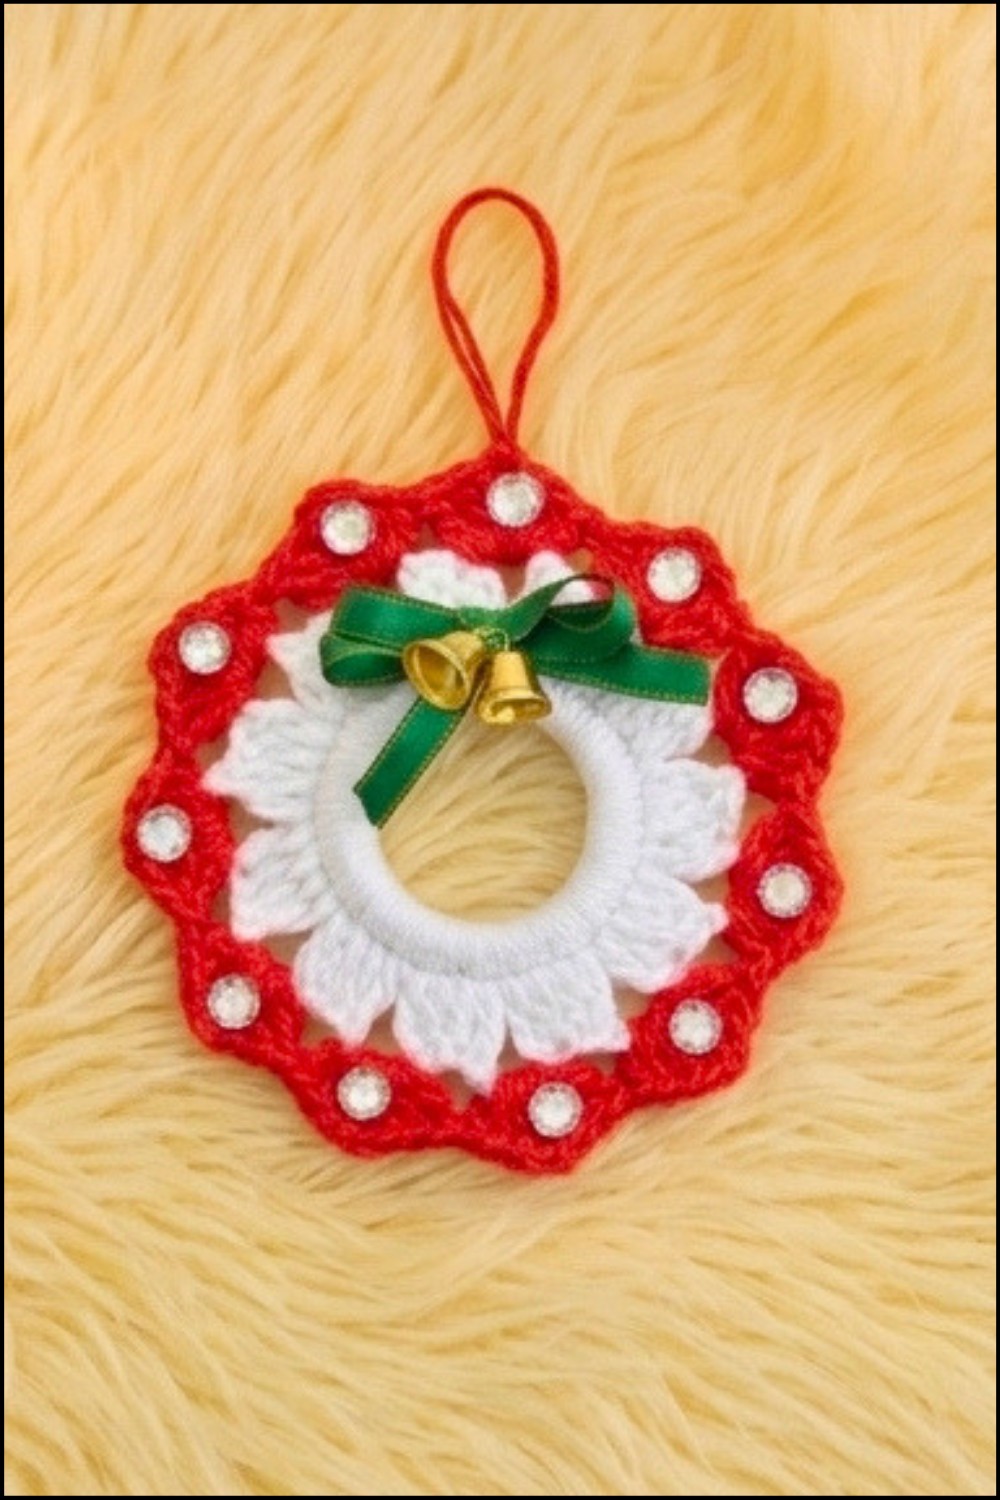
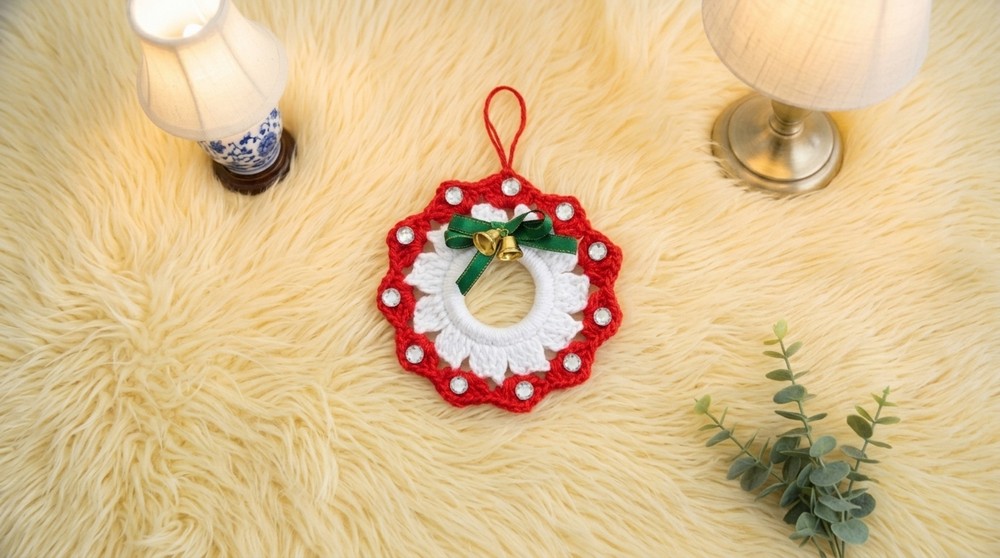
This mini Christmas wreath is a charming handmade decoration perfect for the holiday season. With a simple circular base adorned with crochet stitches in festive colors, a ribbon bow, bells, and beads, it makes an excellent tree ornament or decorative piece for your home. The small size makes it manageable for quick crafting and allows for creative experimentation with colors and textures.
Skill Level
This pattern is suitable for beginners, requiring basic crochet stitches and simple decoration techniques.
Materials
- Plastic Base:
- A small plastic ring (approximately 5 cm in diameter).
- Yarn:
- Festive yarn colors (e.g., green, red, white) — Sinfonía brand was used in the original design.
- Crochet Hook:
- Use a size of crochet hook appropriate for your chosen yarn (commonly 3.0 mm - 3.5 mm for this project).
- Accessories:
- Ribbon: To create the bow.
- Small Bells (2): For embellishment.
- Decorative Beads or Sequins: To add sparkle.
- Adhesive: White glue or clear liquid silicone for attaching decorative beads.
- Needle and Thread: For securing the bow and bells.
- Tools:
- Scissors for trimming yarn.
Special Stitches Used
- Chain (CH):
- Yarn over and pull through the loop on the hook.
- Slip Stitch (SL ST):
- Insert the hook into a stitch, yarn over, pull through the stitch and loop on the hook in one motion.
- Single Crochet (SC):
- Insert hook into the stitch, yarn over and pull up a loop. Yarn over again and pull through both loops.
- Half-Double Crochet (HDC):
- Yarn over, insert the hook into the stitch, yarn over and pull up a loop. Yarn over and pull through all three loops on the hook.
- Double Crochet (DC):
- Yarn over, insert the hook into the stitch, yarn over and pull up a loop. Yarn over and pull through the first two loops, yarn over again and pull through the remaining two loops.
Stitch Abbreviations
- CH: Chain
- SC: Single Crochet
- HDC: Half-Double Crochet
- DC: Double Crochet
- SL ST: Slip Stitch
Useful Tips
- Smooth Yarn Placement: To create a neat foundation, ensure the yarn is evenly spaced as you cover the plastic ring with single crochets or half-double crochets.
- Choosing Decorations: Select beads, sequins, or small ornaments that complement your yarn colors for a cohesive look.
- Securing Decorations: Use liquid silicone or glue that dries clear for neat finishes. Let each decorative element dry completely before handling the wreath.
- Customization: Switch yarn colors for unique designs or use metallic ribbons for extra festive sparkle.
- Stiffening: For more structure, dip the finished wreath into a glue-and-water mixture. Ensure complete drying before displaying.
Pattern Instructions
1. Foundation
Round 1:
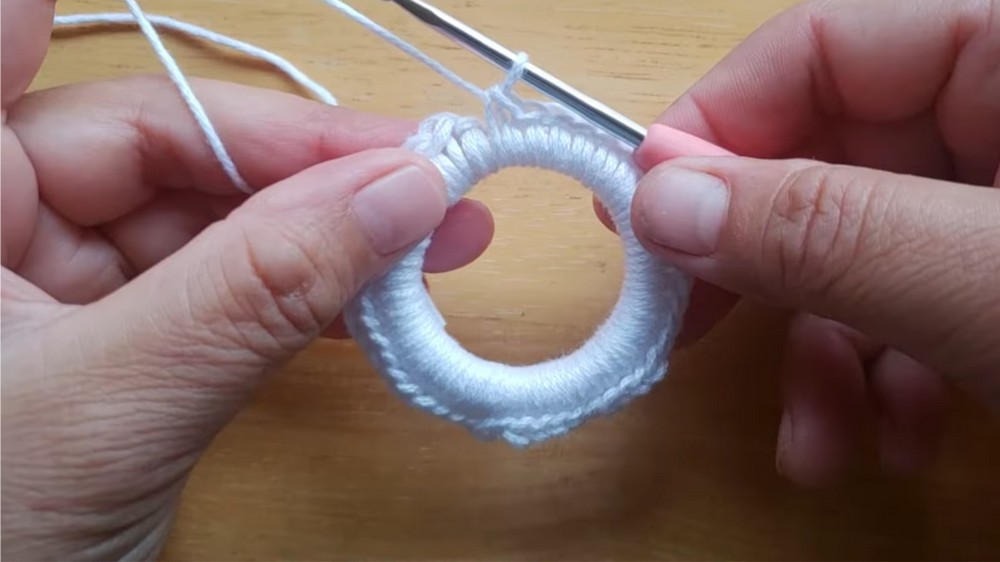
- Attach your yarn to the plastic ring using a slip knot.
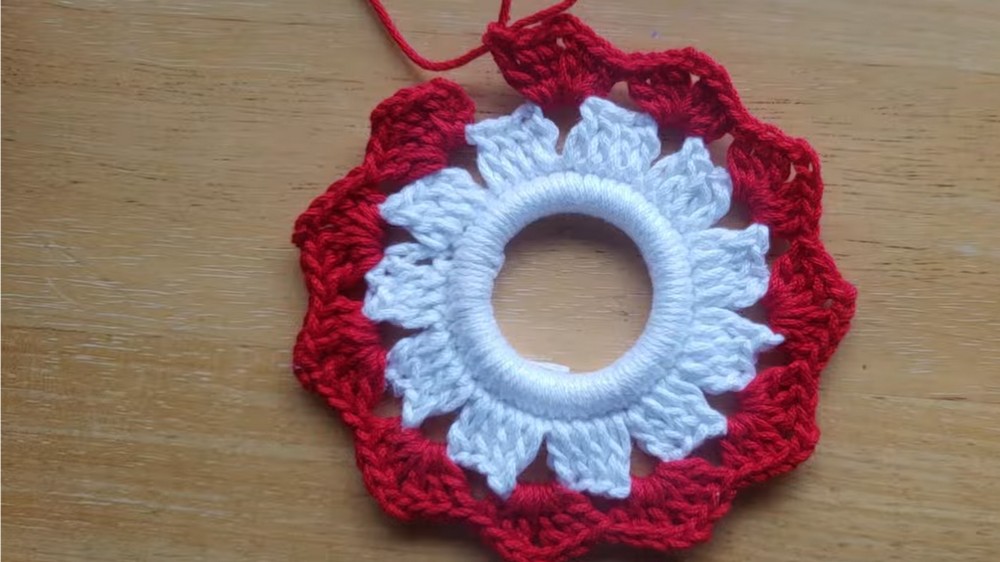
- Work 44 single crochets (SC) or half-double crochets (HDC) evenly around the ring to completely cover it.
- Ensure the stitches are snug and evenly positioned to hide the plastic base.
- Finish the round by joining with a SL ST into the first stitch.
2. First Round of Stitches
Round 2:
- CH 3 (counts as the first DC).
- In the next space around the ring, work 4 DC stitches, then CH 3 to separate.
- Work 4 more DC stitches in the next space around the ring.
- Repeat this pattern of 4 DC stitches, CH 3 in each space until the ring is fully covered.
- Finish the round by joining with a SL ST into the first CH-3.
3. Second Round of Stitches
Round 3:
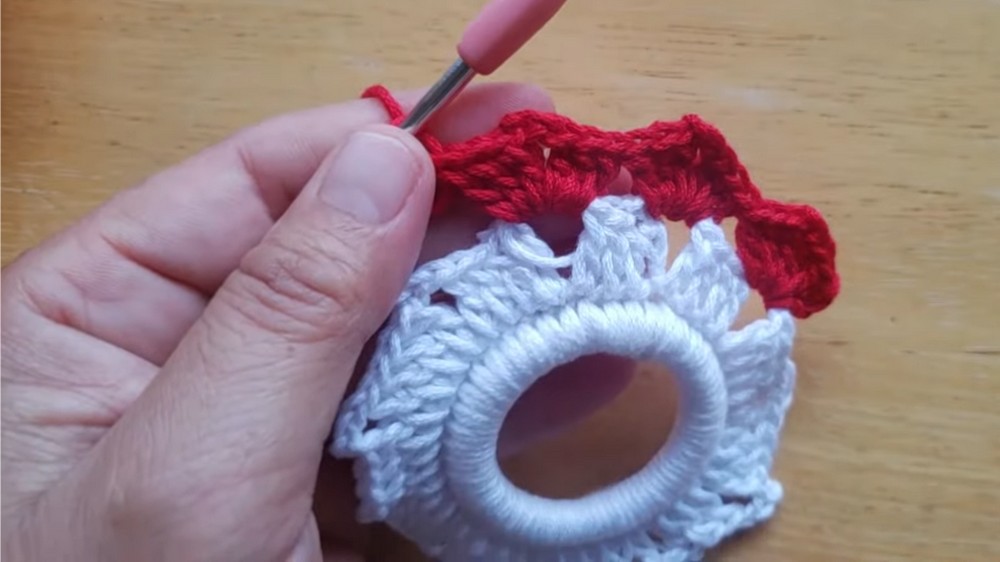
- Switch to your second color of yarn for this round.
- In each space created by the CH-3 separations from the previous round, work the following pattern:
- 3 DC stitches, CH 2, 3 DC stitches (all into the same space).
- Repeat this stitch sequence around the entire wreath.
- Finish the round with a SL ST into the first stitch.
4. Decorating
Step 1:
- Choose your decorative beads or sequins, ensuring they fit proportionally to the wreath size.
- Attach the beads/sequins evenly to the wreath using white glue or clear liquid silicone.
- Be sure to let the adhesive dry completely before proceeding.
5. Adding the Bow and Bells
Step 2:
- Form a bow using your ribbon. Adjust the size so it complements the wreath without overpowering it.
- Use a needle and thread to securely sew the bow onto the top of the wreath.
- Attach two small bells beneath the bow using the same needle and thread. Ensure they are firmly fastened.
6. Finishing
Step 3:
- Create a loop at the top of the wreath using a small piece of yarn or ribbon.
- Securely tie the ends to form a hanger for your Christmas tree or other displays.
Optional Step: Stiffening
If you prefer a sturdier texture, the creator suggests dipping the finished wreath into a mixture of white glue and a small amount of water. This will help keep the wreath and its decorative elements firm. Let the stiffened wreath dry completely before hanging or storing.
Conclusion
The mini Christmas wreath is a quick and festive project that allows for endless creativity and customization. Swap out yarn colors, try different ribbon styles, or embellish with unique decorations to create personalized holiday ornaments. This beautiful wreath is perfect for crafting in batches and spreading holiday cheer.


Leave a Reply