

Perk up Christmas corners through Free Crochet Reindeer Amigurumi Pattern and enjoy charming antlers, festive flair, and cozy character for displays.
A little handmade reindeer can make Christmas decorating feel more personal and fun. With its cute face, tiny antlers, and soft body, the Free Crochet Reindeer Amigurumi Pattern is a sweet project for anyone who loves making small holiday characters.
The finished reindeer has a cute, rounded body that gives it a soft and friendly look. Its little legs, ears, and antlers add plenty of character, while the small size makes it easy to hold and display. The stitched texture gives it that warm handmade feel that works so well with Christmas decorations.
You can place this tiny reindeer almost anywhere. Let it sit on a shelf, mantel, desk, bedside table, or Christmas display. It can also look adorable beside wrapped gifts or other holiday decorations. Its small size means it can add a festive touch without taking over the space.
Reindeer Amigurumi Free Crochet Pattern for Beginners
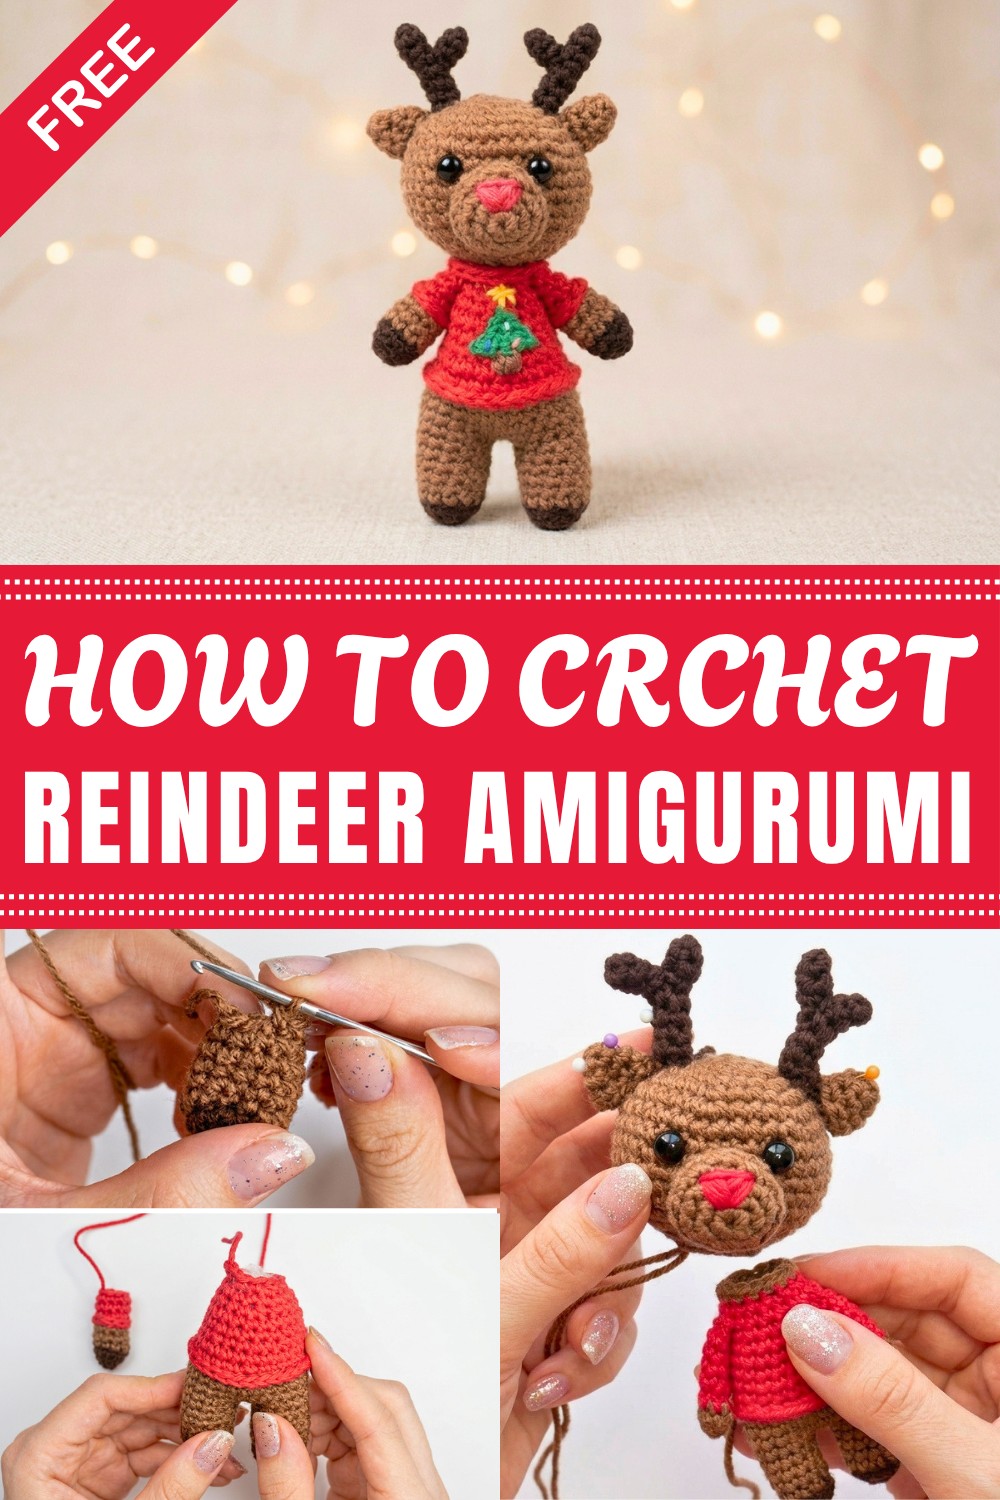
There is also lots of room for a personal touch. Brown yarn can give the reindeer a natural woodland look, while cream or light brown can make it look softer. A red nose can add a classic Christmas detail. You could also add a small scarf, bow, or colorful collar to give the character a style of its own.
This project is a nice match for crocheters who enjoy making amigurumi. Someone new to small crochet toys can use it to practice shaping, joining small parts, and adding simple facial details. More experienced makers can have fun changing the colors or adding extra decorations.
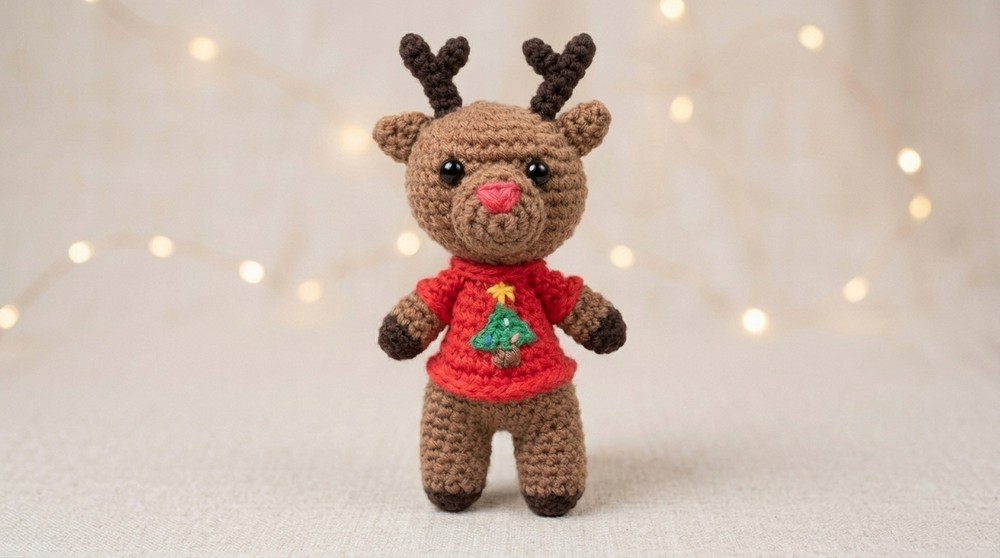
What makes this project especially lovely is its gift value. A handmade reindeer can be given to a child, friend, family member, teacher, or anyone who enjoys cute Christmas items. It can become a small keepsake that comes out every year when the holiday season begins.
Whether it sits among your decorations or becomes a special little gift, this reindeer adds a warm handmade feeling to Christmas. Its cheerful face and tiny details make it a charming piece to keep, display, and enjoy each winter.
Rudolph’s Friend Amigurumi Crochet Pattern
Welcome to this charming amigurumi pattern where you will create a delightful friend of Rudolph the reindeer! With clearly explained steps and color changes, this pattern guides you through crocheting a cute reindeer using basic techniques. This project uses single crochet (sc) stitches, increases, decreases, and simple assembly methods, suitable for beginners ready to advance their skills.
Quick Overview
- Crochet Rudolph’s friend from bottom up starting with legs
- Use dark brown, light brown, and red yarns for color variation
- Work mostly in single crochet (sc) rounds with increases (inc) and decreases (dec)
- Join body parts (feet, legs, arms, ears, and horns) seamlessly
- Add safety eyes and embroidered nose for detail
Notes
- Keeping consistent tension helps maintain shape and size
- Stitch markers are very helpful to mark round beginnings
- Change colors smoothly by pulling new yarn through last loops of stitches
- Stuff firmly but not overstuff to shape parts properly
- Use a yarn needle for joining and hiding ends neat and secure
Skill Level
Beginner to Intermediate:
- Knowledge of magic ring (mr), single crochet (sc), increase (inc) and decrease (dec)
- Comfortable with color changes and basic sewing
Materials
- Worsted weight yarn (approx. 2 mm thickness):
- Dark brown
- Light brown
- Red
- 2.1 mm crochet hook
- Stitch marker
- Yarn/Crochet needle
- Safety eyes - 8 mm diameter
- Polyester fiberfill stuffing
- Scissors
Size
- Finished amigurumi stands approximately 15 cm tall
Stitch Abbreviations
| Abbreviation | Meaning | Description |
|---|---|---|
| mr | Magic Ring | Adjustable ring to start a circle |
| ch | Chain | Yarn over, pull loop through |
| sc | Single Crochet | Insert hook, yarn over, pull through two loops |
| inc | Increase | 2 sc in same stitch |
| dec | Decrease | Crochet 2 stitches together |
| sl st | Slip Stitch | Join round or move stitch position |
The Crochet Pattern!
Body and Feet
Round 1: Magic Ring and First Stitches
- Using dark brown yarn, create a magic ring (mr)
- Crochet 6 single crochets (6 sc) into the ring
- Place a stitch marker in last stitch
Round 2: Increase Round
- Work 2 single crochets (2 sc) in each stitch around to double stitches — total 12 stitches
Round 3: Single Crochet Round
- Crochet 1 single crochet (1 sc) in each stitch around (12 stitches)
Round 4: Begin Color Change to Light Brown
- About 2-3 stitches before finishing Round 4, insert hook and pull through light brown yarn
- Chain 1
- Crochet 1 single crochet (1 sc) in each stitch around in light brown yarn
- Place stitch marker at end
Rounds 5-9: Continue with Light Brown
- Crochet 1 single crochet (1 sc) in each stitch around
- Complete 5 rounds in light brown
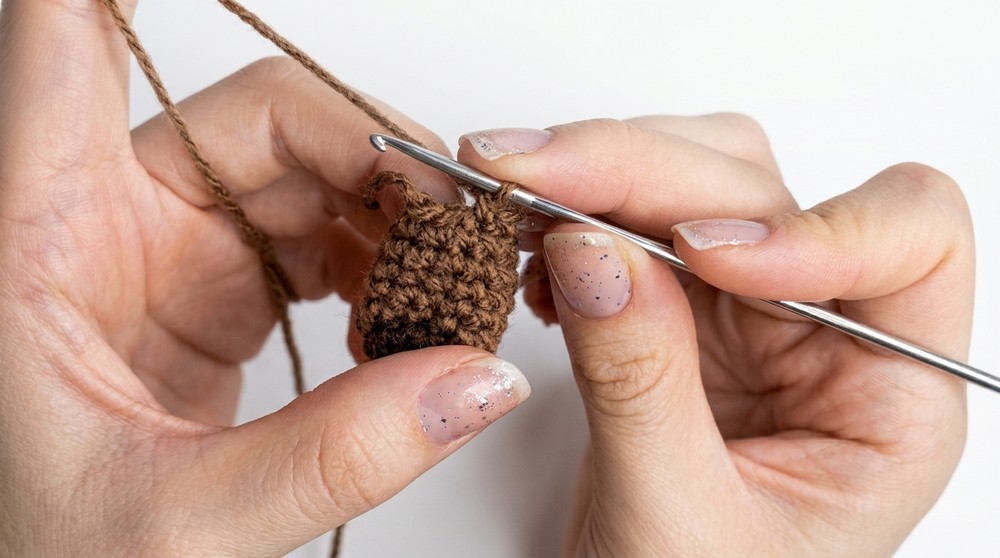
Make Second Foot
- Repeat Rounds 1-9 for second foot, but do not cut the yarn at the end
Join Feet and Body
- Chain 2
- Insert hook at any stitch on first foot, pull yarn through
- Crochet single crochets (sc) evenly around edges of both feet, including the chain space joining them
- Total stitches around should be approximately 28 stitches
- Place stitch marker at end of round
Rounds 10-13: Body Extension
- Crochet 1 single crochet (1 sc) in each stitch without increasing (28 stitches)
- Complete 4 rounds to build leg length
Round 14: Color Change to Red (Sweater Bottom)
- Insert red yarn 2-3 stitches prior to finishing round
- Chain 1
- Crochet 1 single crochet (1 sc) in each stitch for 3 rounds
Stuff Lower Body
- Stuff gently but firmly with fiberfill
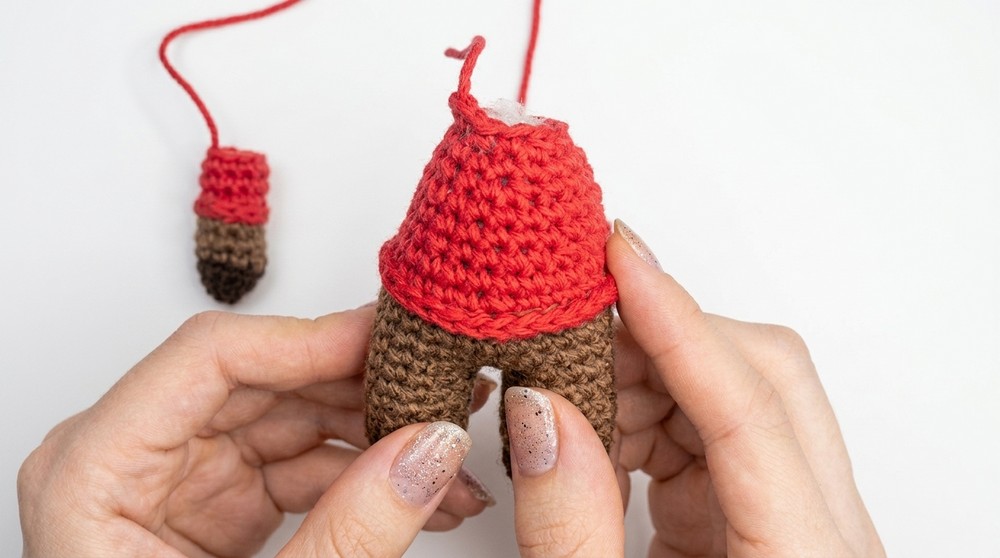
Rounds 15-19: Decreasing and Shaping Torso
- Round 15: 6 sc, then 1 decrease (dec) — repeat around
- Round 16: 6 sc, then 1 decrease (dec) — repeat around
- Continue decreasing similarly to shape torso and neck
- Add stuffing gradually during these rounds
Rounds 20-21: Neck Rounds
- Crochet 2 rounds single crochet (sc) without increasing or decreasing
Arms
Start Arms
- With dark brown yarn, make magic ring (mr)
- Crochet 6 single crochets (6 sc) inside ring
- Place stitch marker
Round 2: Increase Round
- Work 1 sc, then 1 inc repeatedly to end with 9 stitches
Round 3: Single Crochet Round
- Crochet 1 single crochet (1 sc) in each stitch around
Color Change to Light Brown
- Insert light brown yarn before finishing round
- Crochet 3 rounds 1 single crochet (1 sc) each in light brown yarn
Color Change to Red (Sleeve)
- Insert red yarn
- Crochet 3 rounds single crochet (sc) in red
Finish Arms
- Cut yarn leaving a long tail for sewing
- Stuff lightly before closing second arm same way
Ears
Start Ears
- Using light brown yarn, create magic ring (mr)
- Crochet 4 single crochets (4 sc) inside
Round 2: Increase Round
- Crochet 1 sc and 1 inc around to shape
Round 3:
- Crochet 1 round single crochet (sc) to form ear shape
Finish
- Cut yarn leaving tail
- Make two identical ears
Horns
Start Horns
- With dark brown yarn, make magic ring (mr)
- Crochet 4 single crochets (4 sc) into ring
Rounds 2-3:
- Crochet 2 rounds of single crochet (sc) stitches
- Keep stitches loose for shaping
Finish
- Cut yarn leaving tail for sewing
- Make two horns
Nose Embroidery
- Using red yarn and tapestry needle, embroider a small triangle-shaped nose between the eyes
- Use a “V” stitch:
- Insert needle inside base, come out to surface
- Sew “V” shape by making small tight stitches converging towards center
- Secure thread and weave tail inside
Decorative Sweater Edge
- Using red yarn, crochet single crochet (sc) evenly along sweater edge
- Work stitches through side-to-side loops to create a neat border
- Finish round and weave in ends carefully
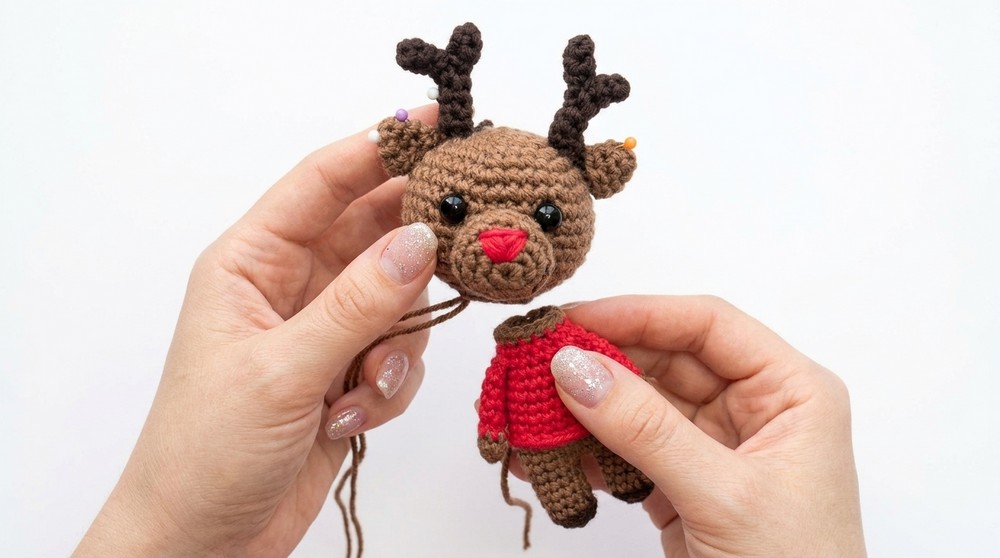
Assembly
- Attach safety eyes securely before stuffing head fully
- Sew head to torso, stretching fabric slightly for smooth fit
- Sew ears and horns to head with small tight stitches
- Sew arms to body at shoulder level, adjust to desired position
- Use small knots and hide ends by inserting yarn needle inside stuffing
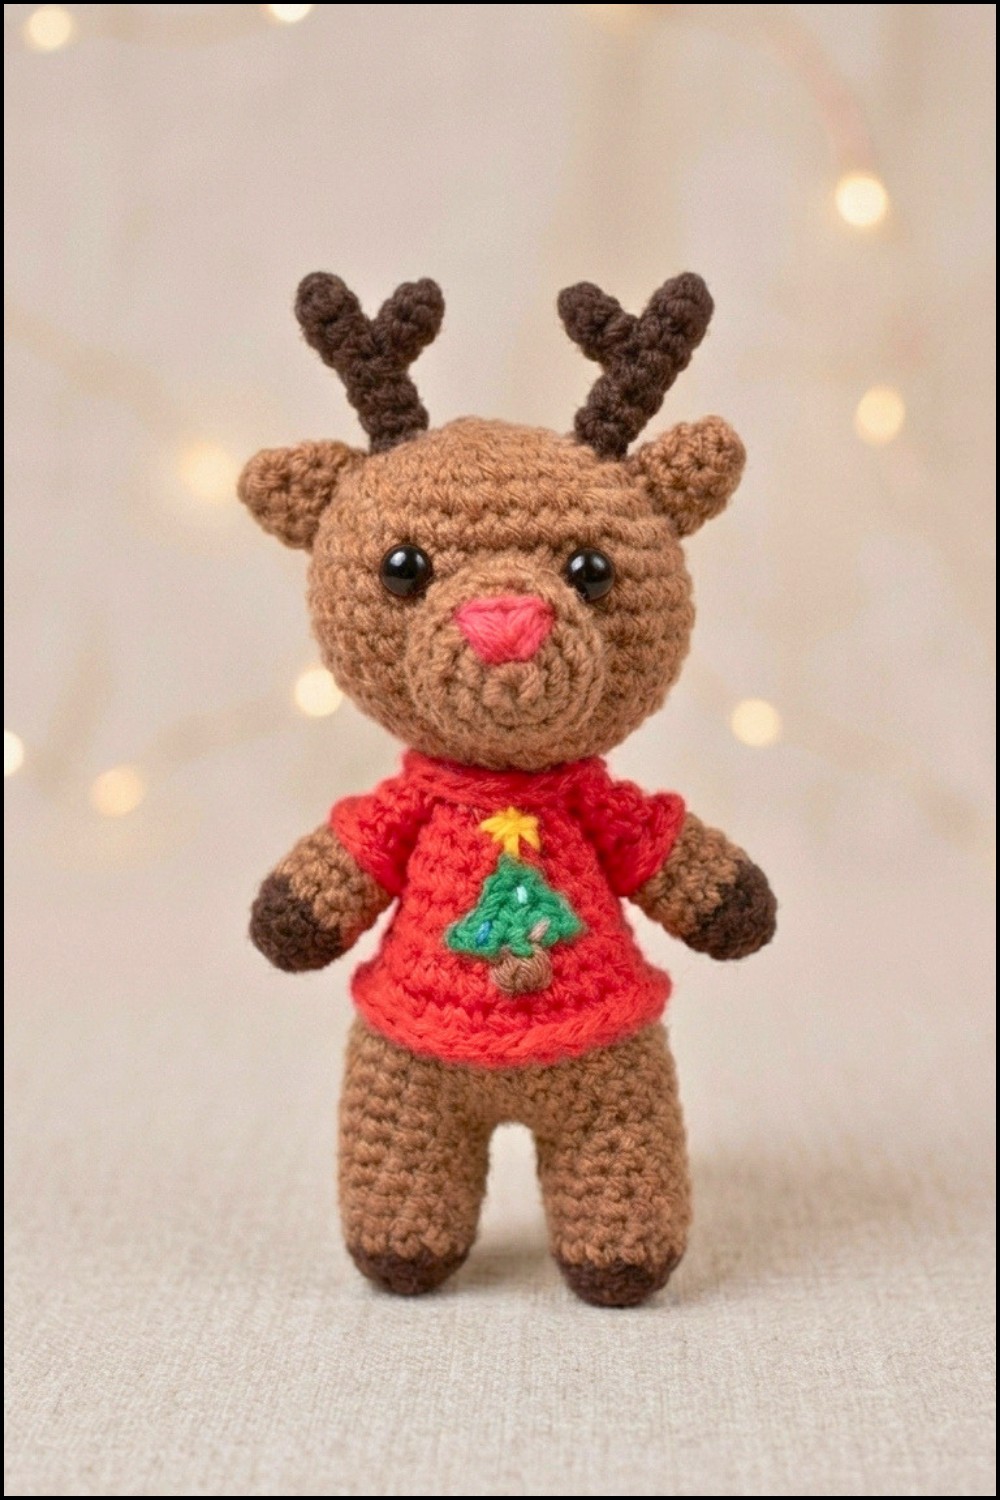
Finishing Touch: Tiny Christmas Tree
- Crochet a tiny green triangle with:
- Chain 2
- Single crochet 1 in first chain
- In next rows, increase stitches as a triangle
- Sew to the front center of sweater as festive embellishment
Final Size
- Completed reindeer friend stands approximately 15 cm tall
Conclusion
Congratulations on completing your Rudolph’s friend amigurumi! Using easy-to-follow rounds of single crochet (sc), thoughtful increases and decreases, and smooth color transitions, you have created a detailed and festive plush toy. This pattern is perfect for beginner crocheters seeking a joyful holiday project with room to practice shaping and assembly skills.

Leave a Reply