

Create your very own strawberry summer cardigan with this free crochet pattern featuring a V-neckline, puff sleeves, and step-by-step instructions for a stylish design.
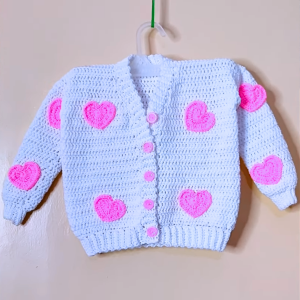
Crocheting a cozy and stylish cardigan has been such a fun and rewarding experience for me. I recently made a beautiful button-up cardigan with a V-neck and soft, slightly puffy sleeves that I love wearing. If you’re looking for a relaxed yet fashionable piece, this Free Crochet Cardigan Pattern might be just what you need. It’s a perfect way to add a handmade touch to your wardrobe or to gift someone special with a cozy, unique garment.
Easy Crochet Cardigan Pattern Free For Summer
This cardigan looks simple but has some lovely details that make it stand out. It has a lightweight and breathable texture thanks to the mix of solid double crochet rows and open square stitch rows, giving it a nice balance of warmth and airiness. The shape is gently flowing with raglan sleeves that have fitted cuffs, making it feel comfortable and flattering. The V-neckline adds a classic touch, and the buttons up the front make it super practical and stylish for everyday wear or even dressing up a bit. Overall, it’s a versatile piece you can wear in many different ways.
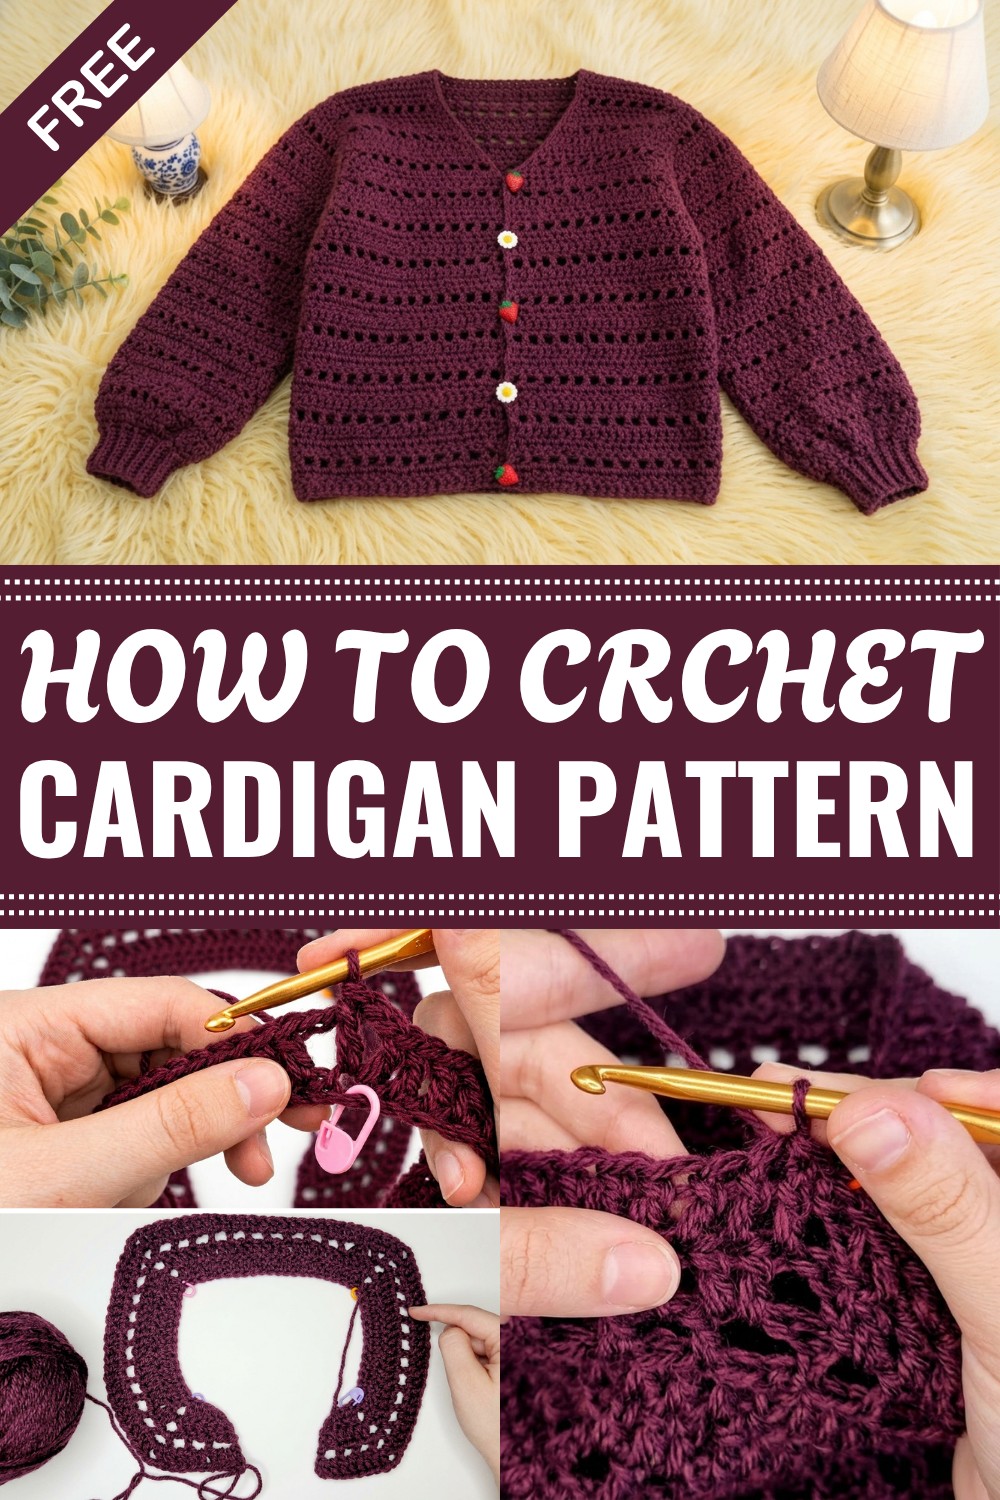
The cardigan is made from the top down, which means you start at the neckline and work your way down, adjusting the fit as you go. The pattern uses easy but effective crochet stitches like double crochet, chain stitches, increases to shape the V-neck, and decreases for the sleeve cuffs. It also uses slip stitches to finish off cleanly. Plus, with some small modifications, you could customize the cardigan into different styles like a sleeveless vest or a cropped jacket. This project is great for someone with an intermediate level of crochet skills, but beginners who are ready for a bit of a challenge can also give it a try, especially with the detailed instructions provided.

This cardigan is not just a pretty project, it’s practical and wearable, perfect for layering year-round. It also makes a heartfelt handmade gift someone will treasure. If you love making clothes that combine texture, fit, and style, this free crochet cardigan pattern is a wonderful choice. Take your time, enjoy the process, and you’ll end up with a warm, beautiful cardigan you can wear proudly.

Strawberry Summer Cardigan Crochet Pattern
Before You Start
- This pattern is a top-down, raglan-style V-neck cardigan designed for easy customization.
- You’ll work alternating rows of double crochet and mesh (square) stitch for texture.
- Sizing is flexible; you can adjust foundation chains and rows to fit.
- Pattern includes instructions for body, sleeves, cuffs, and button placement.
- Refer to pictures and try on as you work for the perfect fit.
Pattern Notes
- Increase stitches are always made at the raglan points (stitch markers) and the neckline during the yoke.
- Mesh “square” rows use a (dc, ch 1, skip 1) repeat.
- Double crochet rows are used for a structured body and easier button placement.
- Cuffs are made in single crochets, worked in the back loop for ribbing.
- Always use stitch markers to keep raglan increases even.
How I Made the Pattern
- Gathered inspiration and ideas from Pinterest, focusing on billowy sleeves and V-neck.
- Experimented with two textures: solid double crochet and mesh squares.
- Developed the raglan increases for easy shaping and fit.
- Tested in both pink and red yarn, adjusting for standard S/M sizing.
- Documented each step visually for user clarity.
Skill Level
- Easy – Confident beginners will master this quickly. If you know chain, double crochet, single crochet, and basic decrease (sc2tog), you’re ready.
Finished Size
- Small/Medium (customizable)
- Length: 20 inches (shoulder to hem)
- Width: 19–20 inches (buttoned/unbuttoned)
- Sleeve length: 23½” (before cuff), 25½” (with cuff)
Materials
- Worsted weight yarn (300–350g), Color: Plum wine
- Crochet hook size I (5.5mm)
- 4 stitch markers (or bobby pins)
- Scissors, yarn needle
- 5–6 large buttons (that fit through dc stitches)
Measurements/Sizing
- Foundation chain: 56 chains for S/M (about 15 inches)
- Raglan stitch markers: Place in the 3rd, 18th, 38th, and 53rd chains.
- Try on your yoke as you crochet; add/subtract rows for the perfect fit.
- Sleeve width/length can be adjusted by changing the number of rows or decreasing more/less for cuffs.
Gauge
- 12 double crochets and 6 rows = 4” square
- Check gauge before starting; adjust hook if needed.
Stitch Abbreviations
- ch: chain
- dc: double crochet
- sc: single crochet
- sl st: slip stitch
- st(s): stitch(es)
- rep: repeat
- dec: decrease (sc2tog)
Special Stitches
- Raglan Increase: (dc, ch 2, dc) all in same stitch/space.
- Mesh Square Row: (ch 1, skip 1, dc in next) across row.
- Decrease (sc2tog): [Insert hook in next st, yarn over, pull up loop] twice, yarn over, pull through all 3 loops.
- Back Loop Only (BLO): Single crochet only in back loop as shown.
The Pattern
Yoke (Top Down, Raglan Style)
- Chain 56 (S/M, adjust for other sizes).
- Place stitch markers in the 3rd, 18th, 38th, and 53rd chains.
Row 1 (Double Crochet with Increases):
- Chain 3 (counts as dc), dc in same st for V-neck increase.
- Double crochet across to first marker, (dc, ch 2, dc) in marker stitch.
- Continue dc to each marker; at each, work (dc, ch 2, dc).
- At last stitch, 2 dc for V-neck increase.

Rows 2–14:
- Double crochet row: Begin with chain 3, dc in same stitch (V-neck increase), dc to each ch-2 space at raglan points (work increase: dc, ch 2, dc), dc to end, 2 dc in last stitch.
- Mesh row: Chain 3 plus 1, skip 1, dc in next, ch 1 repeat. At raglan point do increase (dc, ch 2, dc). Finish with dc in last st.
- Alternate 2 double crochet rows and 1 mesh row until you have 14 rows or your yoke reaches underarms.
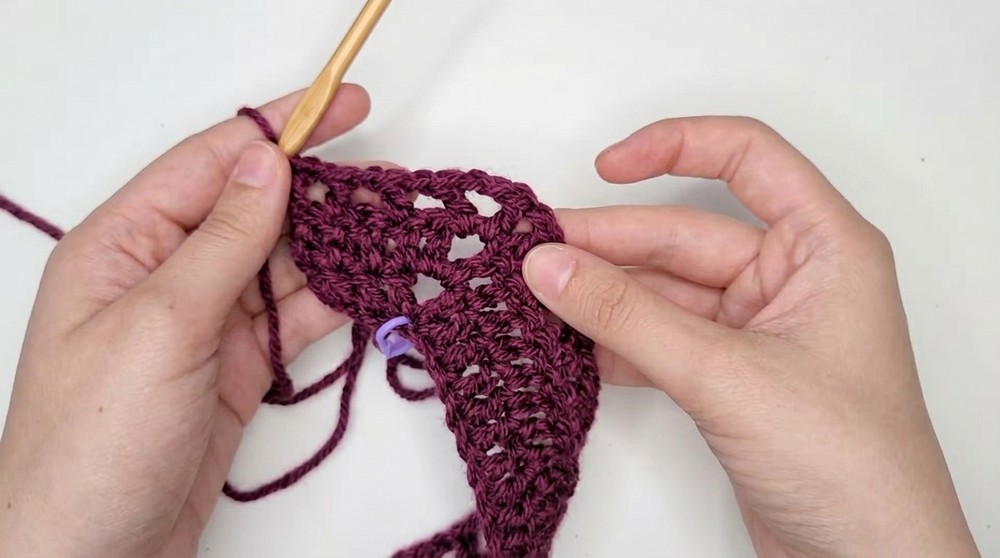
Summary: You’re forming the top of your cardigan by alternating double crochet and mesh rows, increasing at the raglan seams (where your markers are) and neckline. This shapes the yoke and shoulders.
Body Section
- Stop neckline increases after row 14.
- Continue only raglan increases for 6 more rows (for a total of 20 rows).
- Always finish the body section with 2 double crochet rows.

Summary: At this stage, only the raglan points get increased. The V neck is shaped, and your yoke should now fit mid-chest to underarm.
Creating Armhole Openings (Row 21):
- Work a mesh row pattern to the first raglan ch-2 space.
- Double crochet in that space, chain 3 (or as needed for your armhole).
- Skip sleeve stitches; attach to next raglan point with a double crochet to create an armhole.
- Repeat for the second sleeve/side.
- Finish row using mesh pattern.
Row 22 (Working into Armhole Chains):
- Chain 3; double crochet across the row and in each of the armhole chains (from previous row).
Continue for Body:
- Repeat sequence of 2 double crochet rows, 1 mesh row.
- Work to a total of 38 rows or desired length (always ending with 2 double crochet rows).
Summary: You’re separating sleeves from body by chaining across for armholes. Then the lower body is worked straight down in the same alternating stitch pattern. Watch your fit and make it as long as you want.
Sleeves
- Attach yarn to armhole at the 2nd double crochet at the top.
- Work mesh row to start: chain 3 plus 1, skip 1, dc in next, ch 1 repeat around, sl st to join.
- Continue in rounds: alternate 1 mesh square row, and 2 double crochet rows, repeating until sleeve measures 24 rows or just short of your wrist.
- Always end with 2 double crochet rows.
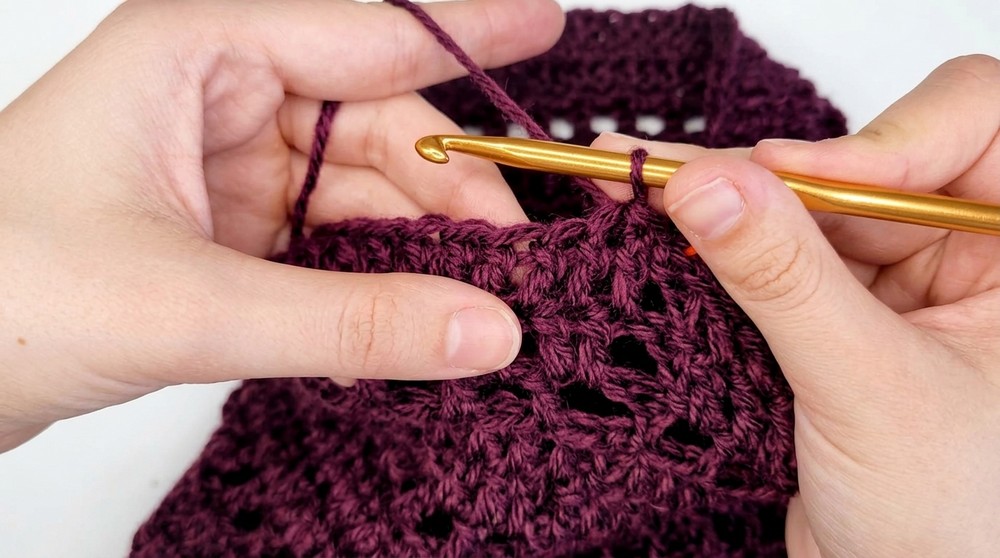
Summary: Start your sleeves at the armhole and continue in your established pattern. Sleeve length and width are customizable, bell shape comes from no decreasing.
Cuffs
- After sleeve achieves desired length, chain 1, use stitch marker in this chain.
- Decrease around (sc2tog) in every stitch.
- Chain 9 (for standard cuff, adjust for fit).
- Single crochet in BLO back and forth, slip stitch to sleeve edge after each row, decrease at start of each row for snug fit.
- Continue until cuff encircles wrist; join final row to beginning with slip stitches through opposite loops.
- Fasten off, weave in ends.
Summary: Cuff is worked directly onto the sleeve edge in single crochets in back loop for rib effect, with decreases for a snug fit. Seam closed at the end.
Button Band & Finishing
- Weave in all yarn ends with a needle.
- Sew buttons on rows with double crochets at V-neck and along front—spaced about every two rows.
- Use the gaps between double crochets as buttonholes.
- Wash and block garment for best shape.
- Try on and adjust button placement if needed.
Solutions to Common Issues
- If mesh rows don’t line up at ends, just finish with a double crochet; it won’t show in the final garment.
- For tighter cuffs, use more decreases or chain fewer stitches.
- Customize armhole size by adjusting chain number.
Projects You Can Make With These Stitches
- Summer or spring cardigans
- Openwork pullover sweaters
- Crochet tote bags using mesh stitch
- Bell sleeve tops
- Button-up vests
Congratulations! Your cardigan is now complete. You can remake this pattern in different colors, vary sleeve lengths, or add extra embellishments for a unique style. The mesh and double crochet combination gives a light, breezy look perfect for layering.
If you prefer plain instruction, you’re working from the top down. You alternate between solid and mesh rows, making increases at the raglan areas. Once you reach your desired yoke depth, you separate the sleeves by chaining for armholes, continue the body straight, then add sleeves, cuffs, and buttons. Each section’s finished measurements are provided for reference, but you can always adjust to fit as you go.


Leave a Reply