

Create a stunning crochet flower motif bag with this free pattern perfect for beginners and learn how to effortlessly connect motifs for a flawless finish.
Sometimes the prettiest accessories come from the simplest ideas—and that’s exactly what you get with a free crochet flower motif bag pattern! If you’re looking to make a fun, eye-catching bag that shows your love of color and creativity, this project is a fantastic choice.
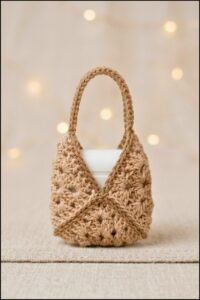
What makes this bag truly stand out is its beautiful design. Each bag is made from a set of charming flower motifs, each one worked in rounds and layered with delicate petals. When you join them together, the whole bag forms a unique mosaic of blossoms, making it look bright, cheerful, and totally one-of-a-kind. The flowers have a 3D texture with puffy petals and a pretty center, giving the finished bag lots of visual interest and a soft, touchable feel.
Crochet Flower Motif Bag – Unique Free Pattern
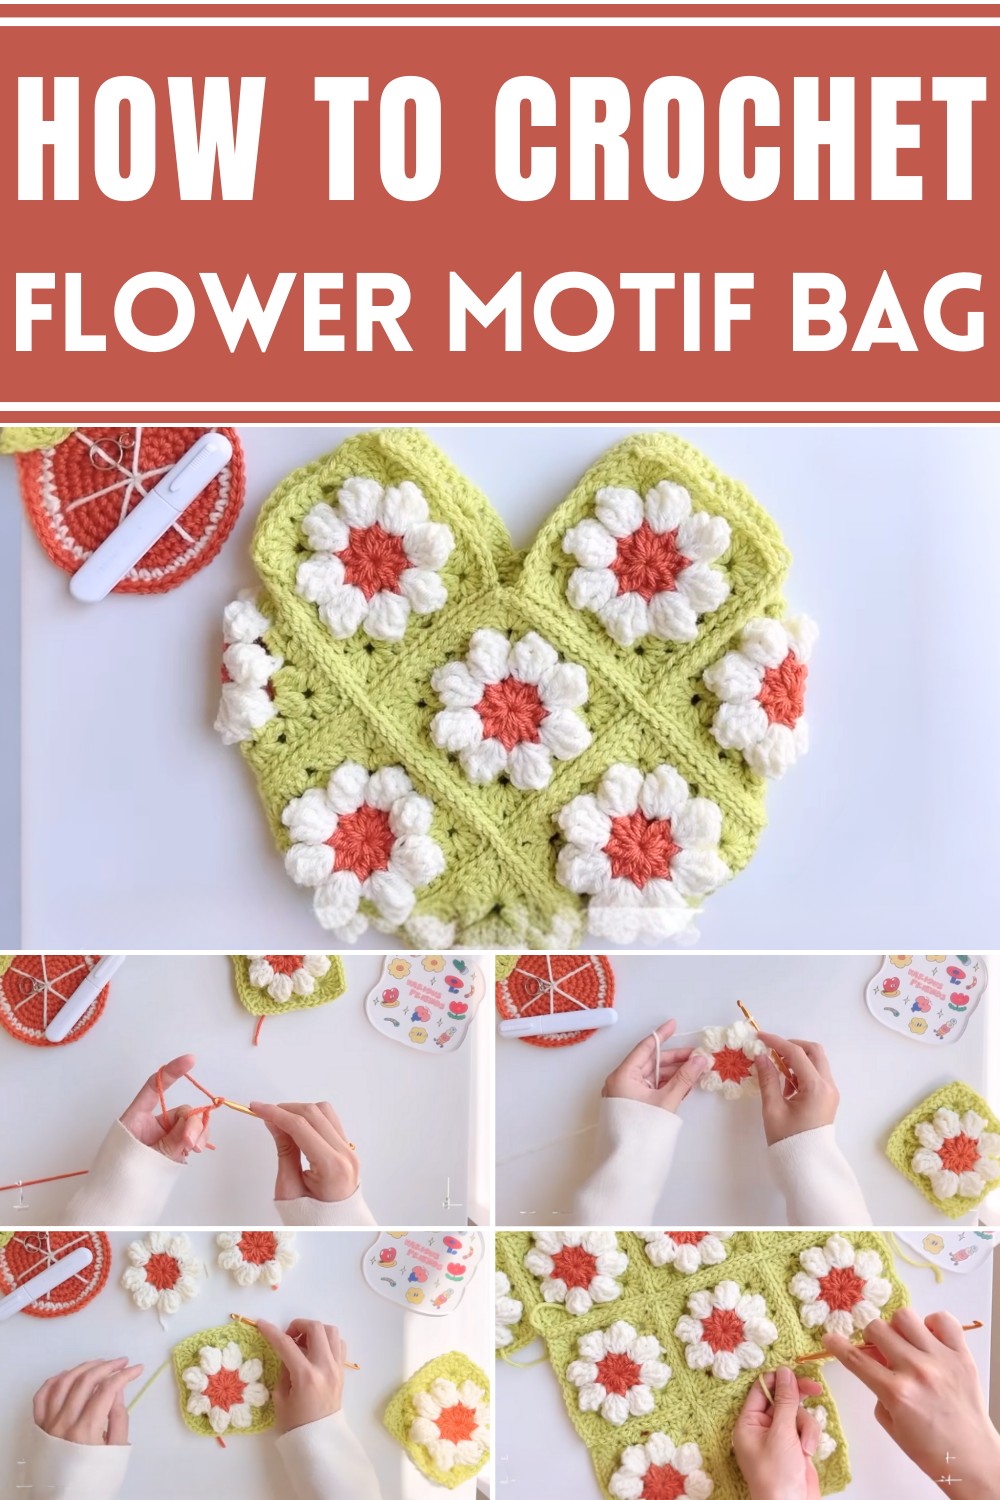
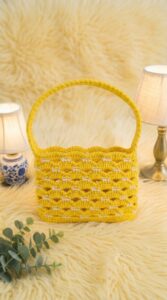
I love how versatile this floral bag is. It’s perfect to use as a summer accessory, a market tote, a casual purse for an afternoon out, or even as a stylish book bag. You can match the colors to your outfits, use your leftover yarn, or even make each motif a different color for a playful, boho style. The bag’s fun, square shape and sturdy construction make it practical enough for daily use, yet light and easy to carry.
This pattern is great for all crochet lovers; beginners get a chance to practice basic techniques like the magic ring, double crochet, and slip stitch, while more advanced crafters can experiment with color combos and assembly methods. It also makes a wonderful gift—handmade, beautiful, and full of personality.
So if you’re looking for a satisfying, creative, and totally charming project, try this crochet flower motif bag pattern and let your love for crochet bloom.
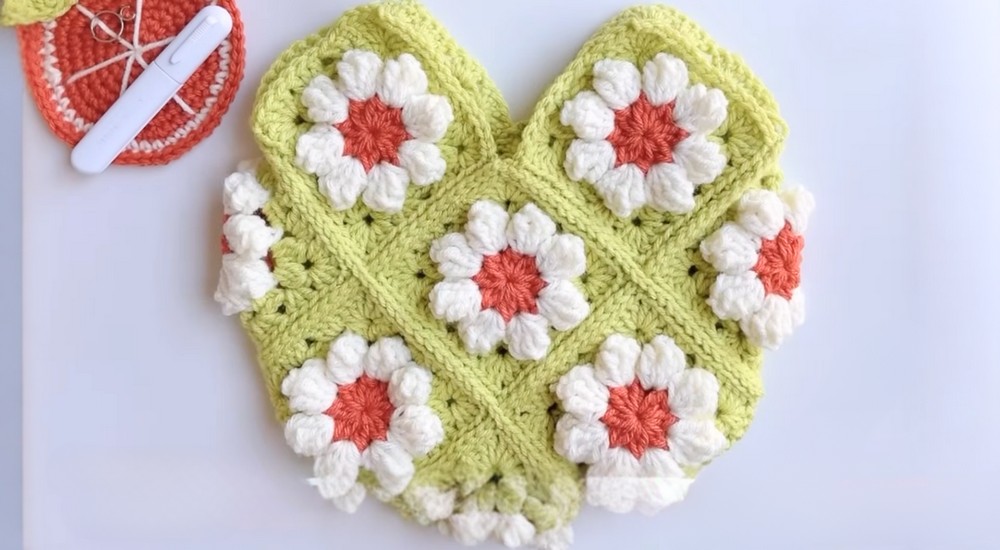
Flower Motif Bag Crochet Pattern
Create a show-stopping and practical bag made of connected flower motifs! This pattern leads you through every step, suitable even for confident beginners. Vibrant, modular, and with a lovely 3D texture, this bag is as enjoyable to make as it is stylish.
Before You Start
- Familiarize yourself with the magic ring, basic stitch decreases, and motif joining techniques.
- Choose coordinated yarn colors for petals, centers, and motif borders.
- Keep your stitch marker, scissors, and tapestry needle at hand.
- Block motifs lightly if you desire perfect squares and crisp petal shapes.
- Plan your motif layout before joining for your favorite color arrangement.
Pattern Notes
- Each bag panel is made from 13 flower motifs (part 1 covers the motif and initial joining).
- The motifs are joined as you go with slip stitch through both motifs at corners and edges.
- The flower motif features dimensional petals and a classic square shaping—perfect for modular projects.
- All motifs are made separately, then joined by crochet (not sewing).
- Yarn tails are woven in after final assembly for a tidy finish.
How I Made the Crochet Pattern?
- Began each motif with a magic ring and a cluster for the center.
- Attached layered petals for a pronounced flower effect.
- Shifted to a square motif base to allow seamless joining.
- Joined motifs using a hook and slip stitch for strong, decorative seams.
- Assembled bag panels by joining motifs in rows, then seaming the sides.
Skill Level
Advanced Beginner / Intermediate
Basic crochet skills needed; new techniques include dc2tog/3tog, treble crochet clusters, and motif joining.
Finished Size
- Each motif: ~9–10 cm square (depends on yarn/hook)
- Bag size: Approx. 30 cm wide x 20 cm tall when using 13 motifs (without handles; size can be adjusted by motif count or yarn/hook choice)
Materials
- 5.0 mm (H-8) crochet hook
- Worsted or Aran weight yarn in 2–3 contrasting colors
- Center color for flower
- Different color for petals
- Main color for square rounds and joining
- Scissors
- Tapestry/yarn needle
- Stitch markers (optional)
Measurements / Sizing
- Each motif: 9–10 cm across
- 13 motifs arranged (2 rows of 6–7 suggested for bag panel)
- Assembly info for both sides—total bag uses 26 motifs (this part covers 13, i.e., one side)
Gauge
- Not critical, but motifs should be uniform and not floppy.
- Aim for 4 motifs = 36–38 cm across for sturdy bag.
Stitch Abbreviations
| Abbreviation | Meaning |
|---|---|
| mr | magic ring |
| ch | chain |
| sl st | slip stitch |
| sc | single crochet |
| dc | double crochet |
| tr | treble crochet |
| tog | together (cluster decrease) |
| dctog | double crochet 2 or 3 together |
| yo | yarn over |
Special Stitches
- dc2tog: (Yarn over, in next stitch: pull up a loop, yo and draw through 2) x2, yo and pull through all 3 loops (cluster made)
- dc3tog: (Yarn over, in next 3 stitches: pull up a loop, yo, draw through 2) 3 times, yo, draw through all 4 loops
- tr5 cluster (petal): (yo twice, insert hook in space, pull up loop, yo and draw through 2, two times, leave last loop—repeat for 5 tr), yo and draw though all 6 loops.
- Joining with hook: Insert hook through both motifs' next sts; yo and pull through all loops for tight join.
The Pattern!
FLOWER MOTIF (Make 13)
Center:
- With center color, make a magic ring ([mr]).
- Ch 2 (counts as first dc); [dc in mr, ch 1], [dc2tog, ch 1] x7. (Total 8 spokes)
- Join with sl st to top of first dc2tog. Tighten ring and fasten off.
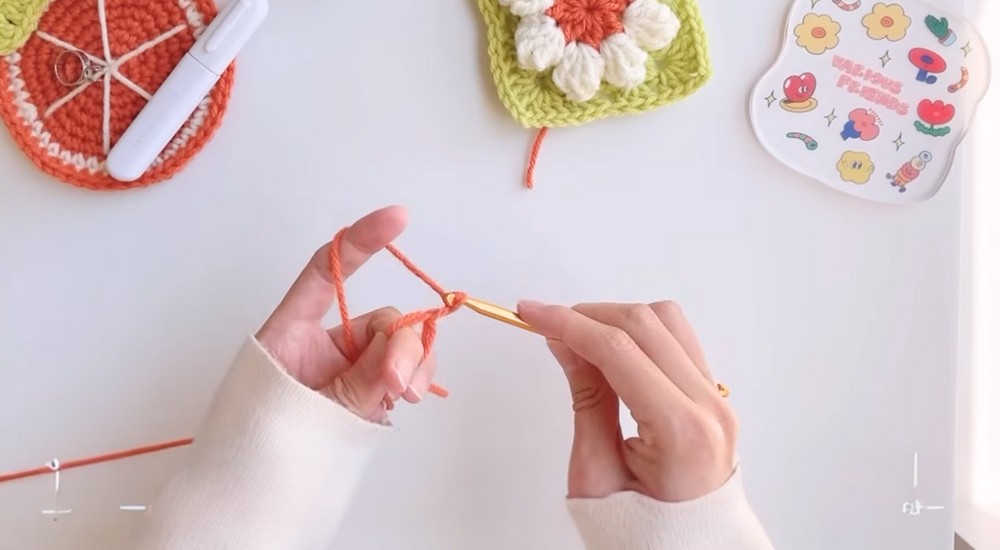
This forms a dainty, open flower center. Each ch-1 space marks where a petal will be added.
If you're not a pattern reader:
- Make a loop, work 1 dc, ch 1, then [dc2tog, ch 1] 7 more times so you have 8 clusters separated by spaces. Close tightly.
Petals (New Color):
- Attach new color in any ch-1 space.
- Ch 4 (acts as first tr), 4 tr in same space (5 total), keeping each tr on hook (do not finish), yo and pull through all 6 loops—petal cluster made.
- Ch 3, and repeat steps above in each next ch-1 space. (8 petals)
- Join with sl st to top of first petal cluster. Fasten off.
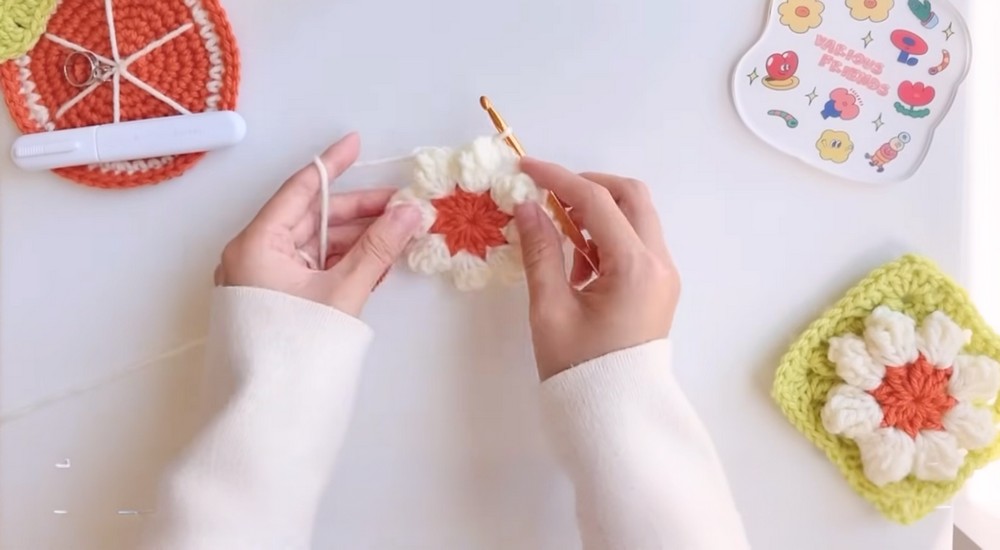
Each petal is a 5-tr cluster; chain 3 makes the space between them, giving a frilly look.
If the petal instructions confuse you, just remember to always work 5 tall stitches per space, join them at the top, then chain 3; your flower will pop!
Motif – 1st (Square) Row:
- Attach main color or border color in any ch-3 space between petals.
- Ch 2, [dc2tog in same space], ch 2.
- In next space: 3 sc, ch 2.
- In next space: dc3tog, ch 2, dc3tog in same space, ch 2.
- In next space: 3 sc, ch 2.
- Repeat the above (so there are 4 “corners” with dc clusters and 4 sides with sc).
- Join with sl st. Move to next space with a sl st for Row 2.
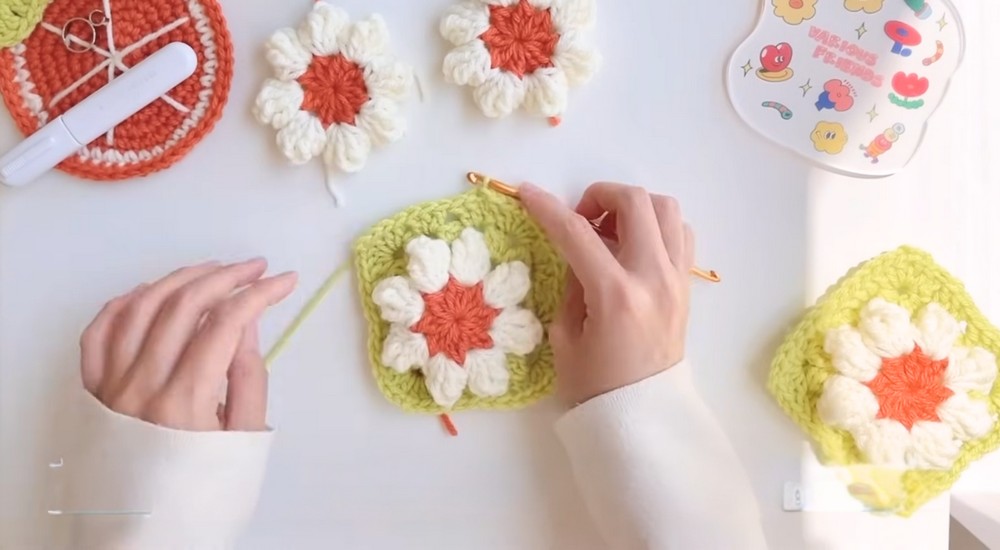
You have now squared the motif! Each motif has 4 corners and 4 sides.
If you don’t read patterns:
- Work a “V shape” of dc clusters at corner, 3 sc at side, always separated by ch-2 for corners and sides.
Motif – 2nd Row:
- Ch 3, 2 dc in same space.
- In side space: 3 dc in space.
- At corner: 3 dc, ch 2, 3 dc in same space.
- Continue (3 dc in side space, corner as above) around.
- Join to first ch-3 with sl st to finish.
This creates the solid square border of the motif. Your flower is ready for joining! Fasten off and weave remaining tails.
If you would like a visual:
- Make each motif a solid square, flowery in the center, with a 3-dc groups at sides and 3-dc–ch2–3-dc groups in corners.
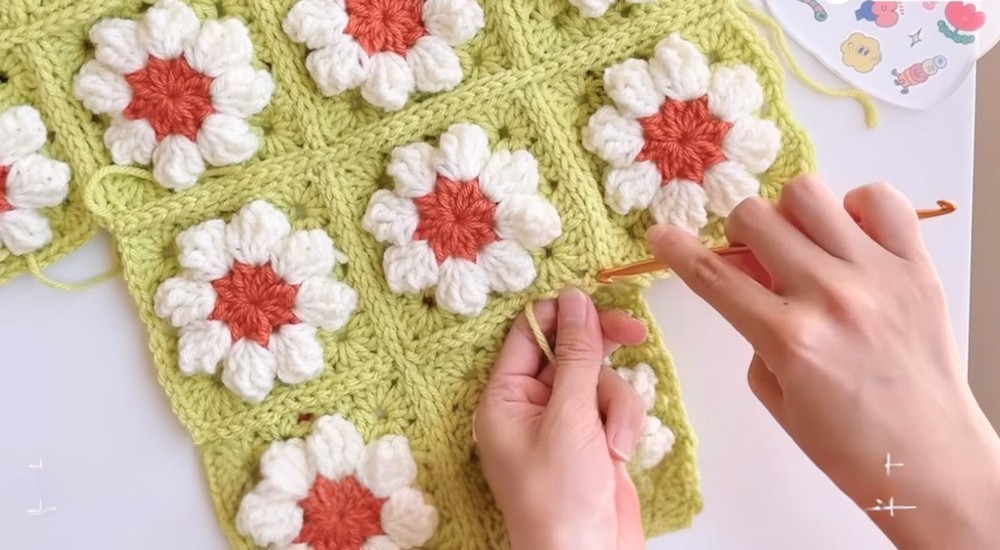
JOINING MOTIFS
- Lay out your 13 motifs in the desired arrangement (suggested: rows for panels).
- Place motifs wrong sides together.
- At the corner stitch, insert hook (working yarn behind motifs).
- Insert hook through both motifs’ next stitches, yo, pull through all 3 loops at once.
- Repeat for the length of the join, stitch by stitch.
- At the corner, ch 1 to cross the vertical line, and continue joining next edge, aligning motifs.
- Work to the end, ch 1 and fasten off leaving a 10 cm tail.
- Fold your joined motif-row in half for bag shaping.
If you don't read patterns:
- Hold two motifs together, insert in both stitches, pull yarn through all stitches at once across each side.
Assembly & Finishing
- Join motifs into rows, matching your layout.
- Use hook joining for all seams (strong and attractive).
- After row is complete, fold in half and join motifs along each side for bag shape.
- After all joining, weave in all yarn ends with tapestry needle.
Solution of Problem
Problem: Motifs curl or shape uneven.
Solution:
- Lightly block motifs to square them before joining.
- If squares do not match up, check your stitch count and tension.
- For joining, keep yarn loose for a flat, non-buckling seam.
What you can make by using these stitches
- Any motif bag design (shoulder, tote, clutch)
- Table runners, placemats, or coasters
- Decorative pillow covers
- Shawls, wraps, or clothing panels
Final Notes
This project is perfect for colorwork and modular fun. In Part 2, you’ll finish the bag with a lining and straps. Modern or classic, your new handmade flower motif bag will get compliments everywhere!
Leave a Reply