

Spice up your look with a fun Crochet Devil Beanie Pattern—bring devilish flair to your outfits for Halloween, cosplay, or a cozy winter style adventure!
Looking for a playful yet stylish twist to accessorize your wardrobe? A devil beanie is the perfect combination of trendy and fun. Whether you're preparing for a Halloween party, adding a quirky flair to your winter collection, or spicing up a cosplay outfit, this design is as versatile as it is eye-catching. With its distinctive devil horns and snug fit, it provides just the right amount of spookiness while keeping your head cozy during chilly days.
Spooky Crochet Devil Beanie for Everyday Wear

This project is not just about warmth; it's about self-expression. Handmade items like this beanie allow for personalization, giving you an accessory that's truly one of a kind. Choose bold red or darker tones to reflect your style and personality. Its portability also makes it an ideal gift for friends who love playful accessories, costume enthusiasts, or even teens looking for a funky hat.
Beyond its aesthetic appeal, this beanie is a great way to unwind and relax, channeling your creativity into something practical and visually striking. Whether for casual use, holiday events, or even photoshoots, its charm enhances any look. A timeless quirky addition, this design balances functionality with flair, giving you an accessory that's playful, stylish, and heartfelt.

How to Crochet a Devil Horn Beanie: A Step-by-Step Guide
This pattern walks you through making a Devil Horn Beanie a daring and playful accessory that's perfect for cosplay, Halloween, or everyday fun! Whether you're a beginner or intermediate crocheter, this project combines simple techniques with unique flair for a delightful experience.
Materials Needed
- Less than one skein of weight-4 yarn (red recommended for devil horns).
- Hook size: 4.5 mm (but sizes between 4 mm to 6 mm will work).
- Stitch markers (or alternatives like bobby pins).
- Darning needle.
- Pair of scissors.
- Polyfill (or scrap yarn) for stuffing devil horns.
Special Features of the Beanie
- Customizable Horn Placement: Adjust horn positions to suit your style.
- Accent Window Row: Adds a decorative touch at the bottom of the hat.
- Versatile Techniques: Choose between magic rings or chain rings based on preference.
Step-by-Step Instructions
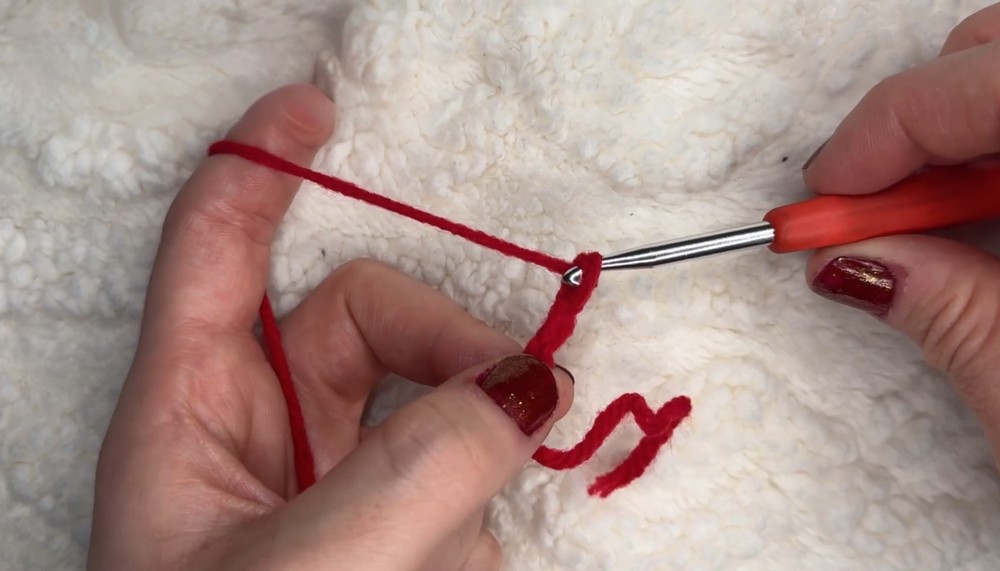
Step 1: Start the Beanie Base
- Create a Chain Ring:
- Make a slip knot and chain 4.
- Slip stitch into the first chain to form a ring.
- Tutor suggests using a magic ring as an alternative for a tighter finish.
- Expand the Beanie:
- Row 1: Chain 1. Place 6 half-double crochets into the ring. Slip stitch into the first half-double crochet and chain 1 to close the row.
- Row 2: Place 2 half-double crochets into each stitch for a total of 12 stitches.
- Row 3: Alternate between 1 and 2 half-double crochets in stitches (total: 18 stitches).
- Continue Expanding Rows:
- Repeat the previous method, gradually increasing single half-double crochets between increases until the circle fits the top of your head.
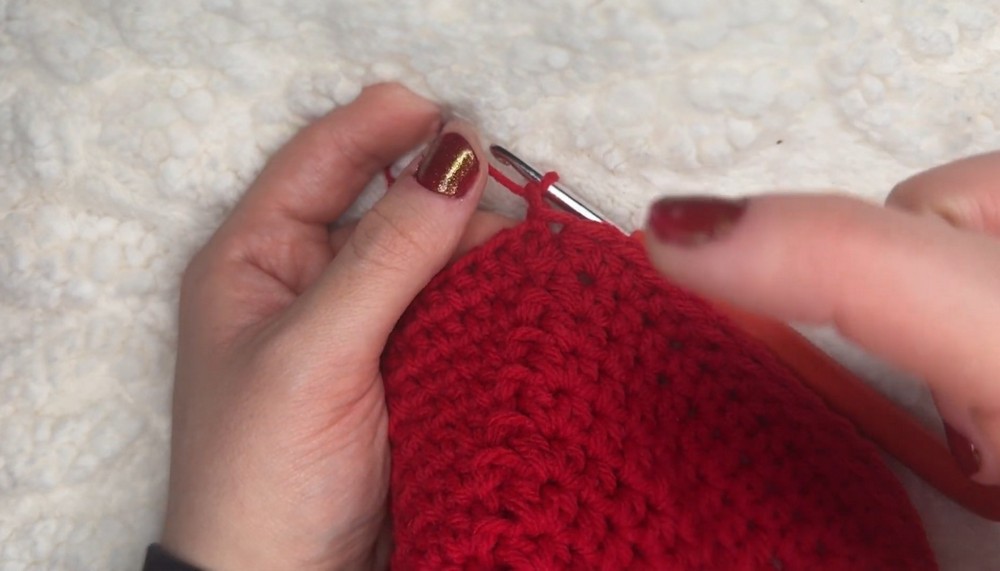
Step 2: Build Height for the Beanie
- Crochet Straight Rows:
- Chain 1 at the start of each row. Add 1 half-double crochet in every stitch until the hat is tall enough to fit your desired height (typically 4-5 rows).
- Measure against your head for accuracy.
- Create the Decorative Window Row:
- Chain 1, skip one stitch, chain another, and place a half-double crochet into the next stitch to form a box pattern.
- Repeat around the row, closing with a slip stitch.
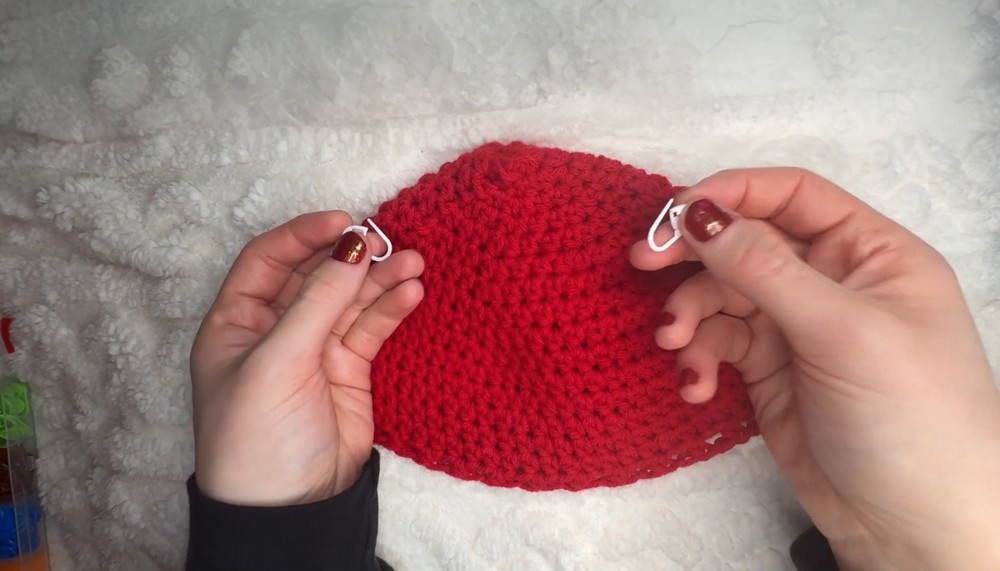
Step 3: Make and Attach the Devil Horns
- Create the Horns:
- Use a magic ring or chain ring to start. Add 3 half-double crochets into the center, slip stitch to close, and chain 1.
- Gradually increase horn diameter through additional rows, alternating between normal half-double stitches and increases (rows with 2 stitches in each space).
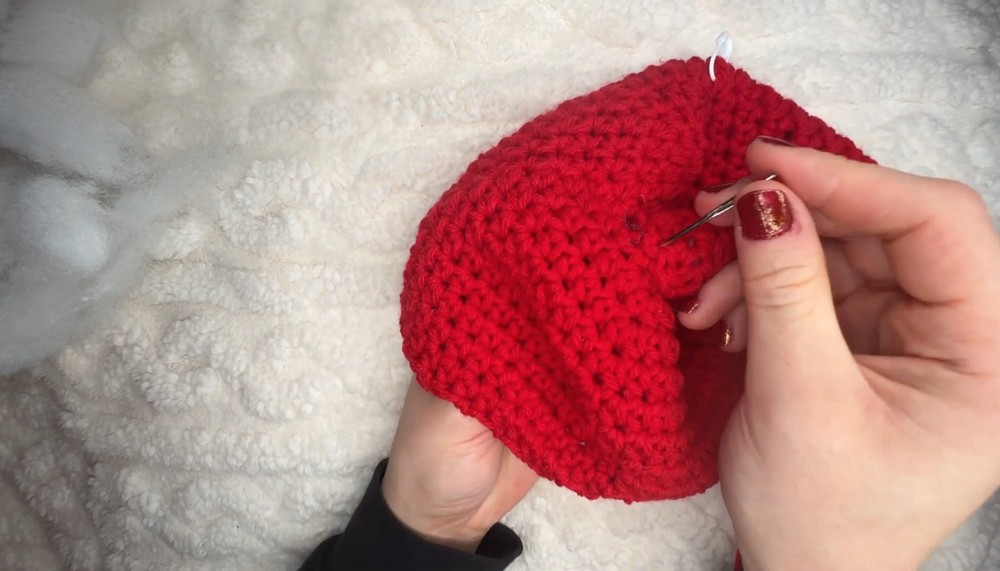
- Final Adjustments:
- Add stuffing to each horn using polyfill or yarn scraps.
- Carefully sew the horns onto the beanie using a running stitch with a darning needle.
Difficulty Level
Beginner to Intermediate:
Though the techniques are simple (chain, slip stitch, half-double crochet), attention to detail in expanding rows, shaping horns, and attaching them precisely makes the project suitable for those with basic crochet experience looking to advance their skills.
Tutor’s Suggestions
- Personal Preferences: Use a magic ring instead of a chain ring for better shaping.
- Sizing Tips: Continuously measure the beanie against your head to ensure proper fit.
- Stuffing Advice: Avoid overstuffing horns to maintain their natural pointed shape.
- Follow Free Patterns: Check her Instagram (@faith.wiis) for visual guidance.
Uses for the Devil Horn Beanie
- Halloween costume or cosplay outfits.
- Fun winter accessory with a twist.
- Personalized DIY gift for friends and family.
Tip for Success
When attaching the horns, ensure their curved part faces inward toward the center of the beanie for a balanced and symmetrical look. Use stitch markers to accurately place them before sewing.
Conclusion
The Devil Horn Beanie is a playful and customizable crochet project that lets you explore creative techniques while producing a fun accessory. With easy-to-follow steps and room for personalization, this project is perfect for anyone looking to add flair to their crochet repertoire.

Leave a Reply