

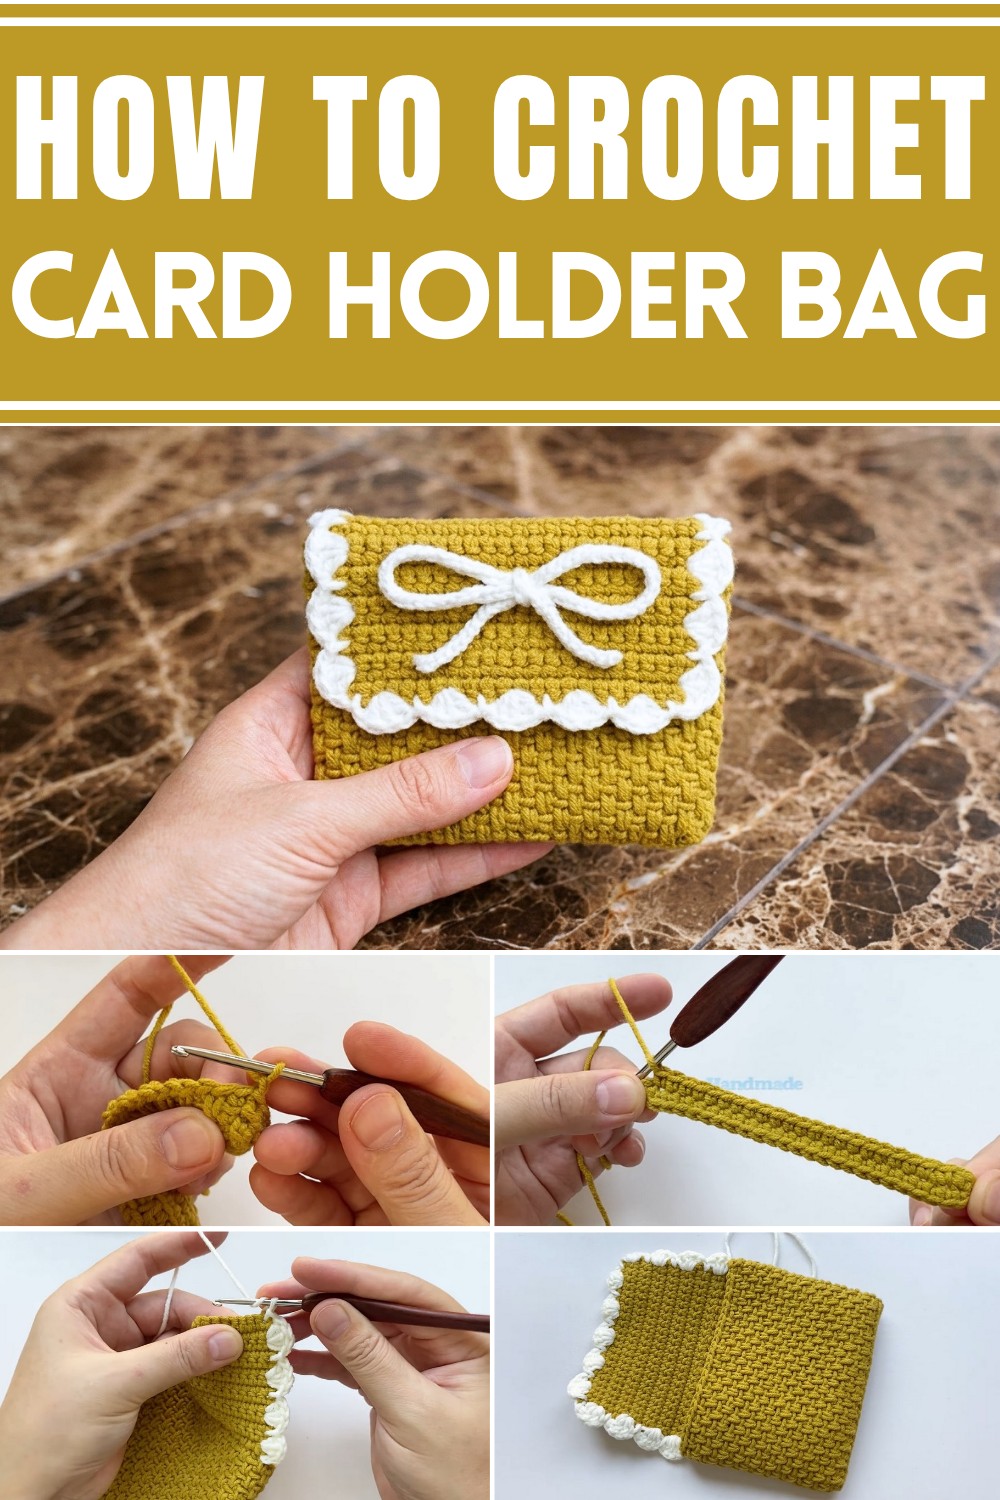
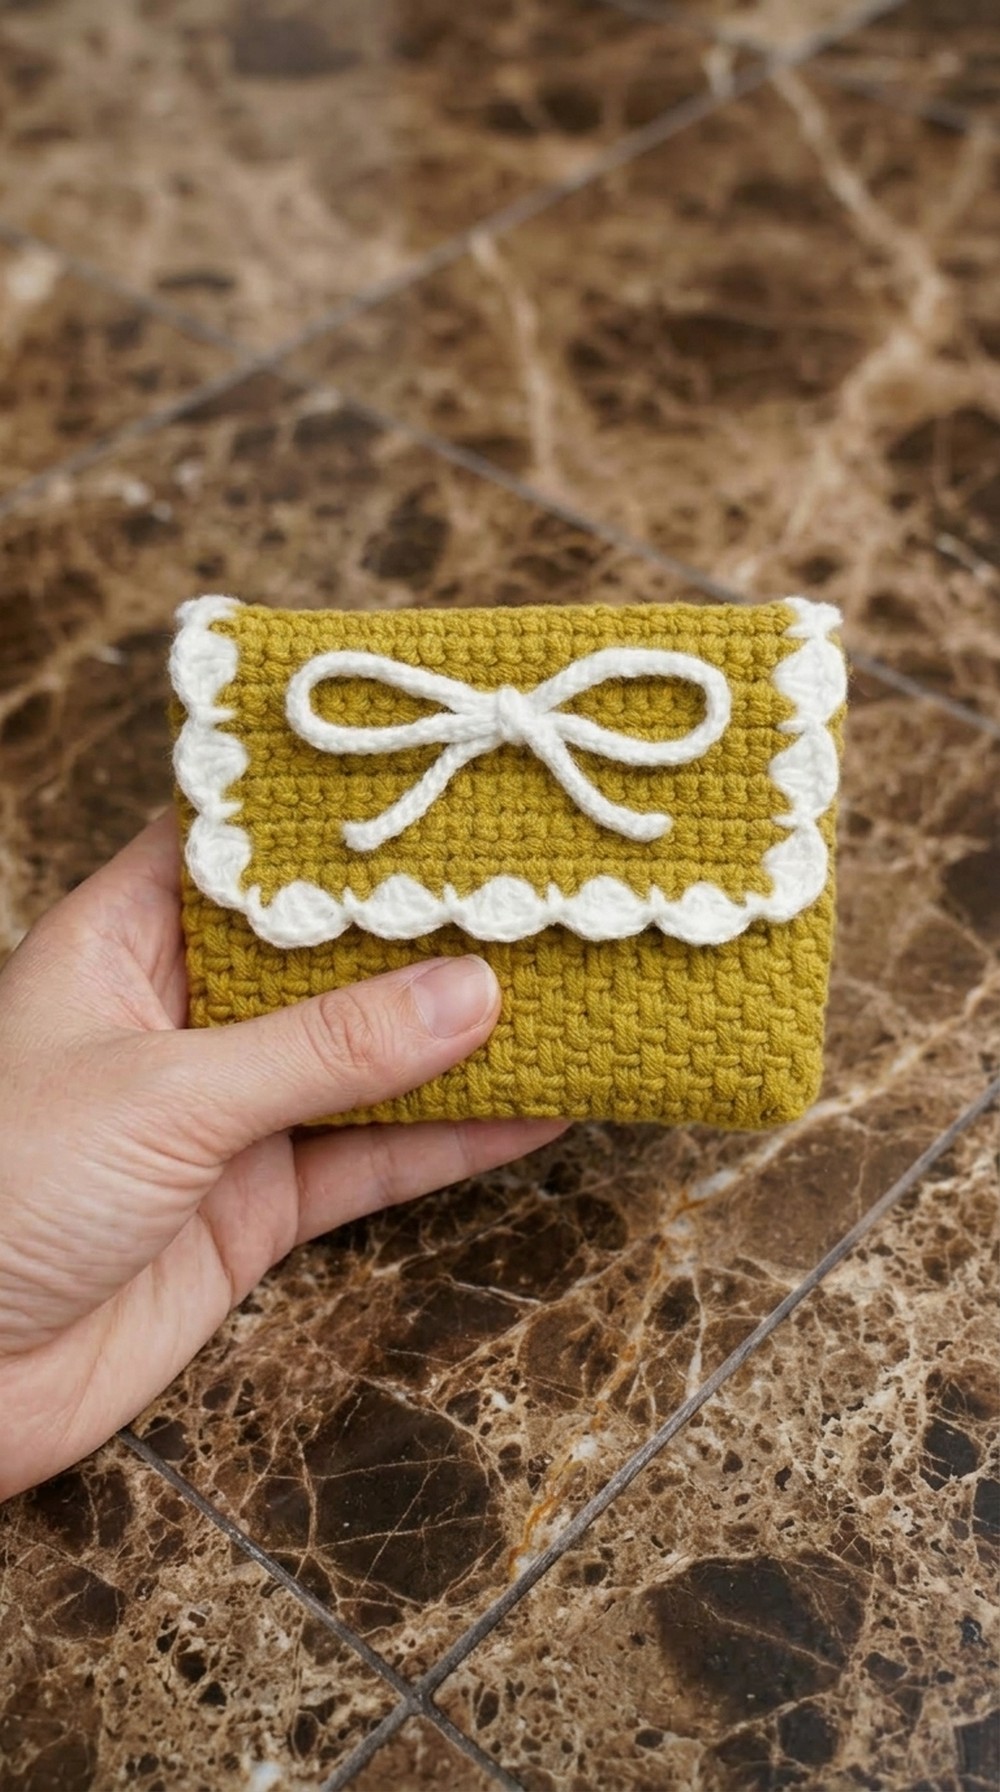
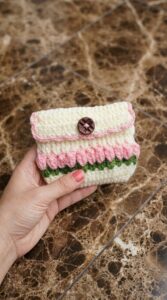
The first thing you’ll notice about the Free Crochet Card Holder Bag Pattern is its beautiful, textured look. This little bag has a rectangular shape with softly rounded corners, giving it a smooth and gentle appearance. The body of the bag features neat, ribbed lines created by working single crochet stitches in the back loop, adding an extra touch of modern style and subtle texture.
What really makes this card holder special is the flap decorated with dainty shell stitches. These shells form a lovely, scalloped edge that looks delicate and pretty, setting off the bag’s design in the sweetest way. The contrasting row of shells makes the flap pop and adds an extra layer of detail that truly stands out.
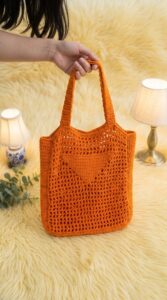
Crochet Free Pattern for Stylish Card Holder Bags
Crocheters will find this project enjoyable because it’s quick and simple to make, even if you’re just starting out. The pattern uses basic stitches and clear rows, so it’s stress-free and perfect for relaxing at the end of the day. Plus, with just a small adjustment, you can turn this pattern into a mini pouch or coin purse. Try changing the yarn colors, or make a longer bag to fit your needs.
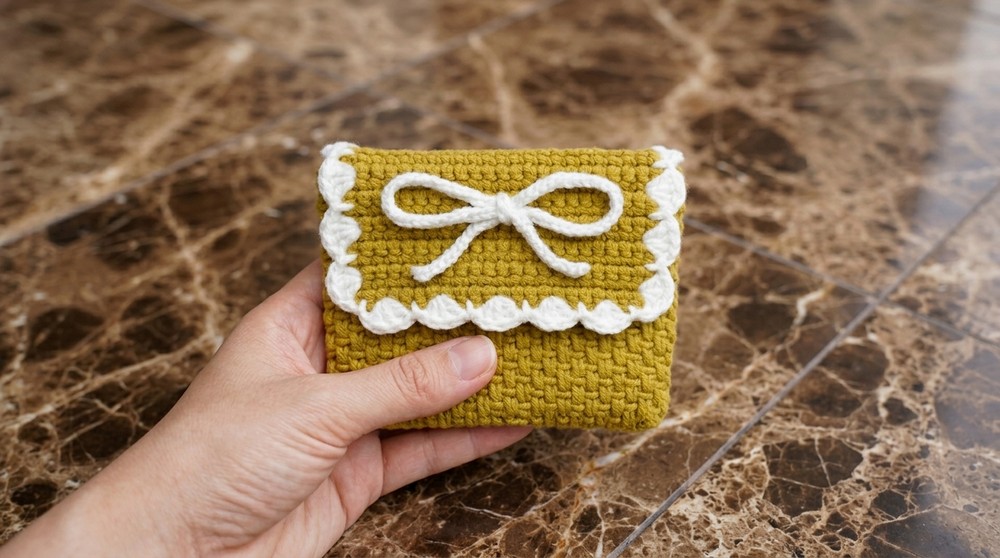
This card holder bag is both charming and useful. You can tuck your cards, coins, or a bit of cash inside and slip it easily into your bigger bag, or carry it on its own when you don’t need much. It’s also a thoughtful, handmade gift for friends or family. However you use it, this little bag is sure to brighten up your accessories and bring a touch of handmade beauty wherever it goes.
Crochet Card Holder Pattern
This pattern guides you through creating a simple, stylish crochet card holder using basic stitches and an easy-to-follow format. The card holder features an attractive texture and a decorative edge, making it perfect for everyday use or gifting. You’ll practice working in back loop only and alternate rows for texture while finishing with a scalloped edge for a professional look.
Skill Level & Terminology
Skill Level: Beginner
Terminology: US crochet terms
Materials & Tools
- Crochet Hook: 3.0 mm
- Yarn: 5 ply cotton yarn
- Scissors: For cutting yarn
- Yarn or tapestry needle: For sewing and weaving in ends
- Stitch marker (optional): For marking your place
Gauge
For reference, your first two rows should measure about 7.5 inches (19 cm) long and 2 inches (5 cm) wide. Gauge isn’t critical; just make sure your stitches are tight enough so cards won’t slip through.
Abbreviations List
| Abbreviation | Explanation |
|---|---|
| ch | chain |
| sc | single crochet |
| dc | double crochet |
| sl st | slip stitch |
| BLO | back loop only |
| st(s) | stitch(es) |
| rep | repeat |
Special Stitch Instructions
- Back Loop Only (BLO): Work into just the back loop of the stitch, leaving the front loop untouched. This creates a ribbed texture.
- Working “under the stitch”: Insert your hook under both loops of the stitch below for a standard single crochet.
- Scalloped Edge: Create 4 double crochets in the same stitch, slip stitch in the next stitch, repeat for a decorative finish.
Finished Size
Final card holder will measure approx. 7.5 inches (19 cm) wide, 3.5 inches (9 cm) tall after folding and sewing (fits standard bank cards or ID).
The Pattern
Base Foundation
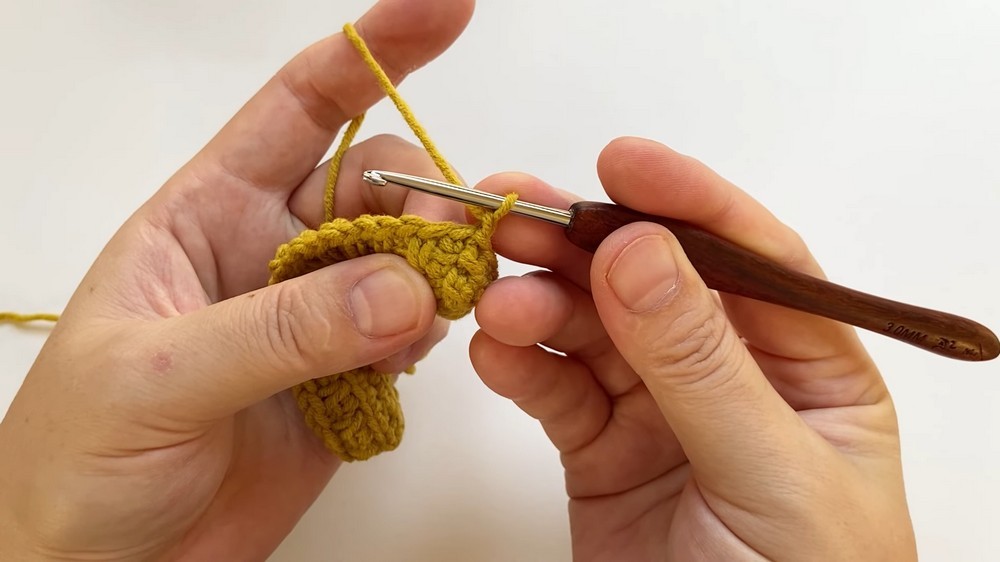
1. Start with Chain:
- Ch 26.
2. First Row (Base):
- Starting from the 2nd ch from the hook: work 24 sc (1 in each ch).
- In the last chain: 3 sc.
- Now working along the opposite side of the chain: 23 sc.
- Finish in the last chain with 2 sc.
- Sl st to join the round.
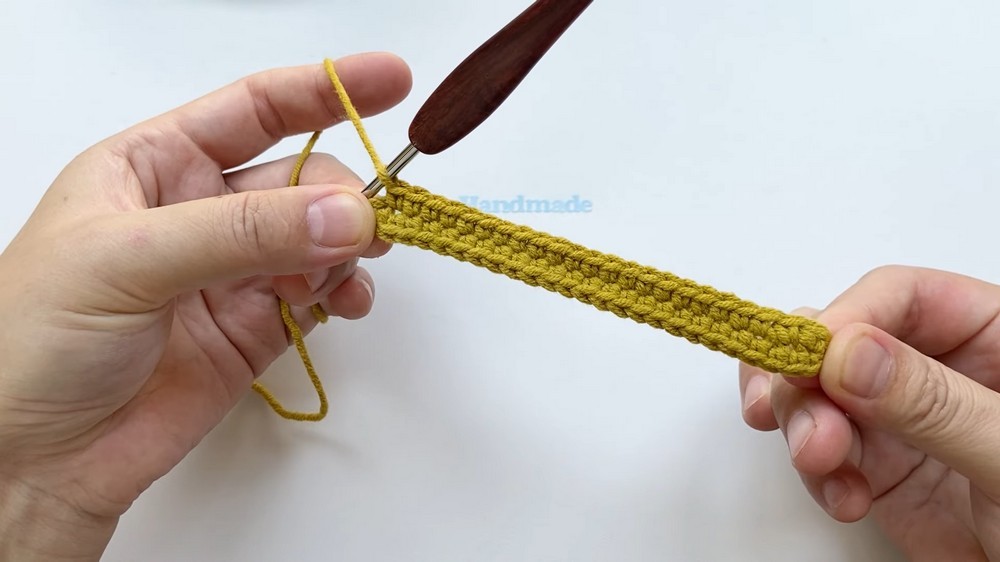
You have now created an oval base for the card holder. If you don’t read patterns, just make a long chain, single crochet along it and back, adding extra stitches at each end to curve the oval.
Body Rows
Row 2: Texture Formation
- Ch 1.
- Make 52 sc, working in back loop only (BLO).
- Sl st to join.
This row forms the sides of your card holder and gives it a neat ribbed texture. Just crochet all the way around, working only into the back loops.
Row 3: Alternating Texture
- Ch 1.
- 1 sc in the first st (BLO), 1 sc in the next st (insert hook under both loops like normal).
- Repeat alternating: [1 sc BLO, 1 sc under both loops] around.
- Sl st to join.
By alternating BLO and standard sc stitches, you create a more interesting and textured look. Repeat this sequence for the full round.
Row 4: Texture Row (Reverse Order)
- Ch 1.
- 1 sc under first st (not BLO), 1 sc in next st (BLO).
- Repeat around.
- Sl st to join.
This row reverses the previous sequence for balanced texture. Alternate these two stitch placements all the way around.
Row 5: Final Row Before Closure
- Ch 1.
- 1 sc under the first st, 1 sc in the next stitch (standard sc).
- Repeat around.
- Sl st to join.
This finishes the main body. If you don’t follow patterns closely, keep doing alternating stitches for about three rounds to build up enough height for your cards.
Finish the Main Body
- Ch 1, cut yarn.
Flap (Optional):
- Attach yarn.
- Sc across to form a flap (number of stitches depending on desired width).
- Ch 1, turn.
- Sc across for additional rows to desired flap length.
- Ch 1, cut yarn.
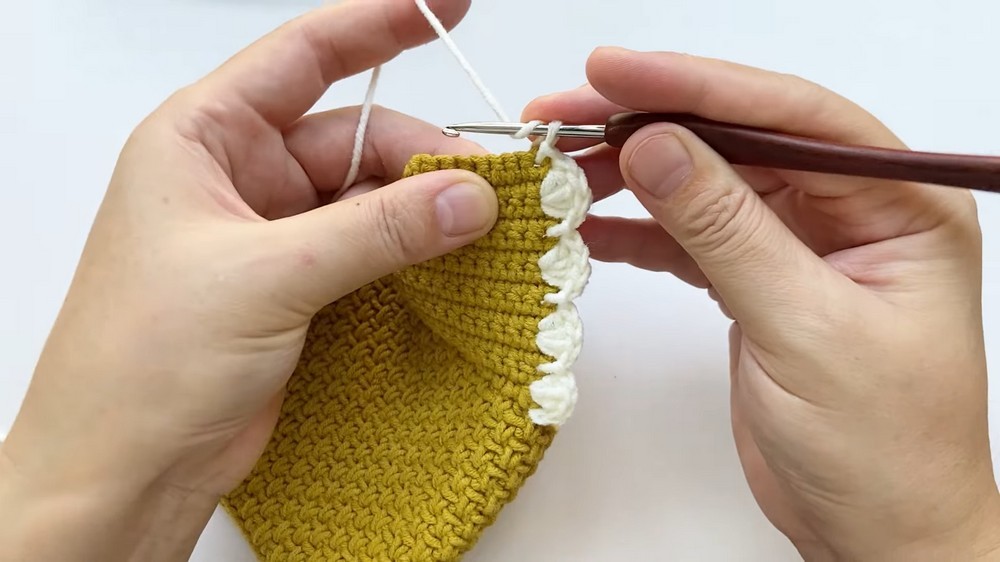
Scalloped Decorative Edge
Start Edging:
- Attach yarn to the edge.
- Ch 1.
- 4 dc in next st, sl st in next st. Repeat around edge.
Skip Stitches for Smoother Curve:
- Skip 1 st, 4 dc in next st, skip 1 st, sl st in next st. Repeat around, especially at curved edges.
Finishing the Edge:
- Sl st into the next st, cut yarn, leave a long tail.
This step adds a pretty wavy border. If you’re not following pattern instructions, just do several double crochets in a stitch, then a slip stitch in the next, skipping stitches where needed.
Assembly & Finishing
- Fold Cardholder:
- Fold the oval in half so the textured rows form the front and back of the card holder, and the decorative edge is facing out.
- Sew Side Seam:
- Use yarn tail and a tapestry needle to whip stitch or mattress stitch the sides (starting from the bottom edge up to the opening).
- Weave In Ends:
- Use your needle to weave in all yarn ends for a neat finish.
- Shaping:
- Block or gently stretch to shape, if desired.
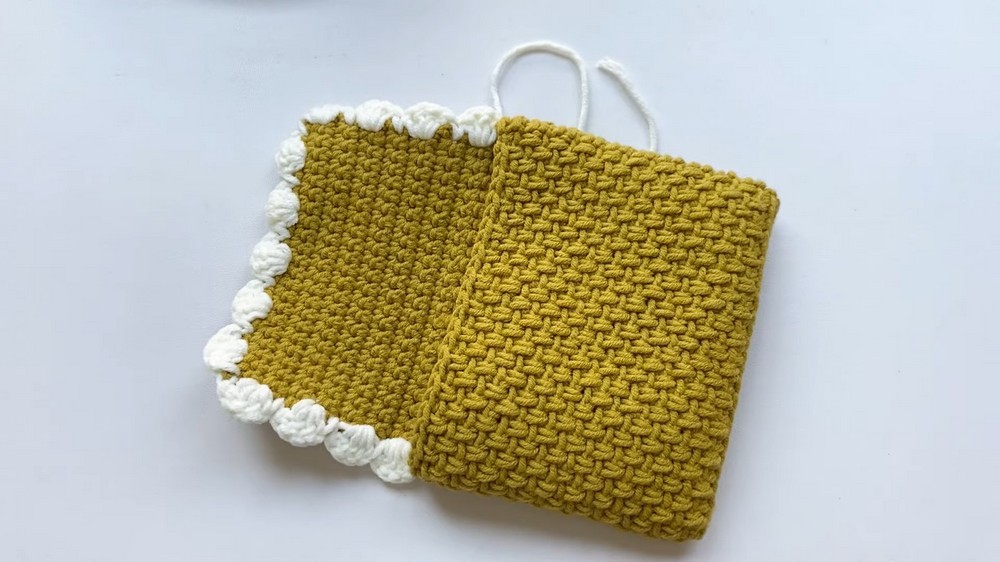
You have just folded the base, sewed the side seams, and finished it off. If you don’t follow patterns, simply fold in half and stitch up the sides!
Conclusion
This crochet card holder pattern is the perfect quick project for beginners and experienced crafters alike. Using fundamental crochet techniques like single crochet, back loop only, and simple decorative edging, you’ll have a practical accessory for cards or small items. The structure is straightforward—work an oval base, build up the sides with alternating textures, finish with a decorative edge, and sew the sides.
The stitches used throughout are: chain, single crochet, back loop only single crochet, double crochet, and slip stitch.
To begin, simply make your base as described and follow the rows—don’t worry if you aren’t comfortable with pattern reading, just follow each step one at a time. This pattern is ideal for anyone wanting to practice new skills in a small project and the final product can be customized with different colors or a button closure.
Leave a Reply