

Try this Crochet Goku Amigurumi and make a mini hero that stands out with spiky hair and a perfect size to brighten your keys or bag.
There’s something truly special about having a soft, lovable anime-inspired doll like this Crochet Goku Amigurumi Free Pattern in your collection. For fans of Dragon Ball and those who appreciate unique, handmade treasures, this project offers a cozy and comforting companion suitable for any season. Whether placed as a cheerful accent in your home, added to a child’s play area, or given as a heartfelt gift, its charming presence adds warmth and personality to any setting.
Charming Crochet Goku Amigurumi Free Pattern With Cute Character Features
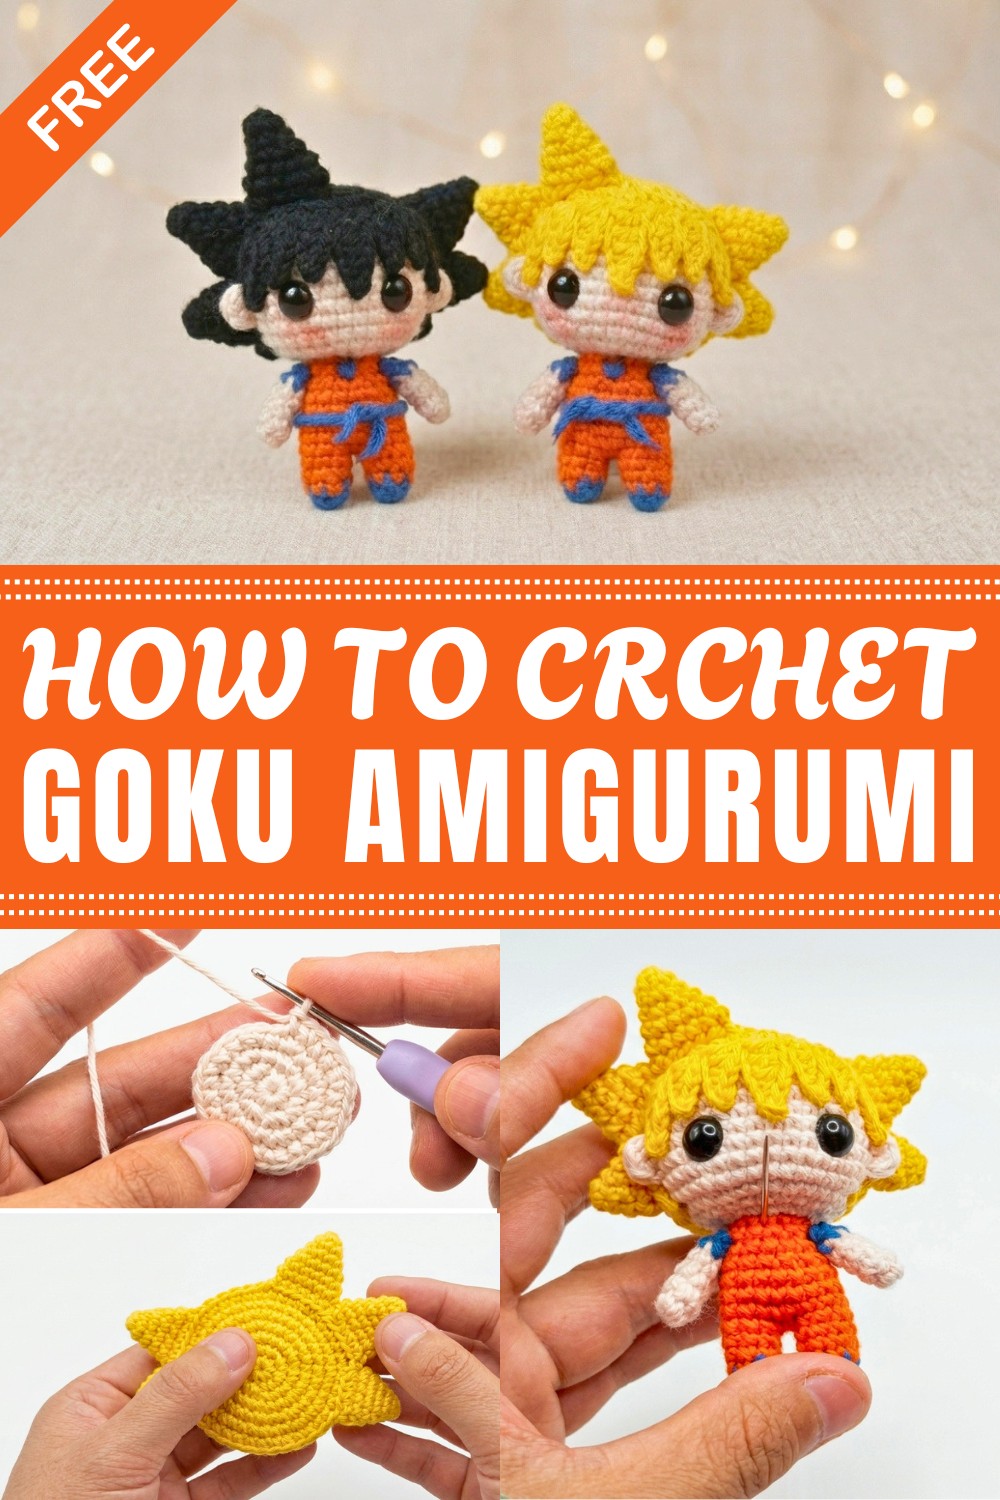
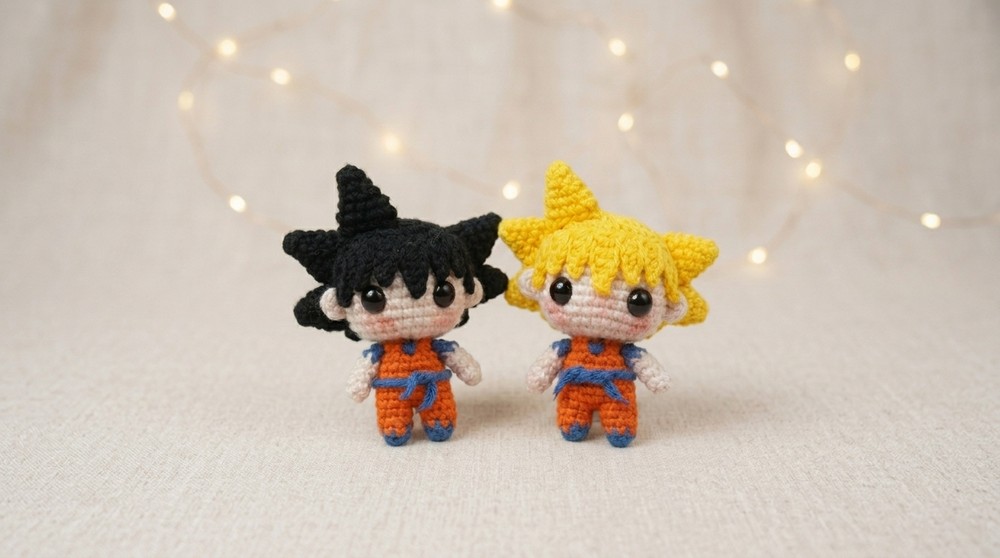
Featuring vibrant colors and careful detailing, this Crochet Goku faithfully captures Goku’s iconic hairstyle and outfit through plush, inviting textures. Its compact size allows for easy display on shelves, desks, or alongside other anime figures, making it a versatile addition to your space. It suits a variety of occasions, from casual everyday enjoyment to themed celebrations, bringing a fun and lively touch wherever placed.
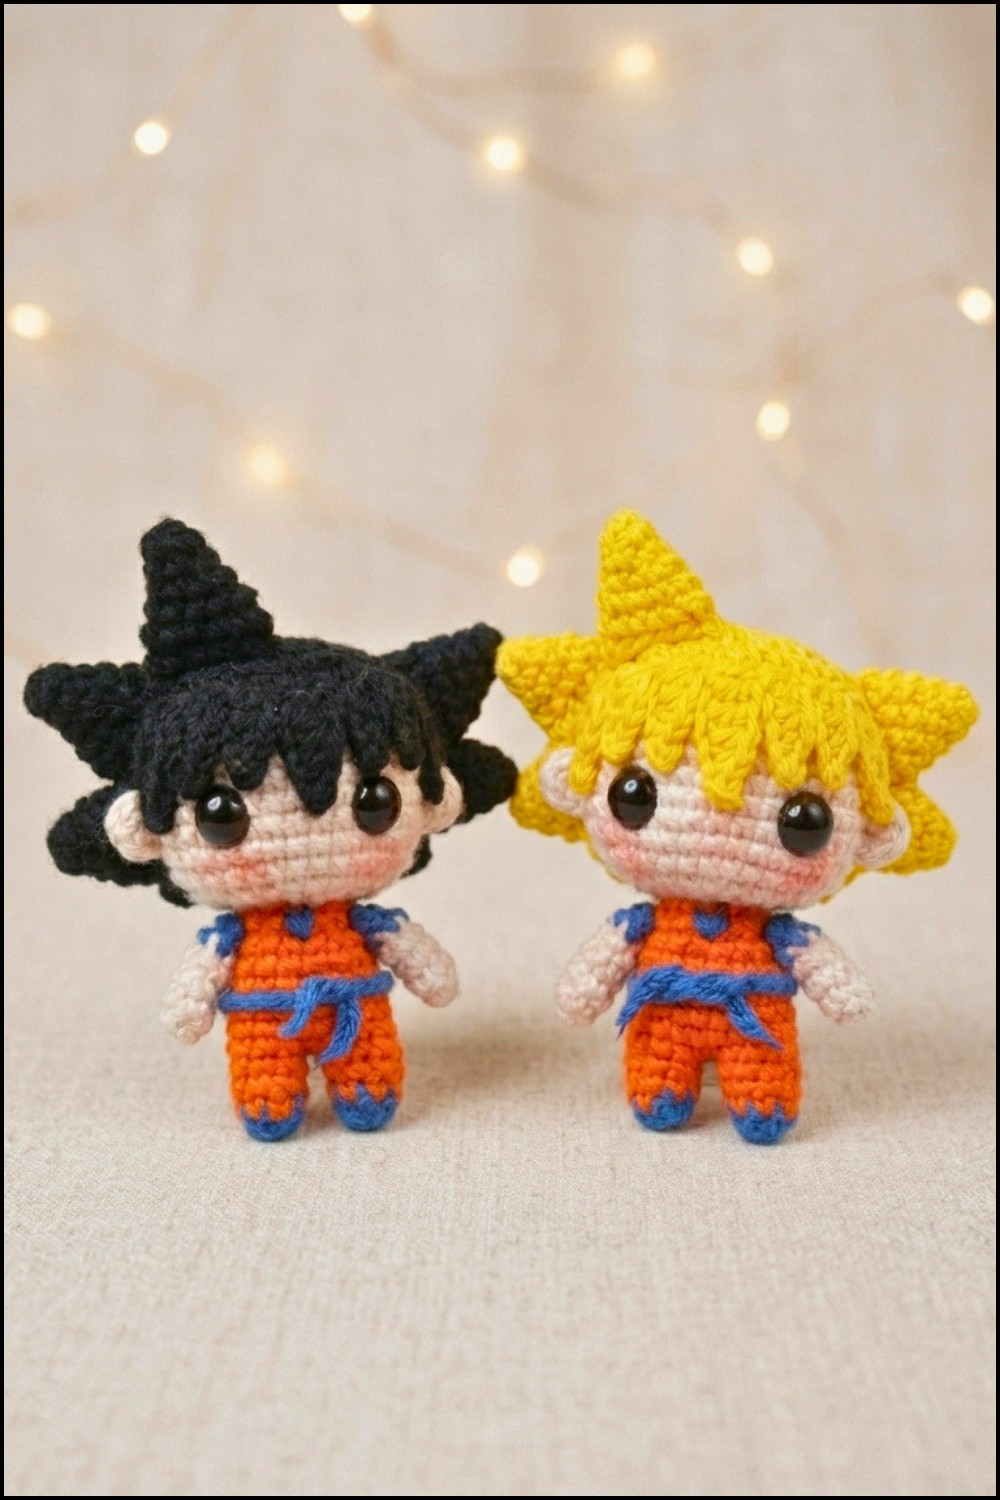
The texture of this piece stands out with a mix of smooth and subtly raised stitches that highlight the character’s defining features with dimension and character. Key design elements include the striking hair spikes and the thoughtfully rendered outfit details, which give this little figure an unmistakable personality. Whether new to this kind of project or experienced, the pattern encourages crocheting a visually appealing and meaningful item. Follow the full crochet pattern and see how each stitch adds to the charm and joyful spirit of this beloved warrior in miniature form.
Crochet Goku Amigurumi Free Pattern
This project offers a detailed step-by-step method for crocheting a charming Goku Amigurumi. The clear instructions focus on essential techniques for shaping the head, assembling unique hair features, and constructing arms, legs, and facial details. Every section is thoughtfully structured, allowing both newer and experienced crocheters to work confidently. Practical tips are included to help achieve a polished finish, and individual components are worked with precision for symmetry and neatness. Small yarn quantities in varied colors are all you need to develop expressive features and a fun outfit. The finished doll easily attaches to a keychain ring, making it a cheerful accessory for bags, keys, or display. Follow along and watch each part fit together to form a lively, personal keepsake.
Quick Overview of the Pattern
- Create a continuous amigurumi head with inserted safety eyes and firm stuffing.
- Crochet the separate hair base and add distinctive bang strands for the front.
- Add realistic detailing with ear pieces, back hair coverage, and individual spiked hair components for extra personality.
- Form arms and legs separately in vibrant colors, joining legs into a seamless body for stability.
- Assemble and secure all components, finishing off with embroidered accents and a handmade belt for additional detail.
- Finish by adding a blush and attaching a keychain ring for practical daily use.
Notes
- This project is worked in the round; use a stitch marker to track your rounds.
- Firm stuffing results in a well-shaped figure.
- Most transitions between yarn colors or pieces require leaving a tail for sewing.
- Amigurumi is ideal for using up small scraps of yarn—you need only a small amount of each color.
- Take care with safety eyes and glue for keychain safety, especially around children.
- Use a felting needle to neaten any visible fiber.
Skill Level
Intermediate.
This pattern uses basic amigurumi stitches with some shaping and color changes. Attention to detail during assembly will help produce the most polished result.
Materials
- Cotton yarn:
- Skin color (for face, arms, and ears)
- Black or yellow (for hair base and spikes)
- Blue (outfit and arms)
- Orange (outfit)
- 1.75 mm crochet hook
- 7 mm safety eyes (set of two)
- Fiberfill/stuffing
- Tapestry needle & felting needle
- Scissors, stitch marker, pins
- Glue (fabric or craft glue for details)
- Blush (for cheeks)
- Keychain ring
Measurements / Sizing
- Final Goku Amigurumi measures approximately 3" (7–8 cm) tall when completed and firmly stuffed.
- Each element can be gently stretched or plumped during stuffing for your desired proportions.
Gauge
Gauge is not critical for amigurumi but work tightly so that stuffing does not show through the stitches. Using a 1.75 mm hook with cotton yarn creates a dense, even fabric.
Stitch Abbreviations
- sc: single crochet
- inc: increase (2 sc in the same stitch)
- dec: decrease (single crochet two stitches together)
- sl st: slip stitch
- ch: chain
- hdc: half double crochet
- dc: double crochet
- st(s): stitch(es)
- Rnd(s): round(s)
Special Stitches
- Magic ring: Form a closed loop to begin crocheting in the round; especially useful for amigurumi.
- Invisible decrease: Work a decrease through the front loops only of two stitches, for a neater, less bulky look.
- Back loop only (BLO): Used for ribbing or shaping certain sections.
The Crochet Pattern
Head (Skin Yarn)
- Rnd 1: 7 sc in a magic ring. (7)
- Rnd 2: Inc in each st around. (14)
- Rnd 3: (1 sc, inc) repeat 7 times. (21)
- Rnd 4: 1 sc, inc, (2 sc, inc) x6, 1 sc. (28)
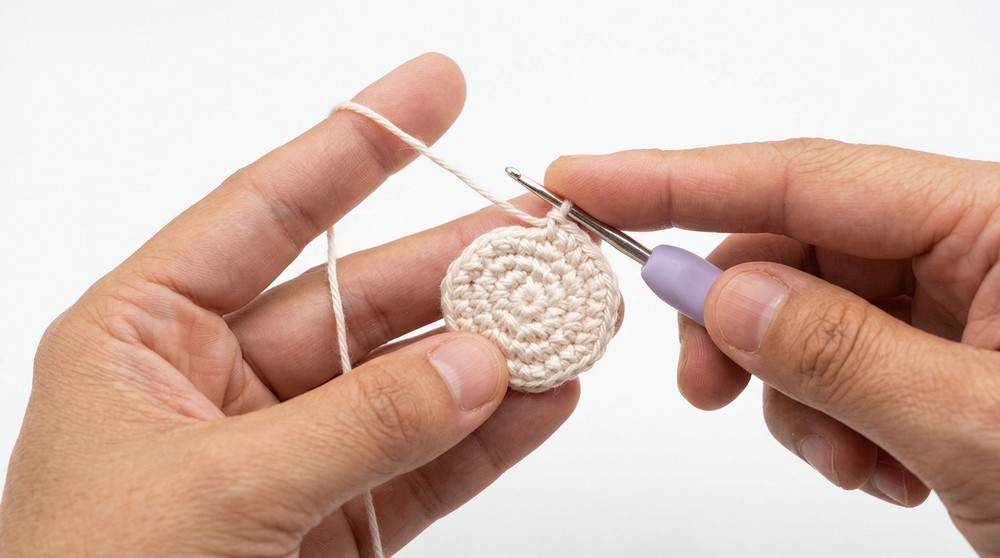
- Rnd 5: (3 sc, inc) x7. (35)
- Rnds 6–13: 1 sc in each st for 8 rounds. (35)
- Insert safety eyes between Rnds 10 and 11, spacing 8 stitches apart.
- Rnd 14: (3 sc, dec) x7. (28)
- Rnd 15: 1 sc, dec, (2 sc, dec) x6, 1 sc. (21)
- Firmly stuff the head and secure fibers with felting needle.
- Rnd 16: (1 sc, dec) x7. (14)
- Rnd 17: 7 dec. (7)
Finish: Fasten off, weave yarn through front loops to close, knot and hide end.
Hair Base & Bangs (Black or Yellow Yarn)
Hair Base
- Rnd 1: 7 sc in a magic ring. (7)
- Rnd 2: Inc in each st. (14)
- Rnd 3: (1 sc, inc) x7. (21)
- Rnd 4: 1 sc, inc, (2 sc, inc) x6, 1 sc. (28)
- Rnd 5: (3 sc, inc) x7. (35)
- Rnd 6: 12 sc; begin adding bang strands in remainder.
Bangs (Strands 1–7, Worked on Base)
- Strand 1: Ch 6, from 2nd ch: sl st, sc, hdc, 2 dc. Skip 1 st on base, sl st to next.
- Strand 2: Ch 5, from 2nd ch: sl st, sc, hdc, dc. Skip 1 st on base, sl st to next.
- Strand 3: Repeat Strand 2.
- Strand 4: Ch 6, from 2nd ch: sl st, sc, hdc, 2 dc. Skip 1 st, sl st to next.
- Strand 5: Ch 5, work as Strand 2. Skip, sl st.
- Strand 6: Repeat Strand 5.
- Strand 7: Ch 6, work as Strand 1.
- Finish Rnd 6 by working 9 sc across remaining base stitches for maximum coverage.
Back Hair Coverage (Worked in Rows)
- Count 9 sts back from last strand, join yarn.
- Row 1: 21 sc.
- Rows 2–3: Ch 1, turn, 21 sc.
- Row 4: Ch 1, turn, 1 dec, 17 sc, 1 dec. (19)
- Rows 5–8: Ch 1, turn, 19 sc. Fasten off, leave a long tail for sewing.
Ears (Make 2, Skin Color Yarn)
- Rnd 1: 5 sc in a magic ring. Fasten off and leave a long tail for sewing.
- Attach ears between Rnds 9 and 12 of the head, about 3 stitches from outer eye corners.
Assembly: Hair Base, Bangs, and Ears
- Align hair base and head at the magic ring points for symmetry.
- Sew base around Rnds 14–15, framing forehead clearly.
- Glue down individual bang strands for a styled fringe.
- Let glue dry thoroughly before continuing.
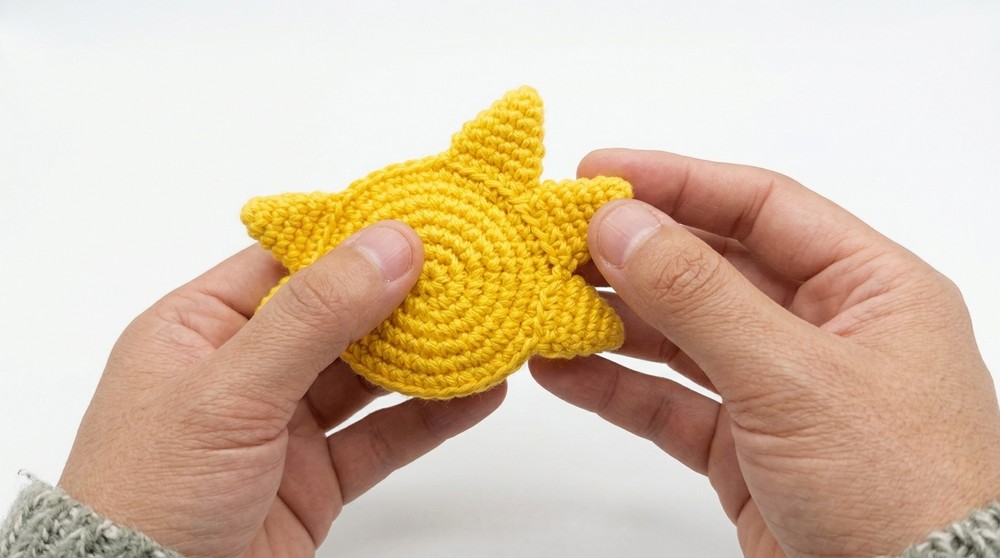
Hair Spikes (3 Spikes per Side, Black or Yellow Yarn)
Spike 1 (Left):
- Rnd 1: 4 sc in a magic ring. (4)
- Rnd 2: (1 sc, inc) x2. (6)
- Rnd 3: (2 sc, inc) x2. (8)
- Rnd 4: (3 sc, inc) x2. (10)
- Rnd 5: (4 sc, inc) x2. (12)
- Rnd 6: 12 sc. Flatten and sew across the edge.
Spike 2:
- As above, but stop after Rnd 5 (10 sc). Flatten and sew.
Spike 3:
- As above, but stop after Rnd 4 (8 sc). Leave open.
Repeat Spike 2 and 3 for the right side. Sew all spikes to top/back edge of hair base, spaced evenly for a spiky hair appearance.
Legs and Body
Leg 1
- Rnd 1: With blue yarn, 7 sc in a magic ring. (7)
- Rnd 2: Switch to orange yarn, 7 sc. (7)
- Rnds 3–4: 7 sc each round. Fasten off with a sl st; set aside.
Leg 2 (as Leg 1, do not fasten off at end)
- After second leg’s fourth rnd, continue:
- Rnd 5: Ch 2, join Leg 1 at sl st; 6 sc around Leg 1, 2 sc along ch-2, 7 sc around Leg 2, 2 sc along opposite side ch-2. (18)
- Rnds 6–8: 18 sc around. (18)
- Rnd 9: (7 sc, dec) x2. (16)
- Rnd 10: 16 sc.
- Rnd 11: (6 sc, dec) x2. (14)
- Fasten off leaving a tail; stuff body; sew securely to base of head.
Arms (Make 2)
- Rnd 1: With skin yarn, 6 sc in a magic ring. (6)
- Rnds 2–4: 6 sc each round.
- Rnd 5: Switch to blue yarn, 6 sc.
- Flatten, sew edge closed, sew both arms between Rnds 10 and 11 of body.
Details & Belt
- V-Borders: Embroider a clear V-shape on the chest using two passes of blue yarn.
- Belt: Ch 29 with orange yarn, trim ends, and affix around waist with glue or by tacking with a needle.
- Facial Touches: Add a natural blush on the cheeks for extra charm.
Assembly & Finished Size
- Sew head to body.
- Sew arms.
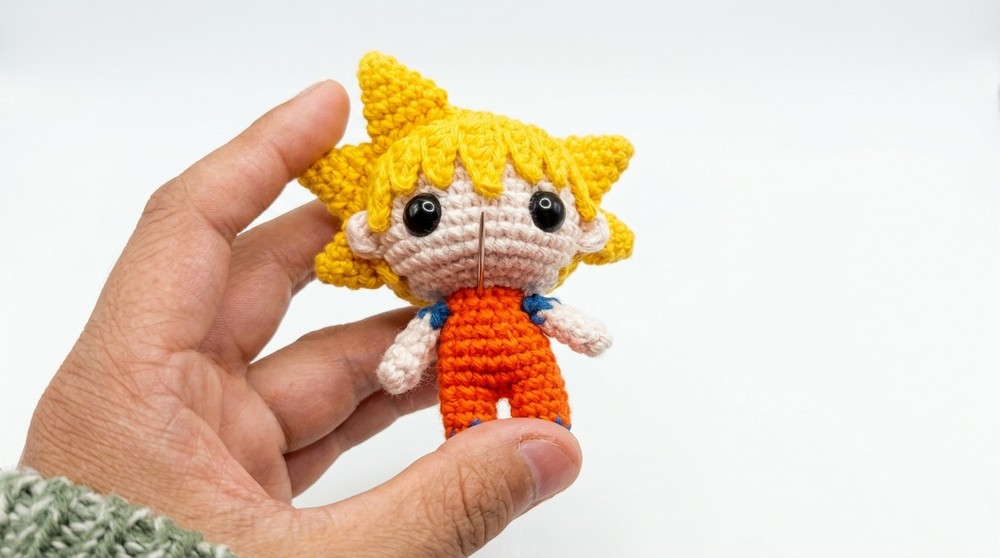
- All features are joined using a tapestry needle and secured.
- Insert stuffing with care, pressing into corners and limbs for optimal shape.
- Attach keychain ring at the top center of the head for convenient use.
- Finished Goku Amigurumi is about 3" tall, with bold hair and a vibrant, characterful outfit.
Conclusion and Ending Words
Completing this amigurumi project leaves you with a bright Goku Amigurumi, full of character and personality. Each element comes together through careful assembly, shaping, and thoughtful color choices. Well-placed stitches and symmetrical features ensure lasting durability and visual appeal. Adding blush to the cheeks and a neat embroidered belt brings extra charm to the finished piece. The result is a miniature doll that fits easily as an accessory or gift, suitable for everyday use. This process not only builds your crochet skills but also gives a sense of achievement with each detail. Enjoy displaying your finished doll or sharing it with friends—it’s a reflection of effort, patience, and creativity in every stitch.
Leave a Reply