

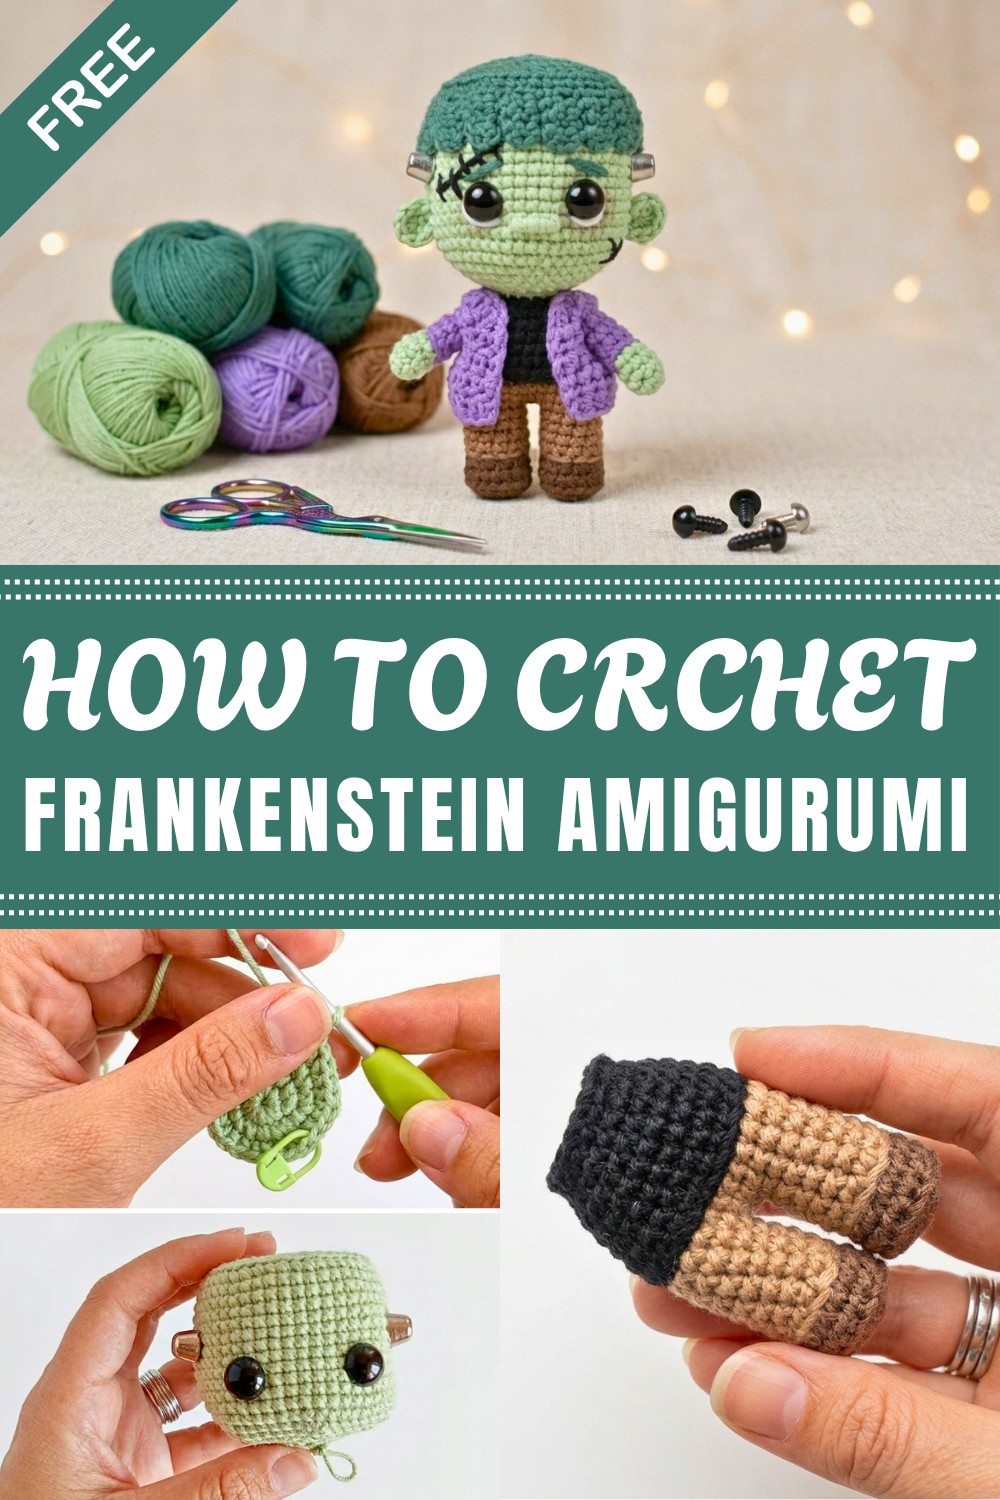
Bring festive character to your collection with a delightful Crochet Frankenstein Amigurumi pattern for Halloween decoration.
Looking for a fun and creative project that adds a touch of whimsy to your collection? Imagine a small, cuddly figure that brings the classic Frankenstein monster to life in a friendly and approachable form. This delightful doll combines softness with playful design, making it perfect for both young and old alike. The Crochet Frankenstein Amigurumi Free Pattern offers an easy and engaging way to create this charming character using yarn and simple stitches.
Playful Crochet Frankenstein Amigurumi Free Pattern For Halloween Lovers
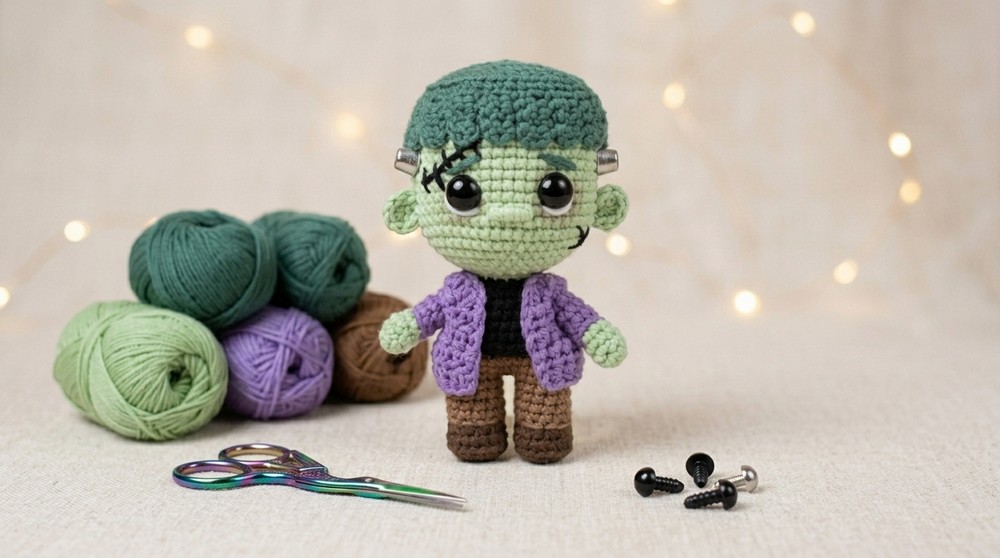
This handmade doll makes a thoughtful gift for Halloween enthusiasts, children, or anyone who enjoys quirky, personalized items. It also serves as a unique decorative piece that can brighten up shelves, desks, or seasonal displays with its vibrant colors and expressive features. The figure boasts a blocky yet rounded shape, with signature bolts on the neck and large, welcoming eyes that soften the monster’s traditional scary image.
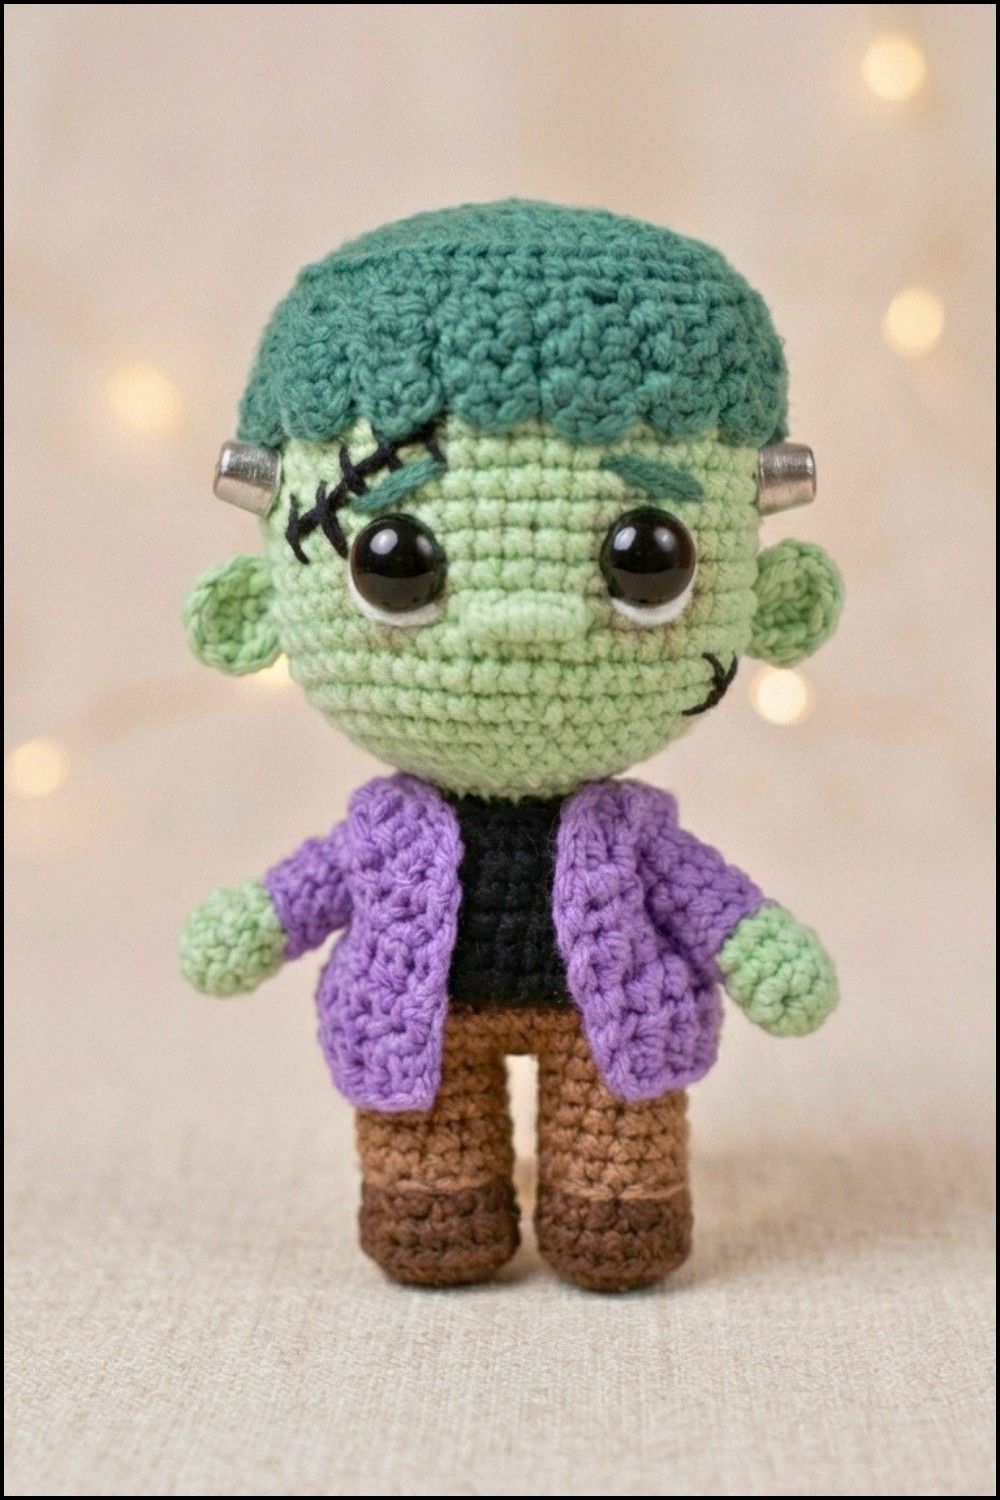
The texture of this amigurumi is soft to the touch but holds its sturdy form well, thanks to the tight, consistent stitching. Its bright green yarn combined with black hair and subtle red details creates a visually appealing contrast, catching attention wherever it’s placed. The piece’s standout design lies in its balance between spooky and cute, making it ideal for gifts, play, or decoration.
Whether used as a collectible, a child’s companion, or festive décor, this charming figure brings warmth and personality wherever it goes. Its approachable style and inviting look mean it’s suited for a wide range of users, adding a playful yet cozy feel to any environment.
Spooky Crochet Frankenstein Amigurumi Free Pattern
This Frankenstein crochet amigurumi pattern showcases a range of amigurumi techniques, resulting in a festive and playful doll inspired by classic monster motifs. Each segment—from his bright green complexion and quirky stitched scars to his stitched-on hair cap and mini jacket—mirrors distinctive Frankenstein features. Throughout, the construction employs classic amigurumi rounds, color changes, and thoughtful embroidery for expressive face details. Using affordable and accessible materials, the finished amigurumi stands as an ideal project for a themed gift, holiday display, or a cheerful handmade keepsake. Step-by-step instructions ensure every essential stage, detail, and assembly tip is included, making it approachable for crocheters who enjoy both structure and creative flair.
Quick Overview Of Pattern
- Head and hands are worked in light green yarn for an iconic look
- Hair cap and strands in dark green add texture and playful effect
- Face assembled with safety eyes, embroidered brows, nose, and subtle shading
- Ears constructed separately and attached for shaping
- Legs are worked up to the inseam, then joined for seamless body creation
- Shirt and pants details are made through simple color changes
- Arms crocheted flat for a cartoonish touch and sewn into the jacket
- Squarish jacket made in panels with integrated armholes
- Thoughtful embellishments include metal brads, safety eyes, embroidery, and creative use of yarn and makeup for unique facial impact
Notes
- Rounds are worked in a spiral unless otherwise noted—use stitch markers to denote your first stitch.
- When switching colors, always complete the last stitch of the previous section in the new color for a tidy, seamless transition.
- All decreases (dec) are done as invisible single crochet decreases, unless otherwise specified.
- Stuff as you go—ensure the head remains lightly stuffed on top for a flatter silhouette.
- Eyes and features are best added before full closure for easy positioning.
- Fasten all ends securely and weave in using a tapestry needle.
Skill Level
Advanced Beginner
Familiarity with basic amigurumi stitches, color changes, and simple embroidery is required. Clear step-by-step instructions make this project suitable for those seeking to build skill through new techniques.
Materials
- Yarn: Cotton or acrylic in light green (head/hands), dark green (hair), dark brown (shoes), light brown (pants), black (shirt), lilac (jacket)
- Crochet Hook: 2.25 mm or 2.5 mm
- Safety Eyes: 10 mm, black
- Hardware: Small metal brads or screws for head detail
- Notions & Tools: Tapestry needle, scissors, stitch markers, fiberfill stuffing, textile or liquid glue, brown eyeshadow for shading
Measurements / Sizing
- Finished amigurumi measures approximately 15–18 cm tall, depending on tension and stuffing.
Gauge
- Gauge is not strictly critical; however, maintaining even tension ensures consistent shaping and prevents stuffing from showing through stitches.
Stitch Abbreviations
| Abbreviation | Definition |
|---|---|
| sc | single crochet |
| sl st | slip stitch |
| ch | chain |
| inc | increase (2 sc in same stitch) |
| dec | decrease (sc2tog) |
| BLO | back loop only |
| hdc | half double crochet |
Special Stitches
- Invisible decrease (dec): Insert hook into front loop only of next two stitches, yarn over, pull through both loops, yarn over again and pull through remaining loops.
- Magic ring: Loop the yarn; work first round’s stitches into the loop, then pull tight.
The Crochet Pattern
Head
Using light green yarn:
- R1: 8 sc in a magic ring.
- R2: 8 inc — 16 sc.
- R3: (1 sc, 1 inc) x 8 — 24 sc.
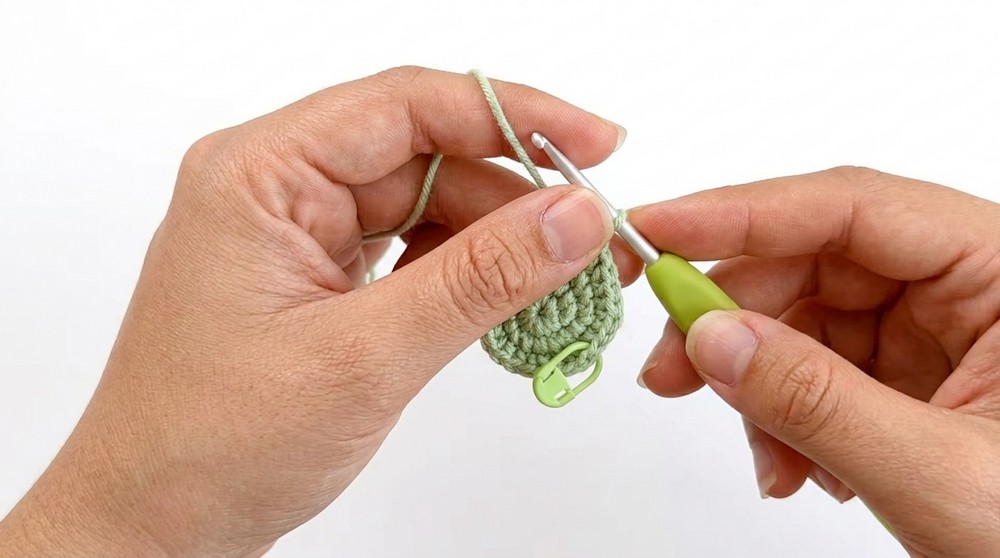
- R4: (2 sc, 1 inc) x 8 — 32 sc.
- R5: (3 sc, 1 inc) x 8 — 40 sc.
- R6: (4 sc, 1 inc) x 8 — 48 sc.
- R7: 48 sc in BLO.
- R8–R19: 48 sc for 12 rounds.
- R20: (6 sc, 1 dec) x 6 — 42 sc.
- R21: (5 sc, 1 dec) x 6 — 36 sc.
Insert head brads/screws 6 rounds below the BLO ridge.
- R22: (4 sc, 1 dec) x 6 — 30 sc.
- R23: (3 sc, 1 dec) x 6 — 24 sc.
Place safety eyes between R15 and R16, spaced 8 stitches apart.
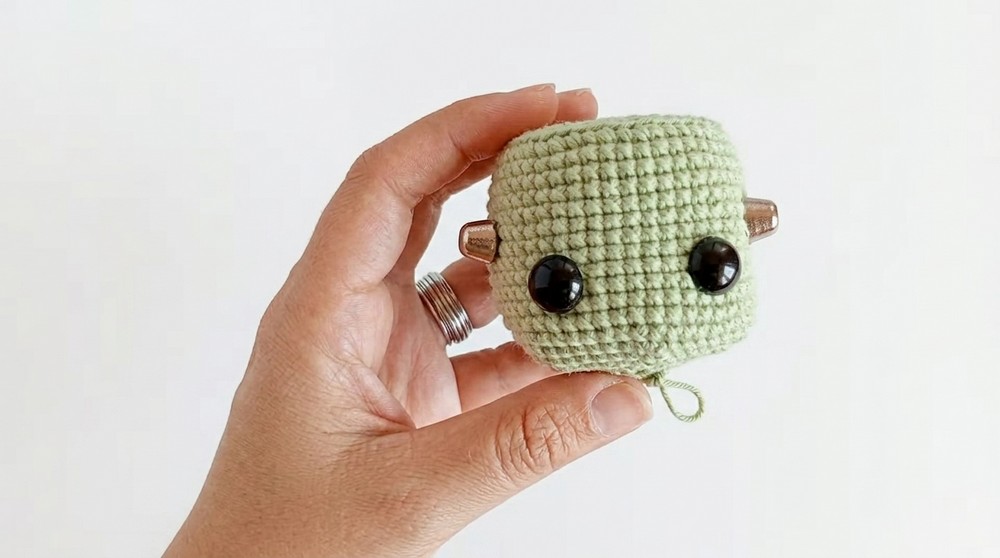
- R24: (2 sc, 1 dec) x 6 — 18 sc. Finish stuffing moderately, keeping the top slightly flat. Fasten off, leaving a long tail for sewing.
Hair Cap & Strands
Using dark green yarn (crochet loosely or use a larger hook):
- R1–R7: Repeat R1–R7 of head pattern (BLO on R7).
- For hair strands:
- Ch 6, start in 4th ch from hook, do 3 dc along the chain.
- Turn, skip 2 sts on the cap, sl st into the third st.
- Repeat continuously around the cap edge to achieve even coverage.
Before attaching the strands, embroider several black scar lines across the forehead for an animated scar effect.
Ears, Face Details & Nose
Ears (Make 2):
- Magic ring, work 6 hdc into the ring, pull tight, leave a long tail.
Face Details:
- Apply brown eyeshadow around the lower eye region for shadowing.
- Sew ears evenly aligned with eyes, using the remaining yarn tail to pull through the head behind the eyes—this indents the eyes, adding personality.
- For the nose, wrap 3 horizontal stitches across 4 center stitches below the eyes, then weave vertically over these wraps to mimic nostrils/structure.
- Embroider angled eyebrows across 4 stitches, one row down from the top edge of the eyes, using black thread.
Legs & Body
Legs (Make 2, start with dark brown):
- R1: 8 sc in a magic ring.
- R2: 8 inc — 16 sc.
- R3: 16 sc in BLO.
- R4: 4 sc, 4 dec, 4 sc — 12 sc.
- R5 (Switch to light brown): 12 sl st.
- R6: 12 sc in BLO.
- R7–R8: 12 sc for each of 2 rounds.
To finish legs:
- Left Leg R9: 10 sc (leave 2 stitches unworked), fasten off.
- Right Leg R9: 15 sc (work 3 extra sc to align inseam properly), do not fasten off yet.
Joining legs into body:
- R10: Ch 1, 12 sc around left leg, 1 inc in ch, 12 sc around right leg, 1 inc on the opposite side of ch — 28 sc.
- R11–R12: 28 sc for two rounds.
- R13 (Switch to black): 28 sl st. (“shirt” section)
- R14: 28 sc in BLO.
- R15–R16: 28 sc for each of 2 rounds.
- R17: 2 sc, 1 dec, 4 sc, 1 dec, 8 sc, 1 dec, 4 sc, 1 dec, 2 sc — 24 sc.
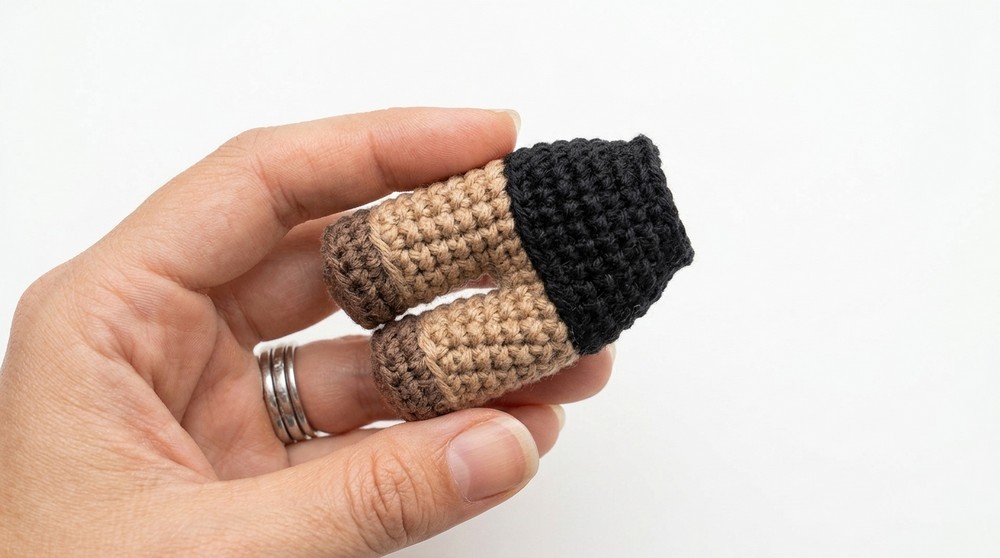
- R18: 24 sc.
- R19: (2 sc, 1 dec) x 6 — 18 sc.
Stuff the legs and body firmly. Fasten off, leaving a long tail.
Arms (Make 2)
With light green:
- R1: 6 sc in a magic ring.
- R2: (1 sc, 1 inc) x 3 — 9 sc.
- R3–R4: 9 sc in each round.
Switch to lilac yarn: - R5: 9 sl st.
- R6: 9 sc in BLO.
- R7–R11: 9 sc for 5 rounds.
- Finish: Flatten the top and work 4 sc across both sides to close. Fasten off, leaving a tail.
Jacket
Using lilac:
- Ch 25, start in 2nd ch from hook, 24 sc, ch 1, turn.
- Extension Rows: Work 3 more rows of 24 sc each.
- Sleeves/Armholes: Work 4 sc, ch 5 (skip 4 sts), 8 sc, ch 5 (skip 4 sts), 4 sc.
- Length: Work 4 rows of 24 sc across all stitches (including underarm chains), fasten off.
Assembly & Finished Size
- Attach the head to the flat neck opening at the top of the body, sewing securely.
- Stitch the arms to body at round 18, just beneath the “shirt.”
- Fit and sew or glue the hair cap to the top of the head, ensuring BLO ridges are aligned and securing strands firmly.
- Slide the jacket over the amigurumi, aligning sleeve holes and body.
- Add safety eyes and embroider eyebrows, nose, and scars as detailed above.
- For added brightness, use a small piece of white yarn to create eye highlights on the outer edge of the safety eyes.
- Attach the small metal brads/screws in the head 6 rounds below the BLO ridge for authentic Frankenstein detail.
- Weave in all ends and apply any extra facial shading as desired.
Conclusion and Ending Words
Assembling this Frankenstein amigurumi yields a characterful and memorable piece, reflecting amigurumi tradition with distinctive stitched lines, textural hair, and bold color-blocking. Each part—from carefully placed joints to the finishing touches of shading and highlights—brings out personality and festivity. Structured rounds and intuitive colorwork speed up the process, while well-integrated details, like the mini jacket and cap, encourage playful experimentation. Whether for Halloween or as a year-round centerpiece, this amigurumi promises delight both in the making and in the giving, offering a classic monster with a cheerful and handmade twist.
Leave a Reply