

Bring your favorite anime character to life by using this Crochet Tony Chopper Pattern for an adorable and fun amigurumi project.
I’ve always loved bringing my favorite characters to life with yarn, and recently I stumbled upon an adorable project that truly warmed my heart—the Crochet Tony Chopper Free Pattern. Tony Chopper, that lovable little reindeer from the anime world, makes for a charming amigurumi figure that’s both fun to make and delightful to display.
Playful Crochet Tony Chopper Free Pattern That Makes A Cute Display
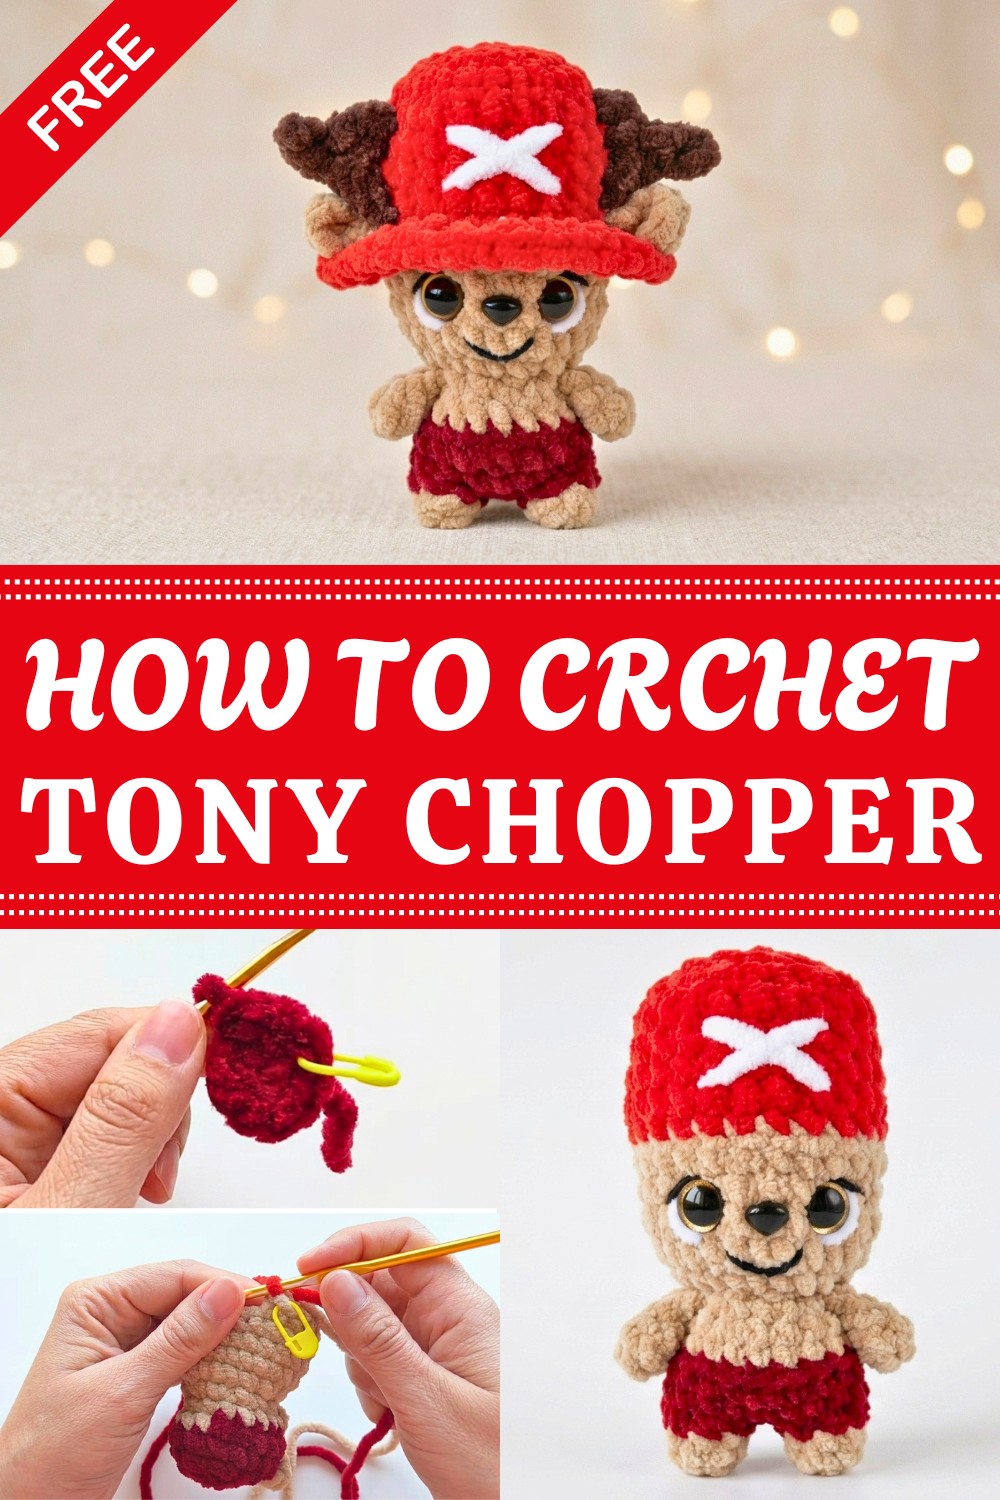
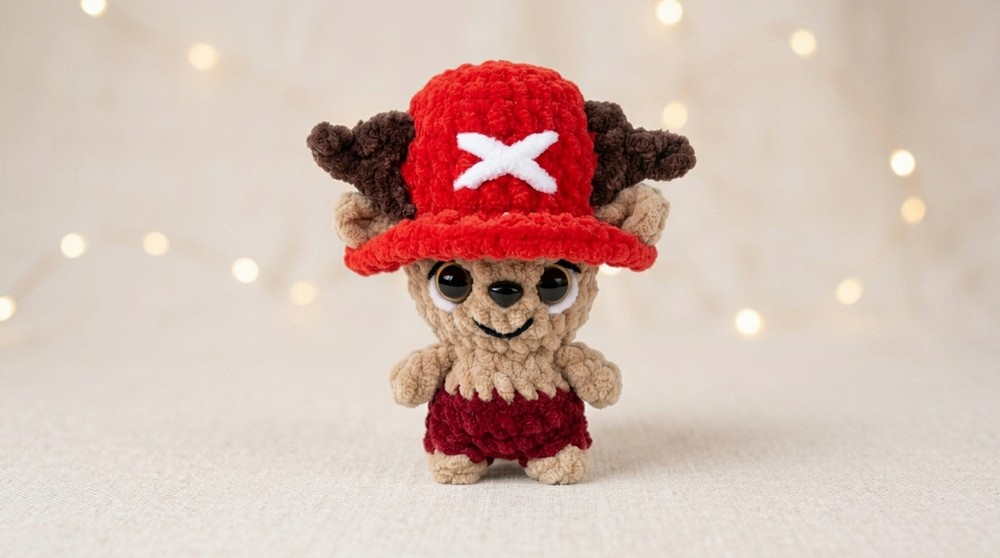
This project is all about creating a small, huggable doll that balances cute and detailed perfectly. The design captures Tony's signature hat, big eyes, and tiny antlers with neat, rounded shapes that give it a soft, approachable look. The texture comes mostly from simple stitches that create a smooth surface, ideal for showcasing the colorful accents and features that make Tony Chopper instantly recognizable. It’s a fantastic beginner-to-intermediate level project, and the pattern usually offers guidance on making at least one standard size, but I’ve found that tweaking yarn weight or hook size can make your Chopper even bigger or smaller to suit your taste.
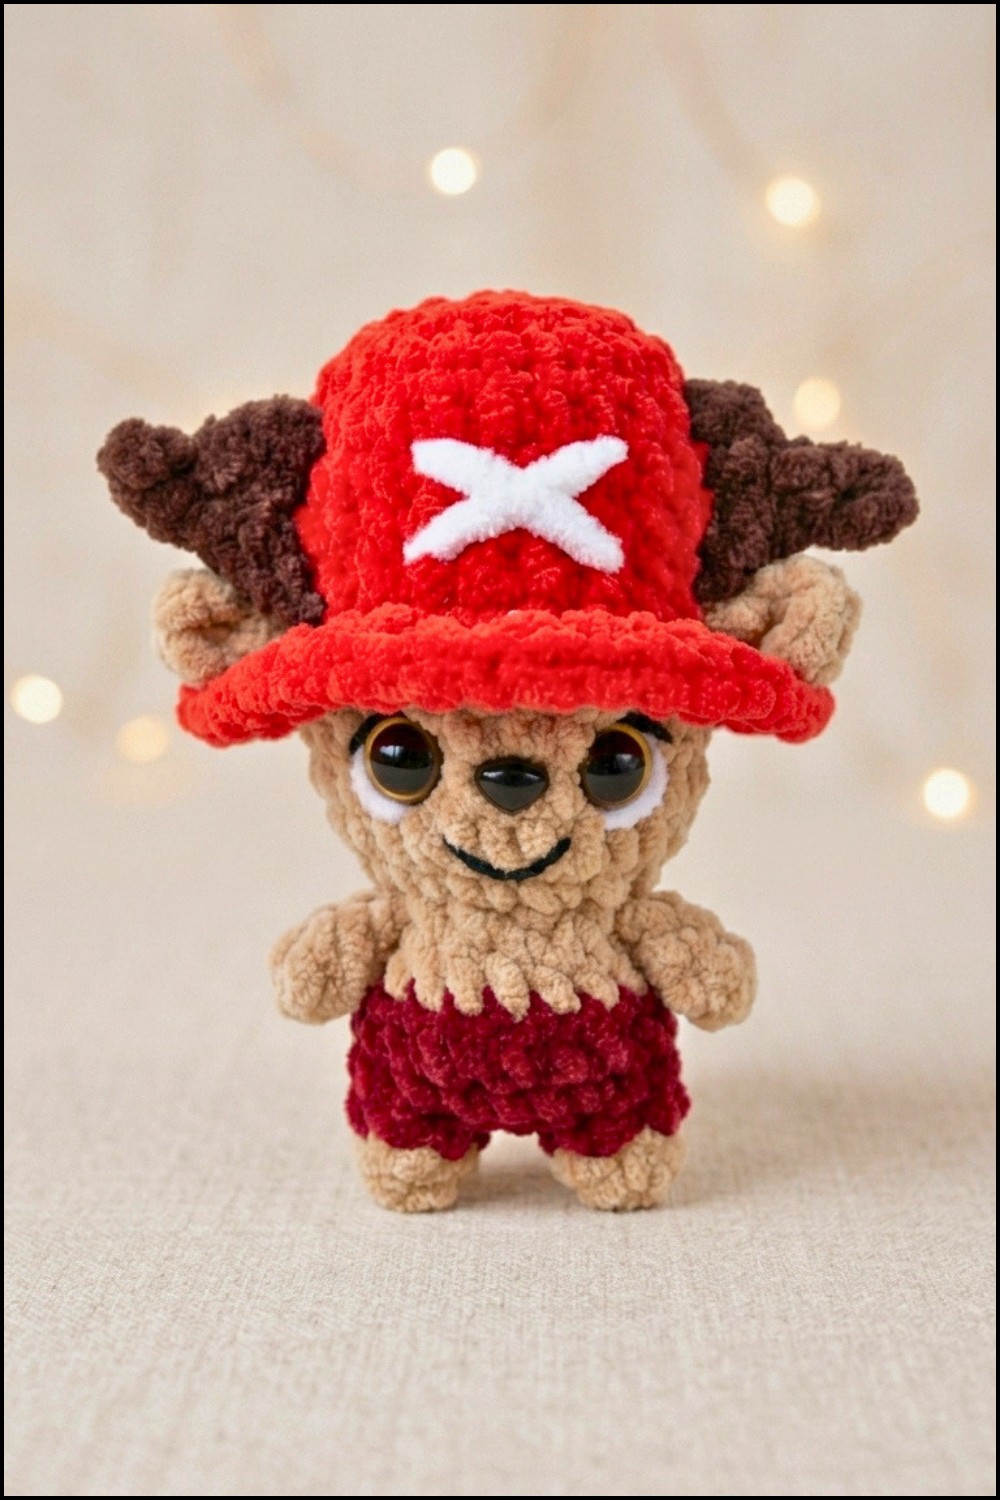
The figure is usually worked in the round, with clever increases and decreases giving definition to the head, body, and limbs. One tip I’ve picked up is to stuff firmly but gently, so your Chopper keeps his shape without getting too stiff. Using a soft, sturdy yarn—like a smooth cotton blend or a mellow acrylic—really helps the stitches pop while keeping the amigurumi cuddly toy and durable.
Inspired by my childhood love for anime character and the gentle nature of Tony himself, this pattern brings a bit of joy to any maker's stash. It’s perfect for gifting—whether a birthday present for a fan or a cute companion for a child—and it encourages playing with colors or adding personal touches, like a tiny scarf or little bag, to make your Tony Chopper uniquely yours. I’ve enjoyed every stitch of this project and can’t wait to see how others put their spin on this delightful yarn creation.
Charming Crochet Tony Chopper Free Pattern
This plush Tony Chopper Reindeer is constructed seamlessly from the base up, incorporating legs, arms, and shaping directly into the main form. The use of plush yarn in carefully selected shades delivers a soft and huggable finish, while detailed instructions result in neat color changes and sturdy features. Techniques such as three double crochet clusters for limbs, precise facial embroidery, and an integrated hat with decorative motifs ensure a satisfying result. With clearly highlighted stitches and sequential steps, each stage flows logically, providing structure and support. This project yields a durable, charming toy with distinct personality and character.
Quick Overview Of Pattern
- Toy is worked in continuous rounds and rows from legs to head.
- Shaped legs, arms, and features are built into body rounds, eliminating seams.
- Safety eyes and nose are attached for durability and a polished look.
- Hat, ears, and horns are crocheted in place and further embellished with embroidery.
- Final assembly includes stuffing, decorative embroidery, and attaching details.
Notes
- All stitches are worked in the round unless specified otherwise.
- Use a stitch marker to mark the first stitch of each round for accuracy.
- Switch yarn colors as indicated for a clean transition between clothing and body parts.
- Secure loose ends and color changes with double knots inside the work.
- Adjust stuffing throughout to maintain an even, flat top and firm toy body.
- Facial embroidery and hat decoration are added after stuffing.
Skill Level
Beginner to Intermediate.
Fundamental skills required:
- Working in the round (amigurumi ring)
- Color changes
- Basic increases and decreases
- Crocheting into back/front loops
- Simple embroidery for finishing details
Materials
- Plush Yarn (100 g / 120 m each):
- Burgundy (for shorts/clothing)
- Main body color (cream or tan)
- Red (for hat)
- White (for accents)
- Brown (for horns)
- Crochet Hook: 4 mm (Hook #4)
- Safety Eyes: 12 mm (black)
- Safety Nose: 7 x 9 mm (oval)
- Stuffing: Fiberfill/toy stuffing
- Stitch Marker, Scissors
- Tapestry Needle (for sewing and embroidery)
Measurements / Sizing
- Finished Size: Approximately 11 cm tall (including hat)
- Ideal for desk or shelf display, holiday gift, or collectible amigurumi
Gauge
- Gauge is not critical for toys, but the stitches should be tight enough to avoid gaps in the fabric and ensure the stuffing is not visible.
Stitch Abbreviations
| Abbreviation | Meaning |
|---|---|
| sc | single crochet |
| inc | increase (2 sc in next st) |
| dec | decrease (sc2tog) |
| dc | double crochet |
| hdc | half double crochet |
| sl st | slip stitch |
| ch | chain |
| BLO | back loops only |
| MR | magic ring |
Special Stitches
- Amigurumi Ring (MR): Form a circle with yarn, work sc stitches into ring, then pull tight.
- 3-dc Cluster: Yarn over, insert into stitch, pull up loop, complete three dc partially in one stitch, then finish all at once (common top).
The Crochet Pattern
Body & Head Pattern (Bulleted Rounds)
- Round 1: Using burgundy yarn, work 8 sc into an amigurumi ring. (8 sts)
- Round 2: Work an inc (2 sc in each st) around. (16 sts)
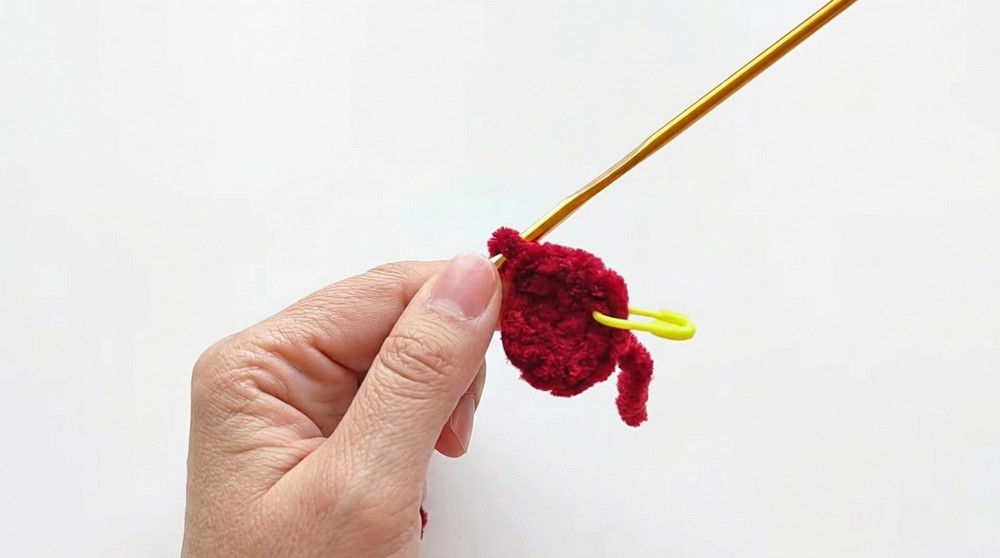
- Round 3 (Legs Row):
- 4 sc in burgundy.
- On the 5th sc, leave last loop on hook; switch to main/body color.
- First leg: 3 dc into the next st with a common top (3-dc cluster) using main color.
- Switch back to burgundy; 3 sc in burgundy.
- On the 4th sc, leave last loop on hook; switch to main color.
- Second leg: 3 dc into the next st with a common top (3-dc cluster) using main color.
- Switch back to burgundy; finish with 5 sc in burgundy. (16 sts)
- Tie off yarn tails securely on the inside.
- Round 4: Work 16 sc around without changes. Finish the last sc with main color, cut burgundy yarn and tie secure knots. (16 sts)
- Round 5 (Arms Row):
- 6 sc in main color.
- First arm: 3 dc into the next st with a common top (3-dc cluster).
- 2 sc in main color.
- Second arm: 3 dc into the next st with a common top (3-dc cluster).
- 6 sc to complete the row. (16 sts)
- Round 6: Repeat (2 sc, dec) 4 times. (12 sts)
- Round 7: Work 12 inc (2 sc in each st) across all stitches to form the base of the head. (24 sts)
- Rounds 8–11: Work 24 sc around. Change to red yarn on the last sc of Round 11. (24 sts)
- Round 12: Work 24 sc around using red yarn. Cut thread and tie knots. (24 sts)
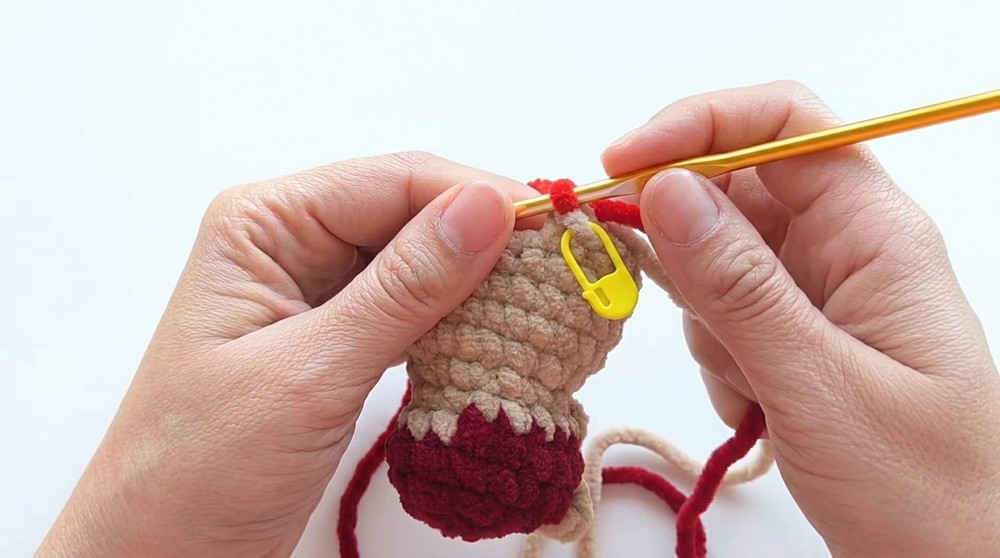
- Rounds 13–16: Work 24 sc around. Insert safety eyes between Rounds 9 and 10. (24 sts)
- Round 17: Work 24 dc BLO (double crochet in back loops only) to form the base for the hat brim. Stuff the body and head with fiberfill. (24 sts)
- Round 18: Work 12 dec (sc2tog) in a row. Add additional stuffing to ensure a flat top. (12 sts)
- Round 19: Work 6 dec (sc2tog). Top off stuffing if needed while keeping the top flat.
- Finishing Head: Weave the tail through the front loops of the remaining 6 stitches, pull tight to close, thread into the center, and bring out to the side.
Facial & Hat Details (Bulleted Steps)
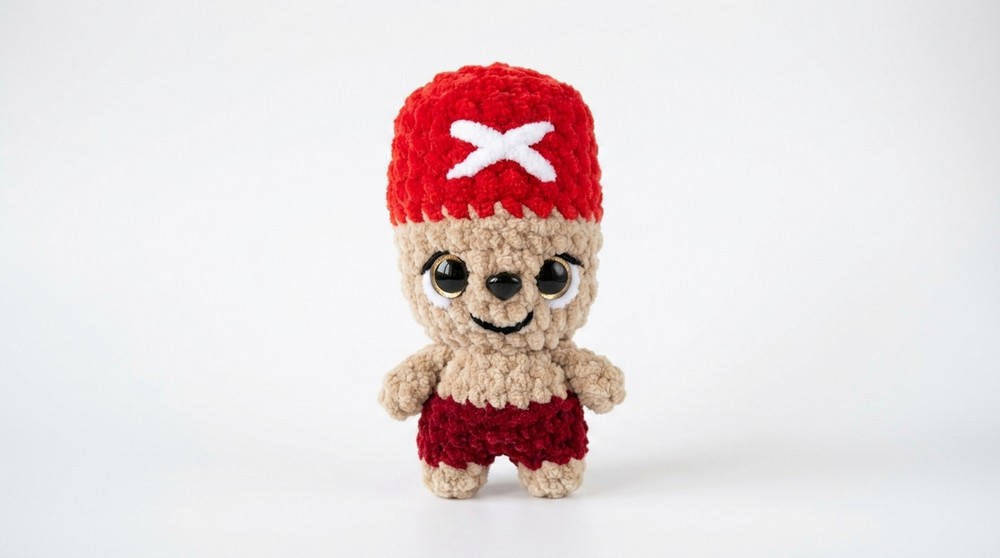
- Eyes: Embroider white yarn around the outer edges of the safety eyes for whites.
- Nose: Glue on a 7 x 9 mm safety nose.
- Mouth: Embroider the mouth, smile, and eyelashes.
- Hat: Embroider an "X" cross pattern on the front of the red hat using white yarn.
Hat Brim (Bulleted Steps)
- Step 1: Turn the toy upside down and attach red yarn to the front loops left from Round 17.
- Step 2: Ch 2, then work 1 dc into the same st.
- Step 3: Repeat (1 dc, 1 inc) around to the end of the row.
- Step 4: Fasten off and weave in ends.
Ears (Bulleted Steps)
- Step 1: Attach yarn at the side of the head and ch 4.
- Step 2: Work 1 dc in the 3rd ch from the hook.
- Step 3: Work 1 hdc in the next ch.
- Step 4: Work 1 sl st back into the head.
- Step 5: Cut yarn and weave in ends. Repeat for the second ear on the opposite side.
Horns (Bulleted Steps)
- Step 1: Attach brown yarn directly above the ear.
- Step 2: Ch 6.
- Step 3: Work 1 sc in the 2nd ch from hook, 1 sc in the next ch, and 1 sl st in the 3rd ch.
- Step 4: Ch 3.
- Step 5: Work 1 dc in the 2nd ch from hook, then 1 sl st.
- Step 6: Work 2 st down along the remaining chain loops.
- Step 7: Work 1 sl st into the starting base.
- Step 8: Cut yarn long. Sew the top portion slightly to the hat to secure the horns upright so they don't fall over. Repeat on the other side.
Assembly & Finished Size
- Attach horns so they’re secured upright on hat.
- Stuff body firmly for a balanced shape.
- Finish embroidery and detailing.
- Final height: Approximately 11 cm, with tall hat.
Conclusion
Upon finishing all assembly steps and detailed embroidery, the Tony Chopper Reindeer stands as a delightful display piece or thoughtful handmade gift. The robust construction, seamless technique, and plush texture provide both visual appeal and lasting durability. Attention to detail in every section contributes to a professional, polished appearance. With secure safety features and careful shaping, this character is suitable for fans and collectors alike. Take care when handling the embroidered accents and attaching horns for a secure, long-lasting finish. Display proudly as a keepsake or share with someone special, celebrating both effort and skill invested in each round.
Leave a Reply