

Recharge your style with this crochet bandana pattern an easy, stylish way to elevate your casual looks with a trendy handmade accessory!
How can you add a touch of handmade charm to your everyday outfits? This crochet bandana pattern provides a stylish and functional solution. It’s an accessory that combines creativity with practicality, offering endless possibilities for customization. Colors, textures, and patterns can be tailored to suit individual preferences, making each piece truly unique.
Cozy Crochet Bandana Patterns for Cooler Days
With its lightweight design, this bandana serves as a versatile addition to any wardrobe, working seamlessly for casual outings, beach trips, or relaxed gatherings. Beyond aesthetics, it supports sustainable practices by encouraging slow fashion and reducing reliance on mass-produced items.
The joy of crocheting something yourself can be incredibly rewarding, and this project is ideal for both beginners and experienced makers. More than just an accessory, a handmade bandana offers a moment of pride and self-expression. Whether created as a gift or a personal keepsake, it stands as a meaningful item that combines style, purpose, and individuality.
Introduction to the Crochet Bandana Pattern
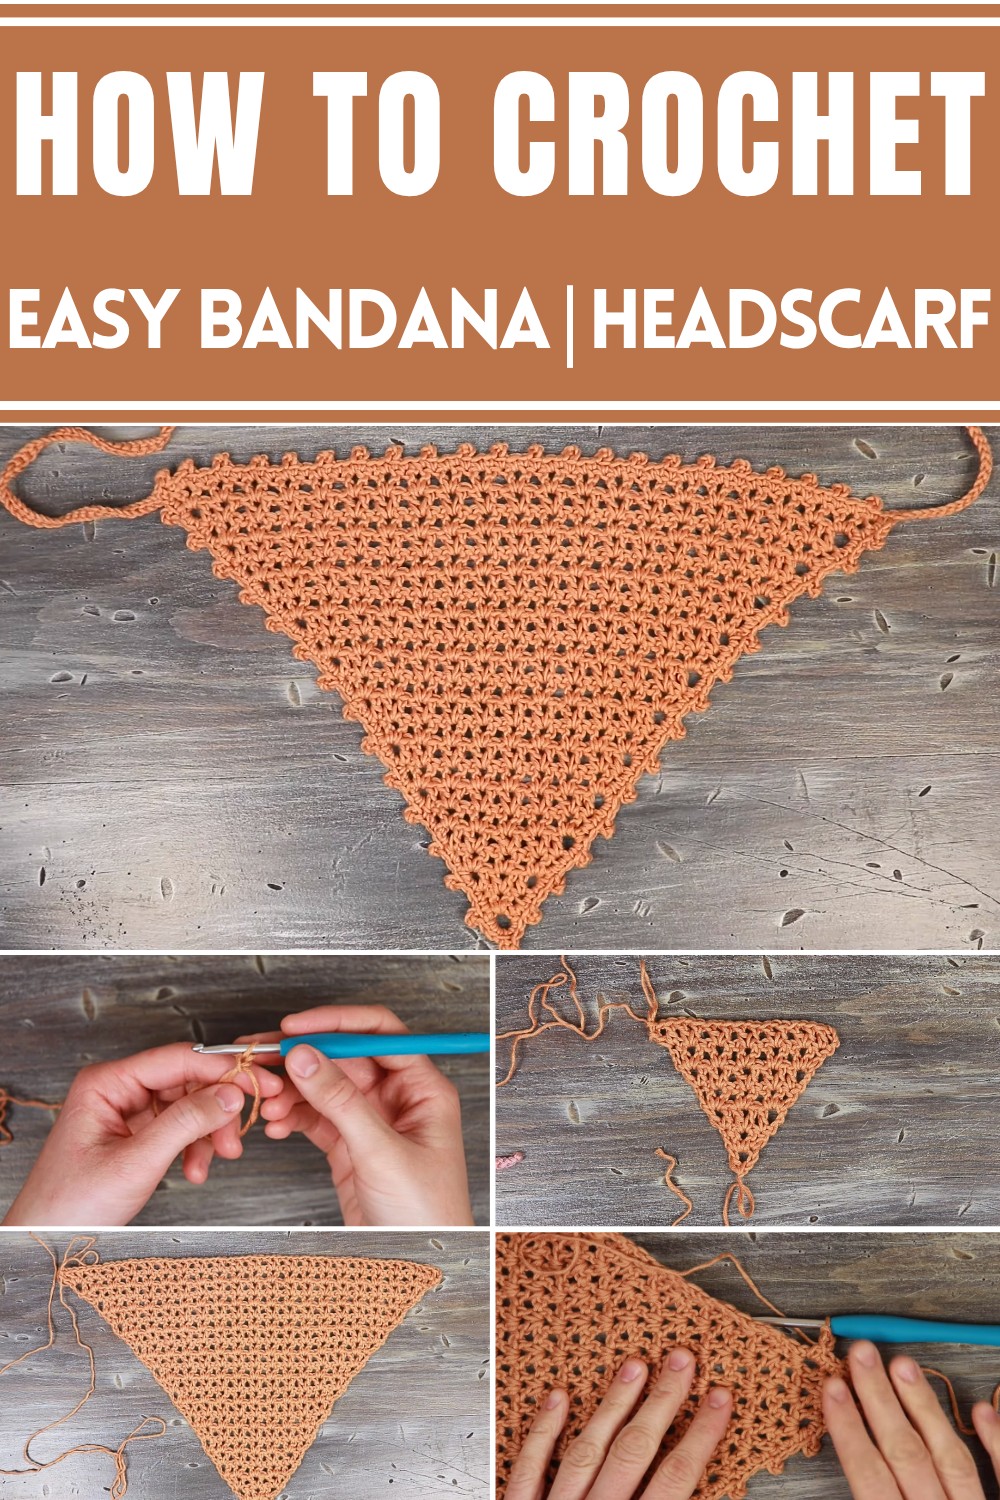
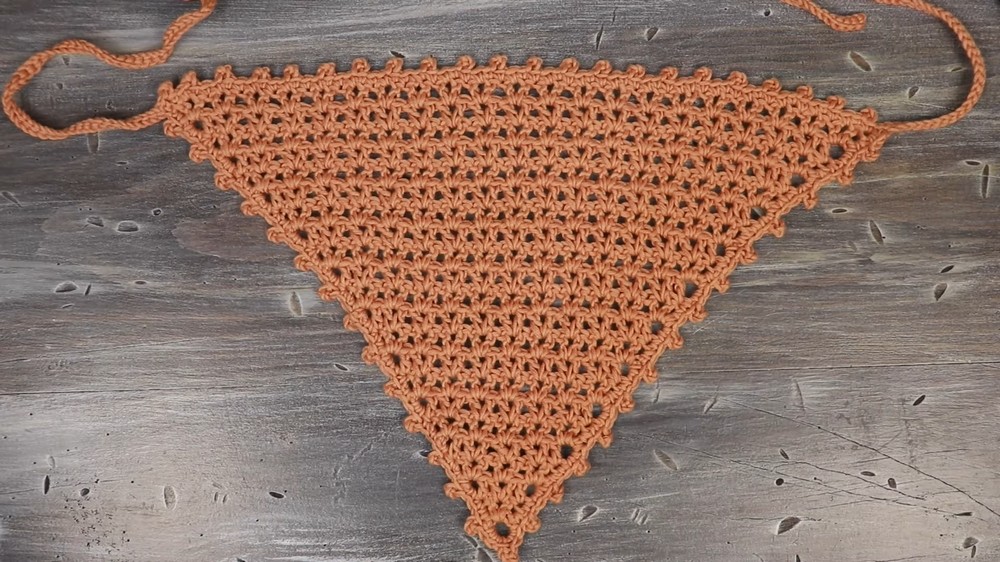
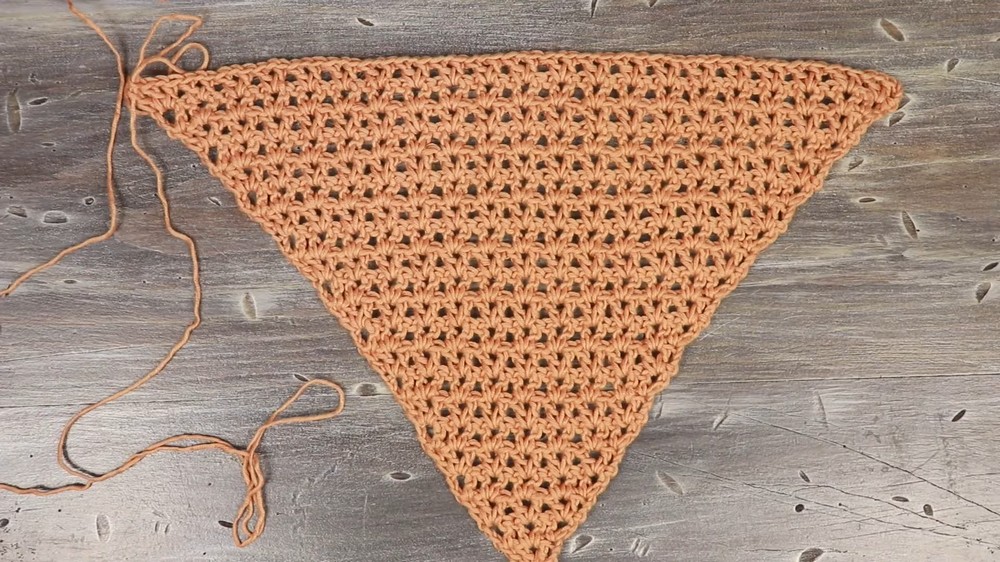
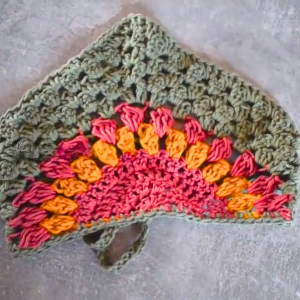
This pattern demonstrates how to crochet a beginner-friendly, lightweight, and springy crochet bandana. The bandana is made using a simple combination of V-stitches and double crochet to create a triangular shape by working from the bottom up. This project can be completed within an hour, making it an excellent choice for both beginners and those looking for a quick and satisfying crochet project. The bandana also features straps and a decorative edging for a polished finish.
Materials Needed
- Cotton yarn (any color of your choice)
- 4.5 mm crochet hook
- Scissors
- Yarn needle (for weaving in the ends)
Step-by-Step Instructions
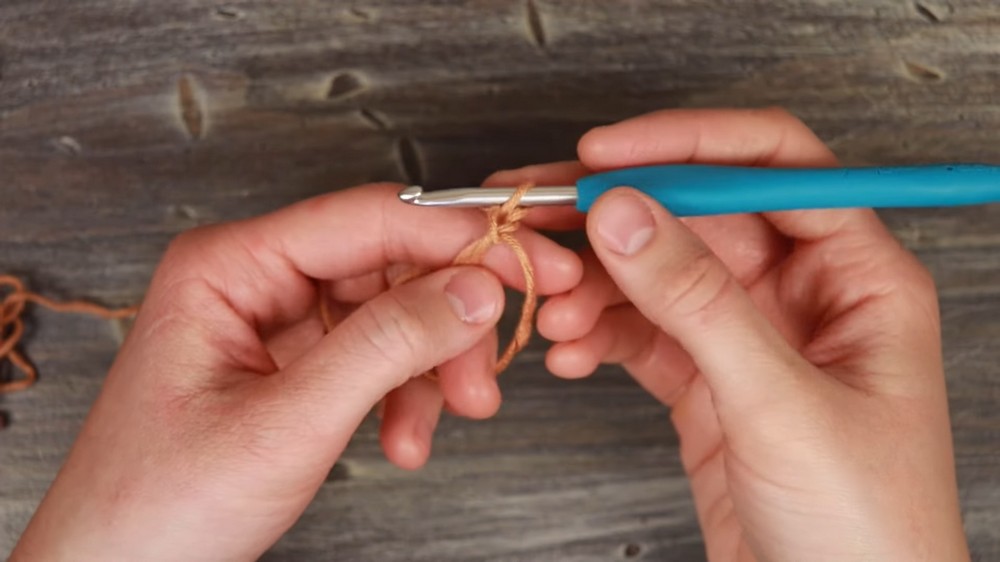
1. Create the Magic Circle (Base of the Bandana)
- Drape your yarn over your fingers, forming an "X" shape at the front with two lines at the back.
- Insert your hook under the back loop, grab the second yarn strand, and pull it through to form a base loop.
- Twist the loop slightly and pull the yarn through again, forming the magic circle.
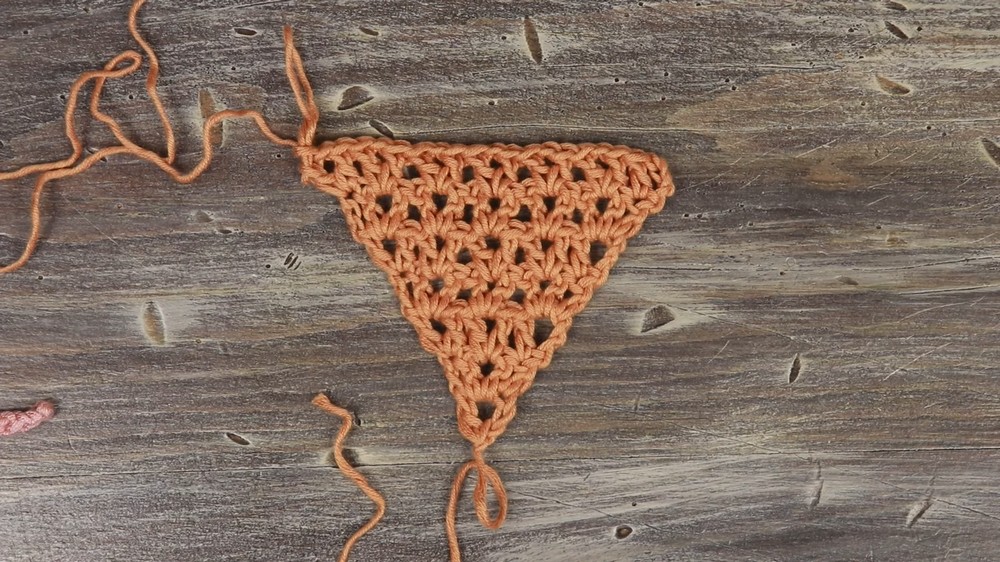
2. Round 1: Starting Chain and First V-Stitch
- Chain 4 (counts as your first double crochet plus a chain-1 space).
- Work a V-stitch into the center of the magic circle:
- (1 double crochet, chain 1, 1 double crochet).
- Pull the loop of the magic circle tight to close it.
- Turn your work to begin the next row.
3. Round 2: Alternating Increase Rows
- Begin with a chain of 3 (counts as one double crochet).
- Insert a V-stitch into the center of the V-stitch from the previous round.
- End the row with one double crochet into the third chain of the starting chain-4 from Round 1.
- Note: Rows alternate between starting with V-stitches and starting with plain double crochets to create the increases.
4. Round 3: Continue the Pattern with Alternating Starts
- Chain 4 (counts as double crochet + chain-1).
- Insert your first V-stitch into the same stitch you just worked out of.
- Work V-stitches into each V-stitch from the previous row.
- End by placing a V-stitch in the top of the starting chain from the previous round.
5. Repeat the Pattern Until Desired Size
- Continue alternating rows that start with double crochets or V-stitches and repeat the process.
- For reference, the tutorial uses 22 rows to achieve the bandana size shown. Adjust the number of rows according to your desired size.
Adding the Straps
6. Make the First Strap
- Once the 22 rows (or your chosen size) are complete, create the first strap:
- Chain 70 or adjust the length according to your preference.
- Turn and work back along the chain using slip stitches to provide reinforcement.
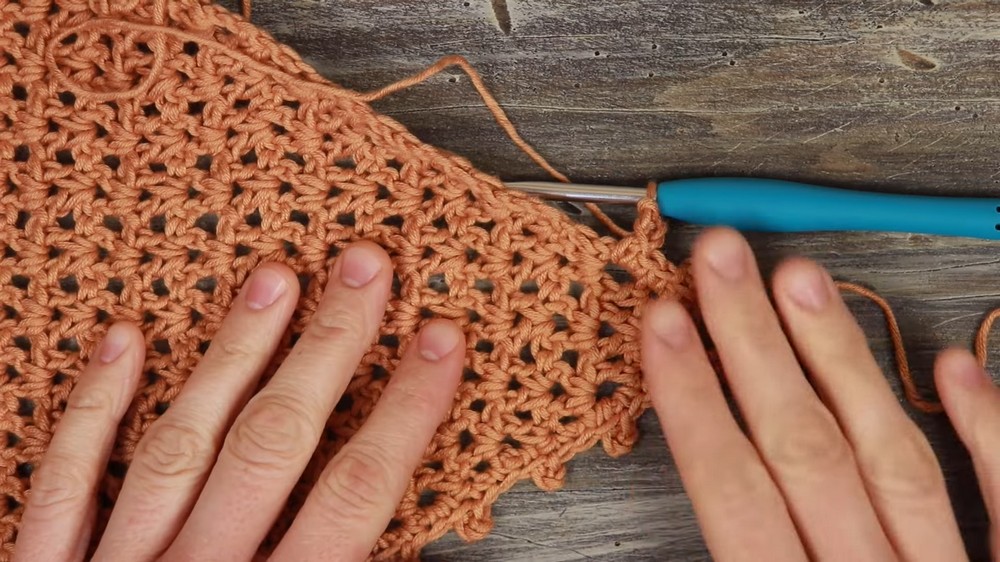
7. Add the Decorative Edging Across the Top
- Along the straight top edge of the bandana, work single crochet stitches with a Pico edge:
- Single crochet in the first stitch, chain 3, and slip stitch through the front loop of the single crochet to create a Pico.
- Single crochet into the next two stitches, and repeat the Pico edging every third stitch.
8. Make the Second Strap
- At the opposite corner of the bandana’s straight edge, chain 70 for the second strap and slip stitch back along the chain, just as you did for the first strap.
Decorative Edging on the Sides
9. Work Along the Sides of the Bandana
- To maintain even spacing, alternate single crochet placements:
- Insert one single crochet into double crochet rows.
- Insert two single crochets into V-stitch rows.
10. Add Pico Edging to the Sides
- To continue the Pico edge down the sides, place a Pico stitch after every three single crochets, as with the top edge.
11. Handle the Point of the Bandana
- At the bottom point of the bandana, add a single Pico stitch for decoration.
- Turn your work and begin working back up the opposite side, mirroring the same process.
Finishing the Bandana
12. Fasten Off
- At the end of the edging, tie off your yarn with an additional chain stitch, cut the yarn, and weave in all the loose ends with a yarn needle.
Conclusion
Your lightweight and stylish crochet bandana is now complete! This project not only teaches V-stitches and Pico edging but also demonstrates how to create a seamless design with built-in straps. With its customizable size and straps, this bandana makes for a practical accessory or thoughtful handmade gift.
Leave a Reply