

Turn yarn into charm with a beautiful crochet bag pattern—combine style, utility, and sustainability in a one-of-a-kind handmade accessory.
Have you ever considered how a simple crochet bag can transform both your daily routine and your wardrobe? These handmade creations are far more than accessories they’re a practical, durable, and stylish solution for carrying essentials while adding a personal touch to your outfit. Perfect for everything from grocery runs to weekend outings, crochet bags offer versatility and charm that mass-produced alternatives simply can’t match.
Gorgeous Crochet Bag Pattern for Every Skill Level

One of the key benefits of crocheting your own bag is the ability to tailor it to your preferences. Whether you opt for vibrant colors, minimalist designs, or intricate patterns, every detail reflects your individual style. Additionally, many crafters choose eco-friendly or recycled yarns, making these bags a sustainable and responsible choice for reducing waste.
But the advantages don’t stop at functionality or aesthetics. The process of making a crochet bag can be deeply relaxing, allowing you to explore new techniques, improve your skills, and experience the joy of creating something practical with your own hands. Whether used as a thoughtful gift or a fashion-forward accessory, a crochet bag is more than just a project—it’s a statement of creativity, sustainability, and personal expression that makes everyday use both enjoyable and meaningful.
Step-by-Step Description of the Spiral Crochet Bag Tutorial
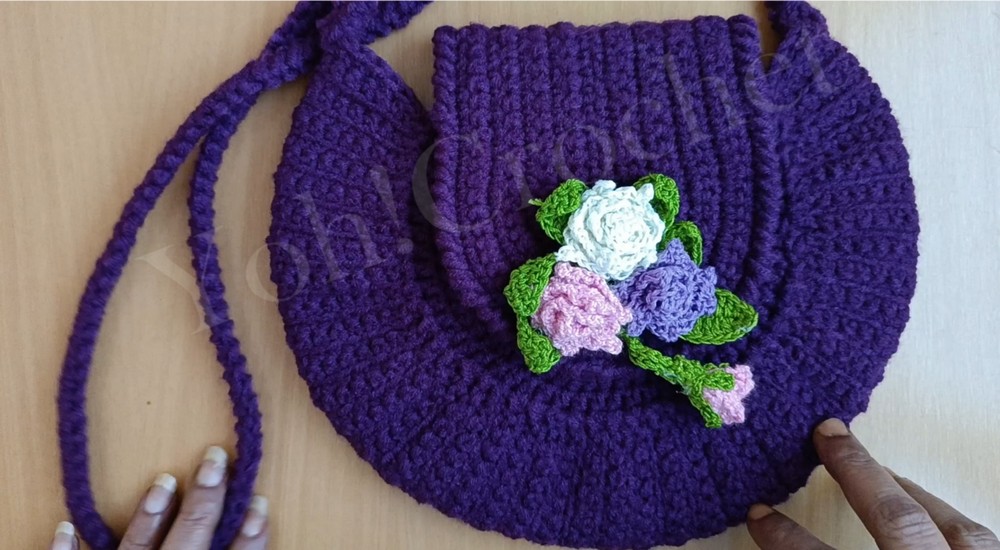
In this pattern, we learn how to create a stylish spiral crochet bag. This project is suitable for crocheters looking to make functional and decorative handmade items. The bag combines simple stitches with innovative construction techniques for a unique circular design. By following these steps, you can make a trendy and customizable crochet accessory.
Materials Required
To make the spiral bag, you’ll need:
- Yarn (type and color of your choice)
- Crochet hook (appropriate for the yarn weight)
- Scissors
- Marker
- Tapestry needle (for finishing)
Step-by-Step Instructions
Base (Making the Circles)
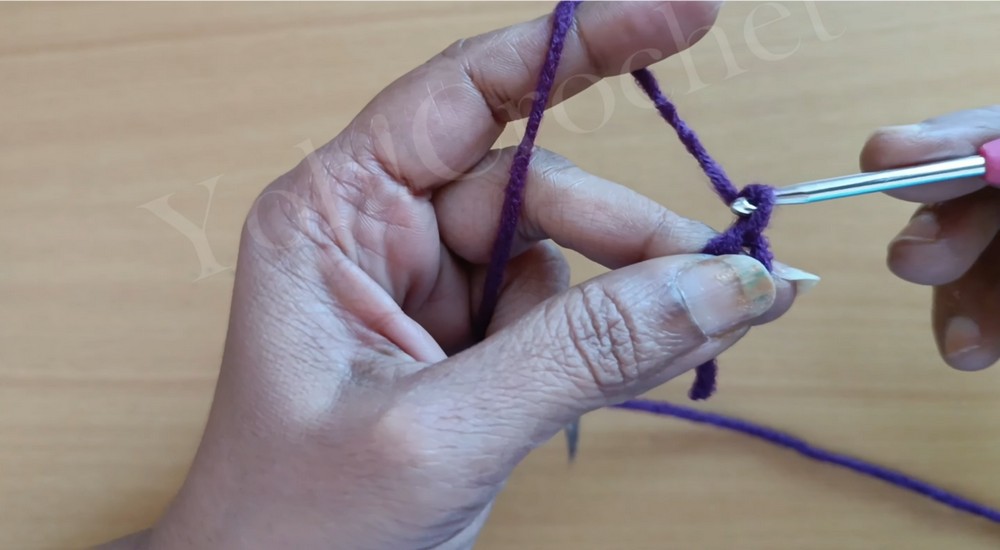
- Magic Ring and First Round:
- Begin with a magic ring and work eight half double crochets into it.
- Place a marker on the first stitch as rounds will be worked continuously without joining.
- Subsequent Rounds:
- Round 2: Work two half double crochets into each stitch (16 stitches total). Mark the first stitch.
- Round 3: Alternate between increasing stitches (two half double crochets in one stitch) and single half double crochets.
- Round 4–8: Gradually increase spacing between increases:
- Round 4: Increase every 3rd stitch.
- Round 5: Increase every 4th stitch.
- Round 6: Increase every 5th stitch.
- Round 7: Increase every 6th stitch.
- Round 8: Increase every 7th stitch.
- After completing Round 8, slip stitch to finish the second circle. Cut the yarn if it’s the first circle; continue if it’s the second.
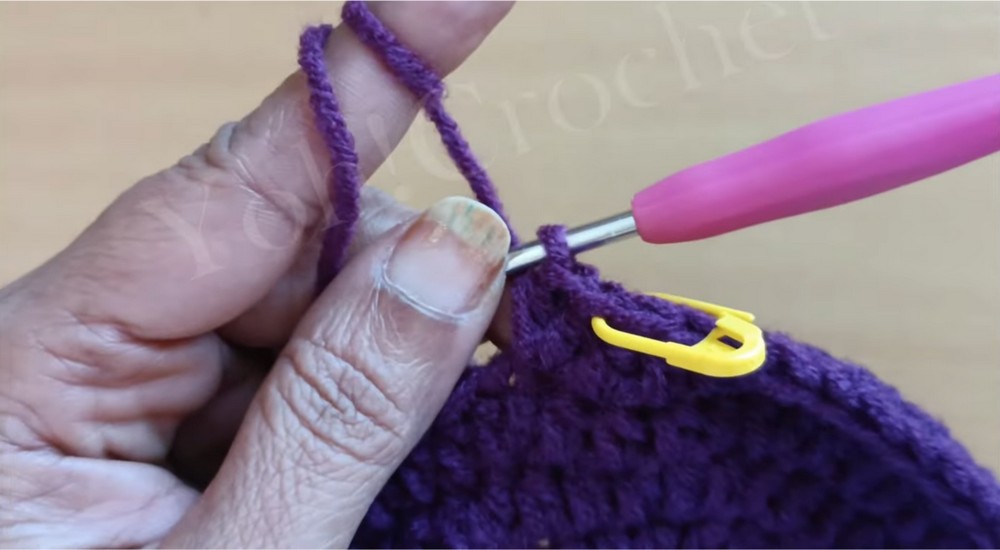
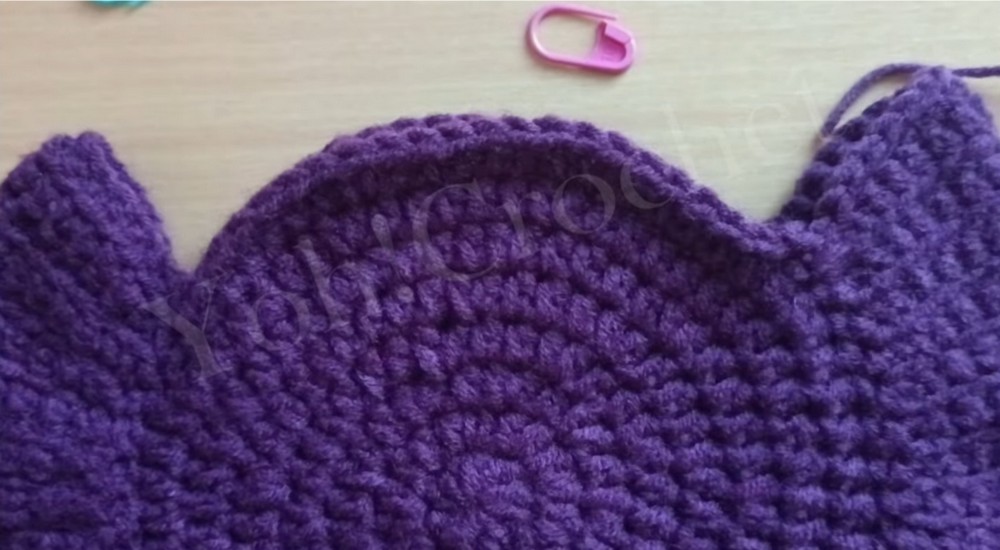
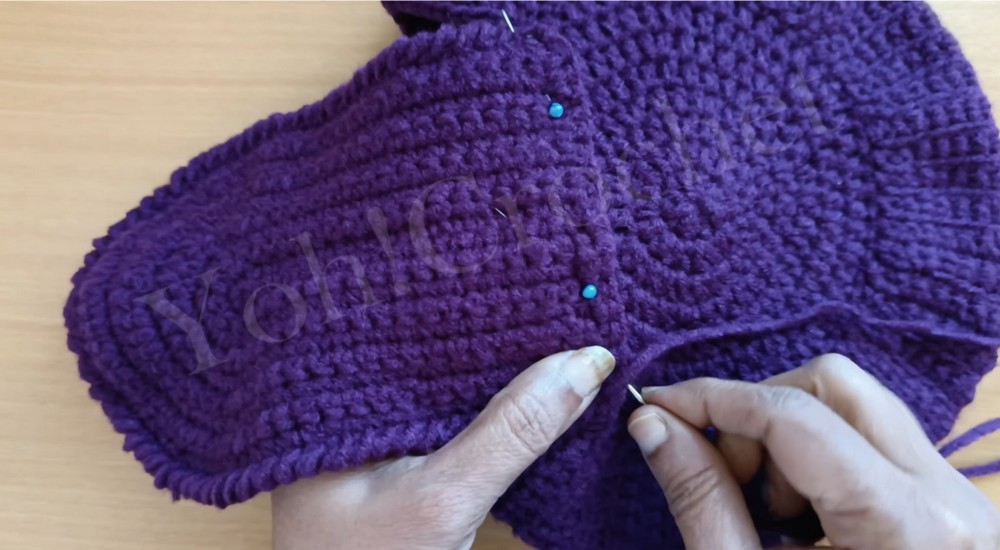
Joining the Two Circles
- Chain 16 to create the handle between circles.
- Insert the hook into one circle’s edge (reverse side facing you) and secure the chains using slip stitches.
- Work single crochets across 12 chains and slip stitches in the remaining two chains.
- Gradually crochet back and forth, alternating slip stitches and single crochets while working only one loop of stitches. Repeat this process to join both circles symmetrically, leaving an opening in the center.
Creating the Bag Flap
- Start with a slip knot and chain 13 plus one turning chain.
- Work single crochets across the chains: 12 single crochets on both sides of the chain and increase at the rounded end (three stitches total in the marked corner).
- Progressively work increases between markers:
- Alternate increases every stitch in earlier rounds.
- Gradually increase spacing, from every 2 stitches to 3, to 4, etc., until reaching the desired flap width.
- Finish the flap with reverse single crochets to give it a decorative edge.
- Attach the flap to one circle of the bag using a tapestry needle.
Adding Final Touches
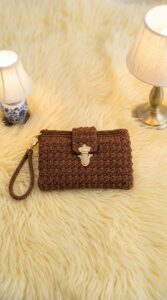
- Straps: Attach matching yarn straps for functionality (or purchased handles for a professional finish).
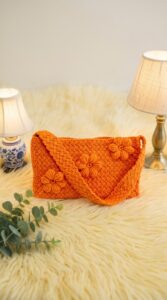
- Decorative Elements: Add a flower or crochet embellishments as shown in the video.
- Buttons: Secure press buttons to fasten the flap.
Special Features
- Spiral Design: The bag's striking circular base makes it unique and eye-catching.
- Continuous Rounds: Working in uninterrupted rounds ensures seamless construction.
- Customizable Components: You can personalize the strap length, flap width, and embellishments.
- Versatile Uses: Ideal for carrying light items or used as a fashionable accessory.
Level of Difficulty
- Intermediate: The project requires basic crochet techniques (magic ring, single crochet, half double crochet, and slip stitches) as well as attention to detail while managing increases and working continuously.
Tutor’s Suggestions
- Use a marker to identify the first stitch of each round to avoid confusion.
- Take your time when working continuous rounds to ensure the spiral pattern is maintained.
- Adjust yarn tension consistently to prevent uneven stitches.
Uses
- Fashion accessory
- Casual bag for light items
- Handmade gift for loved ones
Tip
When working on the flap, ensure that your stitch increases are evenly spaced between the markers for a balanced and professional look.
Conclusion
This pattern provides a creative and fun way to make a crochet spiral bag. By following the detailed instructions, you’ll create a functional yet fashionable accessory that’s perfect for everyday use or gifting. The design allows for flexibility, making it suitable for various personalization options.


Leave a Reply