

Make cute and fun piece of amigurimi by this free crochet Bunny & Chick Egg Covers Pattern that's perfect for Easter or spring decorations with simple crochet techniques.
Handmade items are always useful, and this crochet project is no exception. Crochet Egg Covers not only add a charming touch to your kitchen but also serve a practical purpose by helping keep your boiled eggs warm for longer. Perfect for breakfasts, brunches, or special occasions like Easter, these cozy covers bring warmth and style to your table.
Cute Bunny & Chick Crochet Egg Covers Free Pattern

Besides maintaining the temperature, crochet egg covers protect eggs from dust and accidental bumps, ensuring your meal stays neat and inviting. Their snug fit and colorful designs brighten up any setting, making every meal feel a bit more festive.
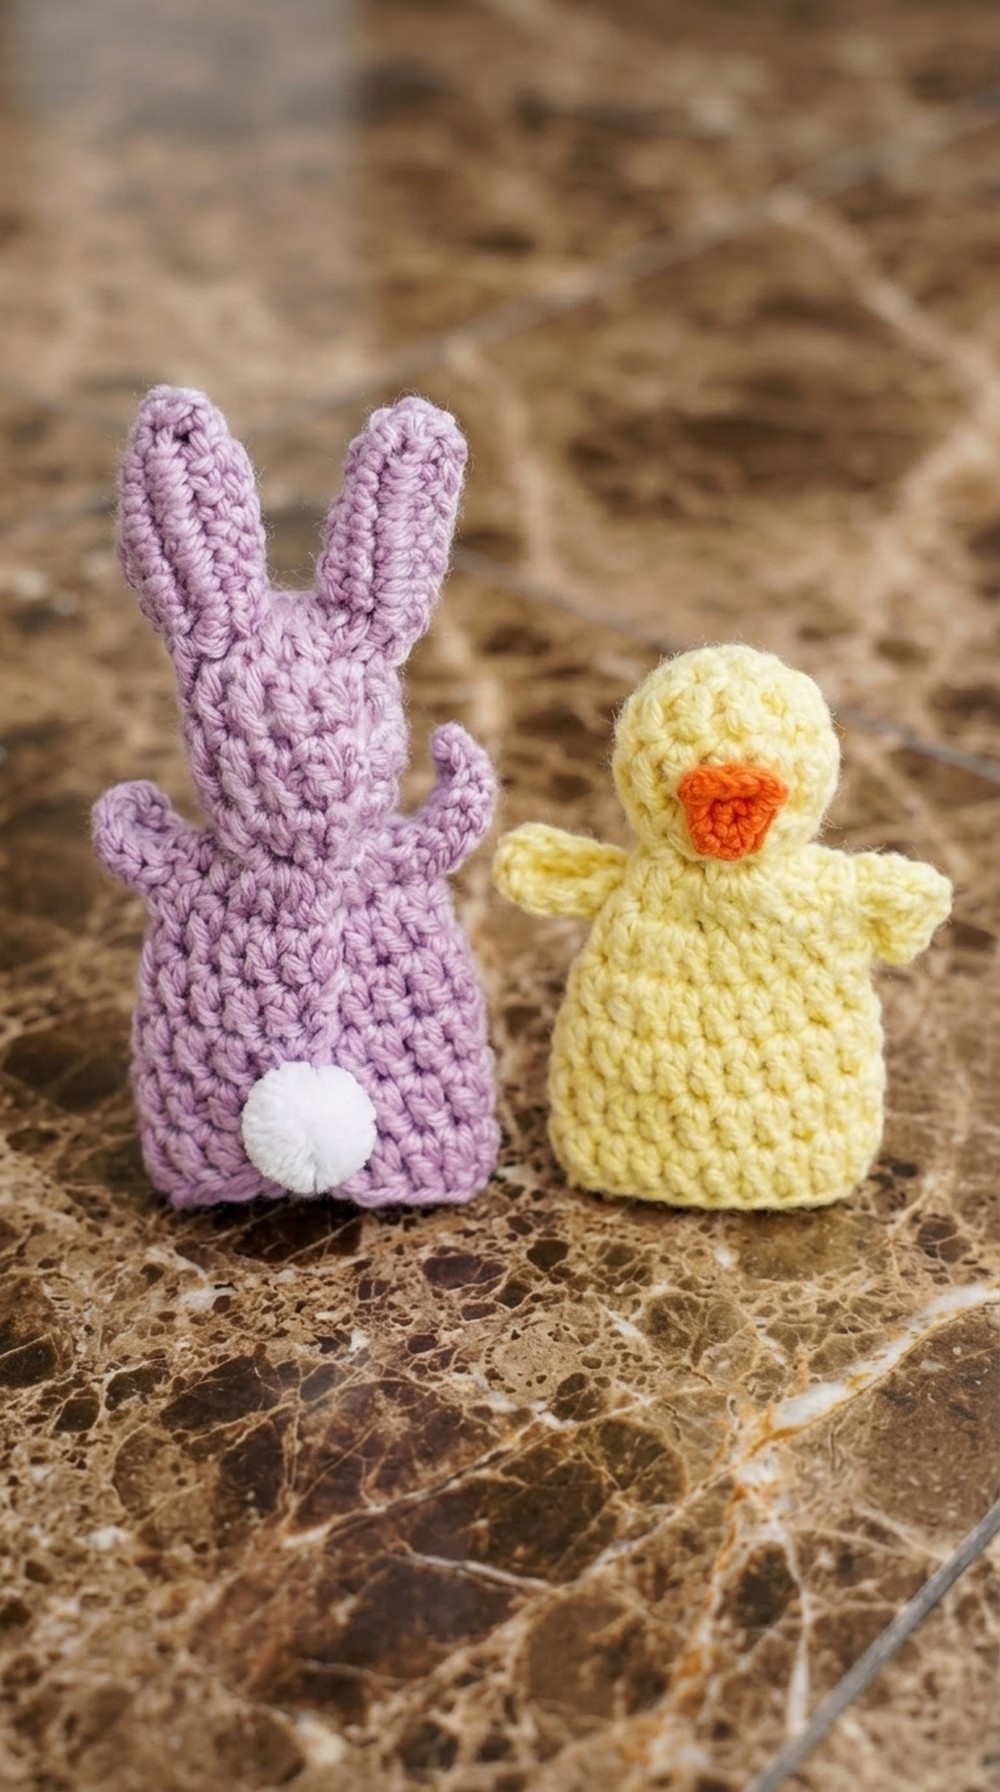
Crocheted from soft, washable yarn, these covers like pouches are reusable and eco-friendly, offering a sustainable alternative to disposable napkins or plastic wraps. Lightweight and easy to store, they’re ideal for year-round use and add a personal, handmade touch to your dining experience.
Whether you’re new to crochet or an experienced crocheter, these egg cozies are quick and enjoyable to make. They also make thoughtful gifts for friends and family who appreciate practical yet creative handmade items.
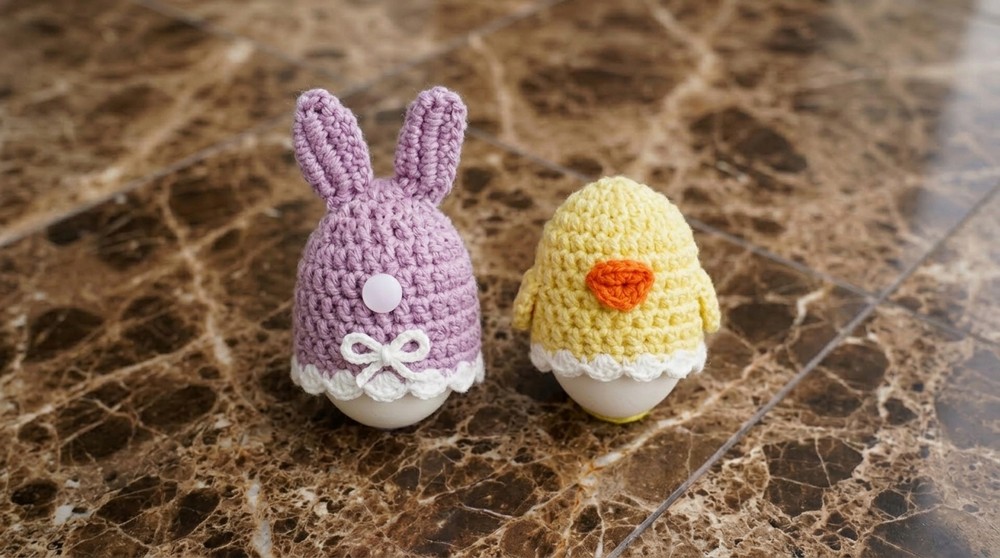
Vintage Easter Animal Egg Warmers (Bunny & Chick)
Before You Start
- This is a simple, customizable pattern inspired by vintage designs and updated for modern crocheters.
- The body fits most small or large plastic or hard-boiled eggs (standard Easter egg size).
- Perfect for last-minute table decor, gift toppers, or children’s holiday crafts.
- You can adjust the size by changing your hook, yarn, or the number of rounds.
- All instructions use standard US terms.
Pattern Notes
- Pattern is written for working in joined rounds.
- Body, head, and animal features (ears, arms, wings, beak) are made separately and sewn together.
- Stuffing is only placed in the head for shape.
- Use acrylic yarn for stretch and easy washing.
- Embellish with bows, felt, or embroidery, or leave plain for a pastel minimalist look.
How I Made the Crochet Pattern
- Adapted a handwritten pattern for a bunny, bear, and lion to modern terms and materials.
- Modified shapes for best fit with modern plastic eggs.
- Simplified assembly for clarity.
- Offered both bunny and chick options for versatility.
- Added suggestions for customizing and troubleshooting.
Skill Level
Easy (beginner to adventurous beginner; only basic stitches needed with some shaping).
Finished Size
- Stretches to fit: Standard plastic Easter egg, about 3.5–4” (9–10 cm) tall, not counting ears.
Materials
- Worsted weight acrylic yarn (lilic for bunny; yellow and orange for chick).
- 4.5 mm crochet hook.
- Yarn or tapestry needle.
- Scissors.
- Polyester fiberfill (a little, for stuffing the head).
- Small pom pom for bunny tail (optional).
- Fabric glue (optional, for tail).
- Decorative ribbons or felt (optional, for embellishments).
Measurements / Sizing (Optional Schematic)
- Body circumference: Approx. 5.5–6” (14–15 cm); stretches to fit.
- Height (no ears): 3.5–4".
- Ear, paw, and wing length: 1.5–2.5”.
Gauge
- 6 rounds double crochet = approx. 2.5 inches diameter.
- Gauge is not critical; adjust by changing hook/row count.
Stitch Abbreviations
- ch = chain
- sl st = slip stitch
- sc = single crochet
- hdc = half double crochet
- dc = double crochet
- st(s) = stitch(es)
- rep = repeat
Special Stitches
- Magic Ring: Make loop, insert hook, yarn over, pull up loop and work beginning stitches in ring. Pull tail to close.
Alternative: Ch 5, sl st to form a ring.
The Pattern
Body + Head (Work in Main Color)
- Begin with a Magic Ring or ch 5 and sl st to form a ring.
- Round 1: Ch 2, 12 hdc in ring, sl st to first hdc (12 sts).
- Round 2: Ch 2, dc in each st around, sl st to join (12 sts).
- Round 3: Repeat as Round 2 (12 sts).
- Round 4: Repeat as Round 2 (12 sts).
- Round 5 (Increase): Ch 2, dc in next st, 2 dc in next st; repeat around. (18 sts)
- Rounds 6–10: Ch 2, dc in each st around, sl st to join (18 sts per round).
- Finish off, leaving a long tail for closing the neck.


After making the head and body, stuff the head lightly with fiberfill for a nice rounded shape, then close the neck as described in assembly. The body section is a tube and fits over your desired egg.
Bunny Ears (make 2, Main Color)
- Leave a long starting tail for sewing.
- Ch 10.
- Dc in 3rd ch from hook and each ch across (8 dc).
- In final ch, work 3 extra dc (for the curve).
- Rotate to work along free edge of starting ch and dc in each ch along back side (8 dc), add one more dc in ch-2 space for symmetry if needed.
- Sl st to base to close.
- Ch 1, finish with a long tail for sewing.
The bunny ears are slightly pinched/folded at their base to shape before attaching to the stuffed head.
Bunny Arms (make 2, Main Color)
- Leave a long starting tail.
- Ch 8.
- Hdc in 3rd ch from hook and each remaining ch across (6 hdc).
- Sl st to finish.
- Leave tail for sewing.

Chick Wings (make 2, Yellow)
- Ch 6.
- Dc in 3rd ch and each ch across.
- In the last ch, work 4 dc (curve around).
- Dc evenly down free edge (other side of chains).
- Ch 2, sl st to base for symmetry, fasten off.
Chick Beak (Orange)
- Ch 3.
- Sc in 2nd ch and each ch across (2 sc).
- Ch 1, turn. Sc in each st (2 sc). Repeat across for 4 rows.
- At row 5: Ch 1, turn. Skip first st, sc in next st (1 sc).
- Ch 1, finish leaving a tail.

The beak is folded in half and sewn to the chick’s face below the midpoint.
Paragraph Instructions for Beginners
If you’re less comfortable with patterns, here’s how the parts fit together:
- The head and body are made in rounds of double crochet. The first four rounds make the rounded head; keep it closed and lightly stuff.
- Next, you start increasing to make the body flare, so it fits over an egg.
- The bunny ears and arms, and the chick’s wings and beak, are all made of simple chain rows with single or double crochet. Just follow along, and if you’re new, count stitches carefully.
- Assembly is by sewing with leftover yarn tails; see the Assembly section.
Assembly & Finishing
- Stuff the head with fiberfill.
- Close neck: Stitch between Rounds 4 and 5 with a yarn needle, pulling tight to form a neck. Tie a knot, weave tails into the body.
- Pinch bunny ears at their base, sew to top of head.
- Sew bunny arms to body sides (or wings for chick).
- Fold beak in half, sew to chick’s head.
- For bunny tail, glue or sew on a pom pom to the back.
- Decorate with bows, felt features, embroidery, or leave plain. Weave in all yarn ends.
Solution to Common Problems
- If your piece looks too loose and holes are visible, try a smaller hook or tighter stitches. Don’t overstuff the head.
- If ears/arms/wings are mismatched, that’s usually due to tension—remake the one you like less, or embrace the handmade charm!
What You Can Make With These Stitches
- Bears, cats, or other animal egg warmers—just change ear/face/wing shapes and colors.
- Keychain or garland decorations (make tiny versions).
- Simple plush toys (increase/decrease as needed).
- Gift toppers for holiday baskets and party favors.




Leave a Reply