

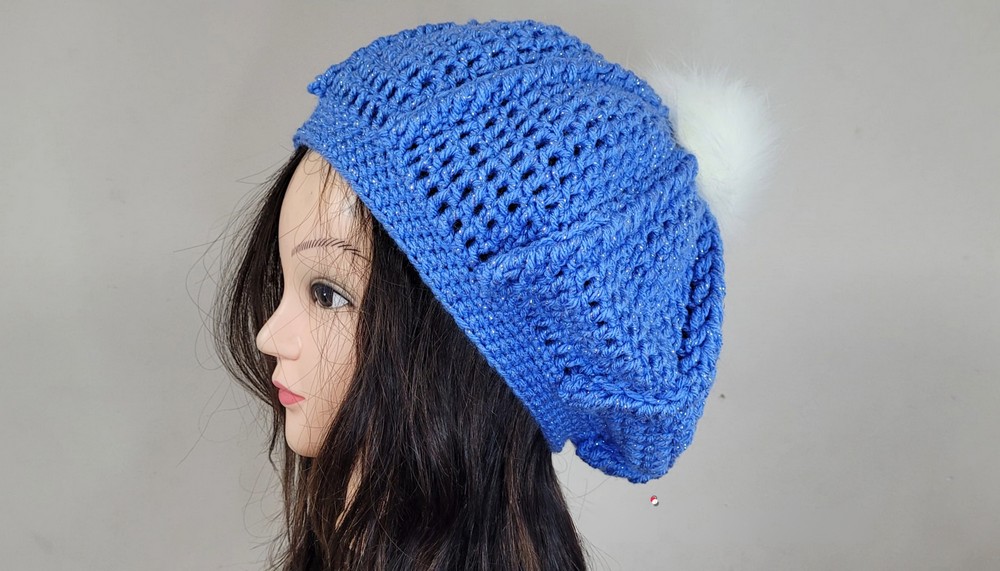
Boost your style with a crochet beret hat, offering timeless elegance, cozy comfort, and handcrafted charm for any outfit or occasion.
Originating as a symbol of cultural and artistic expression, beret hats have evolved over time into versatile fashion staples. The crochet version adds an innovative touch, offering a lightweight and textured alternative to traditional wool or felt designs. These hats are celebrated for their ability to combine practicality with style, providing warmth in cooler weather while remaining breathable for daily wear. Their intricate patterns and soft materials make them a charming and comfortable choice for every season.
Step-by-Step Crochet Beret Pattern For Beginners

Crochet beret hats are ideal for accessorizing, effortlessly elevating casual looks or complementing more formal outfits. Their flattering design suits various face shapes and hairstyles, making them a must-have accessory for fashion enthusiasts. Beyond their aesthetic appeal, many crochet berets highlight sustainable expertise, often made with eco-conscious materials that support the growing movement for greener fashion choices.
In addition to being stylish, these hats offer the benefit of individuality. Every crochet design carries a unique texture, ensuring a standout piece that reflects personal taste. Whether worn for practical warmth or as a finishing touch to an outfit, the crochet beret hat delivers functionality and elegance in equal measure. It’s a wardrobe addition that combines timeless charm with thoughtful wearability.
Materials Needed
- Yarn: 4-ply medium-weight yarn
- Crochet Hook: 5 mm
- Optional: Stitch markers and a pom-pom for embellishment
Step-by-Step Instructions
1. Starting the Base Circle (Row 1)
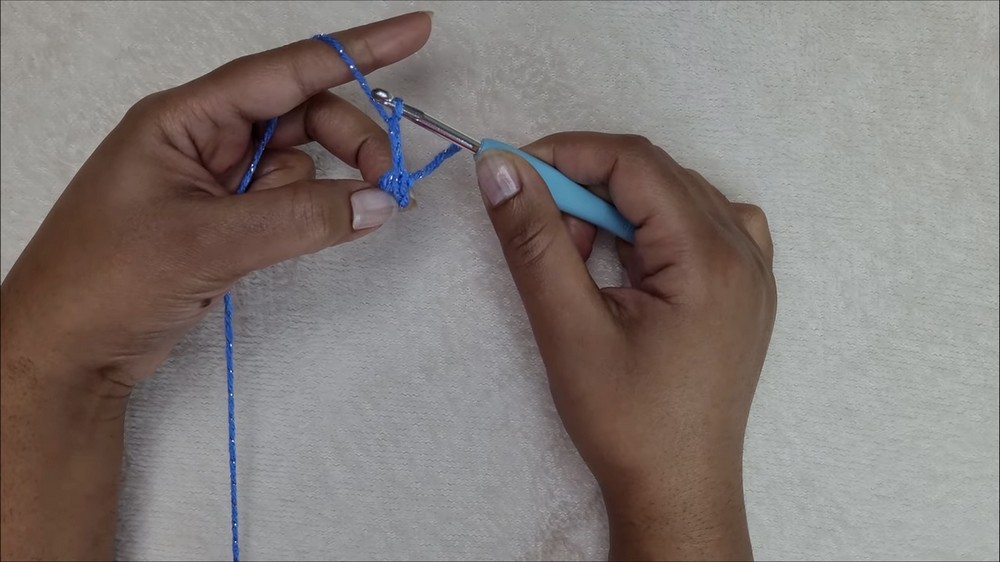
- Chain 4:
- Begin by chaining 4 stitches.
- Join with Slip Stitch:
- Slip stitch into the first chain to form a circle.
- Chain 3:
- This chain 3 acts as your first double crochet.
- Add 17 Double Crochet Stitches:
- Work 17 double crochets into the circle for a total of 18 stitches (including the chain 3).
- Finish the Round:
- Slip stitch into the top of the initial chain 3 to complete the row.
2. Adding Front Post Double Crochet Clusters (Row 2)
- Chain 3:
- This will act as the first double crochet on this row.
- Work 3 Front Post Double Crochets:
- Around the very next stitch, complete three front post double crochets by working into the post of the stitch to create height and texture.
- Single Double Crochet in the Next Stitch:
- Work one double crochet into the top of the next stitch.
- Alternate Repeat:
- Alternate between 3 front post double crochets and 1 double crochet across the round.
- End the Round:
- Slip stitch into the top of the chain 3 to close the row.

3. Increase Rows (Rows 3–9)
Each subsequent row involves increasing the number of double crochet stitches between clusters of three front post double crochet stitches.
Row 3:
- Increase between clusters: Create 2 double crochets in spaces previously containing 1 double crochet.
- Repeat the pattern: (3 front post double crochet cluster → 2 double crochet).
Row 4:
- Increase further: Work 3 double crochets in spaces that held 2 double crochet stitches from the previous row.
- Repeat the pattern as before.
Rows 5–9:
- Continue to increase as follows:
- Row 5: 4 double crochets between each front post cluster.
- Row 6: 5 double crochets.
- Row 7: 6 double crochets.
- Row 8: 7 double crochets.
- Row 9: 8 double crochets.

4. Building Depth Without Increasing (Rows 10–17)
- No More Increases:
- Continue following the established pattern with 8 double crochets between each cluster of front post double crochets.
- Repeat Rows:
- Work between 6 and 10 rows (depending on how deep you want your hat to be).
- Mark Rows (Optional):
- Use a stitch marker to denote the start of this section for tracking purposes.
5. Creating the Band
- Single Crochet Row:
- Start with a chain 1 and work single crochet stitches around the edge of the hat to tighten and form the brim.
- Skip Clusters on the Band:
- When you approach clusters of front post double crochets, skip over them and work only into double crochet spaces.
- Repeat Rows:
- Complete approximately 5–6 rows of single crochet to form a sturdy band.
6. Finishing Touches
- Weave in Ends:
- Cut your yarn and weave in all loose ends.
- Optional Pom-Pom:
- Attach a pom-pom to the center of the beret for added flair.

Conclusion
This crochet beret pattern is an elegant design that combines the visual appeal of textured front post stitches with increasing rounds to create a comfortable and stylish hat. The added single crochet band ensures the hat remains snug and durable while offering room for customization. Whether you choose to add a pom-pom or leave the design as is, this beret makes for a wonderful handmade accessory or gift.


Leave a Reply