

Create a crochet Christmas keychain pattern perfect for holiday decor that is unique gifts and adding a touch of festive charm to your accessories.
A tiny, cheerful figure perfect for spreading holiday joy wherever it goes, this handmade keychain adds a festive touch to your keys, bags, or decorations. Soft and easy to carry, it reminds you of cozy winter nights, sparkling lights, and happy moments shared with loved ones. More than just an accessory, it brings warmth and happiness throughout the year.
Free Crochet Christmas Keychain Pattern to Decorate Bags
This Method using simple crochet stitches, this little character features a fluffy beard and a snug hat, giving it a friendly and playful look. Its bright eyes and smiling face capture the spirit of kindness and celebration. Lightweight and charming, it makes a thoughtful gift or a personal keepsake for anyone who appreciates handmade treasures.
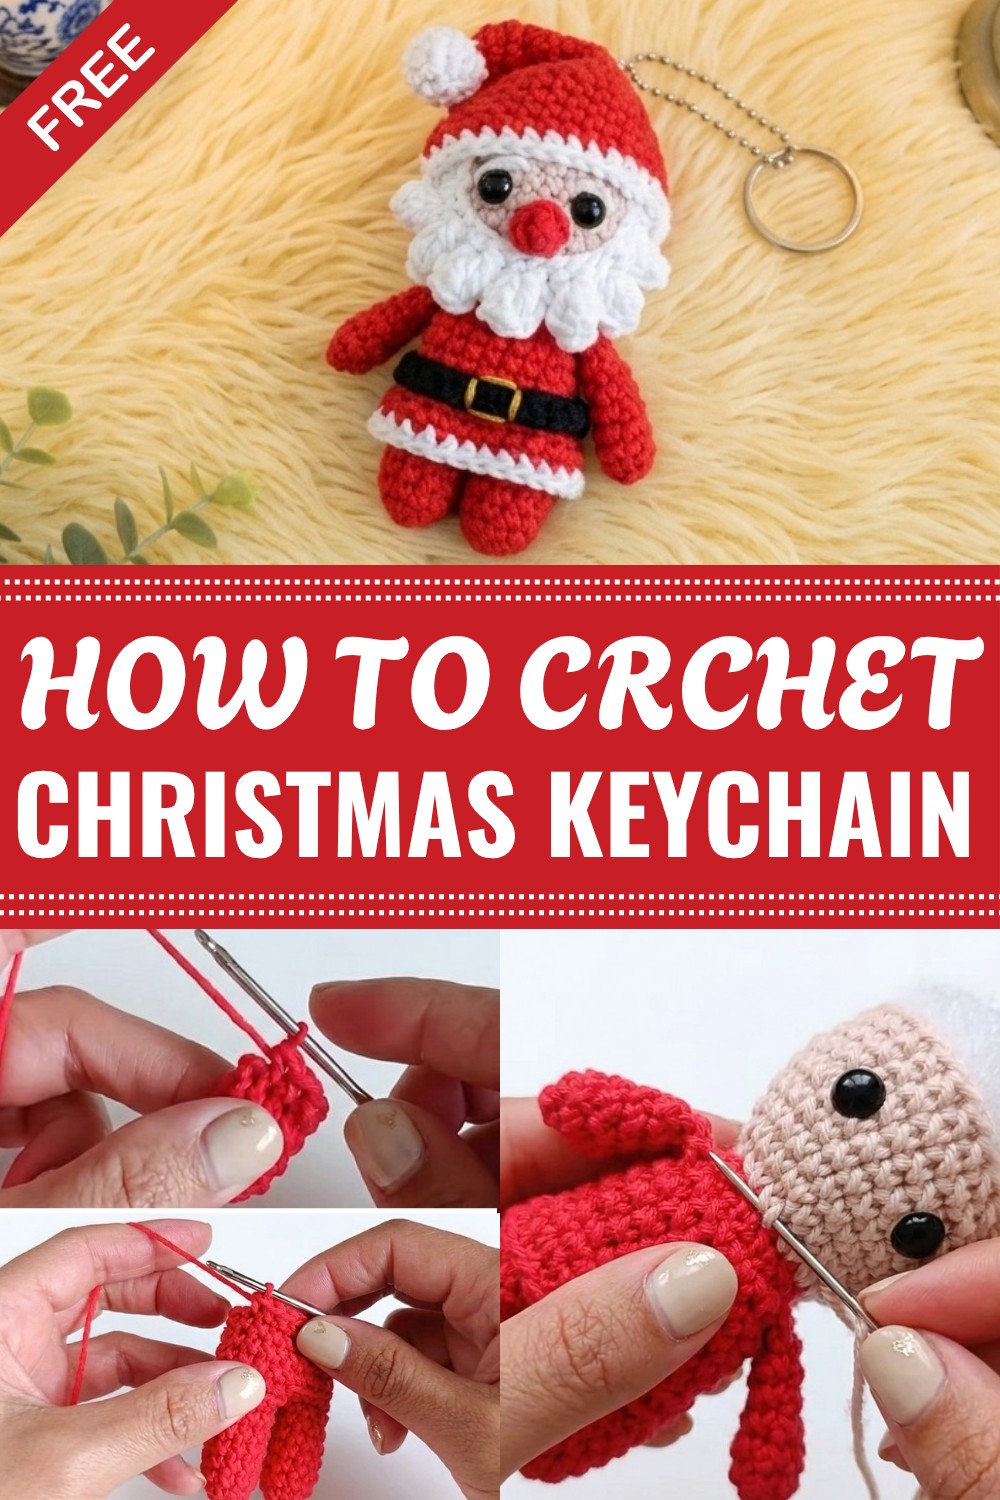
Carrying this miniature keepsake encourages you to pause and enjoy the small joys during the busy holiday season. It’s like holding a tiny piece of happiness that can brighten your day and spark pleasant conversations. This charming item shows how something small and carefully made can hold great meaning and connect people through the joy of giving and festive traditions. A sweet reminder that even the smallest details can make the season special.
Crochet Santa Claus Keychain Pattern
Pattern Notes
- Worked mostly in continuous rounds (spiral), closed with slip stitches where indicated.
- The hat is crocheted separately and attached with silicone glue.
- Avoid skipping stitch counts; careful stitch placement is crucial for neat shaping and attaching arms/legs properly.
- Use a stitch marker to mark rounds, especially in textured rounds like BLO (back loops only).
- Stuff the body firmly with silicon fiberfill before closing the head to maintain shape.
- Sewing or gluing parts is optional but recommended for durability.
- When changing colors (for the body and bag), use the traditional method of pulling through both old and new colors on the last yarn over of the previous stitch.
Skill Level
Beginner to Intermediate — Familiarity with basic crochet stitches, magic ring, increasing and decreasing, attaching parts, and working in spiral rounds is advantageous.
Materials
- Cotton yarn (two colors: traditional red and nude/pale pink)
- Crochet hook size appropriate for your yarn (e.g., 3.5 mm or as preferred)
- Polyester fiberfill for stuffing
- Safety eyes (8 mm) with lock backs
- Tapestry needle
- Silicone glue and pins/clothespins for assembly
- Scissors
- Stitch marker for rounds
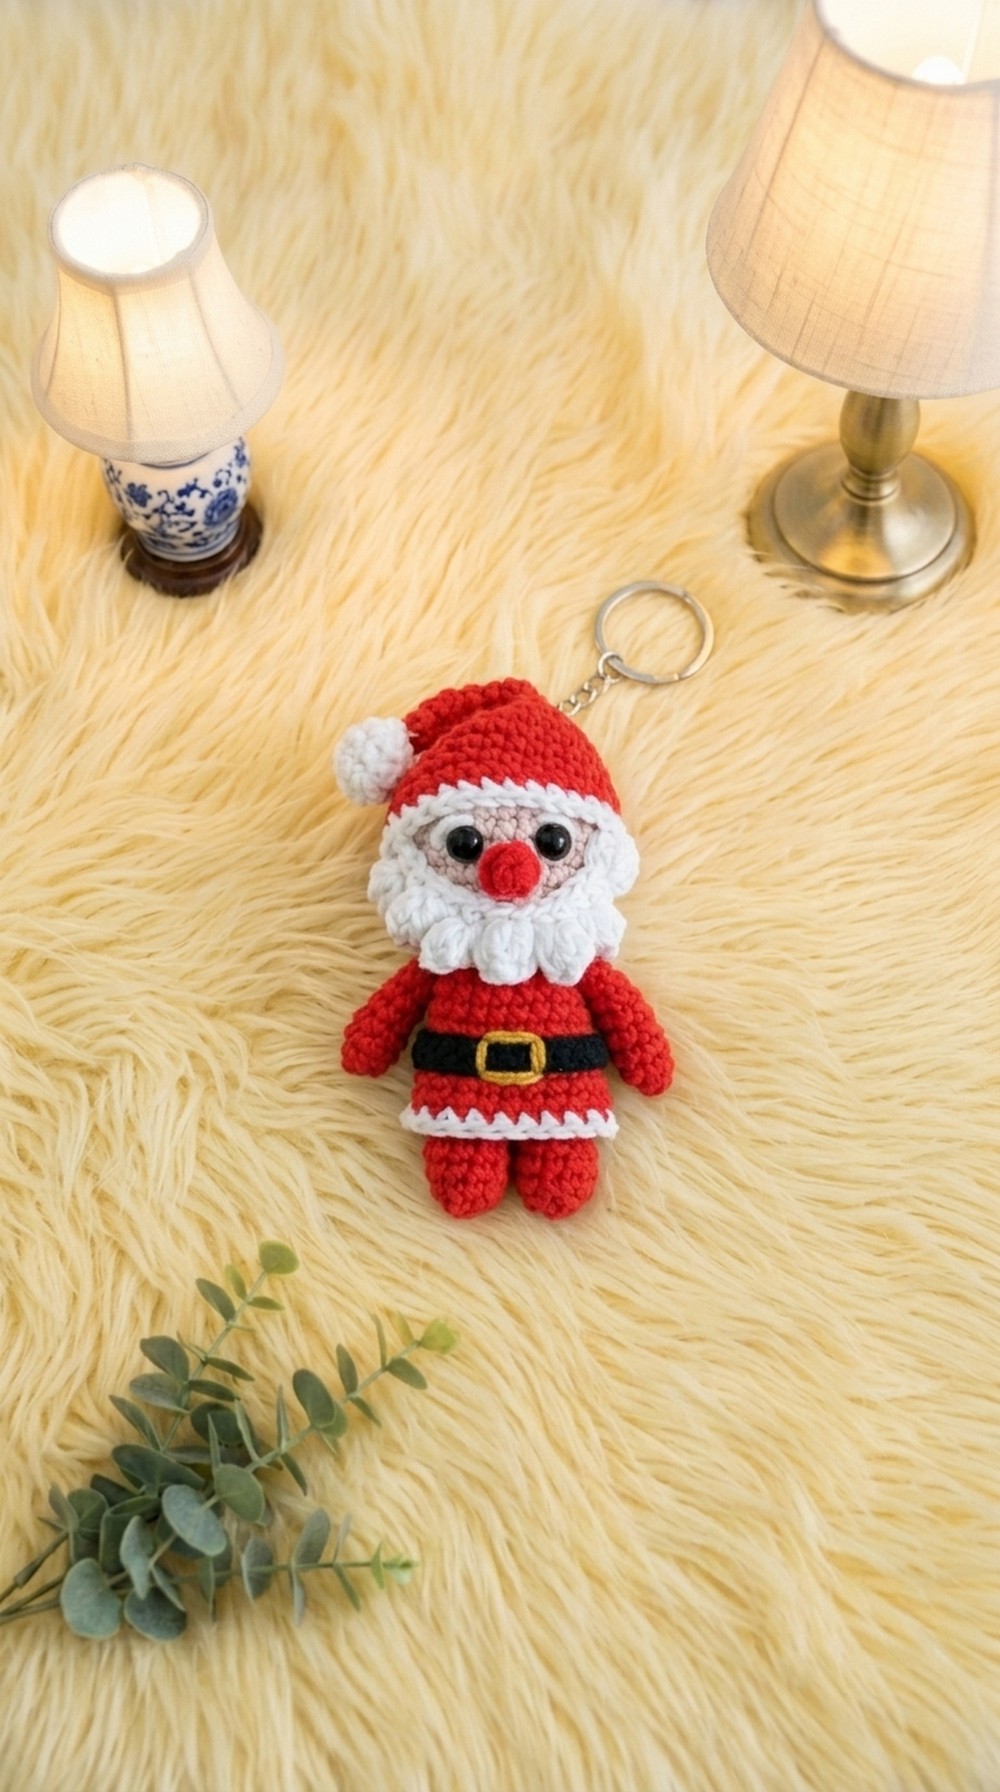
Measurements / Finished Size
- Approximate height: 9-10 cm (including the hat)
- Width: approx. 4-5 cm at the widest point
- Proportion of arms and legs to body is miniature for keychain scale
Gauge
Not critical; pattern sizing is small and dimension is easily managed by adjusting yarn thickness and hook size.
Stitch Abbreviations
- ch — chain
- sc — single crochet
- sl st — slip stitch
- inc — increase (2 sc in one stitch)
- dec — invisible decrease (see special stitches)
- BLO — back loops only
- magic ring — adjustable ring to begin rounds
Special Stitches
Invisible Decrease:
Insert hook through front loop of the next 2 stitches, yarn over, pull loop through, yarn over and pull through both loops on hook. Creates an invisible, neat decrease.
Popcorn Stitch:
In the designated stitch, work 4 double crochets (US single crochet height), remove hook from last loop, insert hook at front of the cluster, pick up the dropped loop, and pull through. This forms a raised “popcorn.”
The Crochet Pattern
Arms (Make 2)
Round 1: Begin with a magic ring. Work 4 sc into the ring. Join with sl st, or continue in spiral.
Round 2: Inc in each stitch around (total 8 sc).
Rounds 3-6: Work 1 sc per stitch, maintaining 8 stitches per round.
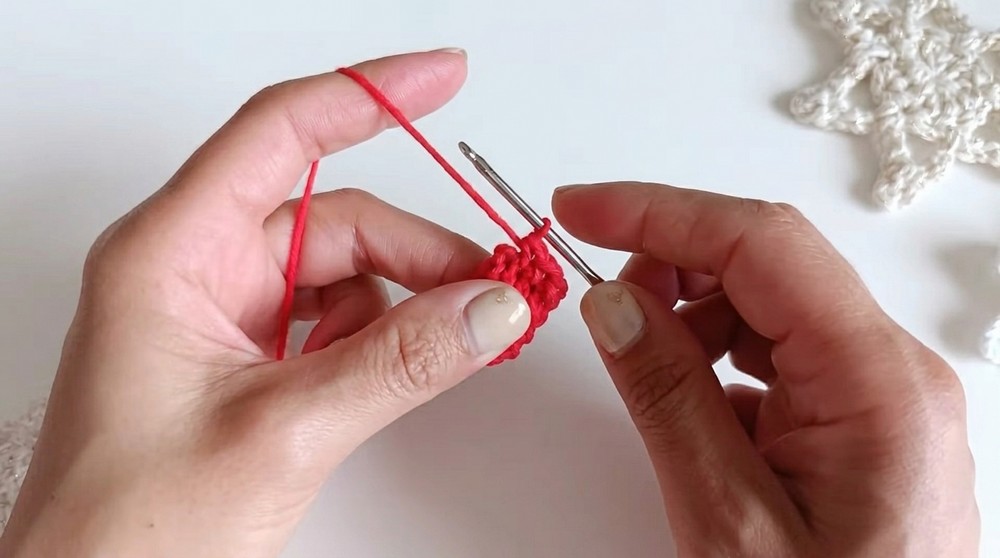
Close top opening of arm by joining edges with 3 sc using yarn tail; secure with chain stitch at the end.
Legs and Body Base
Round 1: Begin with a magic ring. Work 5 sc in ring.
Round 2: Inc in each stitch around (10 sc).
Rounds 3-6: Work 1 sc in each stitch, keeping 10 stitches.
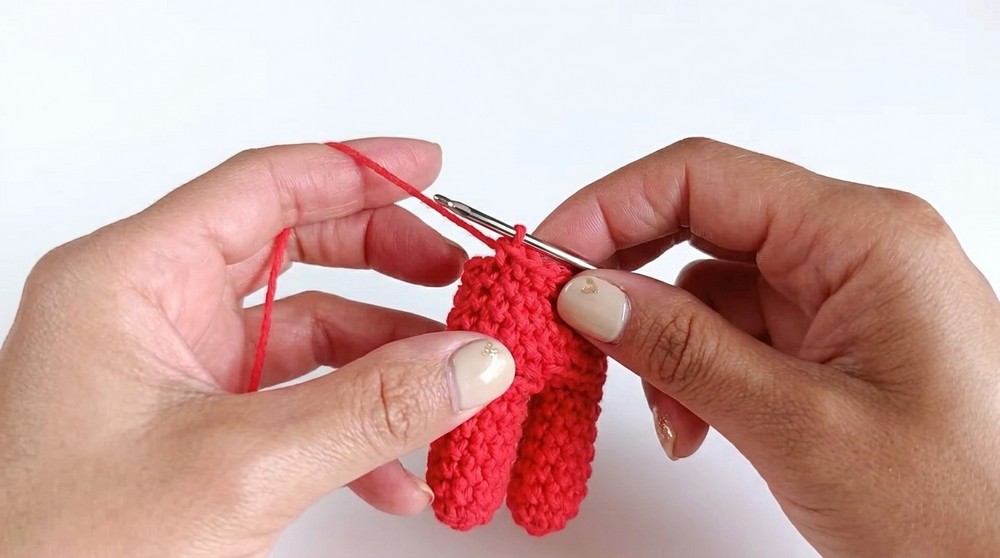
For the second leg, do not cut yarn after finishing. Chain 2, join to first leg with sl st at uneven edge for neat inside look.
Round 7: Join legs by crocheting 24 sc around both legs and chain bridge (10 + 10 + 4 chains). Place stitch marker to mark start/end of round.
Body Rounds 8–13
Round 8: Sc around 24 stitches, working over chains and legs as described.
Round 9: Work 24 sc in BLO (back loops only). This creates a subtle ridge for body texture.
Rounds 10-12: Sc evenly maintaining 24 stitches in each round.
Round 13: Begin to add arms by crocheting 4 sc, attaching the first arm by crocheting one stitch on arm edge and one on body, repeat across arm stitches. Continue with 10 sc on body, add second arm similarly, finish round. Align arms symmetrically on body sides.
Stuffing and Shaping
Stuff body firmly with fiberfill before closing head top.
Round 14: Work invisible decreases all around (12 sc) to start head shaping.
Head Color Change and Shaping
Round 15: Change color to nude/pale pink using traditional method on last yarn over. Work increases to 24 stitches.
Round 16: Increase by doing pattern (3 sc, 1 inc) around for 30 stitches total.
Rounds 17-22: Work straight (30 sc), no increases or decreases — six rounds to build head shape.
Safety Eyes Placement
Count three rounds down from last worked round. Insert safety eyes 4 stitches apart centered on front “face” area using the back ridge (BLO) as the key front marker for neat appearance.
Finishing Head
Close head off with a slip stitch after filling. Attach hat later to cover back of head seamlessly.
Santa's Sack (Bottom Part)
Chain to secure body base with new red yarn.
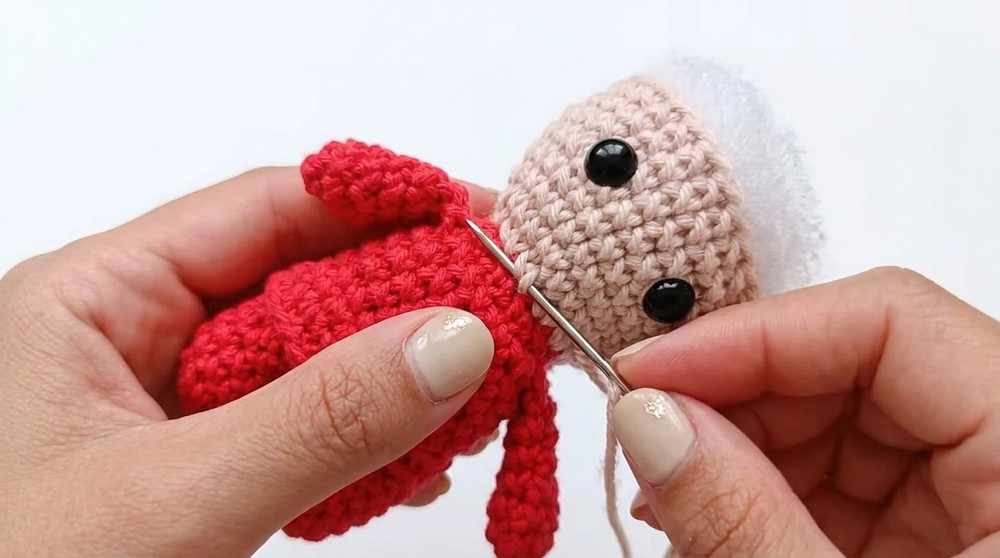
Round 1: Work 5 sc, inc repeated to increase stitches evenly.
Round 2: Sc around evenly without increases.
Rounds 3-4: Alternate colors for striping (white, reds) as desired for the bag effect. Finish top edge with white sc round.
Belt
Chain a length to wrap around body circumference (around 39 chains depending on yarn thickness). Join ends by slip stitch forming a circle.
Round 2: Sc evenly across all chains. Attach belt to bag with silicone glue or by sewing.
Nose
Round 1: Magic ring with 4 sc.
Round 2: 4 sc.
Close with a sl st, leave tail for attaching. Attach with glue and hold with pin until dry.
Beard
Chain 18 for beard base width.
Row 1: Sc starting from 2nd chain onwards.
Row 2: Chain 3 for height and turn. Work popcorn stitches every other stitch following the popcorn sequence (4 double crochets in one stitch, skip one, repeat) for texture.
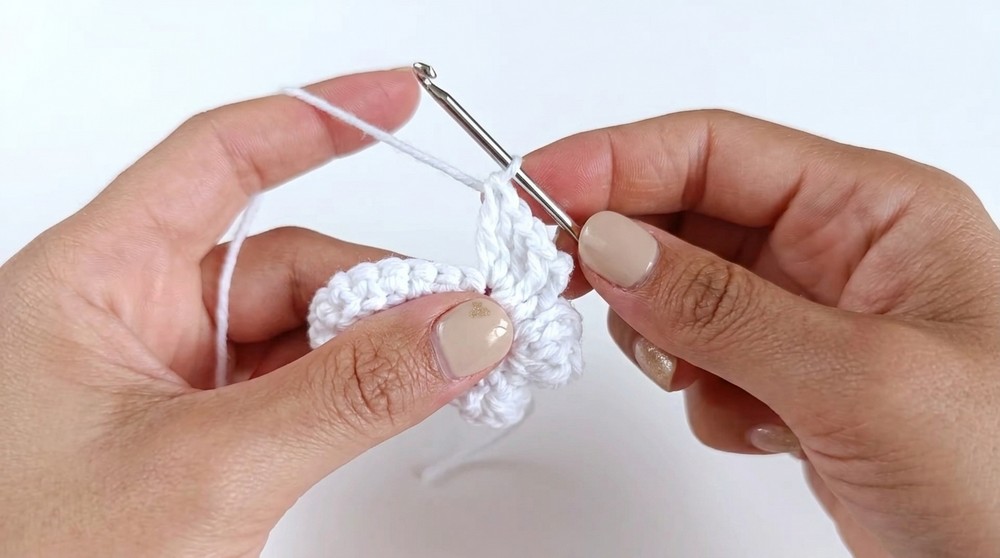
Secure beard to face with silicone glue; use pins to hold position until dried.
Hat
Chain foundation, join to form ring. Work even rounds building cone shape with increases as needed. Finish hat edge with appropriate trim or single crochet rounds. Attach hat to head using silicone glue; position low to tuck behind “eyebrows” area to cover bare head.
Assembly & Finished Size
- Attach arms symmetrically to sides of body.
- Sew or glue legs securely for keychain stability.
- Place safety eyes evenly spaced on head front.
- Glue nose at center front under eyes.
- Secure beard over chin area with glue and pins.
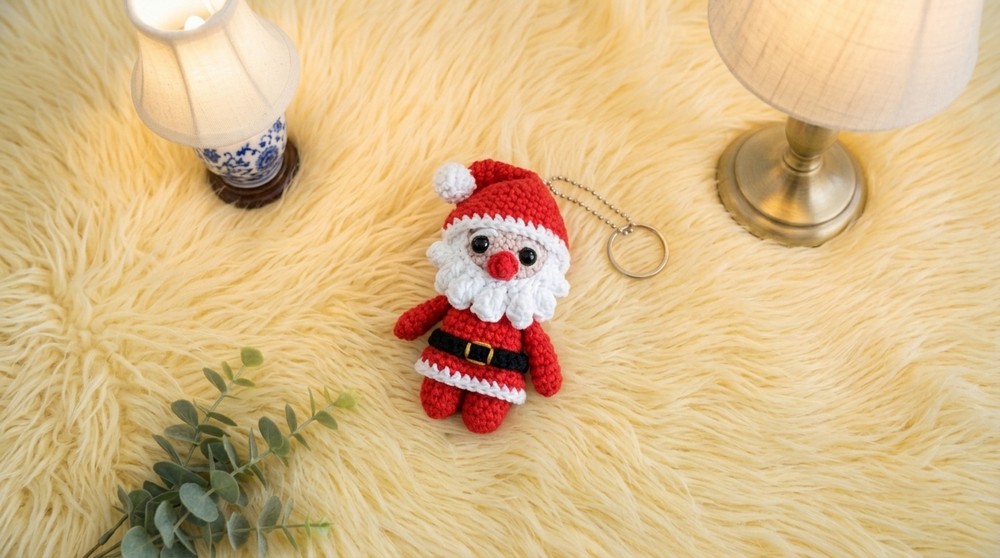
- Attach hat as final step to cover back of head and add Santa charm.
- Fully stuffed and formed, Santa keychain measures approx. 9-10 cm tall.
Summary
Create an adorable Santa Claus crochet keychain, perfect for Christmas decor or gifting. Featuring a small body, legs, arms, hat, and details like a beard and nose, this beginner-friendly pattern guides you through every step to produce a festive, delightful miniature keychain ideal for holiday sales and personal use.



Leave a Reply