

Add festive charm with this Free Crochet Santa Claus Keychain Pattern, a fun and easy project to create a cheerful accessory for keys or holiday gifts.
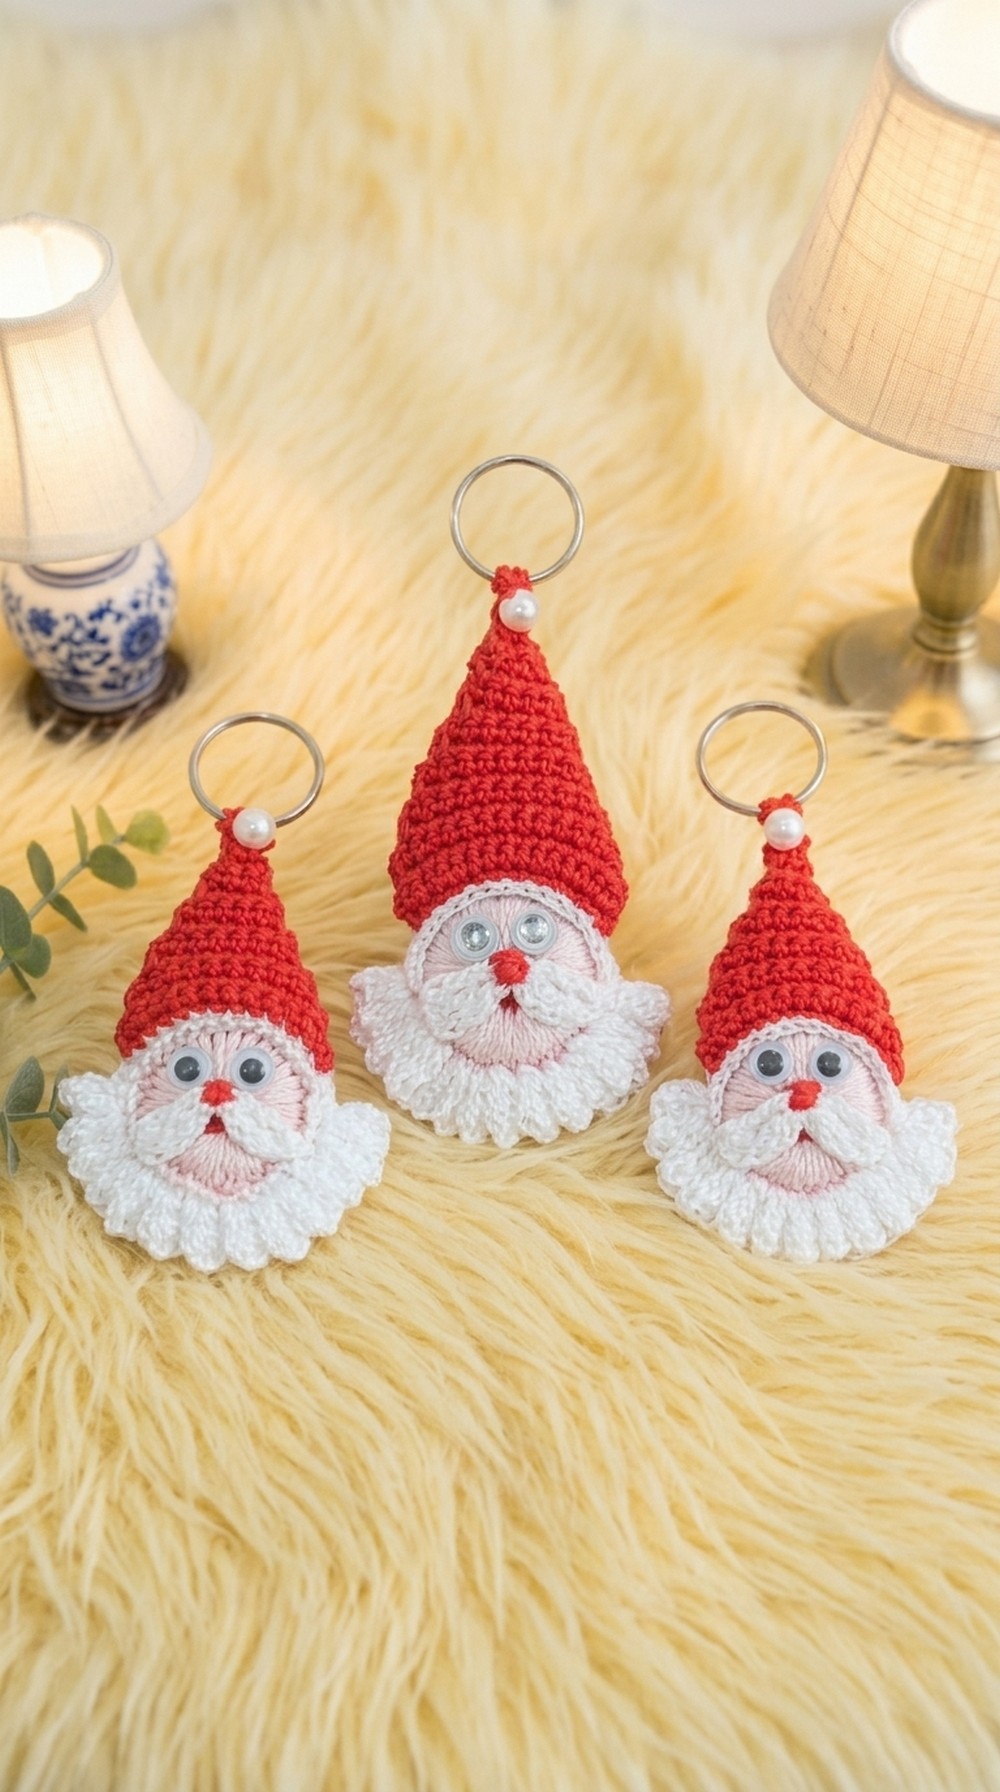
Adding a touch of holiday cheer to your accessories is easy with this free crochet Santa Claus keychain pattern. This delightful little project features a compact, rounded Santa crocheted with soft yet sturdy stitches that give it a nice, tactile texture. The standout details, like the fluffy white beard and the bright red hat, bring Santa’s jolly spirit to life in a charming, miniature form that’s perfect for keys, bags, or zipper pulls.
Unique Crochet Santa Claus Keychain Free Pattern For Bag Charm
Perfect for crocheters of all skill levels, this keychain is a quick and rewarding project. Its simple construction mainly uses basic stitches worked in rounds, making it accessible even for beginners. You can easily customize the size by adjusting your yarn weight or hook size, whether you want a petite keychain or a slightly larger ornament.
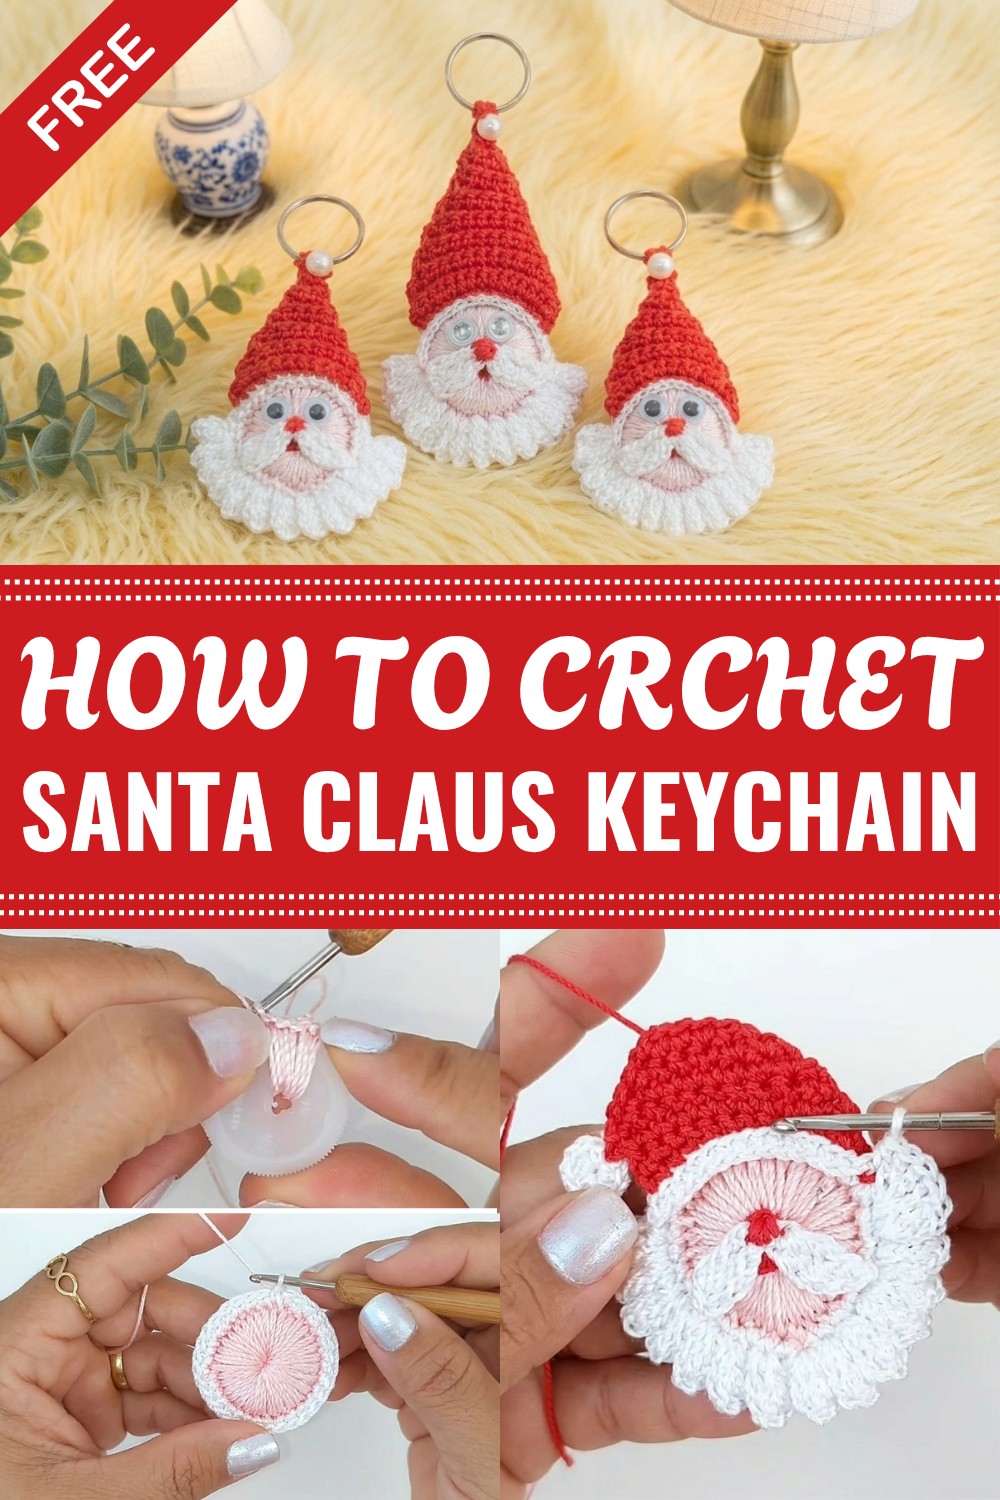
Inspired by the joy and warmth of the holiday season, this design aims to create a handmade token that spreads festive spirit everywhere it goes. Using cotton or cotton-blend yarn enhances the stitch definition, helping the keychain hold its shape while maintaining durability—ideal for something carried around regularly.
This Santa Claus keychain makes a thoughtful and fun gift for stocking stuffers, holiday party favors, or just a cheerful addition to your own collection. Don’t hesitate to add your personal touch with color variations or small embellishments, turning this festive project into a unique creation that reflects your holiday spirit.
Crochet Santa Claus Keychain Pattern
Pattern Notes
- This pattern is designed to crochet a cover for a recycled bottle cap (PET lid). Two common lid sizes are used: a wider lid resulting in a 10 cm tall Santa, and a thinner lid about 8.5 cm tall. Choose your lid based on availability and desired size.
- Velvet thread (Grossa Tex 288 100%) is used, which creates a plush texture but reduces stitch visibility; using stitch markers or counting stitches carefully is recommended.
- You will crochet around the lid covering it fully, then add decorative features like mustache, nose, and hat using basic crochet techniques and simple embellishments like pearl beads.
- Assembly involves sewing elements together and attaching a key ring to complete the keychain.
- Keep tension moderate to tightly cover the lid and avoid gaps.
Skill Level
Intermediate: Basic single crochet, low (slip) stitch, chain stitches, double treble crochet, popcorn stitch, and simple assembly skills required.
Materials
- Velvet thread in red, baby pink, and white (Grossa Tex 288 or equivalent)
- Crochet hook 1.75 mm
- Recycled PET bottle cap (choose preferred size/thickness)
- Sewing needle
- Scissors
- Pearl bead size 8 (or preferred size) for decorations
- Thin wire for sewing and shaping, with lighter or glue for sealing ends
- Key ring
- Stitch markers (optional but helpful)
Measurements / Sizing
- Finished Santa height depends on lid size:
• Smaller lid: approx. 8.5 cm tall
• Larger lid: approx. 10 cm tal - Width varies slightly according to lid diameter (~5-7 cm)
Gauge
Gauge is flexible but maintain even tension for fully covering the bottle cap without gaps or looseness.
Stitch Abbreviations
- ch = chain
- sc = single crochet
- sl st (low point) = slip stitch or very low stitch
- dc = double crochet
- dtr = double treble crochet (UK triple treble)
- pop = popcorn stitch (5 dc gathered together)
- st(s) = stitch(es)
Special Stitches
- Popcorn Stitch: Work 5 double crochets into the same stitch or space, remove hook, insert into front loop of first dc, yarn over and pull through to close the stitch creating a 3D puff.
- Double Treble Crochet (dtr): Yarn over twice, insert hook in stitch, yarn over and pull through, yarn over and pull through first two loops, repeat until only one loop remains.
The Crochet Pattern
Step 1: Prepare the PET Bottle Cap
- Choose the PET bottle cap (mineral water lids recommended for suitable size). There are two common types: wider lids (~10 cm tall Santa) and thinner lids (~8.5 cm tall Santa).
- Using piercing scissors, make small holes evenly spaced around the edge for inserting your yarn. This allows the yarn to be pulled through to cover the lid tightly.
Step 2: Cover the Lid Base with Baby Pink Yarn
- Tie a small initial knot in your baby pink thread.
- Insert the hook through a pierced hole on the lid, grab the yarn, and pull up a loop.
- Work a slip stitch (very low point) to begin covering cap.
- Continue covering the lid, working slip stitches in each pierced hole around the circumference, pulling yarn closely to hide the cap surface.
- Pull stitches tightly to avoid gaps and visible plastic.
- Continue until entire lid surface is fully covered.
- Join to first stitch with a slip stitch and cut yarn, sealing the end.

Step 3: Base Round Around the Lid Edge
- Insert your hook under any stitched loops at the base of the covered lid.
- Work one slip stitch in each base stitch, tightening around the lid edge to create a smooth base ring.
- When finished one round, join with a slip stitch to first stitch made.
Step 4: Create the Popcorn Stitch Row (Hat Trim)
- Chain 3 to start, this counts as the first double crochet (dc).
- In the next space, work popcorn stitches (5 dc in the same space pulled together). Chain 1 for spacing.
- Continue making popcorn stitches separated by chain 1 spaces around the lid’s base edge.
- Aim to complete 13 popcorn stitches (adjust if using a different lid size; more for bigger lids).
- Join last popcorn stitch to first with a slip stitch. Cut yarn and seal.

Step 5: Crochet Santa’s Mustache in White Yarn
- With white yarn, chain 4.
- In 2nd chain from hook, work one double treble crochet (dtr), releasing two loops at a time as you pull through; repeat dtr once more in the same chain.
- Chain 5, then work 2 dtr stitches in the 4th chain from hook, doubling back to create a curved mustache shape.
- Cut yarn, seal end.
- Fold the mustache piece and sew or glue it centered over the lower part of the lid covering.
Step 6: Form the Santa Nose with Red Yarn
- Thread red yarn through needle with a small knot at the end
- Sew one or more small red dots centrally just above the mustache on the pink covered lid surface to form Santa’s nose.
- Secure yarn tightly and weave in ends.

Step 7: Make the Santa Hat Red Section
- Using red yarn, join at one popcorn stitch point on the lid’s base.
- Work slip stitches in each stitch around the lid base (corresponding to popcorn stitch row), working one slip stitch per popcorn stitch base.
- At the end, chain 1 and turn.
- Work single crochet stitches in rows back and forth, skipping the top point of chains on turning rows to shape the tapered hat.
- Narrow the top by working chains and skipping stitches to create a pointed hat shape.
- Cut yarn leaving a long tail for joining.
Step 8: Add White Border on Santa Hat
- With white yarn, join at base of the red hat.
- Chain 12, join with slip stitch to form a loop. This forms the foundation for a hanging loop on the keychain.
- Work slip stitches evenly around the white border on the hat, joining edges cleanly.
- Cut yarn and seal.

Step 9: Adding Pearl Bead Decoration and Key Ring
- Thread an 8 mm pearl bead onto a long piece of yarn.
- Attach it securely near the tip of the hat using slip stitches or sewing needle and yarn.
- Attach the key ring through the chain loop made in Step 8 for easy keychain use.
- Secure all ends well, trimming excess thread.
Assembly & Finishing
- Check that the lid is fully and evenly covered with yarn using tight slip stitches.
- Sew any loose yarn ends with needle, securing mustache, nose, and hat parts firmly onto the base of the lid.
- Seal wire ends (used if any for shaping) with lighter or glue to prevent unraveled threads.
- Attach key ring securely through central chain loop on hat.
Finished Size
- Height: Approximately 8.5 cm (thin lid) to 10 cm (wide lid)
- Width: Approximately 5–7 cm depending on lid diameter
- Thickness: Approx. 2–3 cm including yarn layers and decorative added pieces
- Perfect size for keychain, fridge magnet, or small holiday décor piece.
Summary
This eco-friendly crochet project uses recycled PET bottle caps to create an adorable Santa Claus keychain or fridge magnet. The Santa figure is crocheted around the cap, using velvet thread in festive red, baby pink, and white, and incorporates simple crochet stitches along with decorative features including a mustache, nose, and hat. This step-by-step pattern turns recycled materials into charming gifts or souvenirs, perfect for holiday use or selling as handcrafted products.



Leave a Reply