

Shield yourself from the sun in style with a crochet sunvisor, offering breathable comfort, unique design, and perfect protection for outdoor adventures.
A crochet sunvisor is a delightful accessory offering both style and function. This project begins with a chain foundation, forming a base that comfortably fits around your head. Working with simple yet versatile stitches like half-double crochet and single crochet, you’ll build the band and brim of the visor seamlessly. The pattern incorporates strategic increases in the brim to give it a wide, curved shape that provides ample shade from the sun.
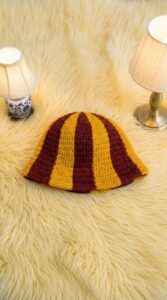
Chic Crochet Sunvisor Pattern for Beginners

What makes this sunvisor special is the balance between practicality and personal touch—it’s lightweight, breathable, and perfect for summer outings. Beyond its protective benefits, it adds a touch of handmade charm to your wardrobe, making it the perfect choice for casual gatherings, outdoor workouts, or a relaxing day at the beach. Whether enhancing your crochet skills or looking for a quick, satisfying project, this pattern offers an enjoyable experience that results in a beautiful, functional sunvisor you'll love to wear.


Introduction
This tutorial provides step-by-step instructions to create a quick and easy crochet sun visor, perfect for sunny days. The project uses basic crochet techniques, making it beginner-friendly while producing a practical and stylish accessory. With the use of two strands of yarn for added thickness, this sun visor offers durability and stability. The design is adjustable, ensuring a custom fit for various head sizes.
Special Features
- Single-Panel Design:
- The sun visor is crafted in one seamless panel, eliminating the need for multiple pieces or complicated assembly.
- Adjustability:
- The number of chains at the beginning can be modified to fit different head circumferences.
- Double Yarn Thickness:
- Two strands of yarn are used simultaneously throughout the project, enhancing the visor's sturdiness and creating a thicker texture.
- Basic Stitches:
- The tutorial primarily uses the slip stitch and half double crochet, making it ideal for beginners.
- Layered Rows:
- A series of alternating increases provides the rounded shape of the visor.
Materials Needed
- Yarn:
- Premier Just Yarn in worsted weight (used in the tutorial, but Red Heart or other worsted-weight brands work well).
- Two strands of yarn held together.
- Crochet Hook:
- Size 6 or "J" hook.
- Other Supplies:
- Tapestry needle (for weaving in loose ends).
- Scissors.
Step-by-Step Instructions
Base (Creating the Band Around the Head)
- Create a Slip Knot:
- Wrap yarn around two fingers and pull through to form a slip knot.
- Insert the crochet hook into the knot.
- Chain 60:
- Adjust the number of chains based on the circumference of your head.
- Join to Form a Ring:
- Slip stitch into the first chain to create a ring.
- Half Double Crochet:
- Chain 2, then work one half double crochet into every stitch around the ring.
- Slip stitch into the top of the chain-2 space to complete the row.
- Repeat this step for 4 rows to form the band.
Visor Section
- Start the Visor:
- Chain 2 and work half double crochet into the next 16 stitches. This section will form the base of the visor.
- Slip stitch into the next stitch to join.
- Alternate Increases:
- Turn your work, chain 1, and begin alternating increases:
- Work 1 half double crochet into one stitch.
- Work 2 half double crochets into the next stitch.
- Continue alternating this pattern to create the rounded shape at the visor's edge.
- Turn your work, chain 1, and begin alternating increases:
- Second Row of Increases:
- Chain 1, turn your work, and repeat the previous row:
- Work two single stitches (half double crochets in single stitches).
- Work two half double crochets into the same stitch.
- Alternate this pattern across the row.
- Chain 1, turn your work, and repeat the previous row:
- Final Row:
- Chain 1, turn your work, and complete the final row by working one half double crochet into every stitch (no increases).
Finishing
- Slip Stitch and Fasten Off:
- Slip stitch into the next stitch to join the row.
- Cut the yarn and fasten off.
- Weave in Loose Ends:
- Use a tapestry needle to sew in loose strands for a clean finish.
Level of Difficulty
- Beginner to Intermediate:
- The tutorial is straightforward, using simple stitches (slip stitch and half double crochet). Beginners should feel comfortable following along.
- Handling two strands of yarn simultaneously may require extra care and patience.
Tutor’s Suggestions
- Yarn Flexibility:
- If you don’t have Premier Just Yarn, you can substitute with any worsted-weight yarn, such as Red Heart Yarn.
- Take Your Time:
- Working with two strands can get slightly tricky, so handle the yarn gently and ensure both strands are caught during each stitch.
- Customization:
- Adjust the number of chains in the beginning ring to fit the circumference of your head.
- Experiment with colors for a personalized look.
Uses
- Sun Protection:
- The visor helps shield your face from harsh sunlight during outdoor activities.
- Fashion Accessory:
- Stylish and customizable; pair it with summer outfits for a chic look.
- DIY Gift:
- A thoughtful handmade gift for friends or family.
Pro Tip
- Check Your Fit Frequently:
- Before moving on from the band section, test the circumference on your head to ensure a comfortable fit. Adjust if necessary to avoid remaking the entire project.
Conclusion
This crochet sun visor is a quick, easy, and highly customizable project that makes for both a functional accessory and a fun DIY challenge. With its beginner-friendly stitches and one-panel design, the visor can be completed in just a few hours. Whether you're headed to the beach or working in the garden, this stylish visor is sure to keep you shaded while showcasing your creativity. Happy crocheting!


Leave a Reply