

Celebrate the festive season with this simple guide for a Crochet Gingerbread Man pattern, perfect for adding charm to your holiday decor.
There’s something truly heartwarming about making your own seasonal decorations, and a little crochet gingerbread man brings that cozy holiday spirit to life in the softest way. The Crochet Gingerbread Man Free Pattern is perfect for adding a charming touch to your festive décor, gift tags, or even as a sweet little mascot to tuck into a stocking. People enjoy making this project because it combines simple shapes with cheerful character—resulting in a piece that’s as delightful to make as it is to display.
Unique Crochet Gingerbread Man Free Pattern To Add A Festive Touch
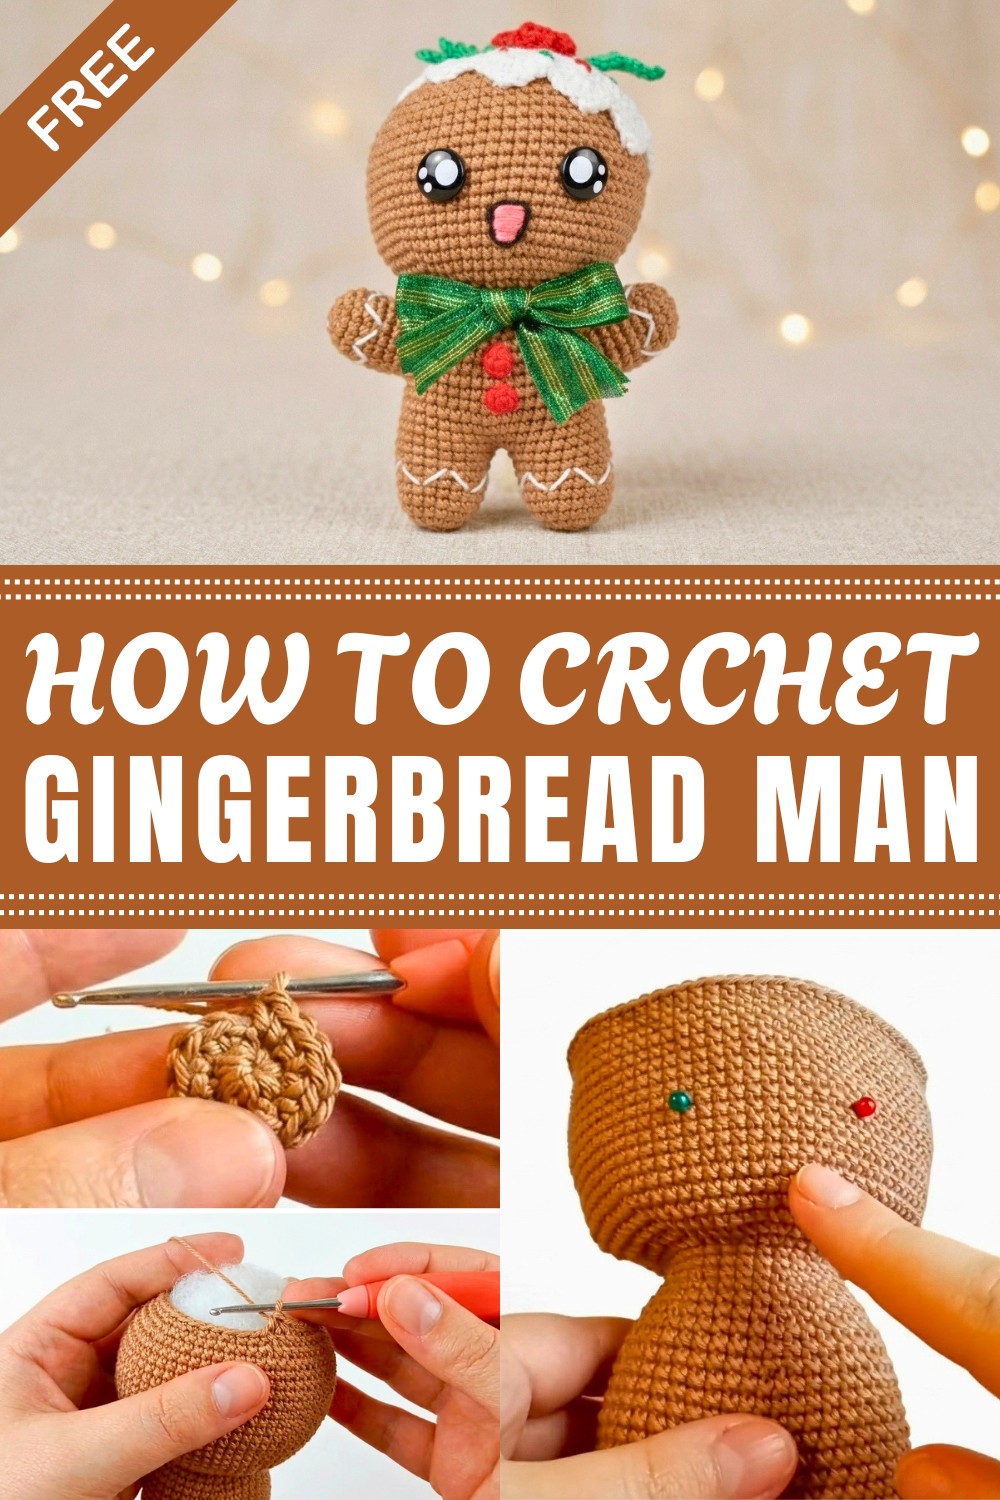
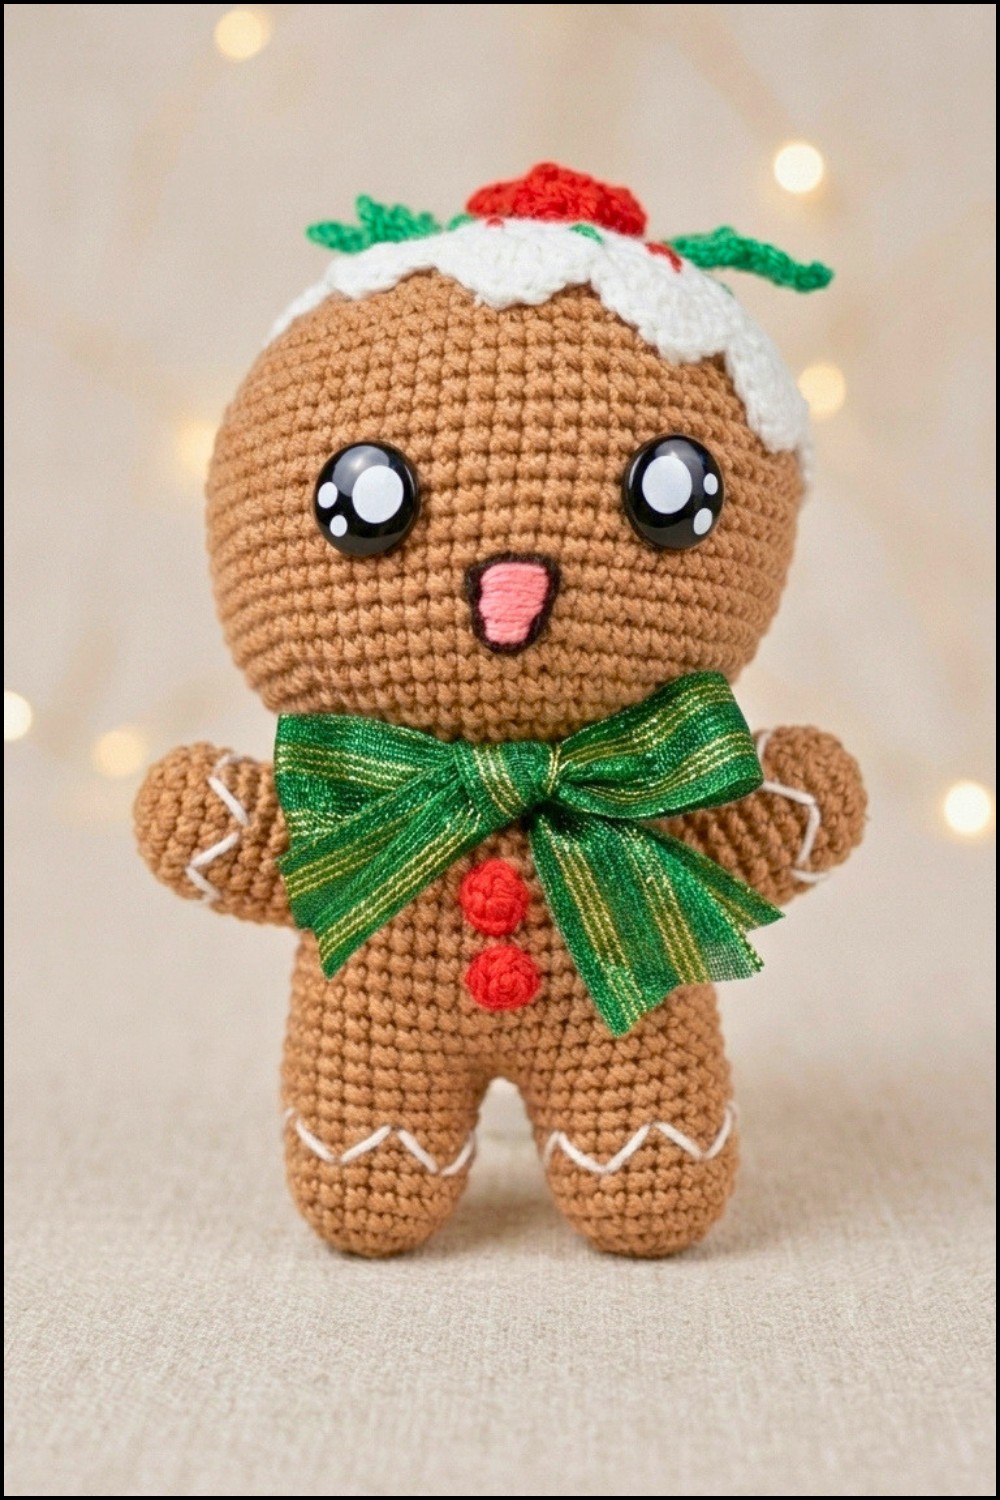
This tiny gingerbread friend features a classic rounded shape, with stubby arms and legs giving it an invitingly plump silhouette. The texture is smooth but with enough stitch definition to hint at the whimsical “icing” details that can be stitched or added later, making it feel like a mini work of art. Because it’s stuffed lightly, the figure holds its shape nicely and feels pleasantly squishy — the kind of soft that almost begs to be squeezed or held while enjoying a cup of cocoa.
One of the best parts about this project is how adaptable it is. Add some embroidery or tiny buttons to customize your gingerbread man’s expression and outfit, or experiment with different yarn colors to give it a twist beyond the traditional brown and white. It’s approachable for intermediate yarn lovers but designed so those newer to stitching can follow along, too, making it a rewarding project whether you’re building skills or just looking for festive fun.
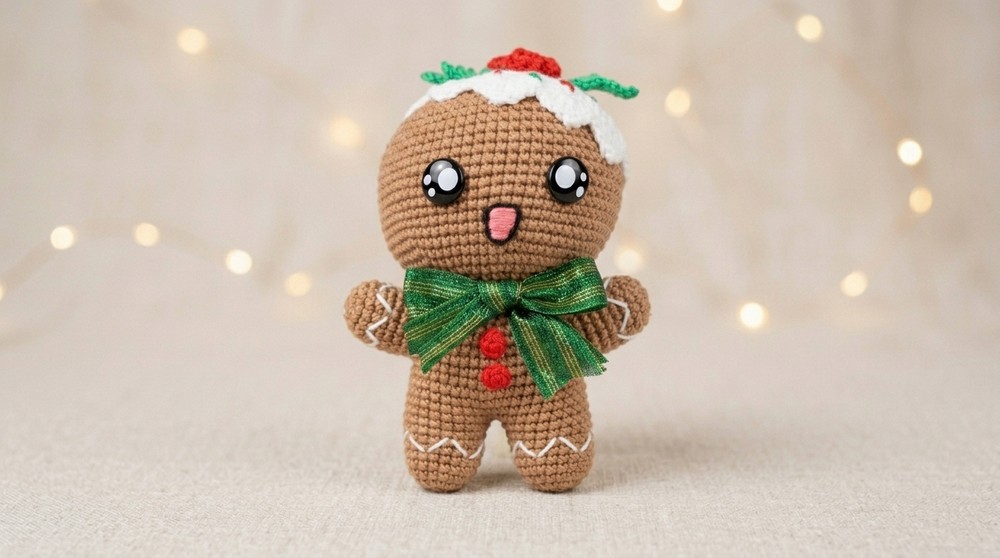
With this project, you’ll enhance your ability to crochet small amigurumi shapes and follow creative stitching for facial features and decoration. It’s a wonderful way to stretch your imagination while creating something homey that celebrates the season. Feel free to dive into the Crochet Gingerbread Man Free Pattern and add a sprinkle of handmade holiday cheer to your world this year.
Easy Crochet Gingerbread Man Free Pattern
Start a festive project by following this step-by-step amigurumi gingerbread cookie crochet pattern inspired by the linked video. This guide highlights every essential step, breaking down the techniques into clear rounds for each part of the gingerbread cookie, including the body, limbs, icing cap, and holly details. All materials, stitch abbreviations, and tips are included to ensure a smooth process for crocheters at any skill level. Accurate rounds and stitch placements build a charming and symmetrical finished toy. The result is a cheerful addition to holiday decorations or a thoughtful seasonal gift for loved ones.
Quick Overview of Pattern
- Separate limb construction: Each leg and arm is crocheted individually and joined seamlessly to the body.
- Detailed head and body shaping: Head, torso, and lower body are built in progressing rounds for a balanced silhouette.
- Eye placement guidance: Position safety eyes for a cute and lively expression.
- Decorative details: Includes an intricate icing cap, holly leaves, and embroidered facial features.
- Minimal sewing required: Most parts are crocheted in one piece, with only key details attached at the end.
- Versatile finishing: Add a ribbon for a festive bow tie to complete the look.
Notes
- Pattern is worked in a spiral; use a stitch marker to keep track of rounds.
- Change yarn color as directed for different components and details.
- Stuff parts as you go for a smooth and symmetrical finished shape.
- Adjust hook size as needed to achieve a firm, tight fabric and prevent filling from showing.
- Safety eyes can be replaced with embroidered eyes if desired for added safety (especially for children).
- Ribbon and twine add finishing flair but are optional—personalize as you wish.
Skill Level
Beginner to Intermediate: The construction uses single crochet, basic increases and decreases, a simple join, and some decorative surface stitches. Detailed descriptions guide new crocheters through special rounds, making this a manageable project for those ready to try amigurumi.
Materials
- Yarn: 4-ply cotton yarn in Mink (light brown, body), White (icing), Green (leaves), Red (details/holly berries)
- Twine: Black and coral twine (for facial embroidery)
- Ribbon: Christmas ribbon or similar—small scrap for bow tie
- Crochet Hook: 2.5 mm (suitable for tight amigurumi)
- Safety Eyes: 14 mm kawaii-style with polka dots (or alternative for embroidery)
- Filling: Fiberfill stuffing
- Tapestry Needle & Scissors
Measurements / Sizing
- Approximate Size when Complete: 15–17 cm / 6–7 inches from foot to head
- Width: About 10 cm / 4 inches at the widest point
Gauge
- Gauge is not critical for amigurumi, but stitches should be tight enough to prevent stuffing from showing.
Stitch Abbreviations
- sc = Single crochet
- inc = Increase (2 sc in the next stitch)
- dec = Decrease (single crochet 2 together)
- sl st = Slip stitch
- ch = Chain
- hdc = Half double crochet
- dc = Double crochet
- MR = Magic ring
Special Stitches
- Magic Ring (MR): Form a tight adjustable loop to begin crocheting in the round.
- Extended dc (edc): Yarn over, insert hook, pull up a loop (three loops on hook), yarn over, pull through one loop, yarn over, pull through two, yarn over, pull through two (worked in 3-steps for border edge effect).
- Border Edging: Decorative scallop formed by a sequence of sc, hdc, grouped dcs, and sl sts for a wavy icing appearance.
The Crochet Pattern
Legs (Make 2)
Work in mink/light brown for both legs.
- Round 1: Start with a magic ring, crochet 7 sc. (7)
- Round 2: Inc in each stitch around. (14)
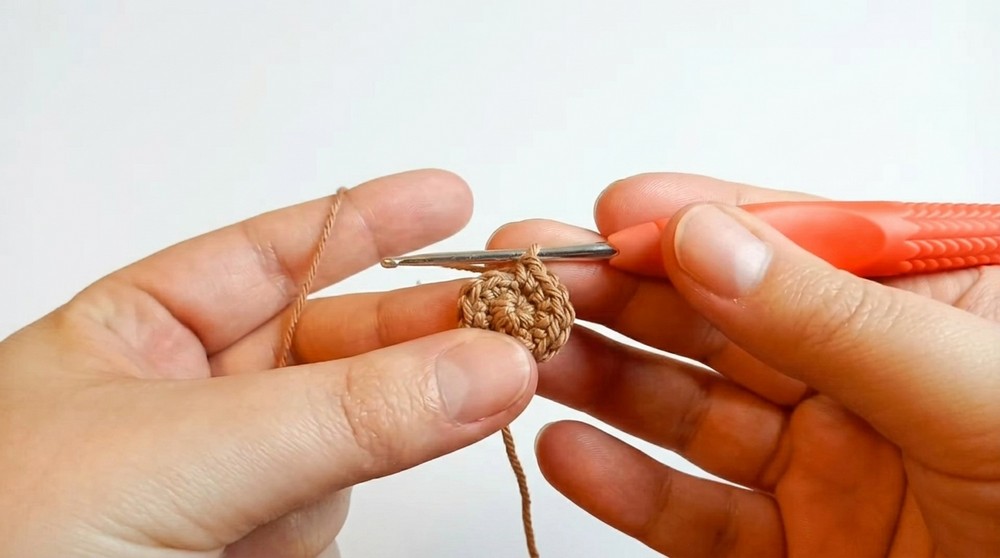
- Round 3: [1 sc, 1 inc] repeat around. (21)
- Rounds 4–9: 1 sc in each stitch around for 6 rounds. (21)
- First leg: Fasten off and set aside.
- Second leg: Do not fasten off; continue to joining section.
Leg Joining & Lower Body
- Round 10: Ch 2 loosely from the second leg. Join to the first leg by working 21 sc around the first leg, 1 sc in each of the 2 chains, 21 sc around the second leg, and 1 sc in each of the remaining sides of the chains (46 total stitches in round). (46)
- Rounds 11–17: 1 sc in each stitch for 7 rounds, maintaining a spiral. (46)
Body
- Round 18: Work as follows: 9 sc, dec, 10 sc, dec, 9 sc, dec, 10 sc, dec. (42)
- Rounds 19–20: 1 sc in each stitch for 2 rounds. (42)
- Round 21: [5 sc, 1 dec] repeat around. (36)
- Rounds 22–23: 1 sc in each stitch for 2 rounds. (36)
- Round 24: [4 sc, 1 dec] repeat around. (30)
- Rounds 25–26: 1 sc in each stitch for 2 rounds. (30)
- Stuff the body firmly at this point for best shaping.
Head
Switch to head section, continue in same color.
- Round 27: [1 sc, 1 inc] repeat around. (45)
- Round 28: [2 sc, 1 inc] repeat around. (60)
- Round 29: [9 sc, 1 inc] repeat around. (66)
- Round 30: [10 sc, 1 inc] repeat around. (72)
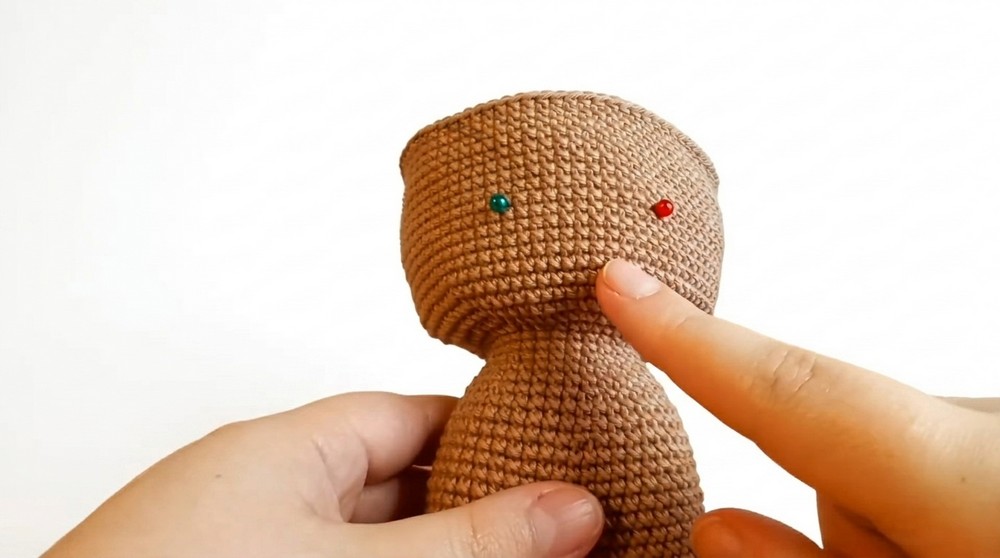
- Rounds 31–45: 1 sc in each stitch for 15 consecutive rounds. (72)Eye Placement:
Insert 14 mm safety eyes between rounds 6 and 7 of the 15-round block, with 11 stitches of space between each eye.
- Round 46: [10 sc, 1 dec] repeat around. (66)
- Round 47: [9 sc, 1 dec] repeat around. (60)
- Round 48: [2 sc, 1 dec] repeat around. (45)
- Begin stuffing the lower part of the head firmly.
- Round 49: [1 sc, 1 dec] repeat around. (30)
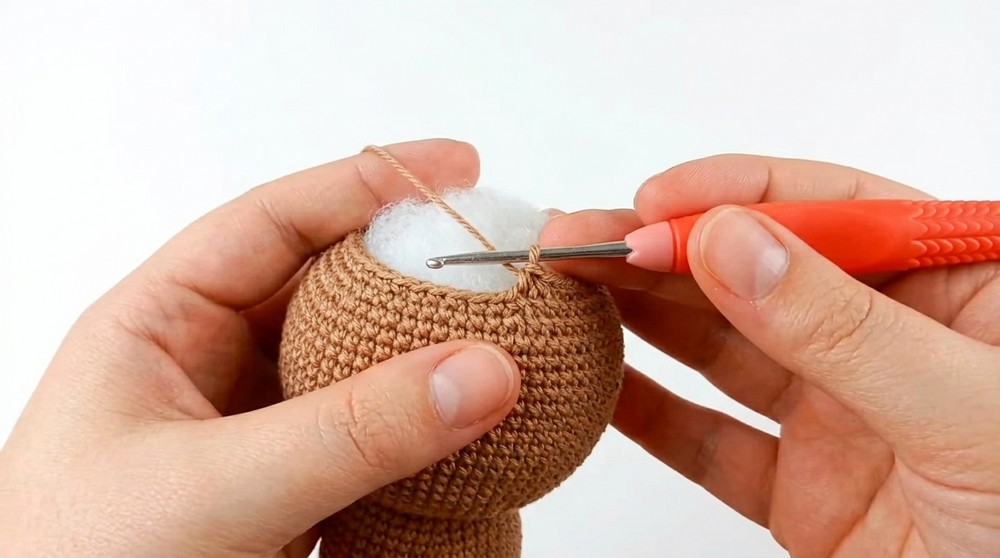
- Round 50: [3 sc, 1 dec] repeat around. (24)
- Round 51: [2 sc, 1 dec] repeat around. (18)
- Round 52: [1 sc, 1 dec] repeat around. (12)
- Round 53: 6 dec (use sc2tog around). (6)
- Fasten off. Weave through front loops of last 6 stitches, pull to close.
Arms (Make 2)
With same color as body.
- Round 1: MR, 6 sc. (6)
- Round 2: Inc in each stitch. (12)
- Round 3: [1 sc, 1 inc] repeat around. (18)
- Rounds 4–10: 1 sc in each stitch for 7 rounds. (18)
- Finish with 1 sl st, ch 1, and leave a long tail for sewing.
Icing Cap (White Yarn)
- Round 1: MR with 6 sc. (6)
- Round 2: Inc in each st. (12)
- Round 3: [1 sc, 1 inc] repeat around. (18)
- Round 4: [2 sc, 1 inc] repeat around. (24)
- Round 5: [3 sc, 1 inc] repeat around. (30)
- Round 6: [4 sc, 1 inc] repeat around. (36)
- Round 7: [5 sc, 1 inc] repeat around. (42)
- Round 8: [6 sc, 1 inc] repeat around. (48)
- Round 9: [7 sc, 1 inc] repeat around. (54)
- Round 10: [8 sc, 1 inc] repeat around. (60)
- Round 11: [9 sc, 1 inc] repeat around. (66)
- Round 12 (Icing Border): Work the following sequence 11 times:
1 sc, 1 hdc, 3 dc in next st (1 dc, 1 extended dc in 3 steps, 1 dc), 1 hdc, 1 sc, 1 sl st. - Fasten off, leaving a long tail to sew to top of head.
Holly Leaves (Make 2, Green Yarn)
- Step 1: Ch 8.
- Step 2: Starting in 2nd ch from hook: 1 sc, ch 2, sl st in 2nd ch from hook.
- Step 3: Repeat [1 sc, ch 2, sl st in 2nd ch from hook] down chain.
- Step 4: In last (end) stitch: 1 sc, ch 3, sl st in 2nd ch, sl st in next ch, 1 sc in end.
- Step 5: Working up the opposite side, repeat [1 sc, ch 2, sl st in 2nd ch] across.
- Fasten off, leaving a tail for sewing. There should be 6 points per side plus the main tip.
Assembly & Finished Size
Assembly Steps:
- Sew arms to each body side, evenly aligned across from each other.
- Stitch icing cap securely to the very top of the head, covering any opening.
- Position holly leaves atop the icing, sewing in place carefully.
- Using black and coral twine or thread, embroider the mouth and other facial features as shown.
- Attach ribbon as a bow tie underneath the head.
- Weave in all loose ends.
- Firmly shape body with hands to finish.
- Final Size: 15–17 cm (6–7 in) tall.
Conclusion and Ending Words
All rounds and assembly instructions in this pattern combine to produce a detailed and appealing amigurumi gingerbread cookie. Each crochet step incorporates specific guidance for proper shaping, color changes, and attachment of decorative accents. Once completed, the toy serves as a cheerful seasonal accent in any holiday theme or gifting scenario. The construction process promotes skill-building and attention to detail while remaining accessible to beginners. With careful adherence to materials and stitch guides, a well-balanced and secure finished figure is ensured. This gingerbread cookie represents the festive spirit with every thoughtful round and finishing touch applied.


Leave a Reply