

Celebrate your love for cute anime characters by bringing home Crochet Nyanko Sensei Pattern, perfect for both new and seasoned crocheters.
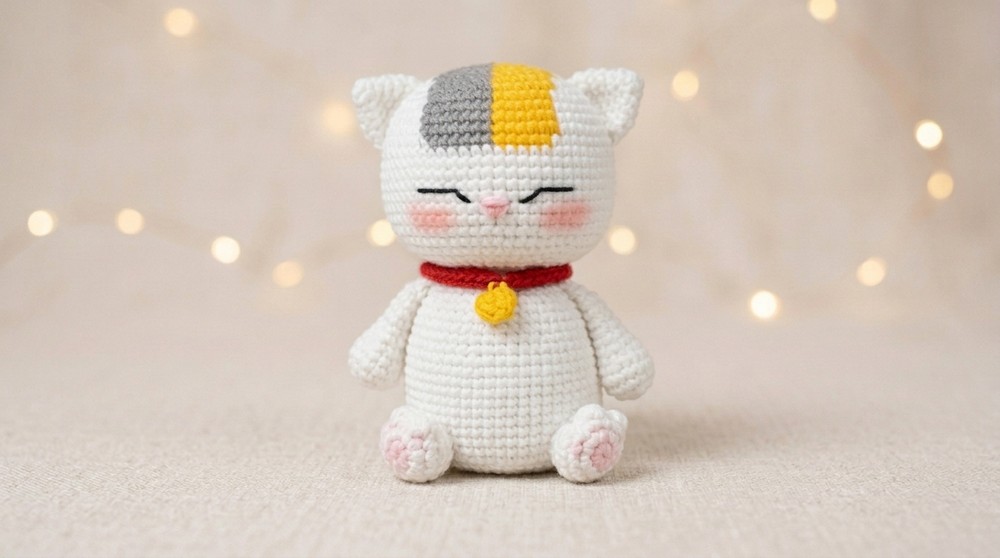
Have you ever wished for a soft and lovable friend to keep you company? The Crochet Nyanko Sensei is just that—a sweet and cuddly cat with a round, plush body and big, friendly eyes. This charming creation looks like a little bundle of joy, perfect for hugging or displaying on a favorite shelf. With its smooth shape and happy face, the finished cat brings warmth and cheer to any space.
Sweet Crochet Nyanko Sensei Free Pattern To Brighten Your Collection
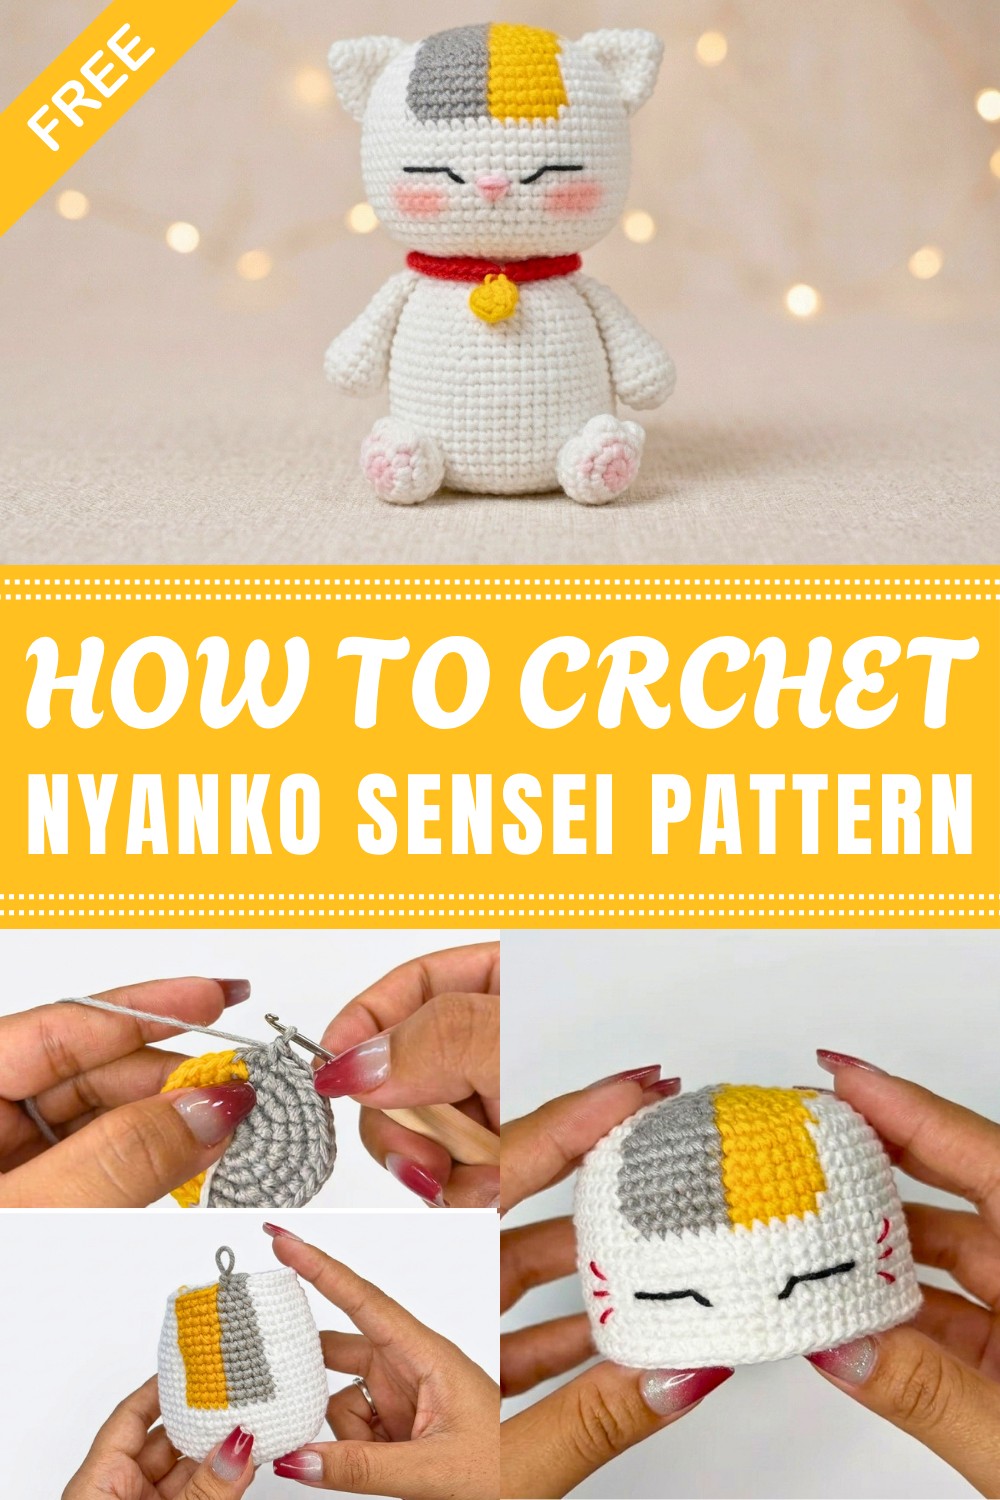
This adorable cat is the perfect size to hold in your hands or carry along wherever you go. Whether for children who love cuddly toys or adults wanting a cute desk companion, this Crochet project fits all ages and occasions. Its simple yet endearing look makes it a wonderful gift that spreads smiles and happiness.
What makes this project even better is how easy it is to follow the pattern. Designed with beginners in mind, the instructions walk you through each step without confusion. The Nyanko Sensei’s lovable design combines simplicity with personality, making the process as fun as the finished piece.
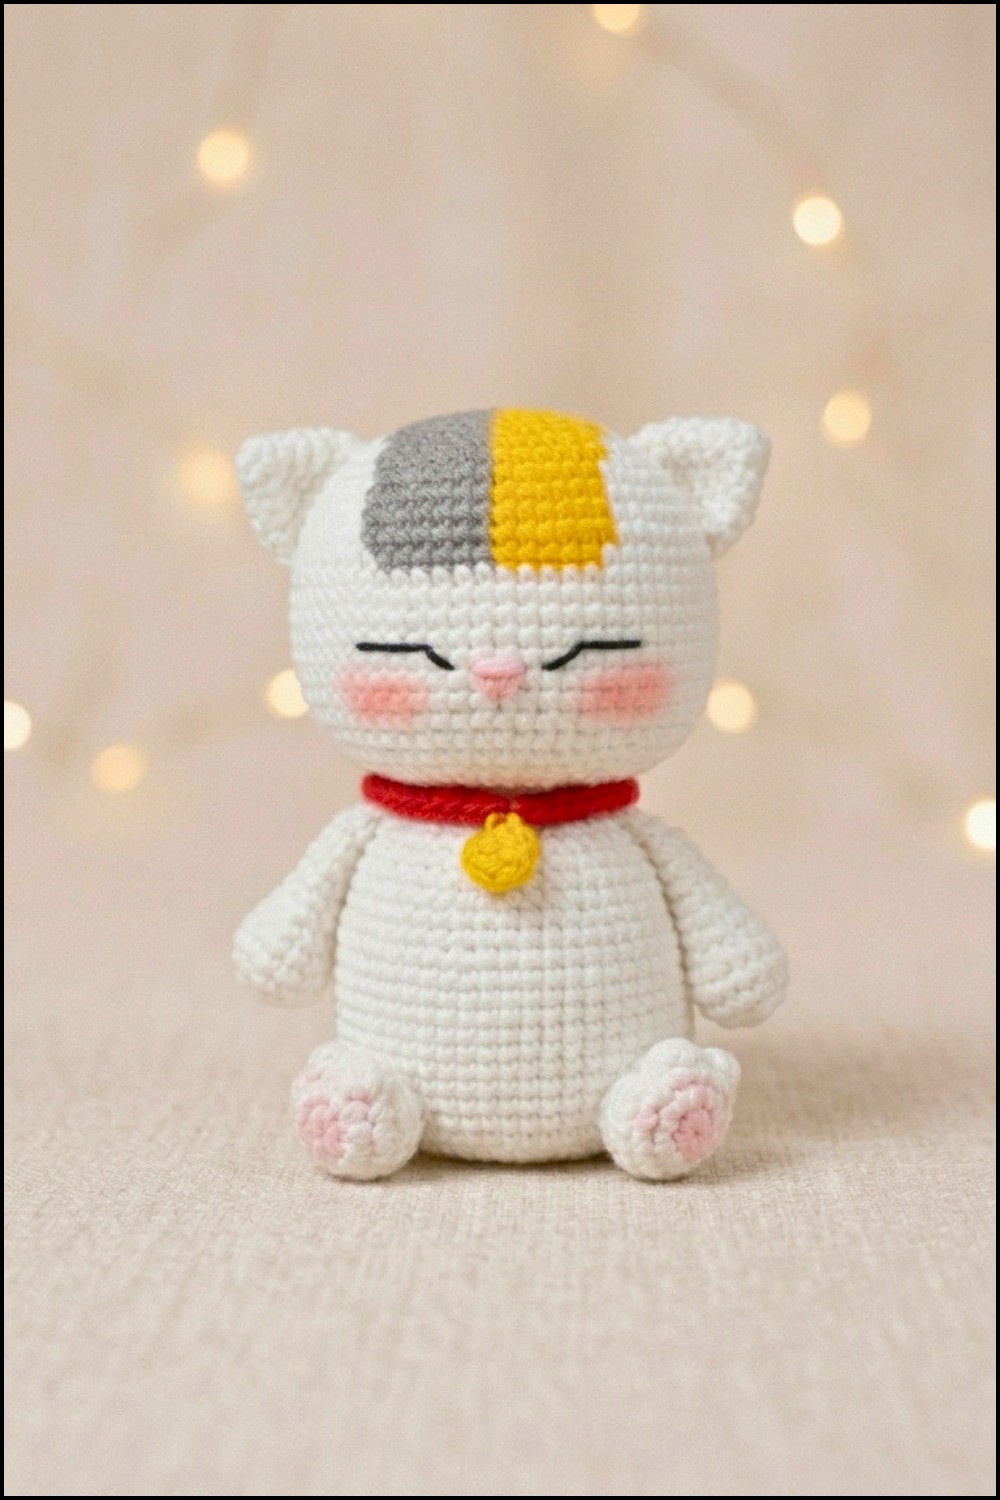
More than just a toy, this crocheted cat is a comforting buddy that invites hugs and brightens any room with its sweet grin. It’s a handmade treasure that brings joy and a sense of calm to its owner. If you’re ready to create your very own cat, don’t miss out on the free pattern. It’s a lovely chance to add a bit of happiness and creativity to your life—one stitch at a time.
Cute Crochet Nyanko Sensei Free Pattern
Nyanko Sensei from the anime Natsume comes to life as a delightful amigurumi in this detailed pattern. This guide leads you through every step required to crochet and assemble each part of project, paying special attention to signature details with color changes and precise shaping. All directions aim to offer a seamless crafting experience as you move from the base rounds to intricate facial and body features. Make sure to keep your colors and tools organized for effortless colorwork and finishing.
Quick Overview of Pattern
- Head: Begins with alternating colors and builds distinct facial color blocks; features firm stuffing and an internal neck tube for support.
- Ears: Small, rounded, and placed accurately with reference to the face.
- Torso: Shaped by standard amigurumi increases and decreases, plus strategic colorwork.
- Collar & Pendant: Red double crochet strip with a bright hanging accent.
- Arms & Legs: Each worked separately; arms are sealed flat while legs feature unique bobble toes.
- Assembly: Stepwise sewing and stuffing for a balanced and expressive finished figure.
Notes
- Nyanko Sensei stands about 14 cm tall using a 2.0 mm hook and La Abuelita brand yarn.
- All pieces are worked in continuous rounds unless stated otherwise.
- Pay close attention to color changes for each round, as this brings the character to life.
- Finish each round accurately before moving on to the next to maintain symmetry in the colorwork.
- Stuff gradually for smooth and rounded shaping.
- Safety is important—use child-safe stuffing and skip glue for toy use.
Skill Level
Intermediate: Familiarity with color changes, working in the round, invisible decreases, and simple embroidery is required for best results. Beginners are encouraged to take their time on colorwork transitions.
Materials
- Yarn: Black, white, mango, gray, and red (La Abuelita brand preferred)
- Hook: 2.0 mm
- Filling: Synthetic fiberfill
- Notions: Yarn needle, scissors, stitch markers, pins, hot or cold glue
- Other: Small quantity of yellow (for pendant)
Measurements / Sizing
- Finished Size: Approximately 14 cm tall. Size will vary with yarn brand, hook, and personal tension.
- Schematic: No separate schematic. The written instructions detail proportions precisely.
Gauge (and Stitch Pattern if applicable)
- Gauge: Not critical; tight, consistent stitches hold stuffing well. Adjust hook size for personal tension if needed.
- Stitch Pattern: Primarily single crochet (sc) in the round, with increases (inc), decreases (dec), and occasional double crochet (dc) for collar.
Stitch Abbreviations
- MR: Magic Ring
- sc: Single Crochet
- inc: Increase (2 sc in the same st)
- dec: Decrease (sc two together/invisible decrease)
- ch: Chain
- dc: Double Crochet
- st(s): Stitch(es)
- rnd(s): Round(s)
Special Stitches
- Invisible Decrease (dec): Insert hook in front loops of next two sts, yarn over, pull through, yarn over, pull through both loops on hook.
- Bobble Stitch (for legs): (Yarn over, insert into st, pull up loop) repeat 4 times in same st, yarn over, pull through all loops on hook.
The Crochet Pattern
Head
- Rnd 1: In gray, 4 sc; switch to mango, 3 sc in MR (7 sts)
- Rnd 2: inc in each st around (14 sts)
- Rnd 3: (1 sc, inc) × 7 (21 sts)
- Rnd 4: (2 sc, inc) × 7 (28 sts)
- Rnd 5: (3 sc, inc) × 7 (35 sts)
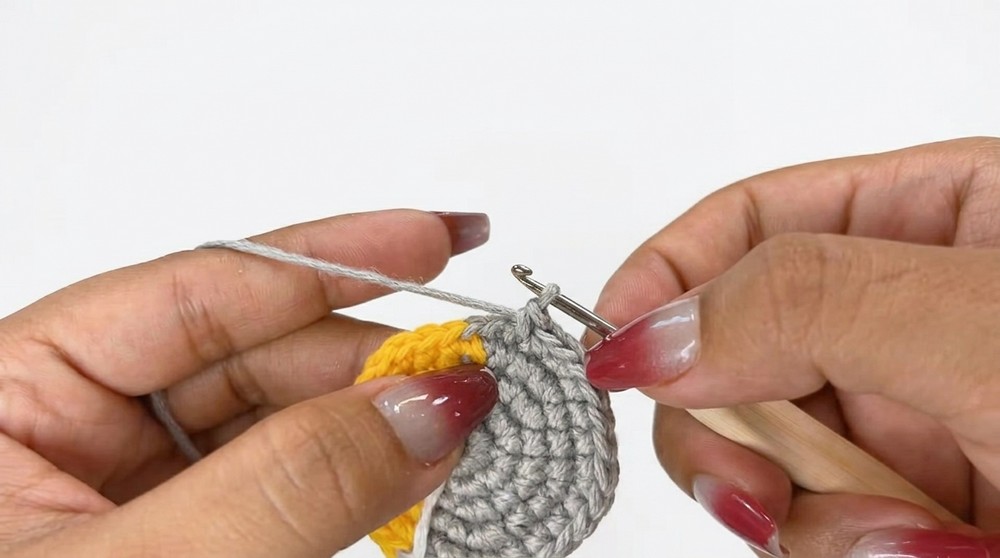
- Rnd 6: 2 sc, inc, (4 sc, inc) × 6, 2 sc (42 sts)
- Rnd 7:
- 5 sc in gray, inc;
- switch to white: 5 sc, inc, 5 sc;
- switch to gray: inc, 4 sc;
- switch to mango: 1 sc, inc, 3 sc;
- switch to white: 2 sc, inc, 5 sc;
- switch to mango: inc, 5 sc, inc (49 sts)
- Rnd 8:
- 3 sc in gray, inc, 3 sc;
- switch to white: 3 sc, inc, 6 sc, inc, 1 sc;
- switch to gray: 5 sc, inc;
- switch to mango: 6 sc;
- switch to white: inc, 6 sc, inc, 2 sc;
- switch to mango: 4 sc, inc, 3 sc (56 sts)
- Rnd 9:
- 7 sc in gray;
- switch to white: inc, 7 sc, inc, 7 sc;
- switch to gray: inc, 5 sc;
- switch to mango: 2 sc, inc, 2 sc;
- switch to white: 5 sc, inc, 7 sc, inc;
- switch to mango: 7 sc, inc (63 sts)
- Rnds 10–12: Work 3 rounds of 63 sc around, following all color changes.
- Rnds 13–21: Work 9 rounds of 63 sc; keep front in white, maintain back colors.
Tip: Embroider facial features and red cheeks between Rnds 17–18, spacing the cheeks 4–5 sts apart.
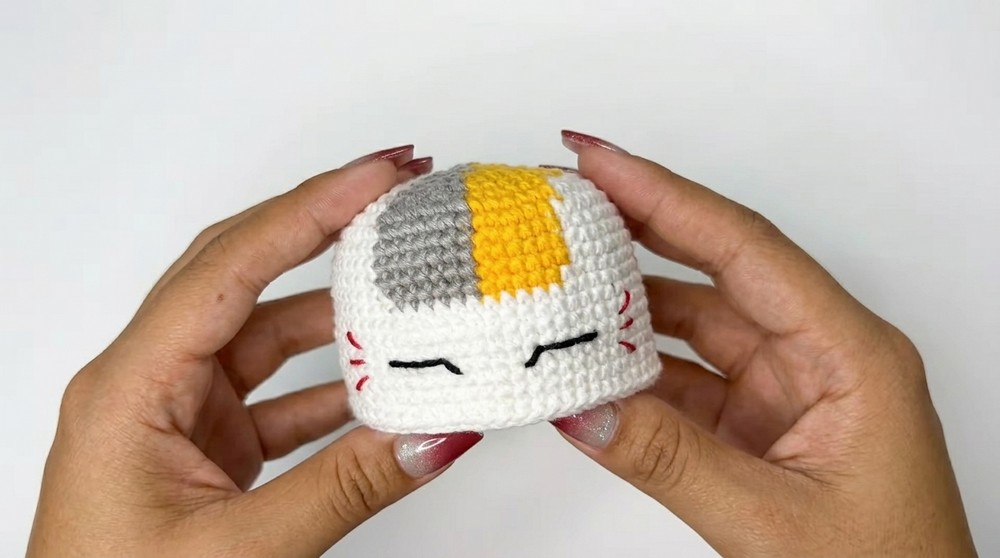
- Rnds 22–23: Work 2 rounds of 63 sc, reducing back color patches as white area expands.
- Rnd 24: (7 sc, dec) × 7 (56 sts)
- Rnd 25: (6 sc, dec) × 7 (49 sts)
- Rnd 26: (5 sc, dec) × 7 (42 sts)
- Rnd 27: (4 sc, dec) × 7 (35 sts)
- Rnd 28: (3 sc, dec) × 7 (28 sts)
- Rnd 29: (2 sc, dec) × 7 (21 sts)
- Rnds 30–37: 21 sc (8 rounds in white, forming tube for neck base)
- Stuff head well, then tuck this neck extension inside head for extra support.
Ears (Make 2)
- Rnd 1: 5 sc in MR (5 sts)
- Rnd 2: 5 sc (5 sts)
- Rnd 3: inc in each st (10 sts)
- Rnd 4: (1 sc, inc) × 5 (15 sts)
- Rnds 5–7: 15 sc for 3 rounds (15 sts each)
- Sew to head between Rounds 7–8 and Rounds 12–13 for symmetry.
Body
- Rnd 1: 7 sc in MR (7 sts)
- Rnd 2: inc in each st (14 sts)
- Rnd 3: (1 sc, inc) × 7 (21 sts)
- Rnd 4: (2 sc, inc) × 7 (28 sts)
- Rnd 5: (3 sc, inc) × 7 (35 sts)
- Rnd 6: (4 sc, inc) × 7 (42 sts)
- Rnd 7: (5 sc, inc) × 7 (49 sts)
- Rnd 8: (6 sc, inc) × 7 (56 sts)
- Rnds 9–13: 56 sc in white (5 rounds)
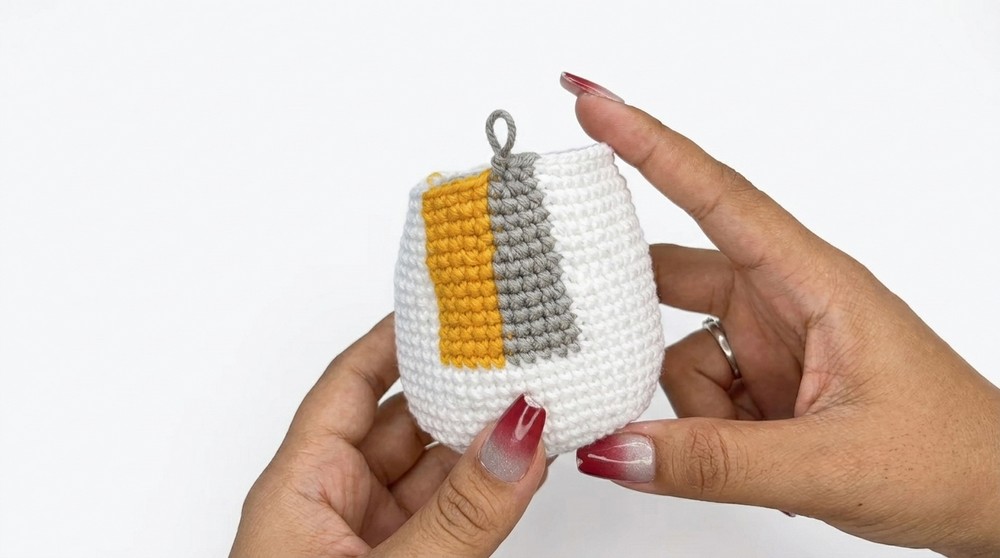
- Rnd 14: 51 sc in white, 5 sc in gray (56 sts)
- Rnd 15: 5 sc in mango, 46 sc in white, 5 sc in gray (56 sts)
- Rnds 16–20: 56 sc in white (5 rounds)
- Rnd 21: (6 sc, dec) × 7 (49 sts)
- Rnds 22–24: 49 sc (49 sts for 3 rounds)
- Rnd 25: (5 sc, dec) × 7 (42 sts)
- Rnd 26: 42 sc (42 sts)
- Rnd 27: (4 sc, dec) × 7 (35 sts)
- Rnd 28: (3 sc, dec) × 7 (28 sts)
- Rnd 29: (2 sc, dec) × 7 (21 sts)
- Rnd 30: (1 sc, dec) × 5, 1 sc (16 sts)
- Rnds 31–38: 16 sc (8 rounds, forming the neck)
- Rnd 39: dec around (8 sts), fasten off, weave tail through remaining sts to close.
Collar & Pendant
- Collar: ch 35, then 34 dc in red yarn to complete the collar.
- Pendant: 6 sc in MR in yellow or mango, secure to collar center.
Arms (Make 2)
- Rnd 1: 6 sc in MR (6 sts)
- Rnd 2: inc in each st (12 sts)
- Rnd 3: (1 sc, inc) × 6 (18 sts)
- Rnds 4–6: 18 sc (3 rounds)
- Rnd 7: (1 sc, dec) × 6 (12 sts)
- Rnds 8–12: 12 sc (5 rounds)
- Fold top flat and work 6 sc through both layers to seal each hand shut.
Legs (Make 2)
- Rnd 1: 6 sc in MR (6 sts)
- Rnd 2: inc in each st (12 sts)
- Rnd 3: (1 sc, inc) × 6 (18 sts)
- Rnd 4: 5 sc, bobble st, 2 sc, bobble st, 2 sc, bobble st, 6 sc (18 sts total with three bobble toes)
- Rnd 5: (1 sc, dec) × 6 (12 sts)
- Rnds 6–7: 12 sc (2 rounds)
Assembly & Finished Size
- Head: Firmly stuff the head. Insert the internal tube created by Rnds 30–37 into the head for support.
- Ears: Attach ears between specified rounds using yarn needle, ensuring both are level.
- Face: Embroider eyes with black yarn or attach safety eyes between Rnds 17–18, spacing as described. Add red cheek markings 4–5 sts apart.
- Neck: Fit the neck tube from the head inside the opening of the torso.
- Torso: Seam the head to the torso securely, adding extra stuffing if needed for stability.
- Arms & Legs: Attach arms at shoulders, legs at the lower sides, sewing on securely for durability.
- Collar & Pendant: Wrap the red collar around the neck, sew in place, then affix the pendant at the center using yellow or mango yarn.
- Finishing: Double-check all seams for gaps and neatly hide any yarn tails inside the body.
- Finished Size: Approximately 14 cm tall.
Conclusion and Ending Words
Every element of Nyanko Sensei’s amigurumi has been carefully developed to beautifully echo the character’s anime features. Color changes, precise shaping, and thoughtful assembly are all critical in achieving a balanced and expressive final result. Take your time with the details—especially the face and color blocks—so each section adds to the overall charm. Your finished Nyanko Sensei will be a delightful, skillful representation with vibrant features and soft texture, suitable for collections, gifts, or a touch of anime cheer on display. Appreciate your completed creation and the clarity that comes from following a carefully structured pattern.
Leave a Reply