

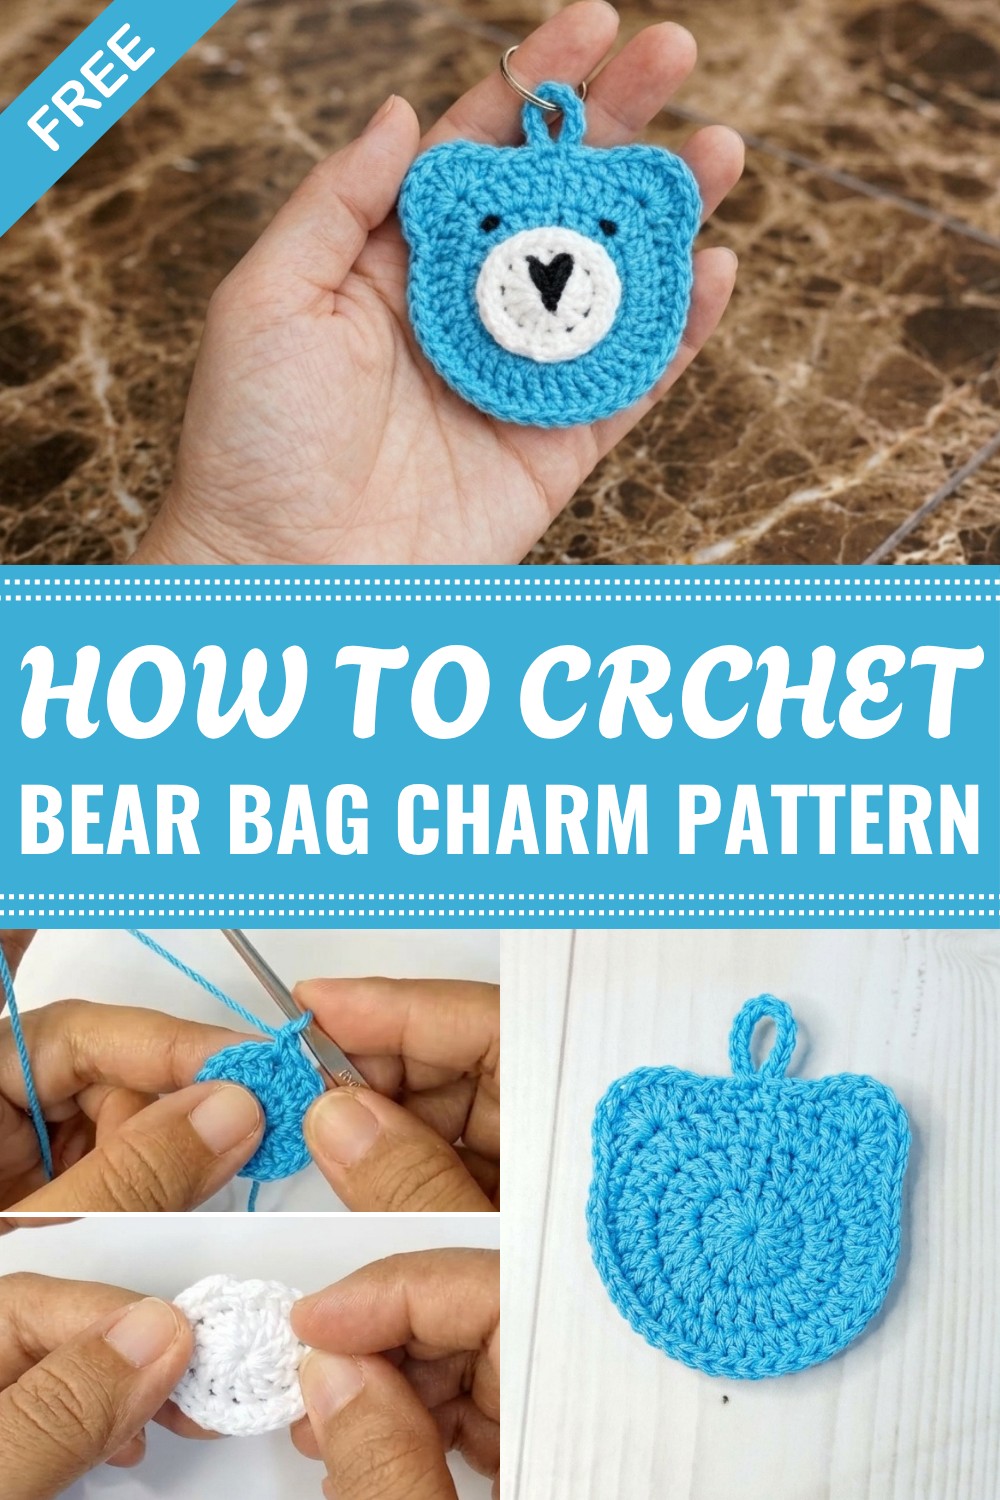
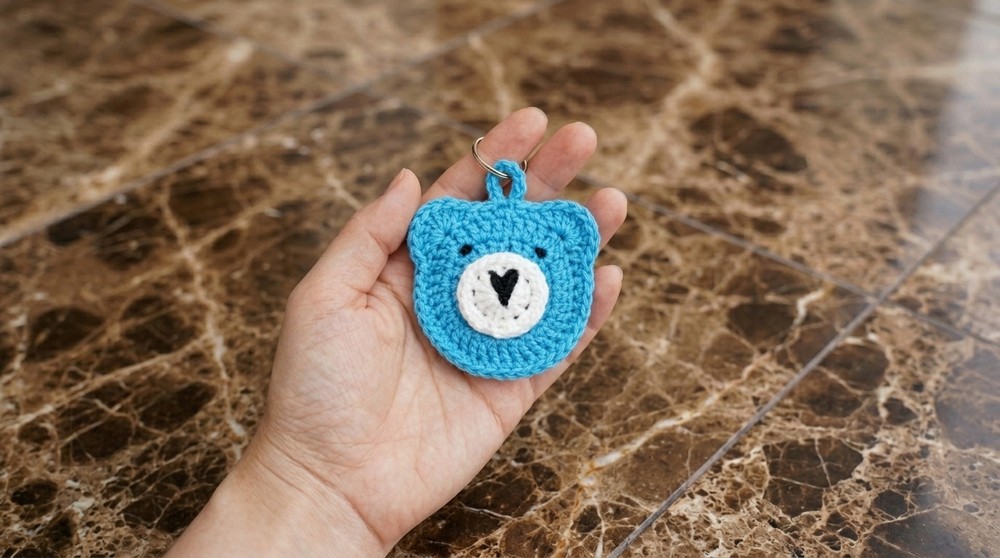
"Fix common crochet issues with this free bear bag charm pattern, offering clear steps and practical tips for achieving a polished, symmetrical design."
You don’t have to be an expert to make something truly adorable, this free crochet bear bag charm pattern proves it! Even if you think small projects are tricky, this bear charm is simple enough for beginners and incredibly rewarding to see come together.
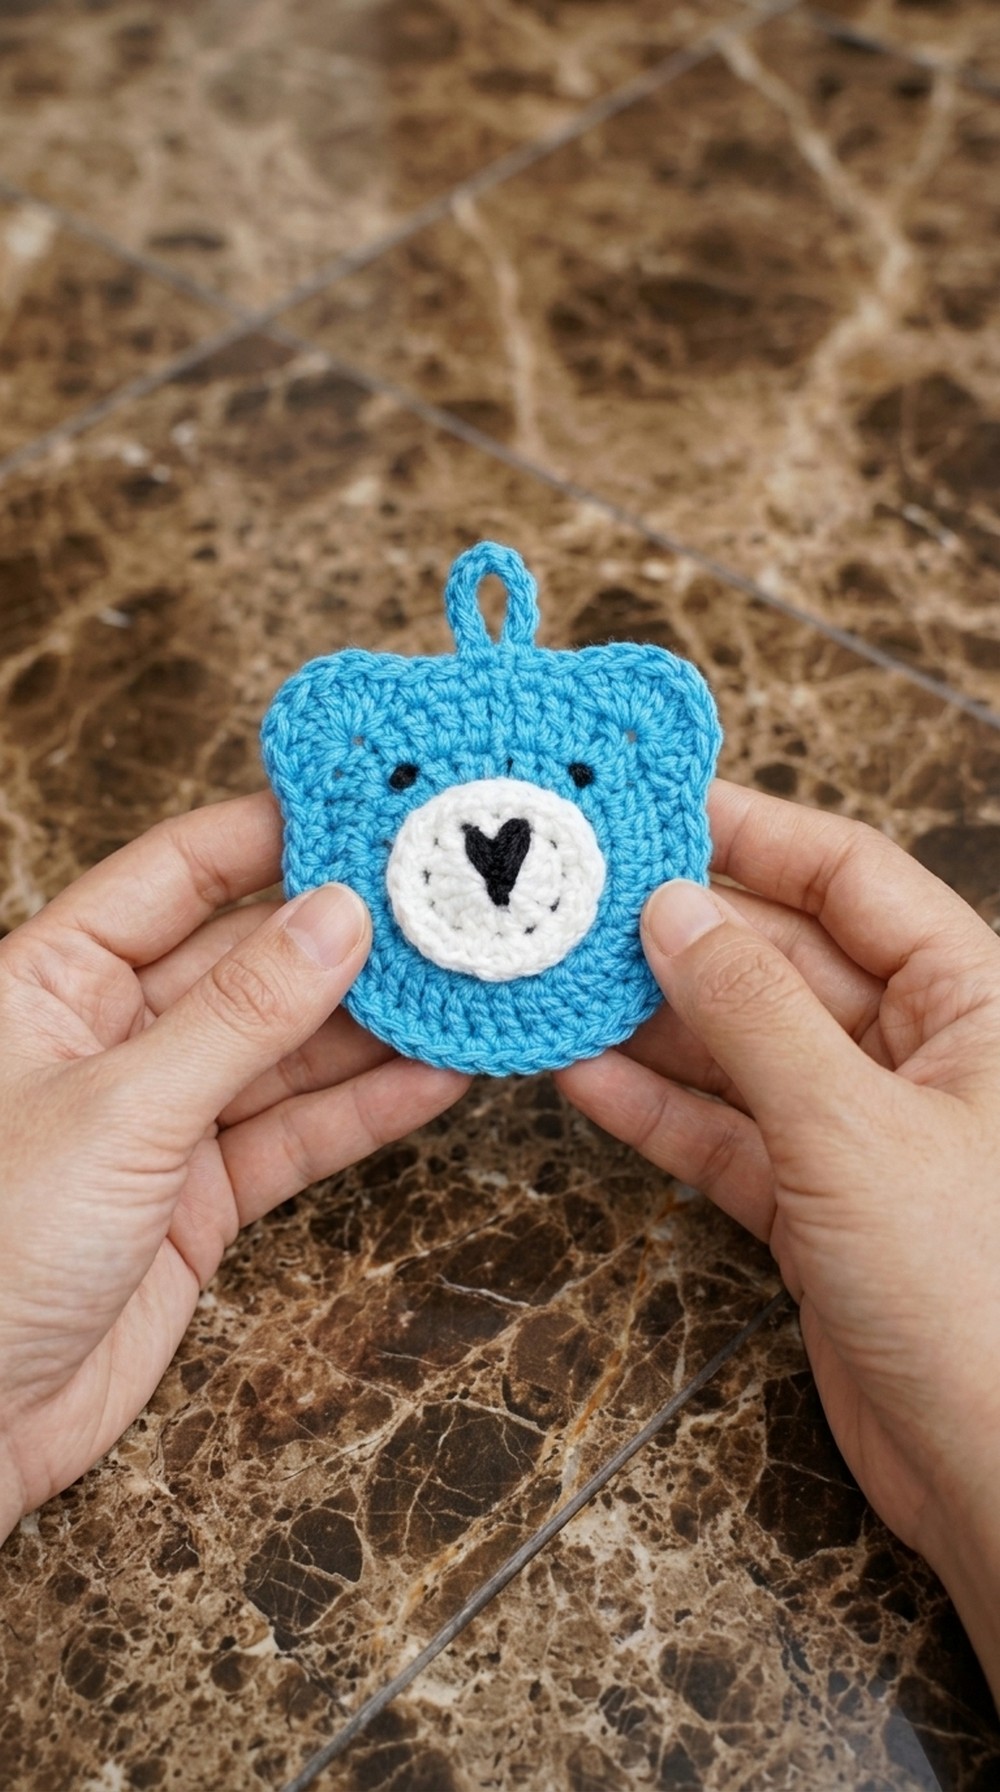
The most charming feature of this pattern is its irresistibly cute bear face. The rounded shape, little ears, and embroidered nose and eyes give it so much personality. Using just two colors of yarn, you can highlight the bear’s features and match it to your favorite bag or backpack. Whether you prefer a classic teddy bear look or want to play with colors, it’s easy to make this project your own.
Handmade Crochet Bear Bag Charm Pattern Idea for Gifts and Decor
The texture is another highlight: the combination of double crochet and single crochet stitches creates a soft but sturdy fabric. The finished piece has just the right amount of thickness to keep its shape and endure daily use as a bag charm or keychain. Small details, like black yarn for the facial features, add extra cuteness without being complicated to stitch.
Although you might worry the size makes it fiddly, the pattern breaks it down into easy steps. You’ll enjoy sewing on the separate snout and assembling the parts, and there’s a handy chain or loop at the top for attaching your new bear friend anywhere you like.
Not only does this bear bag charm add whimsy to your bag or keys, it also makes a heartfelt gift for friends or family. It’s practical, customizable, and sure to bring a smile to anyone who receives it. Give it a try, even if you’ve never made a charm before, you’ll finish with something sweet and huggable.
Bear Bag/Back Charm Crochet Pattern
This adorable bear face bag charm is a quick and useful crochet project. Inspired by the “EE Bear” design, this charm features a sturdy, double-layered bear head with embroidered eyes and nose, a practical chain loop, and a neat finish. Measuring about 6–6.15 cm across, it makes a perfect accessory or small gift.
Before You Start
- Review basic stitches: magic ring, double crochet, single crochet, slip stitch, and chain.
- Read the whole pattern for construction flow—there are details for ears, face, and joining two panels.
- Prepare a tapestry needle for assembling and embroidering the face.
- Adjust the yarn and hook size if you desire a larger charm, but recalculate ear placement for different sizes.
- Watch for where to leave openings for the bear’s chain/handle.
Pattern Notes
- Worked in joined rounds (slip stitch at the end of each round), not continuous spiral.
- Two main circles (front and back) are crocheted, then joined.
- Ears are formed as part of the main circle with a special method in the last round.
- Chain handles are made as part of the last round of circles.
- Nose and eyes are embroidered; the muzzle is worked separately and attached.
- Leave long yarn tails for easier assembly where noted.
How I Made the Crochet Pattern?
- Created two circular motifs as bear face panels.
- Increased for the perfect round shape.
- Shaped ears using grouped double crochet at set intervals in the final round.
- Made a small circle for the muzzle and embroidered the facial features.
- Joined panels with slip stitch, incorporating chain handles, and seamed for tidy finishing.
Skill Level
Advanced Beginner / Low Intermediate
Familiarity with working in the round, increases, and basic embroidery is helpful.
Finished Size
- Width: ~6.15 cm (2.4 in)
- Height: ~6 cm (2.4 in) including ears
- Chain handle: adjustable (recommended 45 ch)
Materials
- 4/0 (2.5 mm) crochet hook (Tulip Gold or equivalent)
- Polycotton yarn (2 shades for main/head and muzzle, plus black for features)
- Tapestry/yarn needle
- Scissors
- Stitch marker (optional)
- Lighter (for melting/fusing thread ends, optional)
- Hot glue or other glue for muzzles and eyes
Measurements / Sizing
- Bear circle: 6–6.15 cm diameter
- Handle: 45 chains (or length as desired)
- Muzzle: ~2.5 cm diameter
Gauge
- Not critical, but circles should lay flat and stiff.
- 7 dc x 5 rows = 2.5 x 2.5 cm approx.
Stitch Abbreviations
| Abbreviation | Meaning |
|---|---|
| mr | magic ring |
| ch | chain |
| dc | double crochet |
| sc | single crochet |
| sl st | slip stitch |
| inc | increase (2 st in same st) |
Special Stitches
- DC Increase: 2 dc in the same stitch.
- Magic ring: Wrap yarn twice, insert hook, pull up a loop, then work stitches into the ring.
- Ear group: 7 dc in one stitch to create round ear shape.
The Pattern!
Main Bear Circle (Make 2)
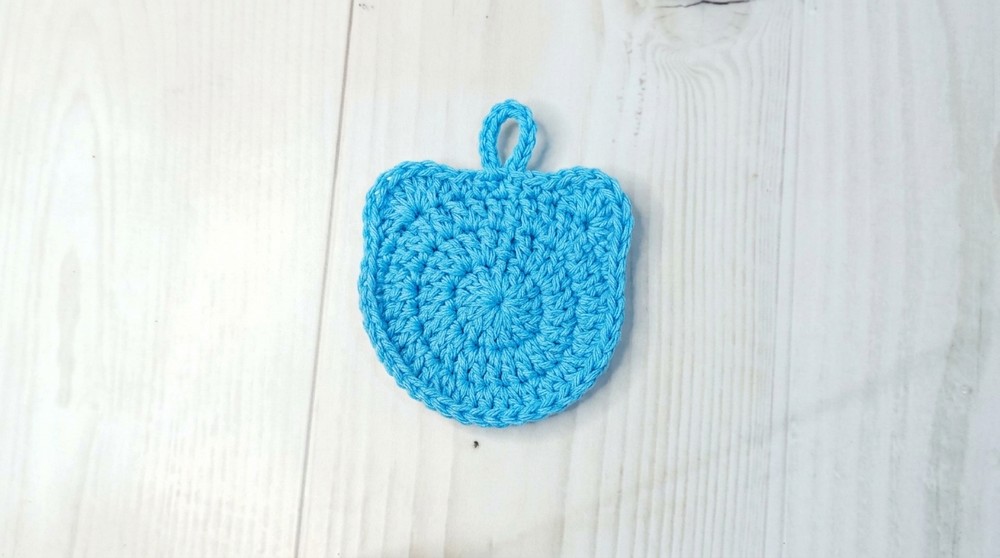
Round 1:
- Make a magic ring ([[mr]]).
- Ch 2 (does NOT count as dc), 12 dc in mr. (12 sts)
- Pull ring tight. Sl st to first dc to join.
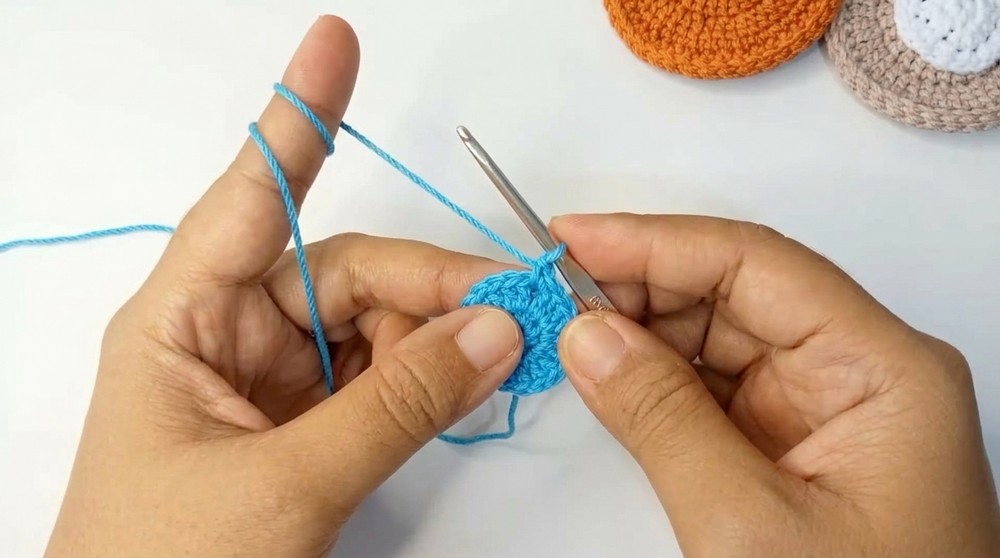
The first circle forms the bear’s face base, creating a neat, even shape.
Round 2:
- Ch 2, 2 dc in each st around. (24 sts)
- Sl st to first dc to join.
Every stitch is increased, doubling the size for a firm, round disk.
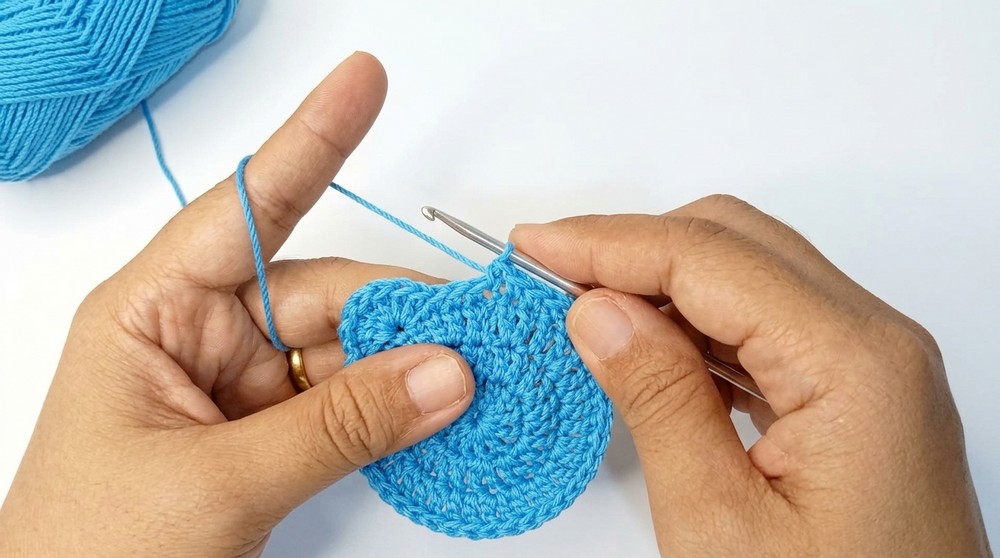
Round 3:
- Ch 2, (1 dc in next st, 2 dc in next st) repeat around. (36 sts)
- Sl st to join.
Alternating one dc and an increase makes the circle grow softly. At the end, your face circle is complete. Repeat for a second circle.
Ears and Upper Edge (worked onto each side of your circle in Round 4)
Round 4:
- Ch 1, sc in same st.
- 2 more sc to next stitches (3 sc total).
- Skip next st, 7 dc in the following st (forms ear).
- Skip next st, 25 sc in next 25 sts.
- Skip next st, 7 dc in next st (second ear).
- Skip next st, 2 sc in last 2 sts.
- Sl st in first sc to join.
In this round, you shape the ears and build the bear’s top as a single unit—watch out for the “skip” stitches that give clear separation for ears. Use markers for the sc at the sides if needed.
Handle/Chain
- At the end of either upper edge, ch 45 (or up to 50 for a longer loop).
- Sl st into the base sc where you began the chain.
- Fasten off, leave tail for sewing in.
This chain forms the bag/back charm handle. One motif (front) receives the long chain; the other (back) can have a small chain (7 ch) if you prefer symmetry, or none if you want a flat back. Both are made with the same recipe.
Muzzle (Nose Patch)
- Using white or cream, make a mr.
- Ch 2, 12 dc in mr, join with sl st to first dc (12).
- Ch 1, 2 sc in each st around (24 sc), sl st to join.
- Fasten off, leave a tail for sewing.
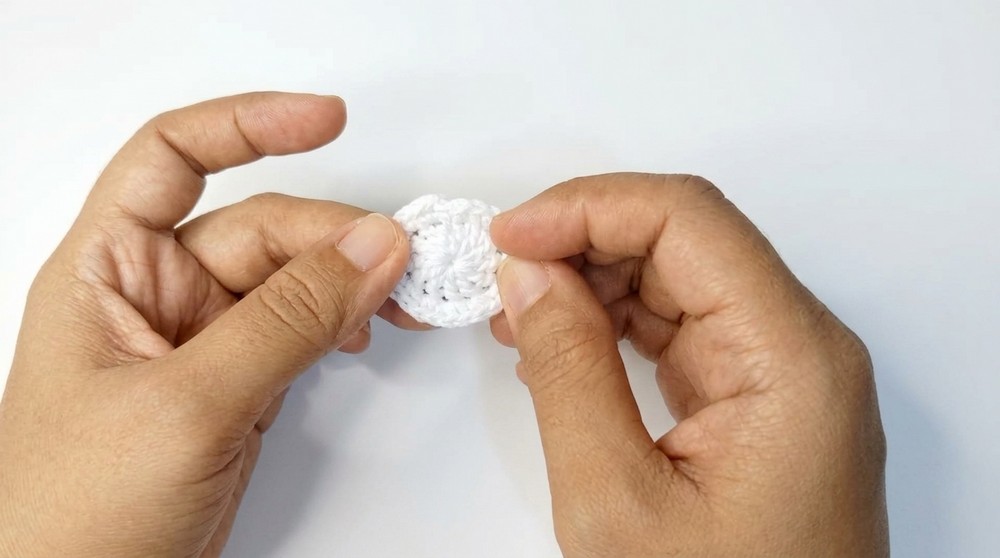
Sew these circles to the face later—embroider nose and mouth lines following the “V” shape shown.
Eyes and Nose Embroidery
- With black yarn/floss, embroider a horizontal oval (nose) on the lower third of the muzzle.
- Using same thread, work a “V” shape under nose (for smile/mouth).
- Above muzzle, embroider two straight or slightly arched eyes, as horizontal stitches or small ovals.
Assembly & Finishing
- Sew muzzle patch to the front circle, centered below the ears.
- Sew (or glue) the embroidered nose and eyes as desired.
- Weave in and secure all yarn ends on the inside.
- Place the two circles with wrong sides together (ears aligned).
- Use a slip stitch seam to join the circles, starting at the outer edge of one ear, going down the side, around the bottom, and up the other side to the second ear.
- Do not join across the top between ears; leave this opening for the charm’s entrance/use.
- Tidy all ends, tuck handles inside if needed.
Solution of Problem
Problem: Circle curls / ears are off-center.
Solution:
If the circle curls, use a larger hook or block the motif flat. For ear alignment, count stitches carefully when skipping so ears are directly opposite. Use markers to help.
What you can make by using these stitches
- Cute animal face bag or key charms
- Mini purses or small child’s wallets
- Pompom or animal-faced hair accessories
- Wall hangings or bunting with face panels
- Pouches for coins or USB drives
For Non-Pattern Readers
Make two small circles with increases, then work extra stitches at each side to form ears. Make a round patch for the nose/muzzle, embroider mouth and eyes, sew all together with a little chain for holding.

Leave a Reply