

Add charm in your home with this cute crochet chick amigurumi with this pattern, ideal for crocheting enthusiasts and amigurumi lovers.
I recently made a small, cute toy that instantly became one of my favorites. It’s a soft little chick that’s fun to hold and makes me smile every time I see it. This project is a great way to create a lovely stuffed animal, and with just a few small changes, you can turn it into other animals like a bunny or a duck. The Free Crochet Crochet Chick Amigurumi Pattern is perfect for anyone who enjoys making charming little toys.
Free Crochet Chick Amigurumi Pattern
This chick amigurumi stands out because of its bright yellow color and soft, smooth texture. It has a round, plump body with tiny wings and a little beak that adds lots of character. The shape is simple but adorable, making it perfect as a toy for kids, a cheerful decoration for your shelf, or even a cute keychain. The style is playful and sweet, designed to bring joy with every stitch you make.
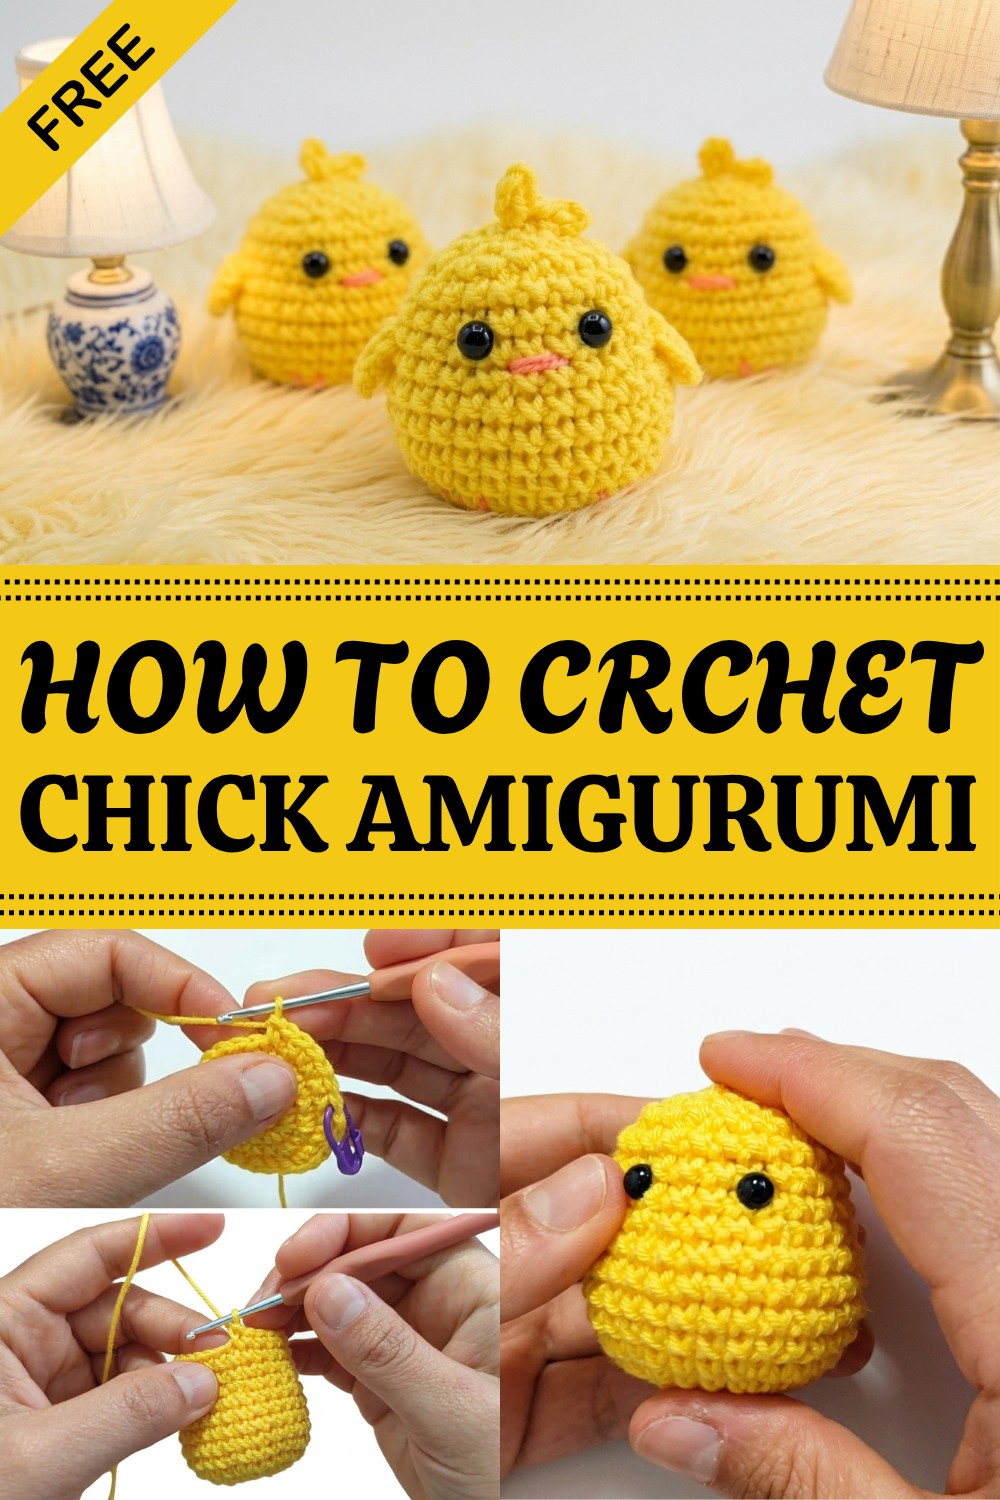
The project is made by crocheting mostly in rounds using the single crochet stitch, which keeps the fabric tight and neat. The main parts like the body, wings, and beak are crafted separately and sewn together to make the chick sturdy and well-shaped. This pattern is great for beginners who know the basics of crochet and want to try making amigurumi for the first time.
This Free Crochet Crochet Chick Amigurumi Pattern is a wonderful gift for children or anyone who loves handmade toys. It also makes a lovely decoration or part of a cute collection of amigurumi animals. If you enjoy small, sweet projects that are both fun and quick to finish, this chick pattern will bring a lot of happiness to your crochet time. Give it a try—you’ll love creating your own little chick friend.

Crochet Amigurumi Chick – Beginner Step by Step Pattern
Before You Start
- This is a simple amigurumi chick project, ideal for beginners and those new to soft toy crochet.
- You’ll practice increases, decreases, embroidering details, and working in spiral rounds with a stitch marker.
- All steps are explained clearly for ease and success.
Pattern Notes
- The pattern works in a continuous spiral, not closed rounds.
- Mark the first stitch of each round with a stitch marker or contrasting thread.
- Use tight, even stitches so stuffing won’t show.
- The wings, hair tuft, eyes, beak, and legs are added after finishing the main body.
- The “front” side of your stitches faces out—this keeps your work neater.
How I Made the Crochet Pattern?
- Adapted from a slow, descriptive Spanish-language tutorial to clear step-by-step English instructions.
- Used increases (2 sc in one st) and invisible decreases to shape the chick’s body.
- Included colorwork and simple embroidery for face and feet.
- Designed the wings and hair tuft with basic chain and stitch combos for quick finishing.
Skill Level
Absolute Beginner / Easy
Finished Size
- Approx. 2.5”–3” (6–7.5 cm) tall when completed (using a 2–2.5 mm hook).
Materials
- 2 mm acrylic (macramé/“hilo guayu”) yarn in yellow and a little orange.
- 2.5 mm crochet hook.
- A small amount of polyester fiberfill.
- Safety eyes, 6 mm, plus washers.
- Dot marker or locking stitch marker.
- Tapestry (yarn) needle.
- Scissors.
Measurements / Sizing (Optional Schematic)
- Finished chick is palm-sized. Adjust by changing hook size or yarn weight for a bigger/smaller bird.
Gauge (and Stitch Pattern if applicable)
- Not critical for amigurumi.
- Use tight single crochet (sc) so stuffing doesn’t poke through.
Stitch Abbreviations
- ch = chain
- sc = single crochet
- inc = increase (2 sc in the same st)
- dec = decrease (sc2tog over two sts, use invisible decrease if possible)
- st(s) = stitch(es)
- sl st = slip stitch
Special Stitches
- Magic Ring (MR): Form a loop with yarn, crochet into center, then pull tail to close.
- Invisible Decrease: Insert hook in front loop only of next two sts, yarn over, draw through both loops, yarn over, finish sc.
The Pattern
BODY (Yellow)
Work in continuous spiral rounds. Use a stitch marker.
Round 1:
- MR, 6 sc into ring. (6 sts)

Round 2:
- Inc in each st around. (12 sts)
Round 3:
- (Sc in next st, inc in next st) repeat around. (18 sts)
Round 4:
- (Sc in next 2 sts, inc in next st) repeat around. (24 sts)

Round 5:
- (Sc in next 3 sts, inc in next st) repeat around. (30 sts)
Rounds 6–9:
- Sc in each st around. (30 sts for 4 rounds)
Round 10:
- (Sc in next 3 sts, dec) repeat around. (24 sts)
Rounds 11–13:
- Sc in each st around. (24 sts for 3 rounds)
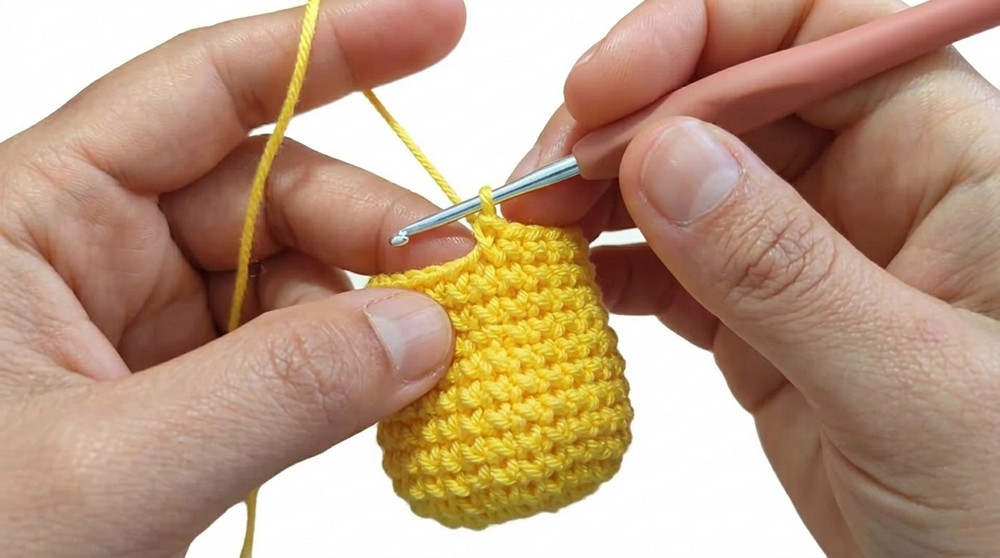
Round 14:
- (Sc in next 2 sts, dec) repeat around. (18 sts)
Now, pause to insert safety eyes BETWEEN rounds 11 and 12, four stitches apart, centered at the front (see assembly notes).
Round 15:
- (Sc in next st, dec) repeat around. (12 sts)
Add more stuffing as you go to make the chick firm but not overfilled.
Round 16:
- Dec in each st around (six decreases total). (6 sts)

To Finish:
- Cut yarn, leaving a long tail.
- Weave tail back through the front loops of each remaining st and pull tight to close.
If you’re new to patterns:
The chick’s body is a ball shape—each round gets wider, then stays the same width, then goes back down. Increases make it wider; decreases close it up. In the “plain” rounds, just put one stitch into each stitch all the way around. Stuff as you go.
WINGS (Make 2, Yellow)
- Ch 4.
- In 2nd ch from hook: sc.
- In next ch: hdc.
- In last ch: dc.
- Fasten off, leaving a long tail for sewing.
These simple flat winglets are sewn to the chick’s sides after body is finished.
HAIR TUFT (Yellow)
- Ch 4, turn.
- Starting in 2nd ch, sl st in each ch (3 sl sts).
- Ch 3, turn.
- Starting in 2nd ch, sl st in next 2 ch.
- Fasten off, leaving a long tail.
The tuft is like two tiny “loops” for a cute feathery head.
BEAK AND FEET (Embroidered, Orange Yarn)
- For the beak: Embroider a small triangle or straight lines (2–3 passes) in the middle, one round below the eyes.
- For feet: Embroider two simple stick feet spaced symmetrically under the body, with 2 “toes” each.
Assembly & Finishing
- Insert safety eyes between rounds 11 and 12, front and centered, 4 stitches apart.
- Stuff the body with enough filling to hold its shape but not stretch the stitches apart.
- Weave in tail at the closing opening: Run the thread through each front loop, pull to close, knot and hide the end inside.
- Sew wings to the sides below the eyes, at equal height—count three rounds down below eyes for ideal placement.
- Sew tuft atop the head, centered between the eyes.
- Embroider beak between the eyes.
- Embroider feet symmetrically on the bottom, two toes on each side.
- Weave in all yarn tails and trim.

Solution to Common Problems
- Stuffing pops out or stitches look too open: Try a smaller hook or crochet more tightly.
- Face is crooked: Always insert eyes and embroider features when the body is still soft and open. You can re-do the sewing if needed.
- Uneven shape: Gently shape with your hands after stuffing; redistribute filling with a tool if needed.
What you can make by using these stitches
- Any basic amigurumi ball/animal—bears, bunnies, cats, etc.
- Kawaii keychains, mobiles, or ornaments—just add a hanging loop.
- Base for baby rattles or softies (enclose a rattle insert).
- Simple plush gifts for Easter baskets, kids, or décor.
This easy crochet chick is the perfect first amigurumi project! With only single crochet, increases, and basic embroidering, you’ll create a cute bird in just a few hours. All pieces are beginner-friendly and super quick. Embellish as you wish for your own flock. For more beginner amigurumi, see the rest of the video course or adapt this simple ball pattern for many adorable animals.

Leave a Reply