

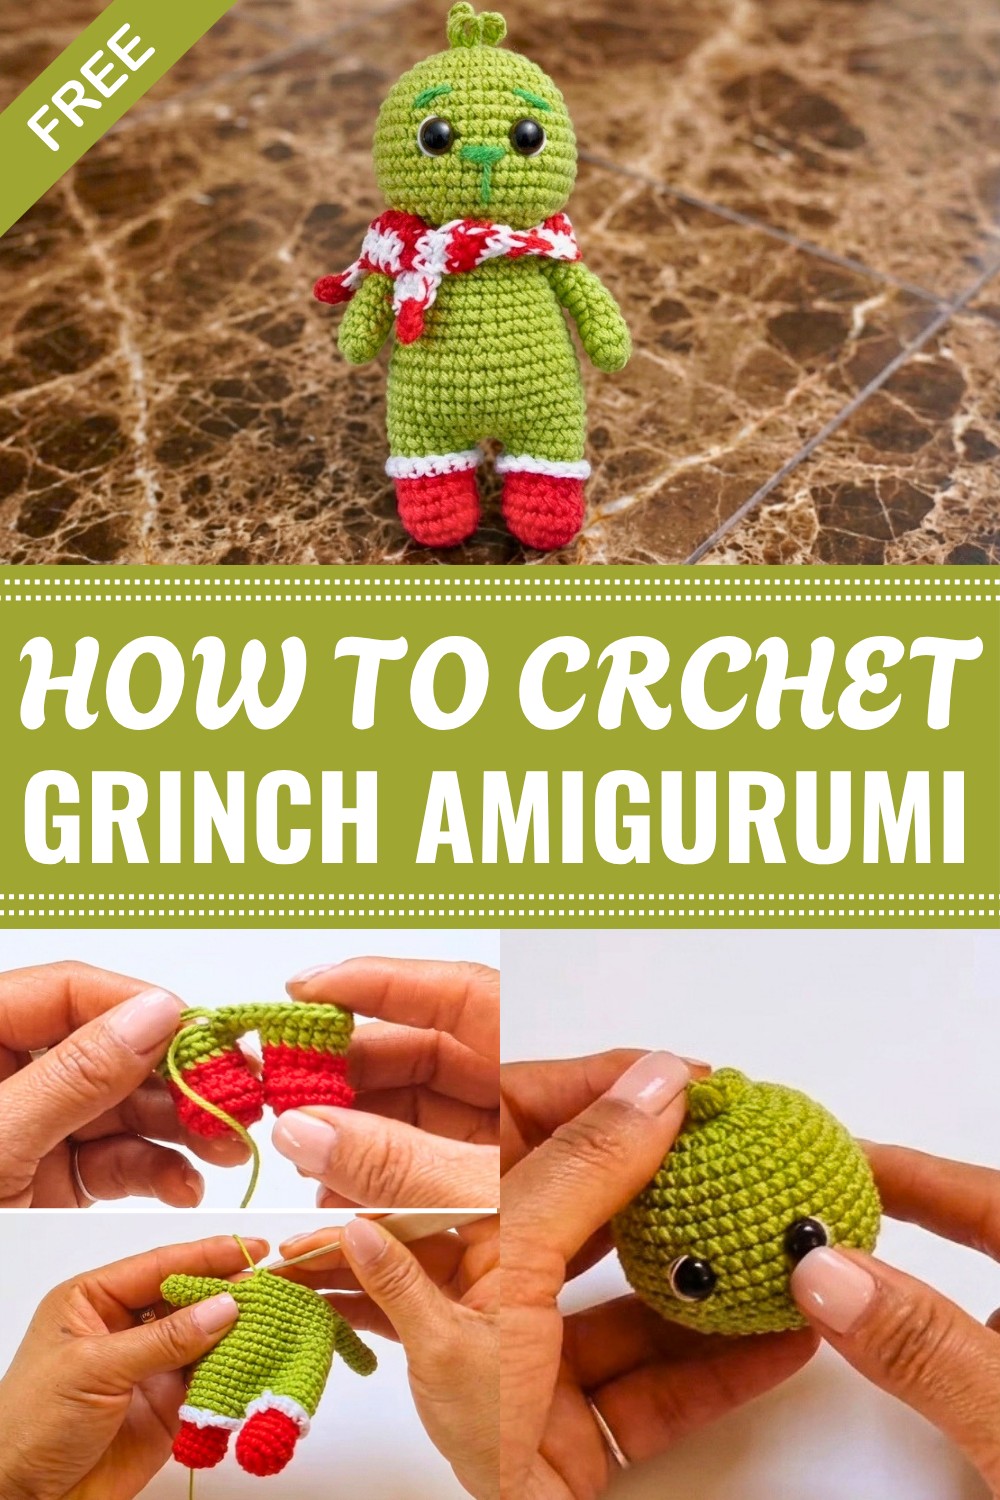
Spark playful holiday fun with Free Crochet Grinch Amigurumi Pattern featuring cheeky grin quirky charm festive spirit and adorable character appeal.
Holiday decorations become even more memorable when they include a character that brings fun and laughter to the season. A handmade Grinch is a playful addition that stands out among traditional Christmas décor, making everyone smile with its cheeky expression and festive charm. The Free Crochet Grinch Amigurumi Pattern is a wonderful project for anyone who enjoys crocheting holiday characters that are full of personality and perfect for seasonal displays.
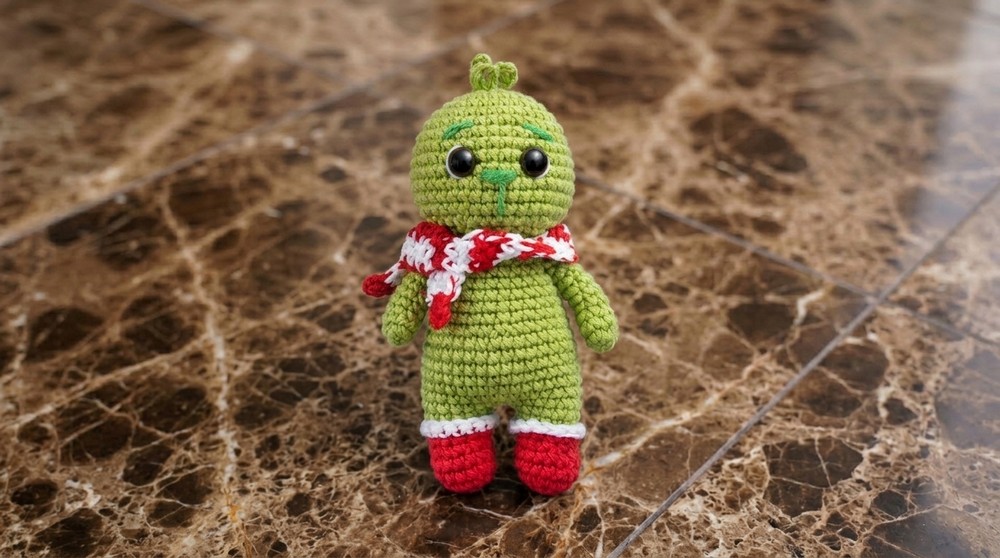
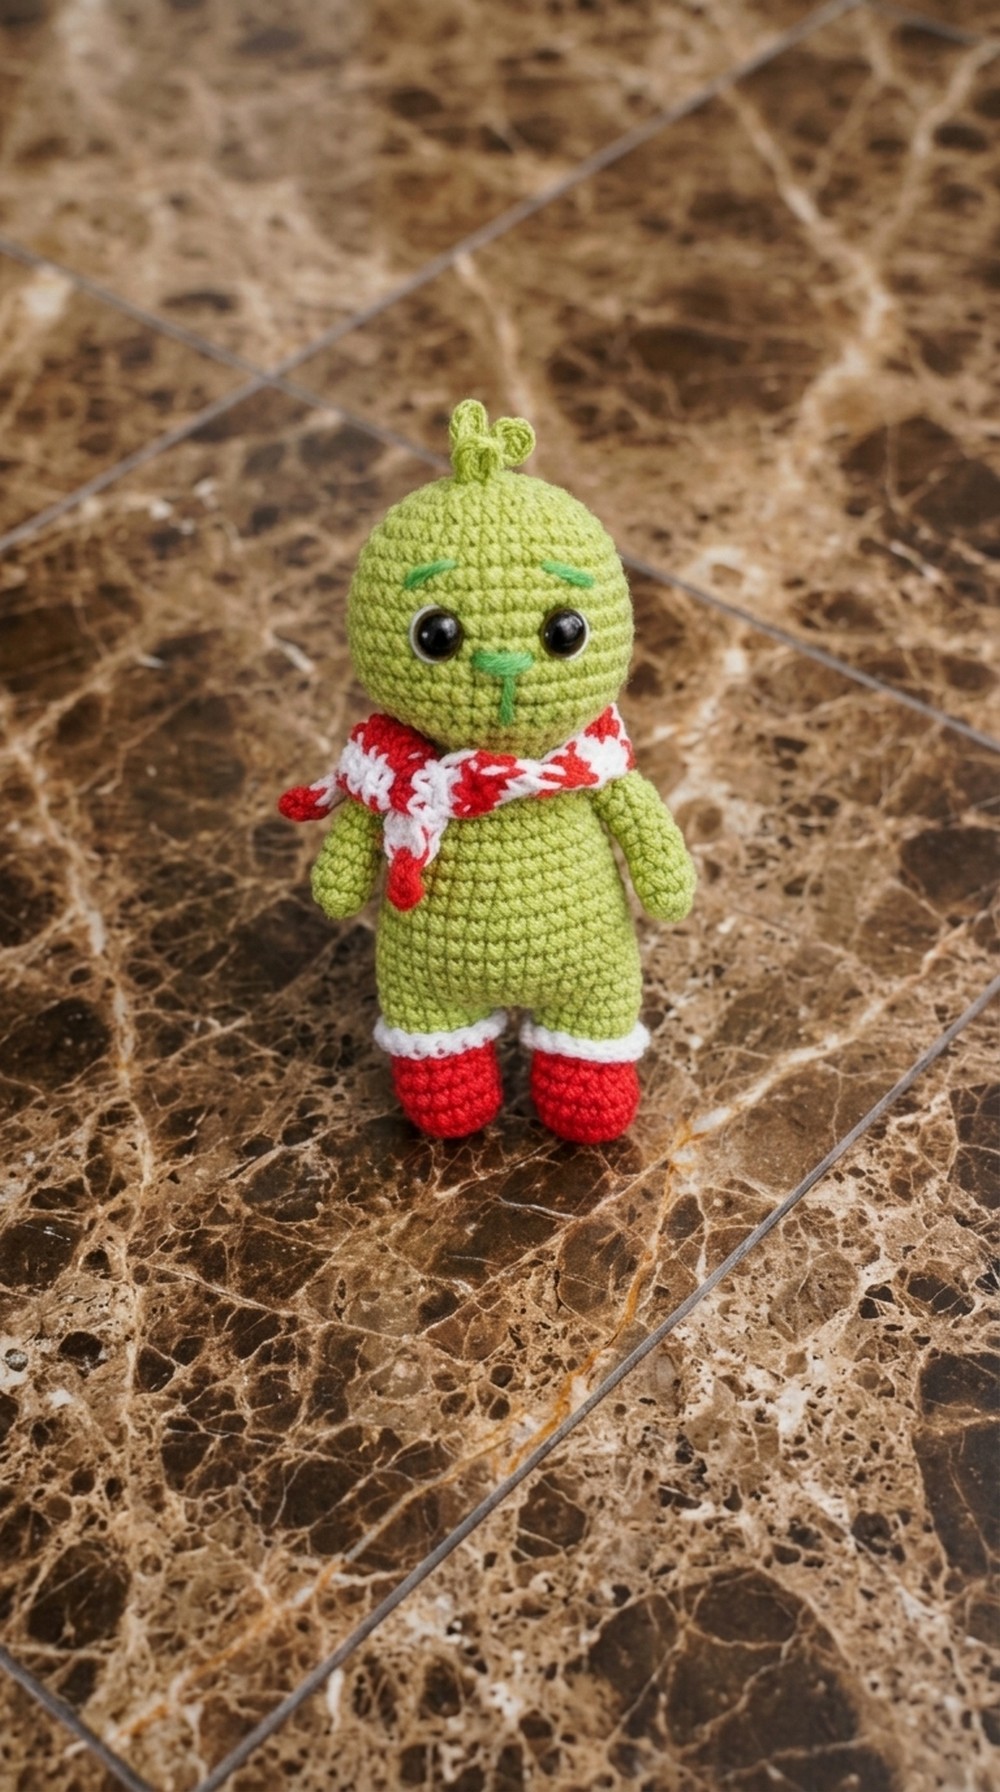
The finished Grinch has a fun look with its bright green body, expressive face, long arms and legs, and festive outfit. Every detail works together to capture the character's playful spirit while giving you plenty of opportunities to add your own creative touches. You can choose a classic red Santa hat, a colorful scarf, or even change the facial expression to give your Grinch a unique style. Different yarn colors and small accessories can make every version look a little different, turning each finished piece into something truly special. This project is well suited for crocheters who are comfortable with basic amigurumi techniques and want to build their shaping and assembly skills.
Cute Handmade Grinch Amigurumi to Add Holiday Cheer
As you work through the pattern, you'll learn how separate crochet pieces come together to form a detailed character. From shaping the head and body to attaching the arms, legs, and facial features, each step helps improve your confidence while keeping the process enjoyable. Watching the Grinch slowly come to life makes every stage feel rewarding and keeps the project interesting from beginning to end.
When your Grinch is complete, you'll have a festive decoration that can brighten a shelf, decorate a Christmas display, or become part of a holiday collection for years to come. It also makes a thoughtful handmade gift for fans of classic Christmas characters. Continue to the pattern and enjoy bringing this fun holiday favorite to life with your own crochet skills.
Crochet Elf Doll Amigurumi Pattern
This detailed crochet pattern will guide you in creating a delightful elf doll amigurumi featuring colorful boots, a cozy scarf, delicate hair, and embroidered facial details. Designed to stand approximately 15 cm tall, this cheerful character makes a charming gift or festive decoration. The pattern follows US crochet terminology and is suitable for beginner to intermediate crocheters familiar with basic amigurumi techniques.
Skill Level & Terminology
- Skill Level: Beginner to Intermediate
- Terminology: US crochet terms
- Techniques Used: Magic Ring, Single Crochet, Increase, Decrease, Back Loop Only stitches, Slip Stitch, Chain stitches, Embroidery
Materials & Tools
- Yarn: Worsted weight yarn in red, green, white, and skin tone colors
- Crochet Hook: 2.5 mm crochet hook
- Safety Eyes: 8 mm (2 pieces)
- Stuffing: Polyester fiberfill
- Embroidery Thread: For eyebrows and nose (skin tone or contrasting color)
- Tapestry Needle: For sewing parts and embroidering details
- Wire/Pipe Cleaner: Optional, for shaping arms
- Scissors
Gauge
- Gauge is not strict but aim for tight stitches to prevent stuffing from showing through.
- Approximately 16 SC and 16 rows per 10 cm in single crochet is ideal with 2.5 mm hook.
Abbreviations
| Abbr. | Meaning |
|---|---|
| MR | Magic Ring |
| SC | Single Crochet |
| inc | Increase (2 SC in same st) |
| dec | Decrease (SC two stitches together) |
| sl st | Slip Stitch |
| ch | Chain |
| BLO | Back Loop Only |
| st(s) | Stitch(es) |
| rnd | Round |
| row | Row |
Special Stitch Instructions
- Magic Ring (MR): Begin by wrapping yarn around fingers to create an adjustable loop, crochet stitches inside, then pull tightly to close ring center.
- Increase (inc): Crochet two SC into same stitch to increase stitches.
- Decrease (dec): Crochet two stitches together to decrease stitches and shape the work.
- Back Loop Only (BLO): Insert hook only under back loop of stitch for a ribbed texture or design effect.
Finished Size
- Approximately 15 cm (6 inches) tall after assembly.
The Pattern
1. The Arms (Make 2)
Using skin tone or desired yarn color.
- Round 1:
Create a Magic Ring (MR), crochet 8 SC into the ring
8 stitches - Round 2:
Work 8 SC evenly around for each round
Tube shape with consistent stitch count - Round 3:
Work 8 SC evenly around for each round - Round 4:
Work 8 SC evenly around for each round - Round 5:
Work 8 SC evenly around for each round - Round 6:
Work 8 SC evenly around for each round - Round 7:
Work 8 SC evenly around for each round - Round 8:
Work 8 SC evenly around for each round
Make two identical pieces and set aside for later attachment.
Summary for Arms:
You have now crocheted two narrow tubes which will become the elf’s arms. These tubes maintain a uniform circumference for a neat, slim appearance.
2. The Legs (Make 2)
Using red yarn for boots.
- Round 1:
Make a Magic Ring, crochet 8 SC into the ring
8 stitches - Round 2:
8 increases (2 SC in each stitch)
16 stitches - Round 3:
Work 16 SC evenly
Straight cylindrical section - Round 4:
Work 16 SC evenly
Straight cylindrical section - Round 5:
Work 4 SC, 4 decreases (SC2tog), 4 SC
12 stitches - Round 6:
(3 SC, 1 increase) repeat 3 times
15 stitches - Round 7:
Switch to green yarn, work 15 SC in Back Loop Only (BLO)
Creates a textured sock or boot cuff - Note:
The unused loops from the previous round are crocheted over with white yarn to add the boot border (work in the remaining loops for a neat edge).
Summary for Legs:
Each leg starts as a boot in red with a textured green cuff. The shaping decreases and increases add dimension, while the final textured bands enhance the boot’s realism.
3. The Body
Using green yarn.
- Round 8:
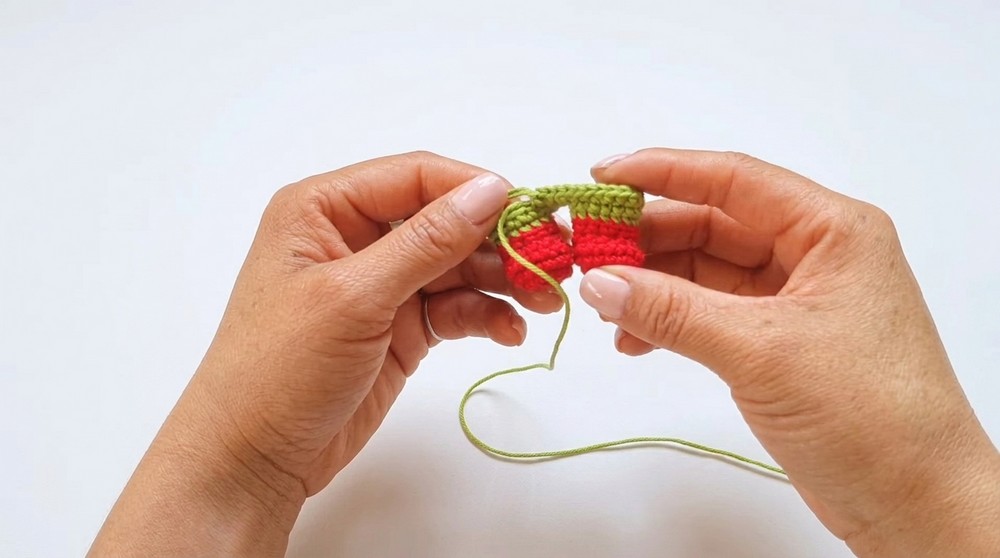
Chain 2 and join the two completed legs together by crocheting around both openings
34 stitches total - Round 9:
Work 15 SC, 2 increases, 17 SC
36 stitches - Round 10:
Work 36 SC evenly
Body widens and shapes upward - Round 11:
Work 36 SC evenly
Body widens and shapes upward - Round 12:
Work 36 SC evenly
Body widens and shapes upward - Round 13:
Work 36 SC evenly
Body widens and shapes upward - Round 14:
Work 36 SC evenly
Body widens and shapes upward - Round 15:
Work 36 SC evenly
Body widens and shapes upward - Round 16:
(4 SC, 1 decrease) repeat 6 times
30 stitches - Round 17:
Work 30 SC evenly
Tapering body towards neck - Round 18:
Work 30 SC evenly
Tapering body towards neck - Round 19:
Work 30 SC evenly
Tapering body towards neck - Round 20:
Join the arms to the sides, incorporating 4 stitches per arm into the round
Seamless attachment of arms - Round 21:
Crochet evenly incorporating 30 stitches total (including arms) - Round 22:
Crochet evenly incorporating 30 stitches total (including arms) - Round 22 (Decrease Round):
(3 SC, 1 decrease) repeat 6 times
24 stitches - Round 23:
(2 SC, 1 decrease) repeat 6 times
18 stitches - Stuff the body firmly with polyester fiberfill.
- Insert wire or pipe cleaners into the arms for shaping if desired.
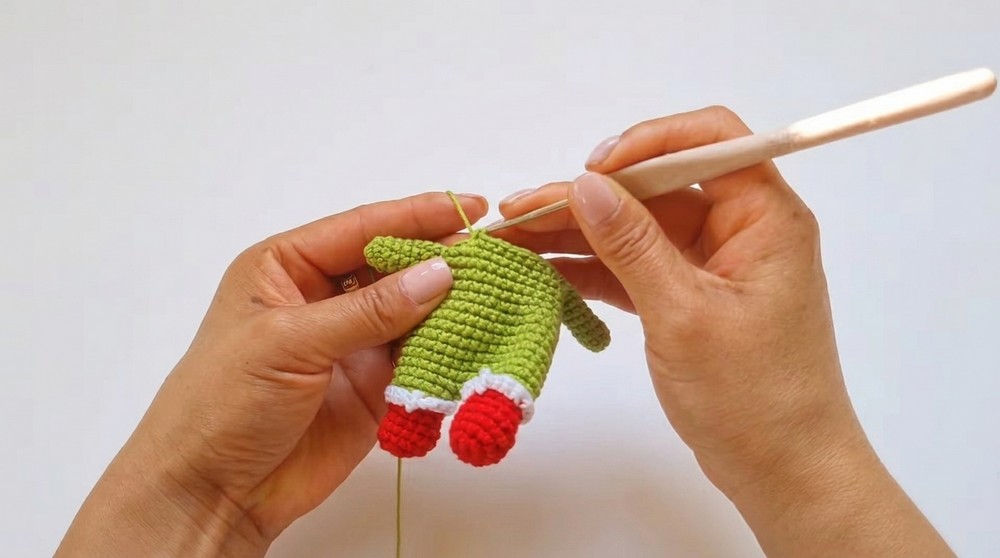
Summary for Body:
The legs are sewn together, forming the base to build the torso. The body widens and then tapers to mimic natural proportions. Arms are attached pragmatically, and the piece is stuffed to maintain form and stability.
4. The Head
Using skin tone yarn.
- Round 1:
MR, 6 SC
6 stitches - Round 2:
6 increases
12 stitches - Round 3:
12 increases
24 stitches - Round 4:
(3 SC, 1 increase) repeat 6 times
30 stitches - Round 5:
(4 SC, 1 increase) repeat 6 times
36 stitches - Round 6:
Work 36 SC evenly - Round 7:
Work 36 SC evenly
Head begins to round out
- Round 8:
(5 SC, 1 increase) repeat 6 times
42 stitches - Round 9:
Work 42 SC evenly - Round 10:
Work 42 SC evenly - Round 11:
Work 42 SC evenly - Round 12:
Work 42 SC evenly - Round 13:
Work 42 SC evenly - Round 14:
Work 42 SC evenly
Full head shaping
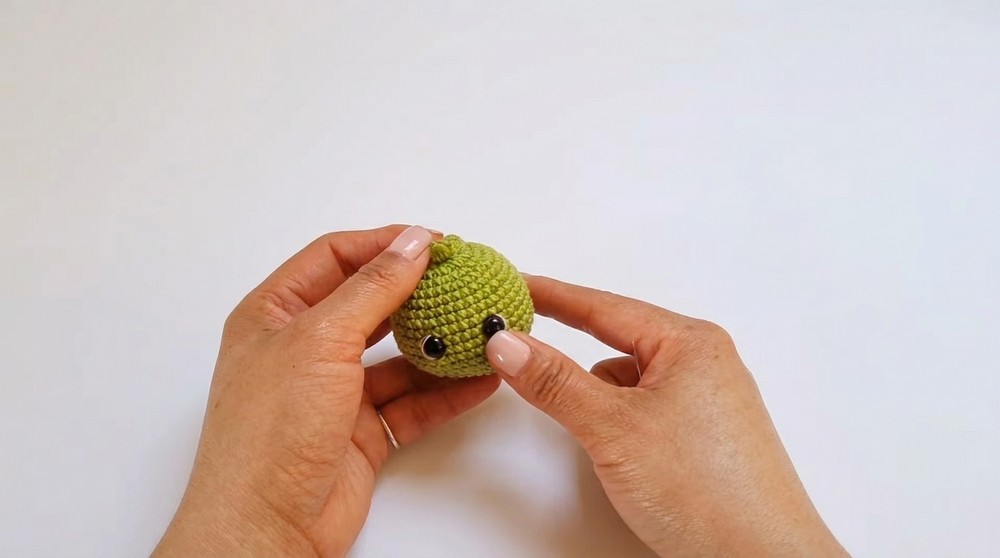
- Eyes:
Insert 8 mm safety eyes between Rounds 10 and 11, leaving 5 stitches of separation - Round 15:
(5 SC, 1 decrease) repeat 6 times
36 stitches - Round 16:
(4 SC, 1 decrease) repeat 6 times
30 stitches - Round 17:
(3 SC, 1 decrease) repeat 6 times
24 stitches - Round 18:
Continue decreasing evenly until head closes - Round 19:
Continue decreasing evenly until head closes
Shape the chin and jaw
Summary for Head:
The head is carefully shaped from small to large then tapered back down creating a smooth round face. Eyes are positioned securely to give the face character.
5. Finishing Details
Hair
- Use yarn tail and sewing needle to loop hair strands onto the top of the head. Create the desired hairstyle by varying length and placement.
Scarf
- Chain 4 stitches using red yarn.
- Work back and forth with single crochet on 3 stitches, alternating rows between red and white yarn to form a striped scarf approximately 10 cm long.
- Tie the scarf around the elf’s neck.
Embroider Face
- Use fine embroidery thread (matching or contrasting) to stitch delicate eyebrows and a small nose. Embroidery enhances the doll’s expression and personality.
Summary for Finishing:
The hair and scarf add character and color to the elf, while delicate embroidery completes the facial details. These subtle touches bring your amigurumi to life.
Assembly & Final Touches
- Sew Head to Body: Attach securely with yarn and needle.
- Weave in all yarn ends cleanly.
- Stuff to firm shape.
- Optional: Insert wire in arms for possibility.
Additional Notes
- Work tightly throughout for firmness suitable for amigurumi.
- All pieces are crocheted in continuous rounds except scarf which is worked back and forth.
- Adjust stuffing firmness to desired feel.
Leave a Reply