

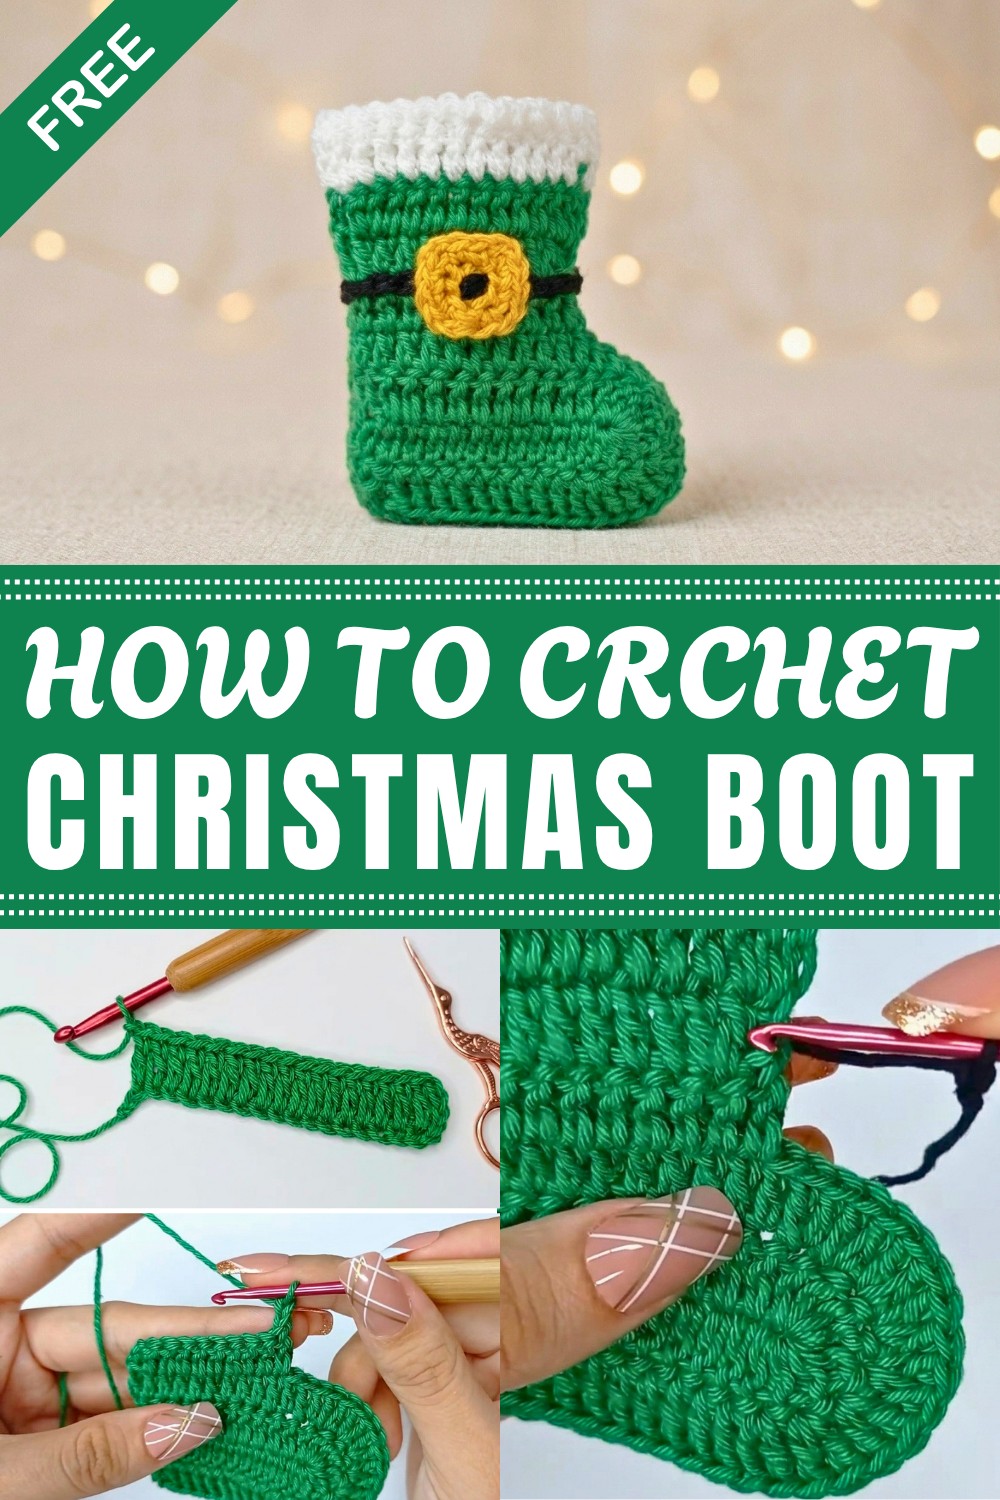
Infuse holiday magic into any space through a free crochet Christmas boot pattern combining festive charm with easy seasonal crafting delight.
Handmade decorations add a special touch to the holiday season, and a crochet Christmas boot is a sweet example. The Free Crochet Christmas Boot Pattern lets you make a festive little boot that’s perfect for adding charm to your home or giving as a gift. Many enjoy this project because it’s easy to make and results in a delightful item that can hold candy, small gifts, or holiday treats.
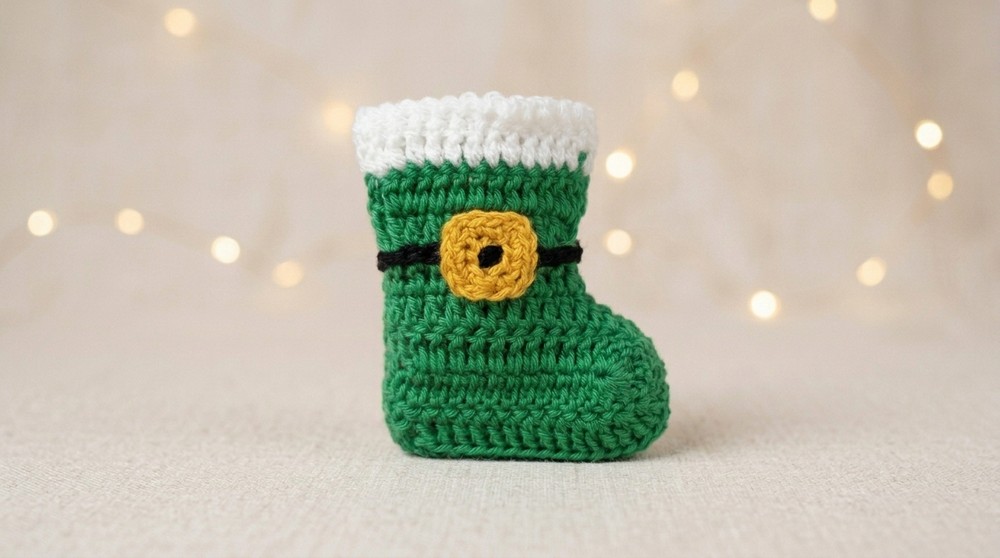
The Christmas boot has a classic and recognizable shape, making it a cozy symbol of the season. It’s made with soft yarn that feels nice and looks inviting. The boot keeps its shape well, thanks to sturdy stitches, so it works great as a tree ornament or a cheerful decoration on a shelf. You can pick any colors—traditional red and white are popular—or add special touches like sparkly yarn or embroidered names for a personal twist.
Free Christmas Boot Crochet Pattern: Perfect for Tree Decor
This project suits crocheters at various skill levels. Beginners will find the pattern straightforward enough to follow, while more experienced crocheters can enjoy customizing and experimenting with colors and details. It’s a great way to practice different stitches and techniques without being complicated.
Making this crochet Christmas boot brings a sense of joy and warmth to your holiday project. It’s not only fun to create but also a lovely way to spread holiday spirit in your home or with loved ones. With the Free Crochet Christmas Boot Pattern, you can crochet something that’s both charming and useful—a perfect festive accessory or gift that carries the warmth of handmade care.
Christmas Boot Crochet Decoration Pattern
This pattern teaches you how to crochet a charming Christmas boot decoration. Using fine cotton yarn and a small crochet hook, the boot is worked in the round with attention to shaping and detailed edging. You will create a festive piece perfect for hanging on a tree or incorporating into holiday décor. The tutorial carefully outlines each step from foundation to finishing touches including white trim, decorative edges, and final details.
Pattern Highlights
- Worked with fine cotton yarn (2mm or doubled 1mm) and 3.0 mm hook.
- Begins with a foundation chain and rounds of double crochet stitches.
- Builds the boot shape with increases and shaping around curves.
- Adds contrast white trim with double crochet and decorative chain-slip stitch edging.
- Decorative edging with single crochets and chain gaps around curves.
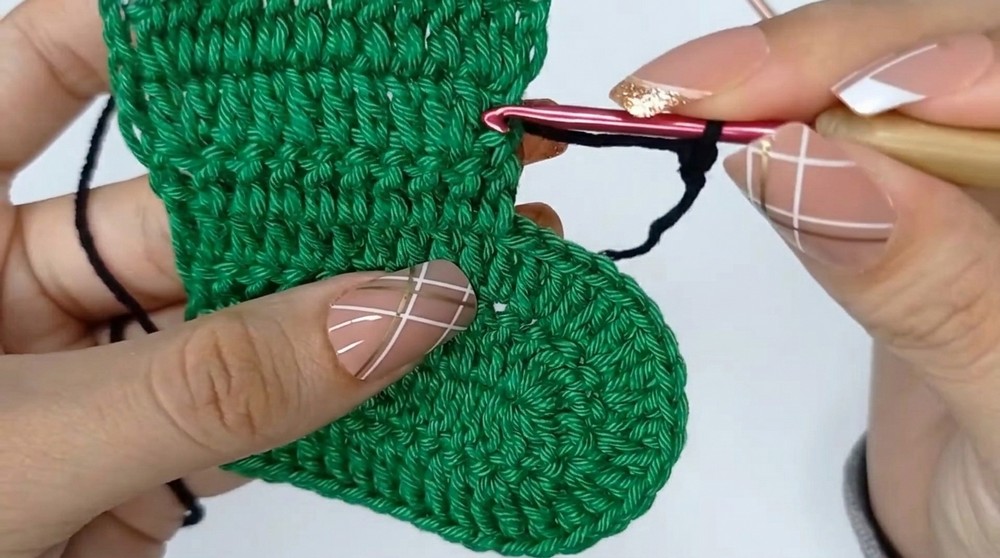
- Finishing touch with black slip stitches to define the heel-ankle join.
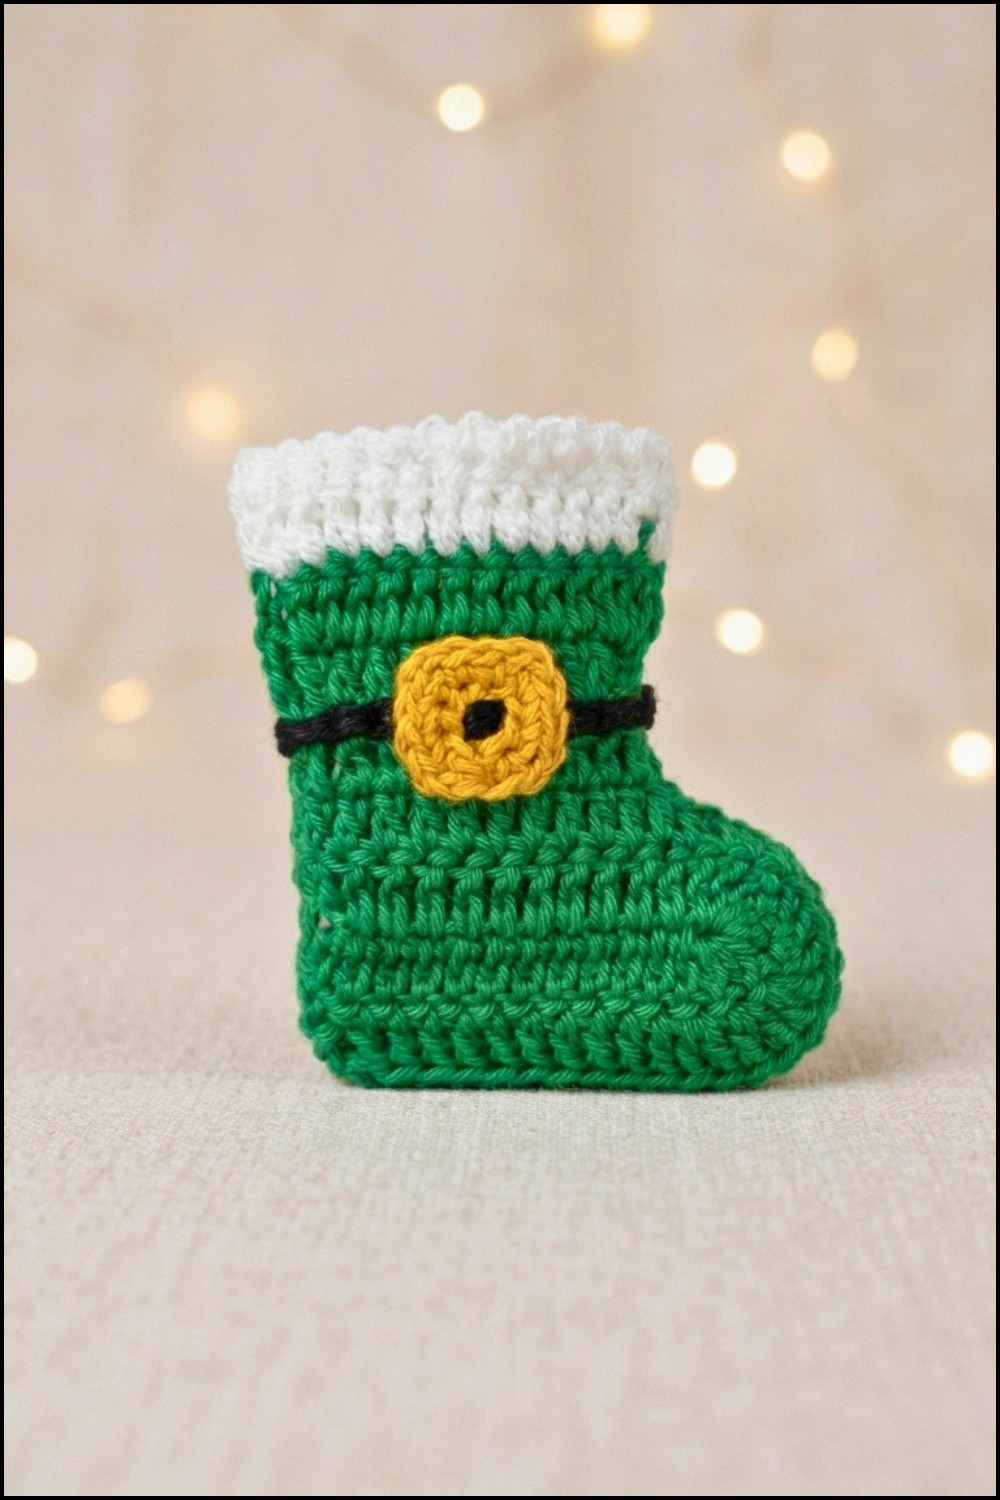
- Allows for addition of embellishments like buckles or holly appliques.
Notes
- Maintain consistent tension for neat textured stitches at this fine gauge.
- Be mindful of stitch counts especially during increases and curves to preserve shape.
- Use stitch markers if necessary to track rounds and position of increases.
- White trim and decorative edges add polished festive details; do not skip.
- Final slip stitch line enhances dimension and realism of boot structure.
Skill Level
Intermediate — suitable for crocheters familiar with:
- Slip knot and foundation chains
- Double crochet (dc) stitches
- Increases (working 2 dc in one stitch)
- Turning chains and working in rows
- Single crochet (sc), slip stitch (sl st), and chain (ch)
- Simple decorative edging
- Color changes and finishing techniques
Materials
- 2mm cotton yarn or 1mm yarn doubled for thickness
- 3.0 mm crochet hook
- Yarn needle for weaving ends
- Scissors
- Optional embellishments such as small buckles or holly appliques
Measurements / Sizing (Optional)
- Finished Christmas boot approximately 8 cm long and 5 cm tall; size varies with tension and yarn.
Gauge (and Stitch Pattern if applicable)
- Gauge flexible; approximate tension is 14 dc per 5 cm.
- Main stitch pattern is worked in rows and rounds of double crochet, with increases for shaping.
Stitch Abbreviations
| Abbreviation | Stitch | Description |
|---|---|---|
| ch | Chain | Yarn over, pull through loop |
| dc | Double Crochet | Yarn over, insert hook, yarn over, pull through 2 loops twice |
| sc | Single Crochet | Insert hook, yarn over, pull through both loops |
| sl st | Slip Stitch | Insert hook, yarn over, pull through stitch and loop |
Special Stitches
Increase (2 dc in one stitch)
- Work two double crochet stitches into the same stitch to increase stitch count and shaping.
Decorative Edge (Slip Stitch and Chain Alternation)
- Work a sequence of alternating slip stitch and chain stitches along row edge to create an openwork decorative trim.
Step-by-Step Pattern
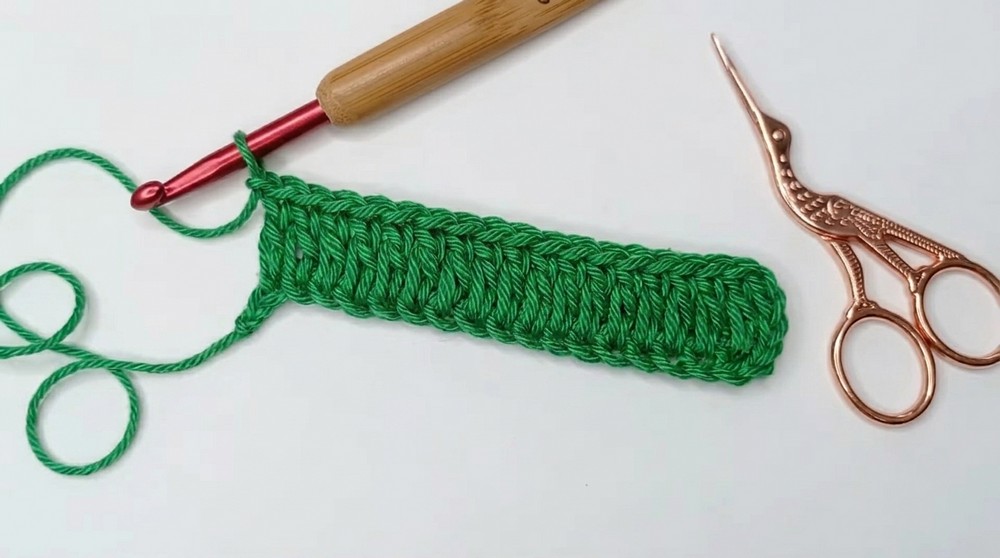
Round 1: Base Foundation
- Make a slip knot.
- Chain 14.
- Count back to 4th chain from hook.
- In the 4th chain, make 1 double crochet (dc).
- Make 1 dc in each of the next 10 chains (total 11 dc including the one in 4th chain).
Round 2: Turning the Corner
- In the last chain, work 8 dc into the same chain space — this shapes the curve of the heel.
Round 3: Other Side of Chain
- Work 11 dc along the opposite side of the initial foundation chain — this completes the oval base shape.
Round 4: Second Round of Foot
- Chain 2, turn your work.
- Work 11 dc straight across the row.
Round 5: Heel Increases
- Work 2 dc in each of the 8 stitches around the curve (heel) — total 16 dc.
- Then work 11 dc along the side to maintain foot width.
Round 6: Third Round
- Chain 2, turn.
- Work 10 dc across the foot.
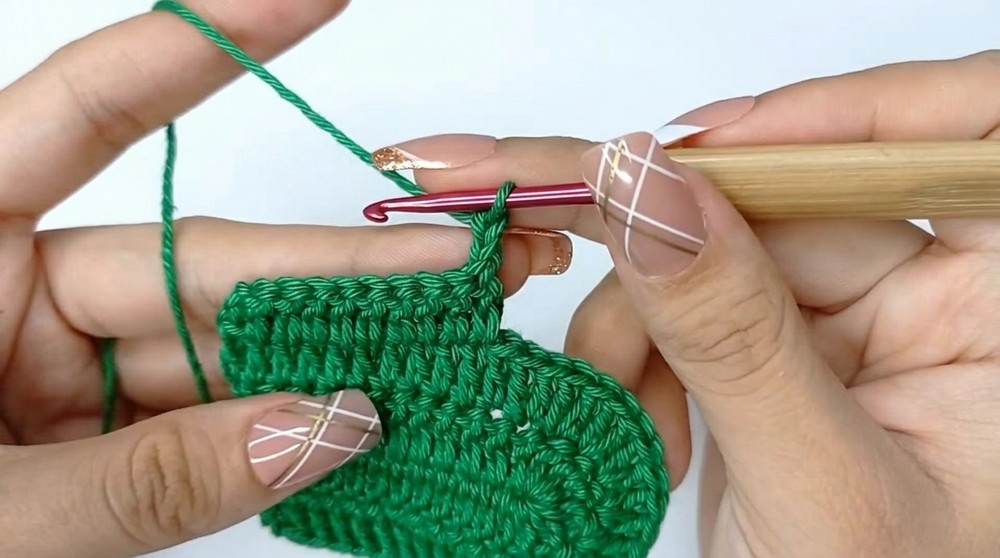
Round 7: Shaping the Ankle
- Chain 2, turn.
- Work 2 dc (increase) in first stitch.
- Work 6 dc stitches evenly.
- Work 2 dc (increase) in the penultimate stitch.
- Work 1 dc in the corner stitch.
Round 8: Fourth Round
- Chain 2, turn.
- Repeat shaping:
- 2 dc in first stitch (increase).
- 8 dc stitches.
- 2 dc in penultimate stitch (increase).
- 1 dc in corner stitch.
Round 9: White Trim
- Join white yarn at heel curve.
- Work 1 row of dc across the heel section.
- Turn work.
- Work decorative edging by alternating:
- 1 slip stitch (sl st)
- 1 chain (ch 1)
- Repeat across the row for a scalloped effect.
Round 10: Decorative Detail Around Heel Curve
- Attach yarn at the 8-stitch heel curve.
- Work around the curve:
- 1 sc,
- then ch 2 gap,
- repeat sc, ch 2 sequence for the entire round.
Round 11: Finishing Line Detail
- Using black yarn, work a neat row of slip stitches (sl st) along the seam line between the foot and ankle parts of the boot.
- This adds definition to the boot shape.
Final Step: Assembly and Embellishments
- Add final decorations like a small buckle or holly applique by sewing or gluing securely.
- Fasten off yarn and weave in all ends carefully.
Tips for Beginners
- Use stitch markers to mark your beginning of rounds or curves.
- Keep your tension even but not too tight to maintain the boot’s shape.
- Count stitches carefully at increase locations to follow shaping accurately.
- Practice the decorative chain and slip stitch edging on scrap yarn before working on the boot.
- Don’t worry about going slowly — it’s better to take your time for neatness.
Assembly & Finished Size
The final Christmas boot decoration measures approximately 8 cm in length and 5 cm tall depending on the yarn and your tension. Its fine cotton yarn and small hook size lend delicate stitchwork that’s perfect for cozy holiday décor. The decorative trims and finishing line build a dimensional, polished appearance. Once embellished and secured with a loop or hook, your boot is ready to hang on your Christmas tree or gift as a handcrafted seasonal keepsake.
Conclusion
This Christmas boot crochet decoration combines elegance with straightforward crochet techniques, building round by round with clear increases and shaped edges. Its fine gauge cotton yarn and carefully executed trims offer a charming miniature boot that can be personalized with embellishments. The detailed instructions guide you from foundation to finishing line ensuring the best possible stitch definition and holiday flair. Whether gifted or kept for your home, this festive crochet piece adds a handmade touch to your seasonal celebrations.
Leave a Reply