

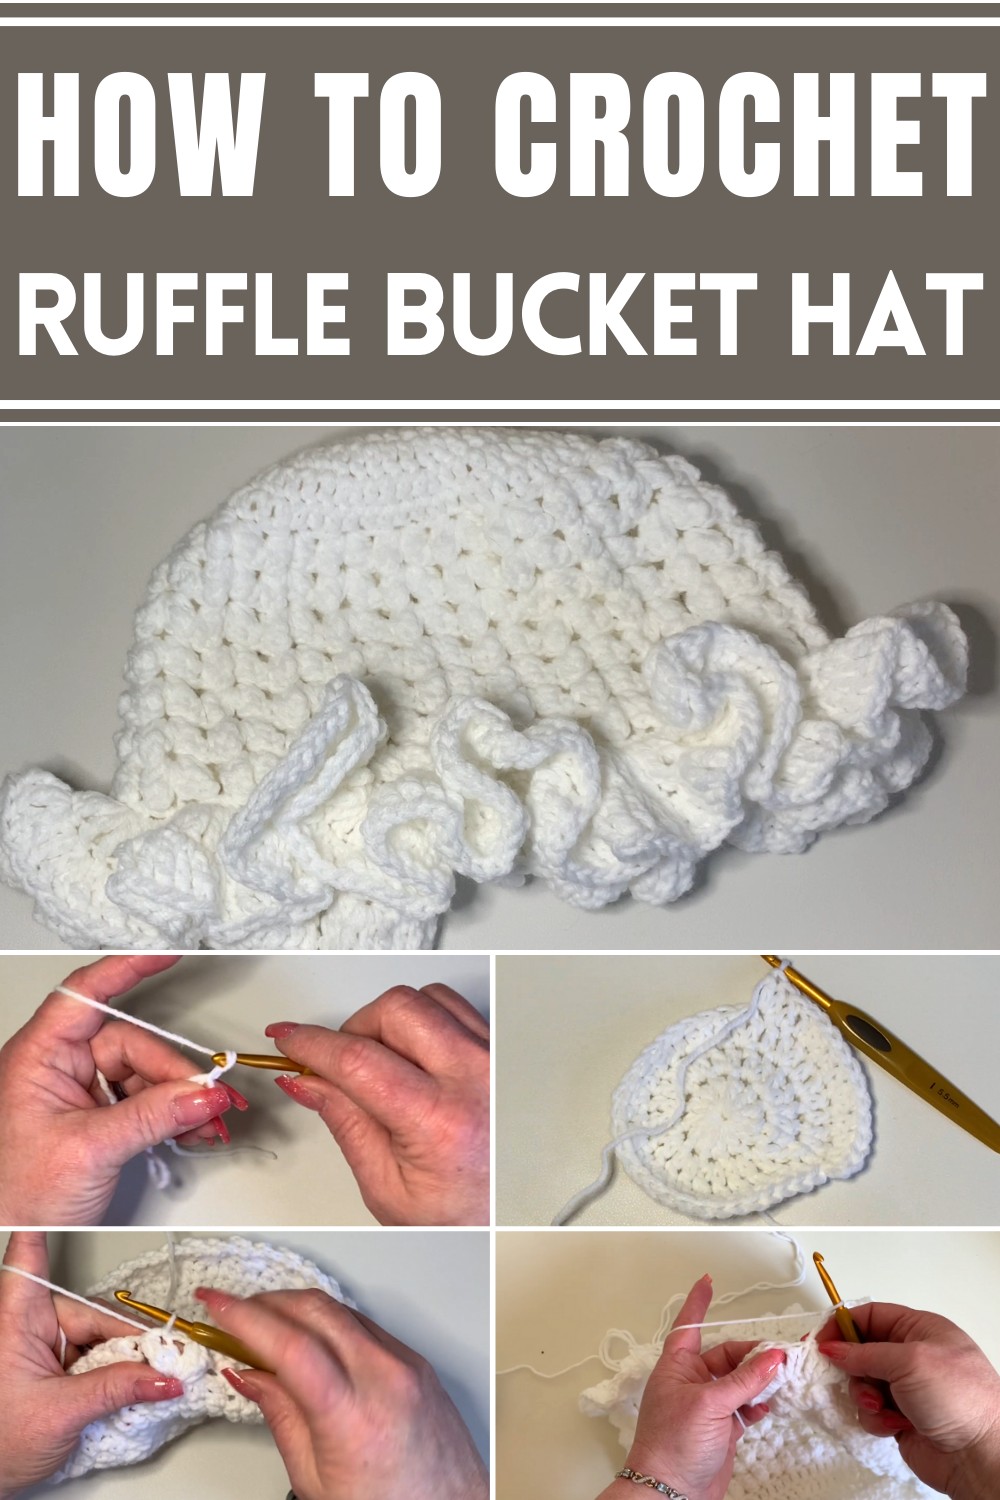
Crochet a one-of-a-kind accessory with this Crochet Ruffle Bucket Hat Pattern, designed to help you create a trendy, chic hat that stands out in every wardrobe!
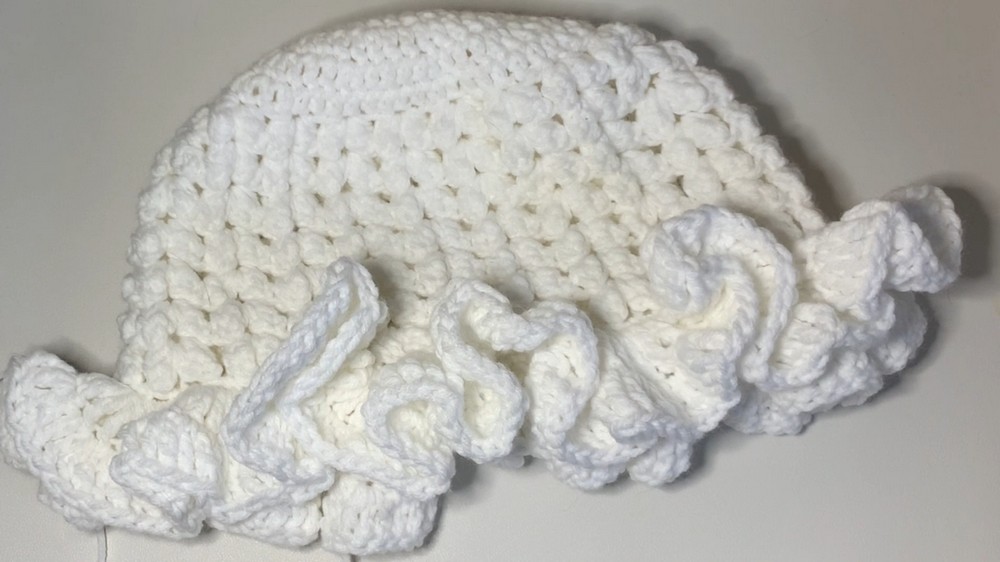
Adding ruffles to a bucket hat turn a simple design into something both stylish and functional. This crochet ruffle bucket hat brings together elegance and practicality, perfect for sunny days or chilly evenings. The ruffled brim not only adds aesthetic appeal but also provides extra shade and coverage, making it ideal for outdoor activities. Its lightweight construction ensures comfort, while its unique design complements a wide range of outfits from casual to semi-formal.
Chic Crochet Ruffle Bucket Hat Pattern You’ll Love to Wear
Versatility is one of the greatest benefits of this hat. It’s easy to pair with different looks, making it an accessory that works throughout the seasons. Beyond enhancing personal style, the pattern serves as a relaxing project that encourages creativity and skill-building. The detailed instructions make it accessible for beginners, yet engaging enough for experienced crocheters who want to refine their techniques.
Whether it’s made as a gift, part of a personal collection, or simply for fun, this ruffle bucket hat offers more than just functionality it’s a reflection of individuality and artistic expression. Minimal resources and effort can lead to a unique piece that truly stands out, allowing anyone to enjoy a stylish, handmade addition to their wardrobe.
Introduction
Welcome to this project, I'm going to teach you how to make a really cute ruffle bucket hat. This hat is essentially a beanie with a ruffle at the bottom, which gives it the appearance of a bucket hat. It's perfect for cooler climates and particularly suitable for occasions like Easter. Let's get started.
Materials Needed
- Worsted weight 4 yarn
- 5.5 mm crochet hook
- Pair of scissors
- Darning needle for weaving in ends
- Measuring tape (optional)
Measurements
- Hat measures approximately 11 inches across.
- Measures approximately 10 inches from top to the bottom of the ruffle.
Steps to Follow
Creating the Magic Circle and Initial Rounds
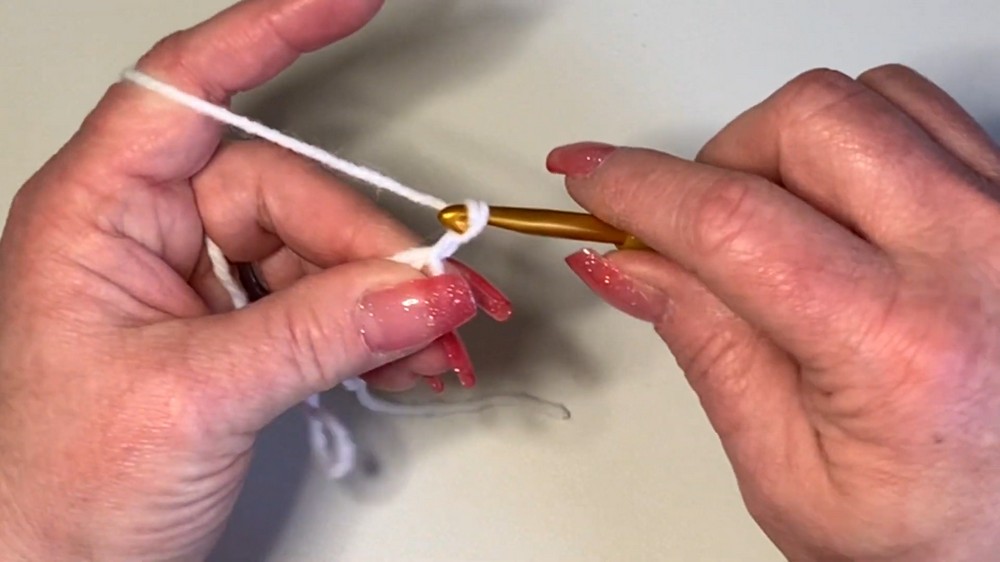
- Begin with a Magic Circle
- Chain 1 and 2 (these do not count as stitches).
- Make 12 double crochets into the circle.
- Round 1: Increase Round
- Chain 2 (does not count as a stitch).
- Place 2 double crochets into each stitch around (total: 24 double crochets).
- Round 2: Continue Increasing
- Chain 2.
- In the same stitch, place 2 double crochets.
- In the next stitch, place 1 double crochet.
- Repeat the sequence: 2 double crochets in one stitch, followed by 1 double crochet in the next stitch (total: 36 stitches).
- Round 3: Further Increase
- Chain 2.
- 2 double crochets in the same stitch.
- 1 double crochet each in the next 2 stitches.
- Continue the sequence (2 double crochets, 1 each in the next 2 stitches) around the circle (total: 48 stitches).
- Round 4: Last Round of Increase
- Chain 2.
- 2 double crochets in the same stitch.
- 1 double crochet in each of the next 3 stitches.
- Keep up this sequence (2 double crochets, 1 each in the next 3 stitches) until the end (total: 60 stitches).
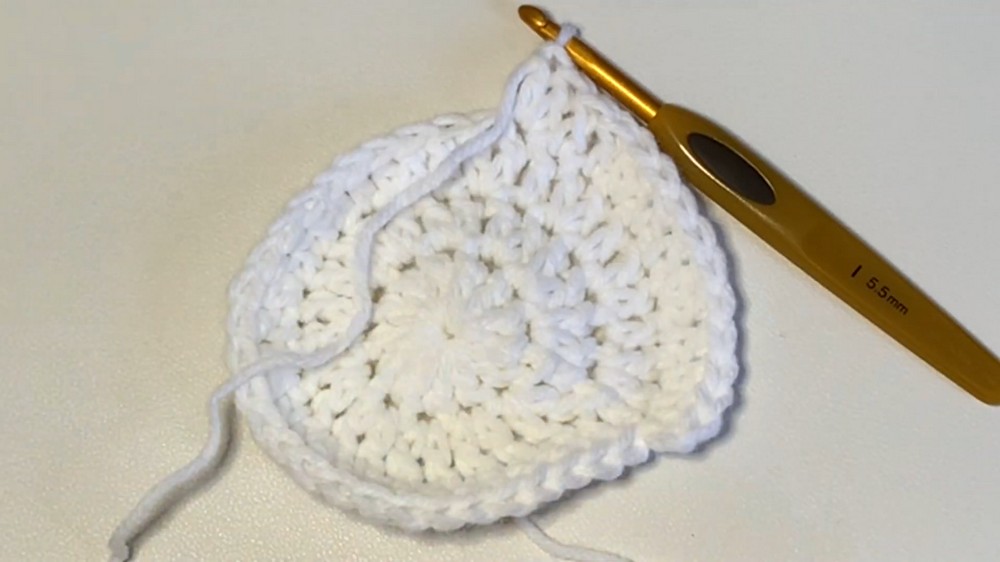
- Round 5: Double Crochets Only
- Chain 2.
- Place 1 double crochet in each stitch around to create the beanie shape.
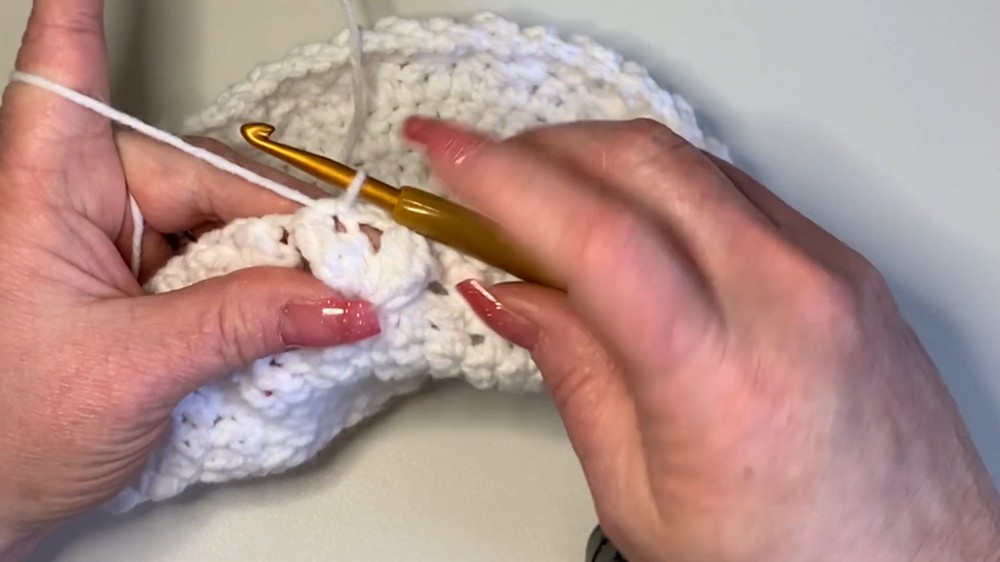
Popcorn Stitch Rounds
- Initiate Popcorn Stitches
- Chain 2.
- 3 double crochets in the same stitch.
- Pull yarn through the first double crochet to form a popcorn stitch.
- Chain 1, skip 2 stitches, and repeat.
- Chain 2 between sets of popcorn stitches.
8.Continue with Popcorn Stitches
-
- Repeat the same for 7 rows of popcorn stitches.
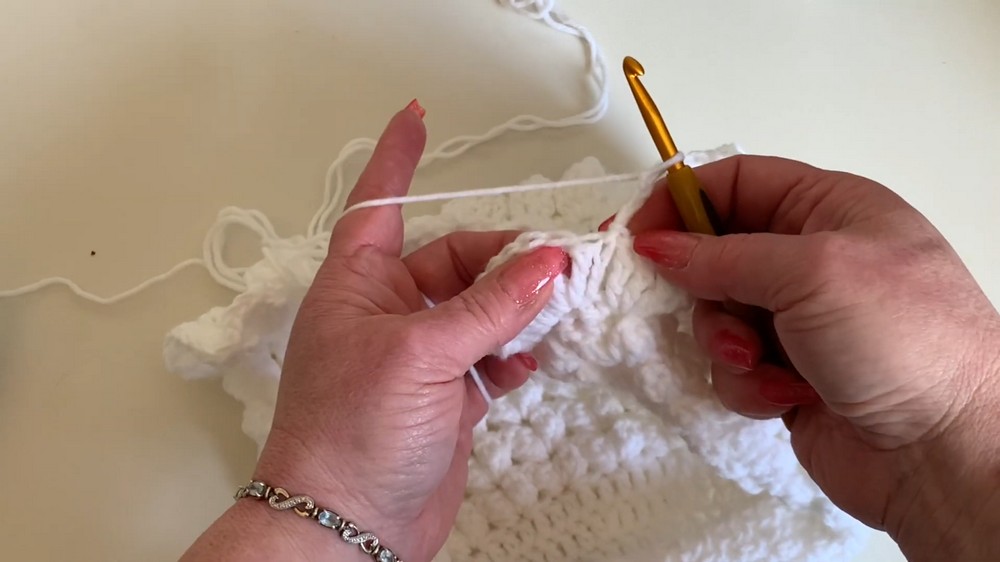
Forming the Ruffle
- Single Crochet Round
- Chain 1.
- Make 50 single crochets evenly around the hat.
- Begin the Ruffle with Treble Crochets
- Chain 3.
- In each stitch, place 4 treble crochets to form the ruffle effect.
- Second Ruffle Round
- Chain 3.
- Place 2 treble crochets in each stitch around.
Finishing
- Slip Stitch and Fasten Off
- Slip stitch to the first chain 3.
- Cut yarn and pull through to tie off.
Conclusion
Congratulations on completing your ruffle bucket hat! This stylish piece is both cozy and cute, ideal for various occasions while providing warmth in cooler climates.

Leave a Reply