

Give your holiday setup a cheerful touch with this Crochet Christmas Tree Pattern and enjoy this charming tree as part of your seasonal decor.
There’s something truly magical about bringing a miniature Christmas tree to life with yarn and a hook. This delightful project, the Crochet Christmas Tree Pattern, captures that cozy holiday spirit in a handmade decoration that’s as charming as it is festive. Full credit for this beautiful design goes to the YouTube channel Norma y sus tejidos, where the full pattern is shared in a friendly, easy-to-follow video.
Charming Crochet Christmas Tree Free Pattern For Christmas Displays
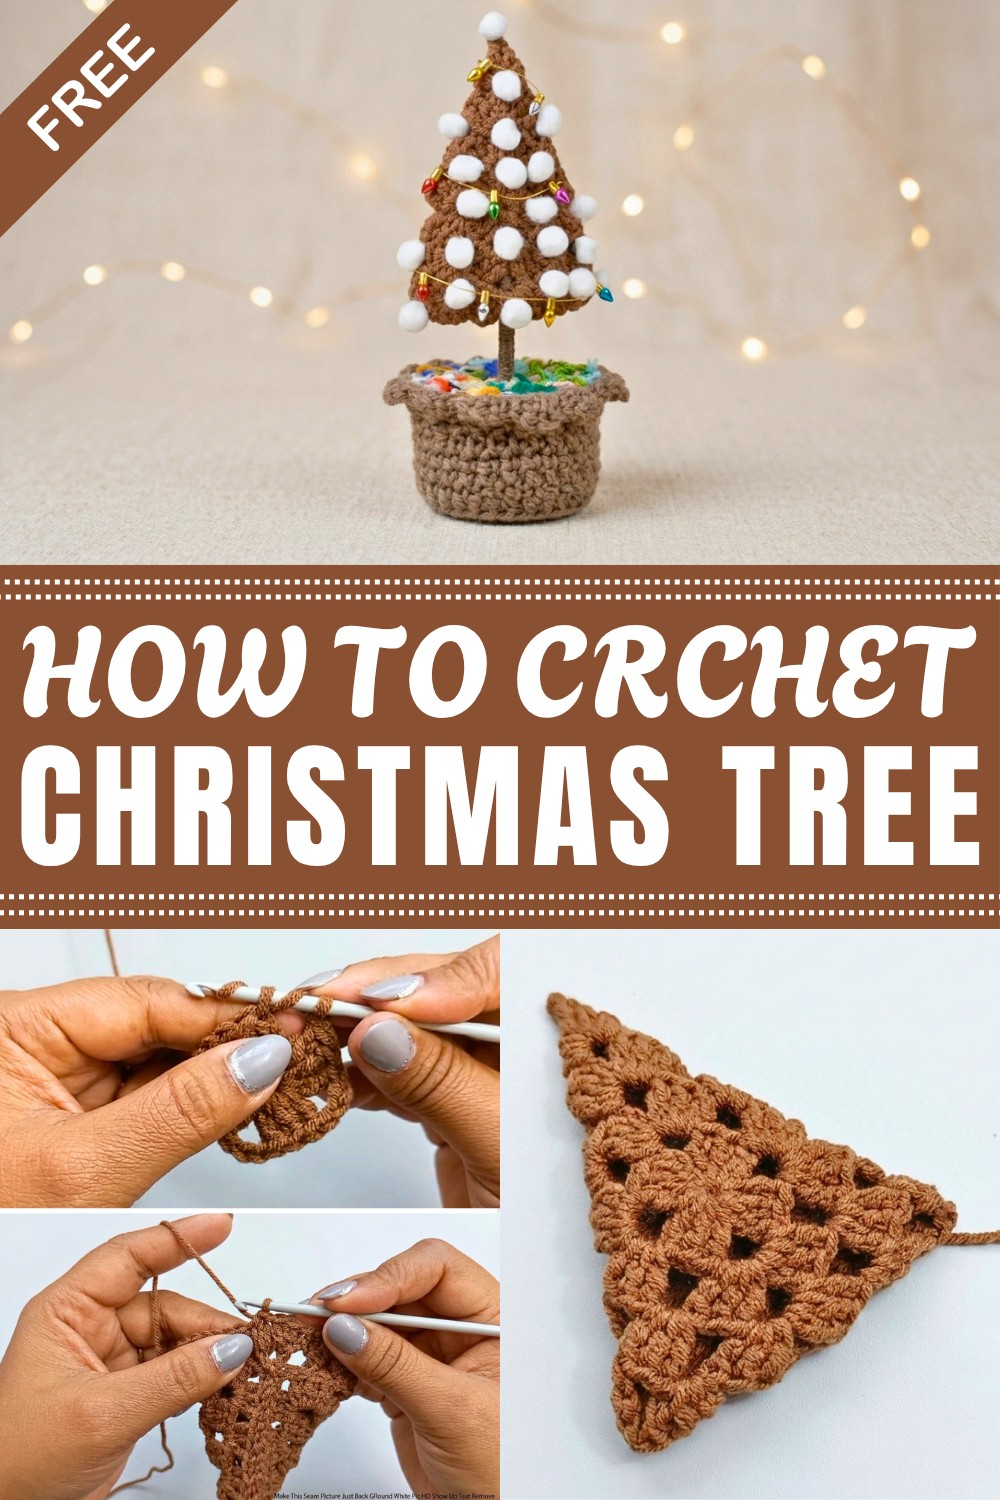
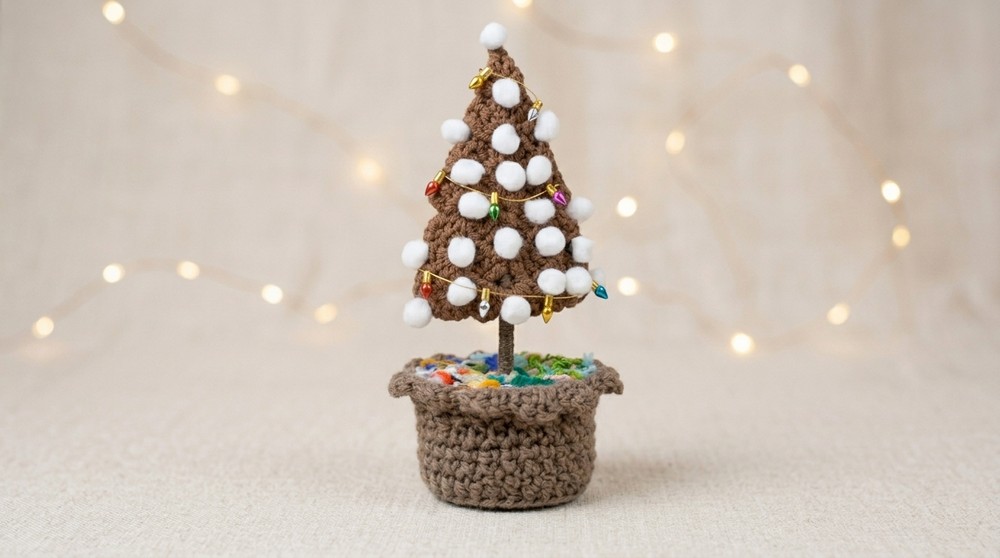
The finished tree is a wonderful blend of texture and shape. Its layered branches gently taper to a pointed tip, mimicking the classic pine silhouette we all recognize and love. The texture is soft but structured, striking a perfect balance that allows the tree to stand upright while remaining lightweight and easy to display anywhere—from mantles to tabletops.
One of the joys of this project lies in its versatility. Using different shades of green yarn, you can create a forest of unique trees, and adding beads, tiny pom-poms, or a little star at the top gives you an opportunity to personalize your creation. Whether you’re making a single statement piece or a collection of mini trees for a festive village scene, this design adapts beautifully.

This pattern lends itself wonderfully to crocheters at various levels. If you have some experience with basic stitches and shaping, you’ll find this an engaging and rewarding project. Along the way, you’ll build skills in working in rounds, increasing and decreasing, and adding decorative accents—all valuable techniques that extend beyond this holiday project. If you’re looking for a seasonal project that combines holiday cheer with the satisfaction of creating something handmade, this Crochet Christmas Tree Pattern just might become a new favorite. For those ready to start stitching festive joy, be sure to check out the free full pattern.
Decorative Crochet Christmas Tree Free Pattern
Handmade holiday decorations add warmth and character to any festive setting. This project centers on a crochet Christmas tree constructed using the classic granny square technique, followed by clever shaping, sturdy assembly, and delightful finishing touches. The structure uses accessible materials, such as yarn in your choice of colors, wooden sticks for trunks, and a simple, stable base. Both beginner and intermediate crocheters will find the process engaging yet approachable, with ample opportunity for creative embellishments. Each phase of construction is precisely described, resulting in a festive, three-dimensional table or mantel decoration certain to be cherished each year.
Quick Overview Of Pattern
- Crochet a basic granny square using your preferred yarn color and hook size.
- Fold and sew the granny square to form a triangular, tree-like shape.
- Prepare a trunk by wrapping yarn around a wooden stick.
- Insert and secure the trunk into a weighted base.
- Crochet a round base cover with decorative edges.
- Add final embellishments such as pearls, pom-poms, or string lights for a festive finish.
Notes
- Combining yarn strands yields a fuller texture if you’re working with thin yarn.
- Trunk stability improves when using sturdy sticks and a well-filled base.
- Adjust tree size by altering the number of granny square rounds.
- Embellishments can be personalized to suit various color schemes and styles.
- Always weave in all loose ends for lasting durability.
- Ensure good ventilation when using a lighter to neaten yarn ends.
Skill Level
Beginner to Advanced Beginner
Familiarity with basic granny square construction, increasing, and sewing pieces together is helpful.
Materials
- Yarn: Colors of your choice (green, red, beige, brown, mustard, etc.); double/triple up for thin yarn
- Crochet Hooks: 2.0mm, 2.5mm, or 4.0mm (to suit chosen yarn/desired firmness)
- Scissors
- Tapestry Needle
- Glue Gun
- Wooden sticks: Twigs, skewers, or similar for trunks
- Base: Small container such as a yogurt cup, ceramic salsera, or wooden round
- Fillers: Plasticine or plaster
- Decorations: Pearls, pom-poms, beads, or string lights
Measurements / Sizing
- Tree height: Adjustable; typical finished height ranges from 12 to 20 cm (including base and trunk).
- Base diameter: Should fit your chosen container (usually 5–7 cm).
Note: Actual size depends on yarn weight, hook size, and number of granny square rounds completed.
Gauge (and Stitch Pattern if applicable)
Gauge is flexible. For a firm structure, denser crochet is beneficial:
- Granny square sample gauge: Approximately 8 dc (pillars) x 4 rounds = 5 cm square (using 2.5mm hook and doubled yarn)
- Stitch pattern: Classic granny square using dc (pillars), ch spaces, and shell corners
Stitch Abbreviations
- ch – chain
- dc – double crochet (pillar)
- sl st – slip stitch
- sp – space
- st – stitch
- sc – single crochet
Special Stitches
- Magic ring: An adjustable starting loop to ensure a tight center on your square or base
- Shell (in square): Group of 3 dc in a single stitch or space
The Crochet Pattern
Phase 1: Crocheting the Tree (Granny Square)
Magic Ring:
- Begin with a magic ring.
Round 1:
- Ch 3 (counts as first dc), work 2 dc into the ring, ch 3.
- Repeat the group (3 dc + 3 ch) three more times (4 sets of 3 dc total).
- Pull ring closed. Sl st to the top of the initial ch-3 to join.
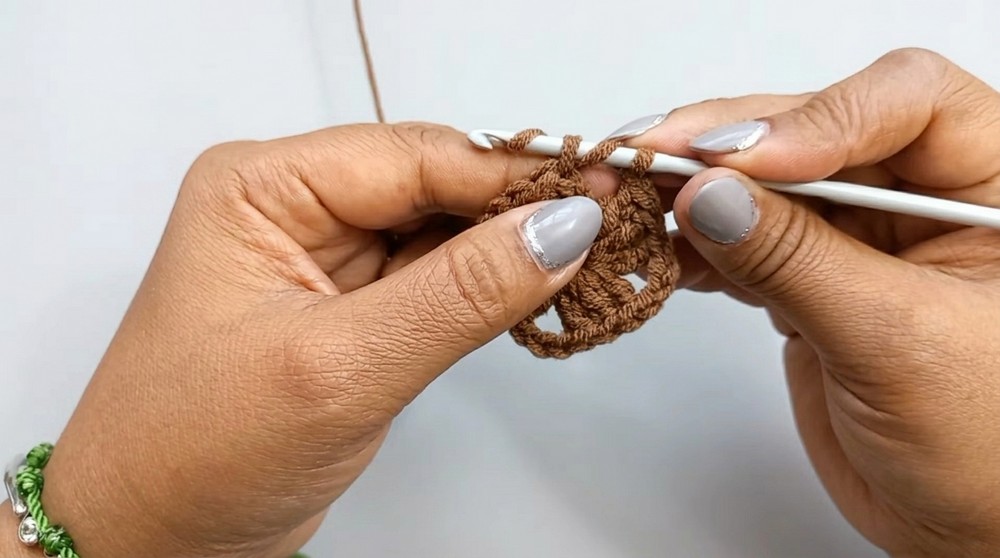
Round 2:
- In the next corner space, ch 3 (counts as the 1st dc of an incomplete corner), 2 dc, ch 1.
- In every corner: 3 dc, ch 3, 3 dc.
- After each corner, ch 1 (for side spaces).
- Repeat in each corner. Sl st to the top of starting ch-3 to finish.
Round 3:
- Chain 3, work 2 dc in the corner space.
- Chain 1, work 3 dc in the side chain-1 space.
- Chain 1, work [3 dc, chain 3, 3 dc] in the corner space.
- Repeat around each side and corner.
- Complete first corner with 3 dc, close with Chain 1 and hdc into initial chain 3.
Round 4 (Optional for Larger Trees):
- Chain 3, work 2 dc in corner space.
- Chain 1, work 3 dc in the 1st side space, Chain 1, work 3 dc in 2nd side space.
- Chain 1, work [3 dc, chain 3, 3 dc] in corner space.
- Repeat around, complete first corner with 3 dc, chain 1, sl st to end, leaving a long tail for sewing.
- Fasten off.
Phase 2: Shaping and Assembly
Folding and Sewing the Tree:
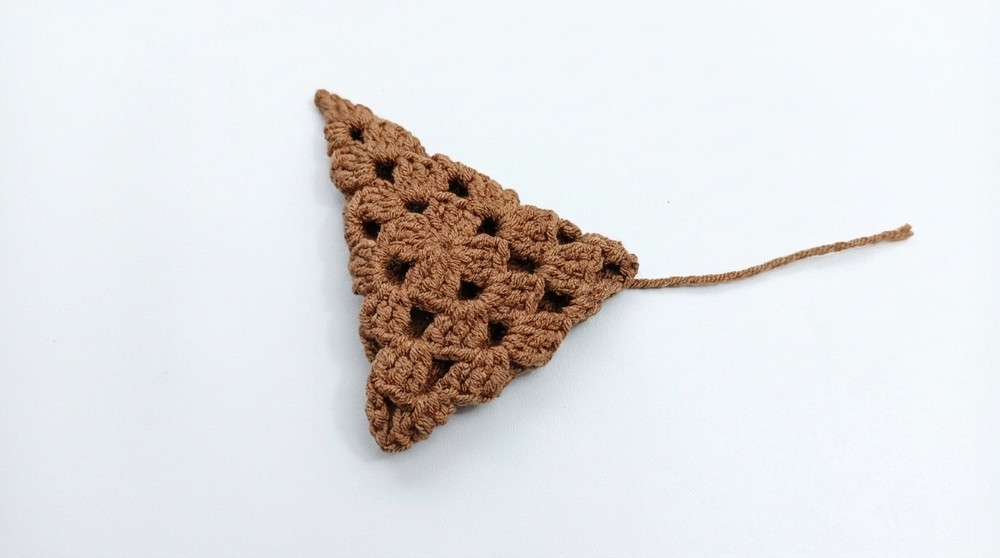
- Fold the completed granny square diagonally so that two opposite corners meet, creating a triangle.
- Align the long edges.
- With a tapestry needle and matching yarn, stitch from the base of the triangle up each side, sewing the two layers together.
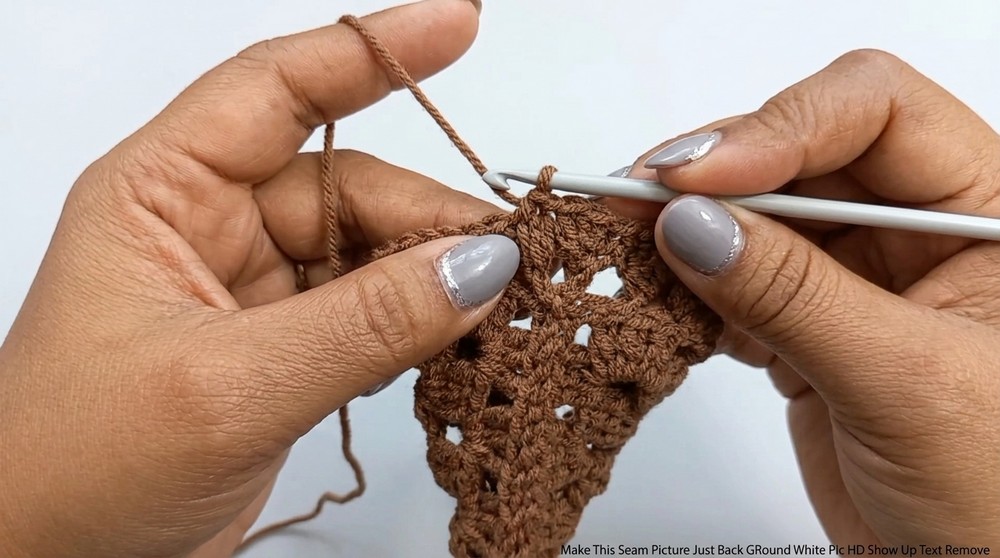
- Ensure pillars align and your seam is straight, forming a neat cone or pyramid.
Preparing the Trunk:
- Take a wooden stick and begin wrapping it tightly with brown or coordinating yarn.
- Every few centimeters, add a dab of glue to secure the yarn in place.
- Leave the lower portion of the stick unwrapped; this will be anchored in the base.
Mounting the Tree:
- Insert the wrapped stick into your chosen base (yogurt cup, ceramic container, or wooden round).
- Fill the base with plasticine or prepared plaster, ensuring the stick stands upright and doesn’t wobble.
- Allow the filler to set, if using plaster, before proceeding.
Phase 3: The Base Cover
Foundation:
- Begin with a magic ring.
- Work 12–14 dc (pillars) into the ring. Pull tight and sl st to join.
Increasing Round:
- Work 2 dc into each dc from the previous round. You should have approximately 28 dc at the end.
- Sl st to join.
Forming the Sides:
- For the next round, work in the back loops only to encourage the cover to curve up vertically.
- Dc in each st around; sl st to join.
- If a deeper base cover is needed to fit your container, add 1–2 more rounds of dc.
Edge Decoration:
- Ch 2, work 3 dc in the same st.
- Skip 2 sts, sl st in next st, ch 2, 3 dc in same st.
- Repeat around to form a delicate shell or scallop edge.
Phase 4: Final Details
Decorating:
- With a glue gun, securely attach small pearls, pom-poms, or beads to the tree surface, focusing on seams or assembly points if desired.
- For extra magic, wind mini string lights around the tree.
Finishing:
- Briefly run a lighter over the tree to remove any stray yarn fibers, being cautious to avoid burning.
- Use extra glue on the base to secure the tree so there is no wobble or shifting.
Assembly & Finished Size
- Insert the completed, wrapped trunk into the filled base and allow to set.
- Slide your crocheted base cover over the base and trunk. Adjust for a snug, finished look, ensuring the decorative edge sits flush.
- Double-check the tree’s vertical alignment.
- Add any final embellishments and display.
Finished tree size will vary based on rounds, hook and yarn, but typically stands between 12–20 cm tall, with a base diameter of 5–7 cm.
Conclusion and Ending Words
Celebrating the holidays with handmade decorations fosters a personal touch and creates lasting memories. This granny square Christmas tree project blends straightforward techniques with customizable elements, making it suitable for a range of skill levels and style preferences. The clear instructions for each phase—from granny square construction through three-dimensional shaping, trunk assembly, and creative embellishment—lead to a delightful finished piece ideal for gifting or home decor. Each completed tree stands as both a testament to tradition and an expression of creativity, enriching festive gatherings year after year.




Leave a Reply