

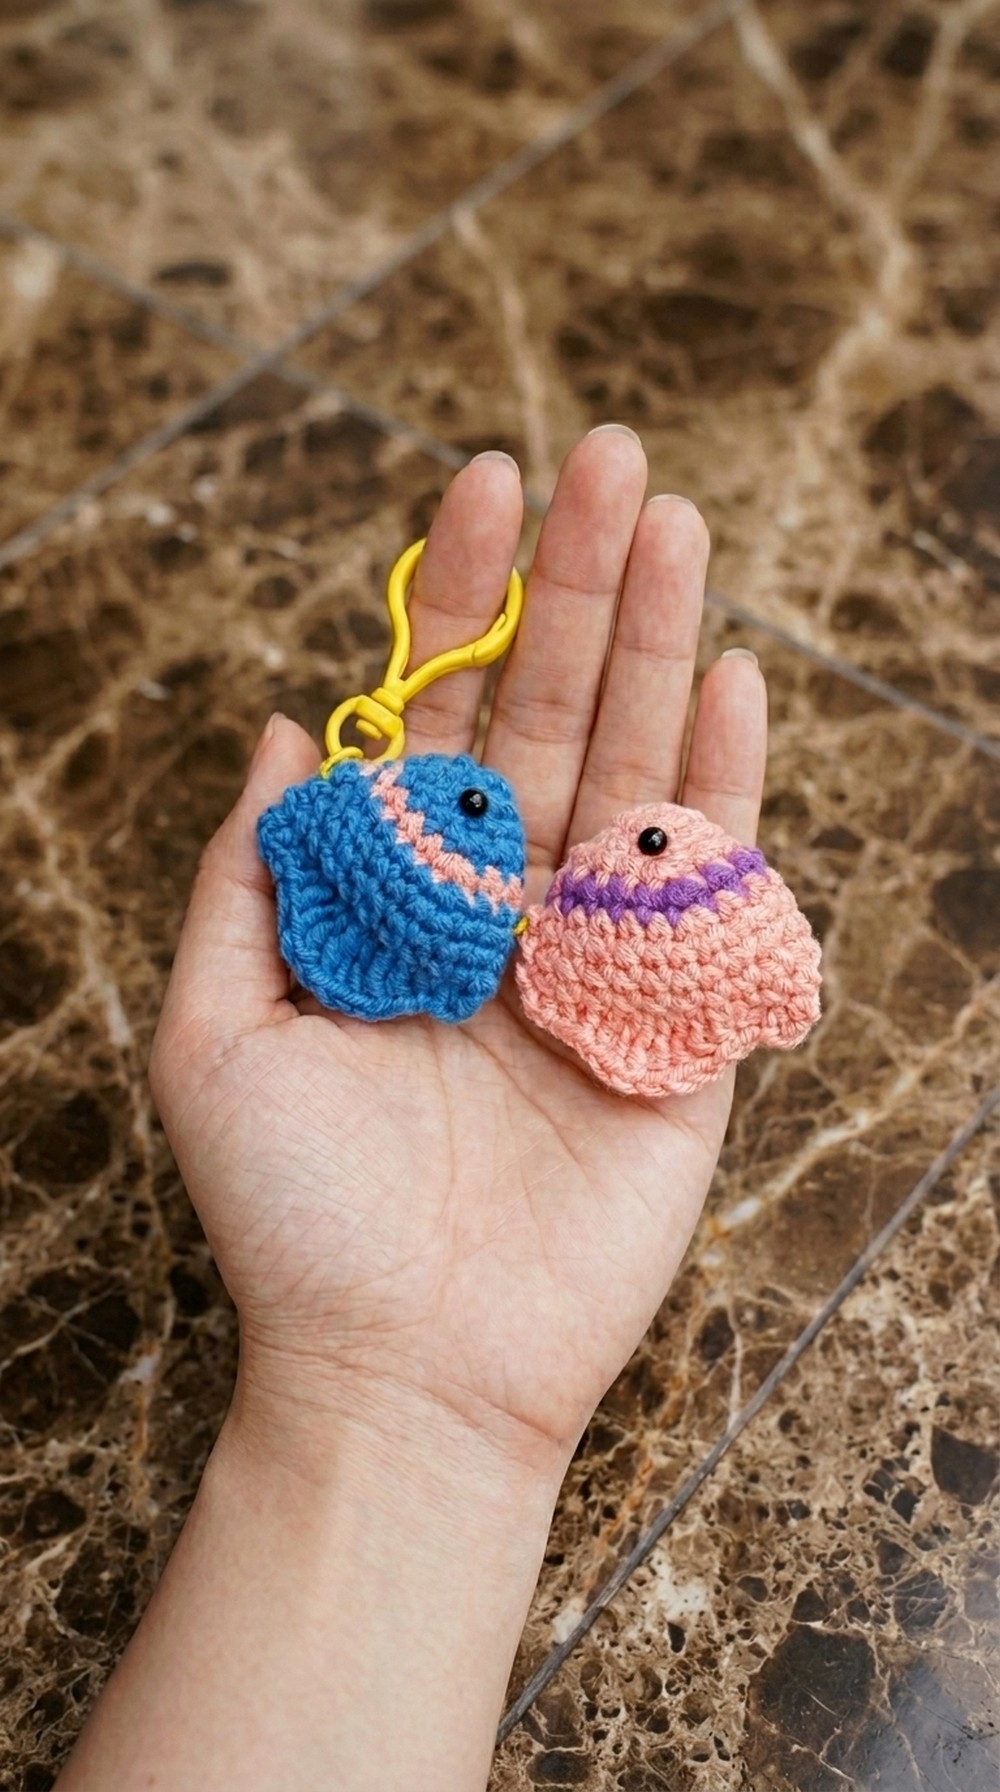
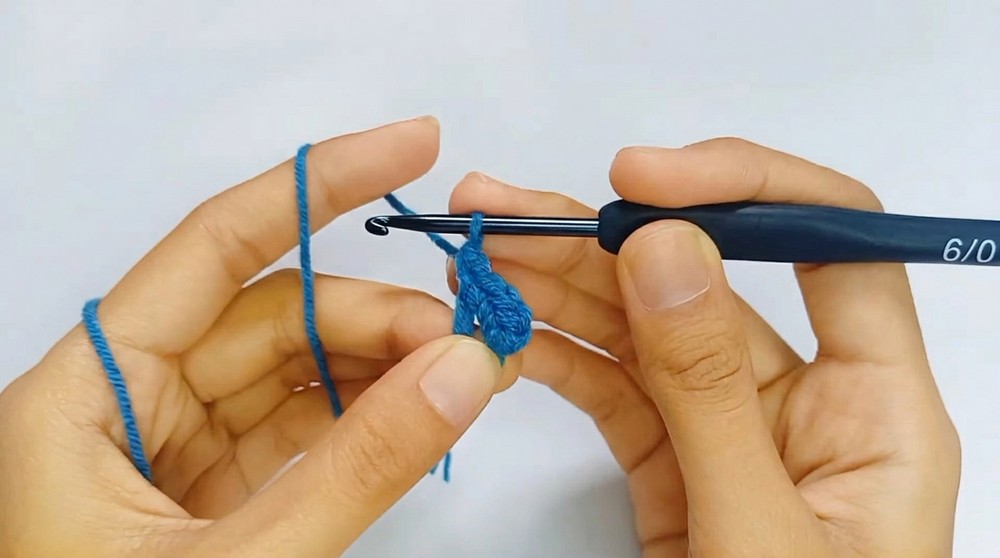
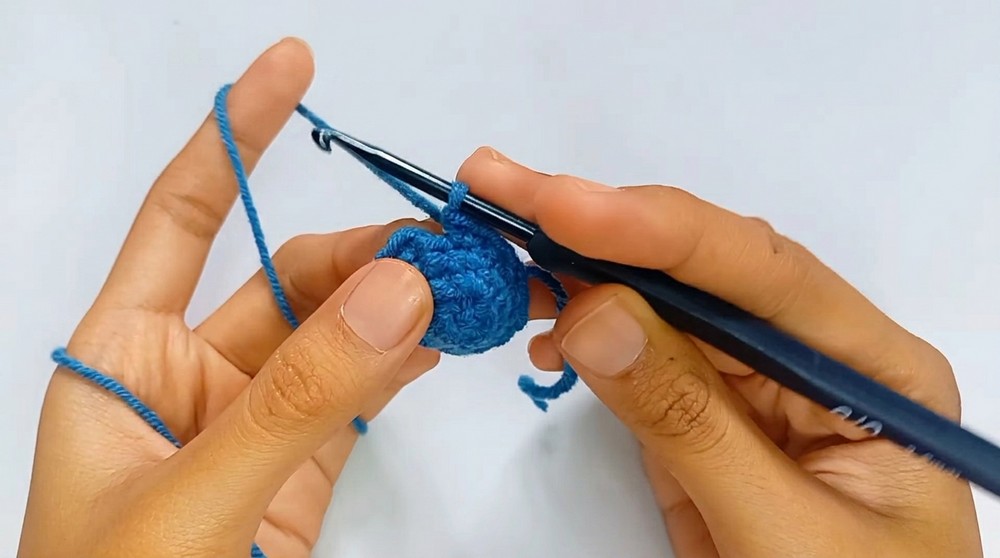
Learn how to create a cute crochet fish amigurumi with this free, featuring detailed steps for shaping, decorating, and personalization.
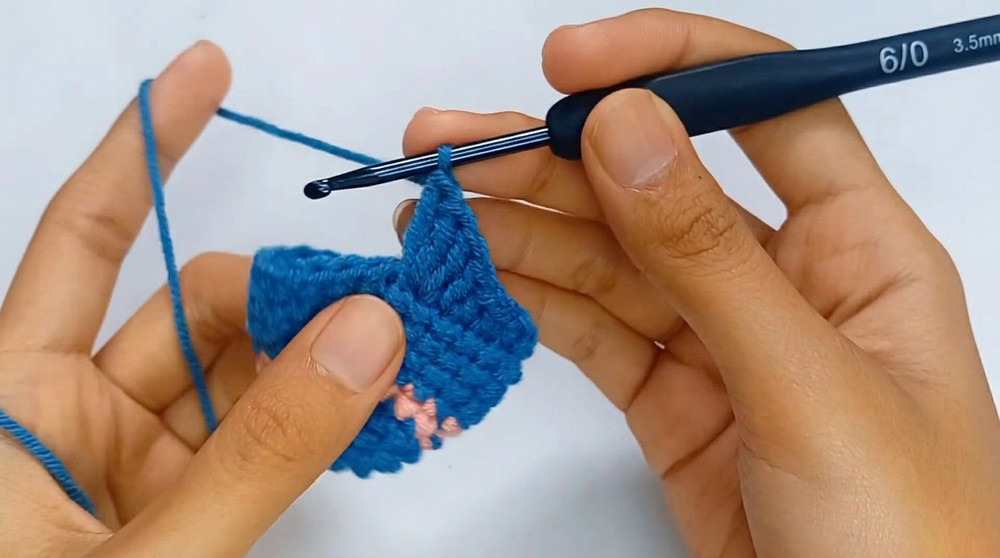
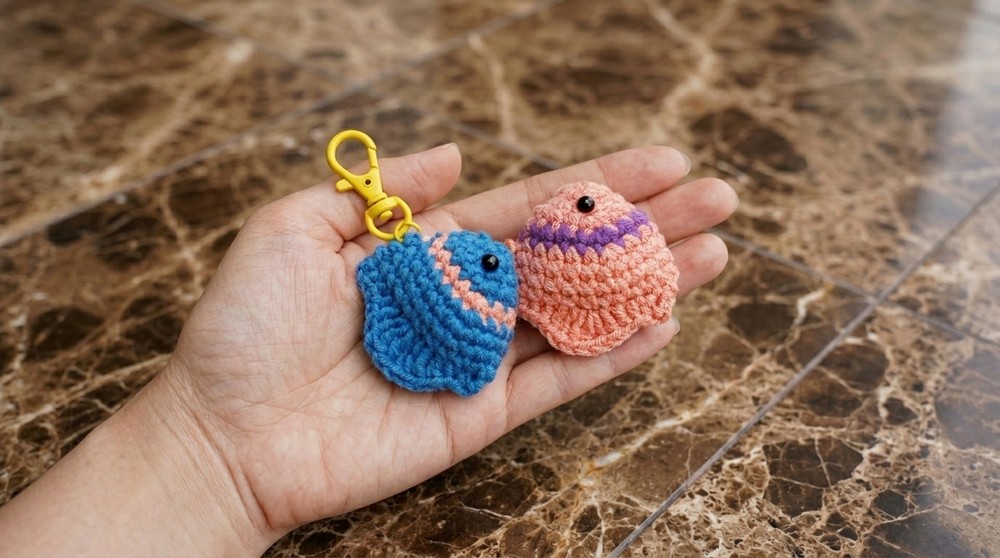
When I first tried making a crochet fish amigurumi, I was amazed at how something so simple could turn out so adorable and eye-catching. As you crochet the soft, rounded body and add tiny fins and a sweet face, it’s hard not to smile at how quickly your little fish comes to life! The beauty of this Free Crochet Fish Amigurumi Pattern really shines through in its charming, playful look and cozy texture, thanks to the smooth stitches and bright yarn colors you can choose.
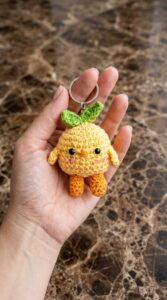
Free Crochet Fish Amigurumi Pattern for Beginners
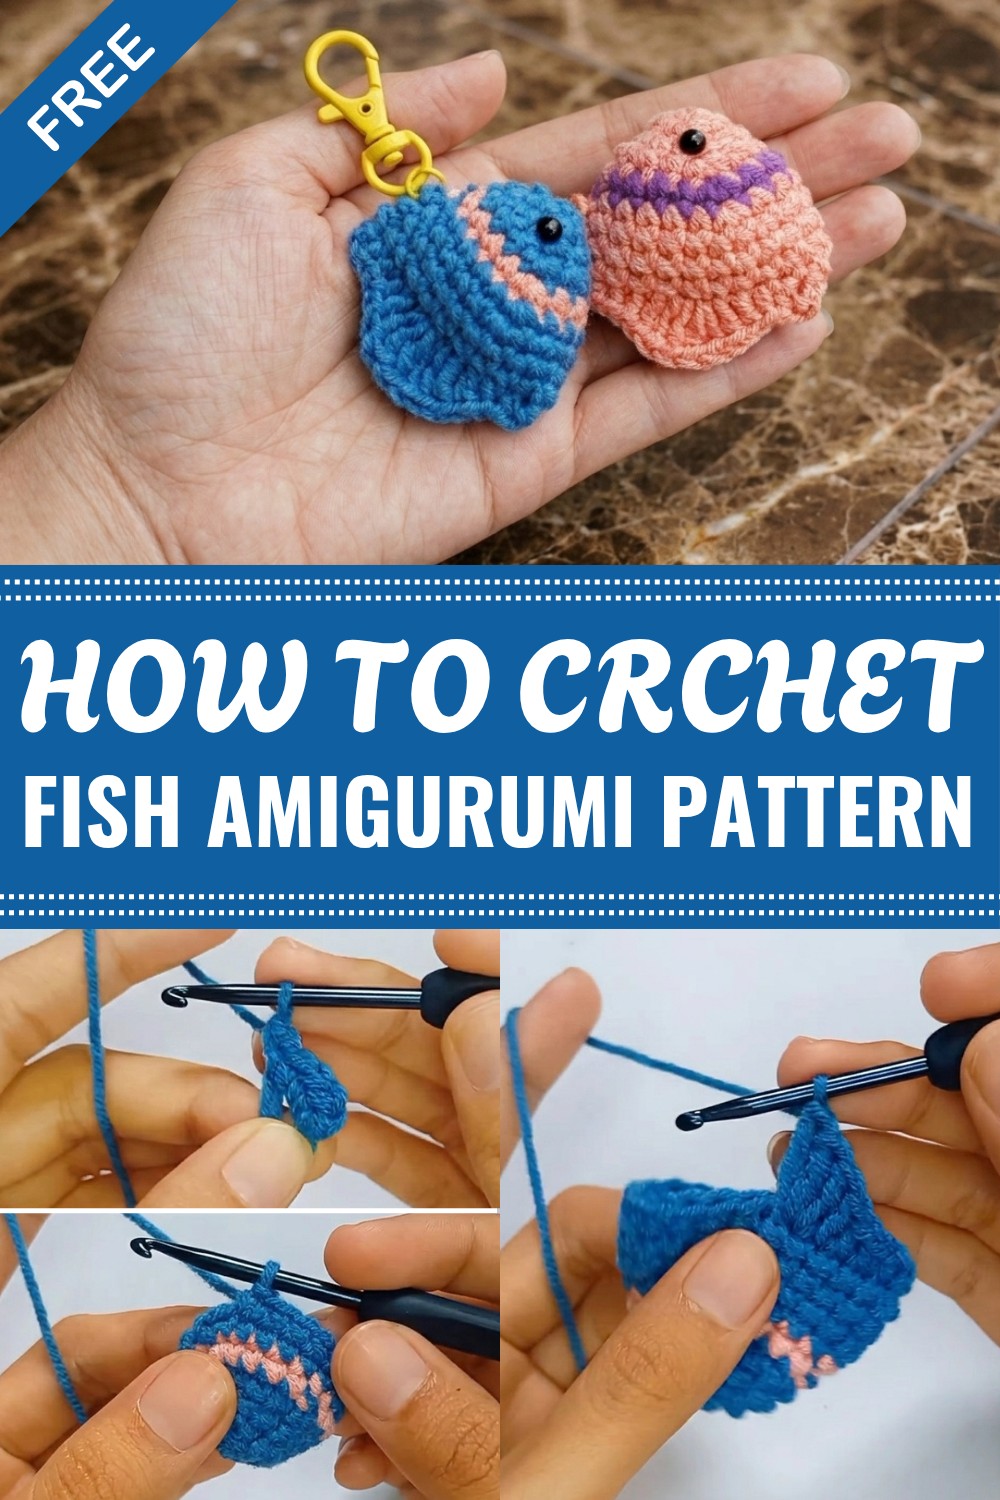
These crochet fish are versatile and can be used in many ways. They look lovely hanging on a backpack or set of keys as a keychain, and they’re perfect as a cute desk companion or even as a small fidget toy you can squeeze when you need to relax. If you use different color combinations, every fish has its own personality—make a whole school of them in rainbow shades or add fun details like embroidered eyes and blushing cheeks.
One of my favorite things about this pattern is how beginner-friendly it is. If you’re new to crochet, you’ll find the simple shapes and straightforward stitches easy to follow, but even experienced crafters will enjoy how fast and satisfying this project can be. Leftover yarn pieces work great, so it’s a smart way to use up odd scraps.
Ideal for gifts, party favors, or just a cheerful handmade project, this crochet fish amigurumi is a delightful craft for all ages. Whether you keep your creation or pass it on, this little fish will bring joy to anyone who sees it.
Simple Crochet Flower Appliqué Pattern
Before You Start
- Select two or more yarn colors for a pretty, dimensional effect.
- Keep your hook size slightly smaller than recommended for tight, neat stitches.
- Have a yarn needle handy for weaving in ends and adding details.
- Use a stitch marker if you struggle to find round starts/ends.
- Review the pattern fully so you can follow color changes and stitch sequence smoothly.
Pattern Notes
- Pattern is written in US crochet terms.
- The flower is worked in the round from the center outward, increasing gradually.
- Color changes are used for layered petals (feel free to customize colors).
- Stitches include sc, hdc, dc, and tr to mimic natural petal shapes.
- Gauge is not crucial, but uniform tension gives the best shape.
- Appliqué can be used for kitchen décor, keychains, or embellishments on other projects.
How I Made the Crochet Pattern
- Started with a classic magic circle and continuous increases.
- Incorporated gradual color changes for dimensional petals.
- Used multiple stitch heights in last round (sc, hdc, dc, tr) to form realistic petal effect.
- Finished with optional features: stamens/eyes for center, and a hanging ring for keychain use.
Skill Level
Beginner to Easy (suitable for confident beginners)
Finished Size
- Approx. 2–2.5 inches (5–6.5 cm) across (with DK/light worsted yarn and a 3.5–4mm hook).
Materials
- Small amounts of cotton or acrylic yarn in two or more colors
- Crochet hook—3.5–4mm (E–G) or to suit your yarn/tension
- Scissors
- Yarn needle
- Stitch marker (optional)
- Optional: Black embroidery thread or safety eyes for face, keyring or jump ring for hanging
Measurements / Sizing
- Center circle: ~0.75–1 inch across
- Finished diameter: ~2–2.5 inches
- Adjust easily by substituting thicker/thinner yarn or larger/smaller hook
Gauge & Stitch Pattern
- Gauge not significant; work tightly to help petals stand up.
- Main stitches: sc (single crochet), hdc (half double crochet), dc (double crochet), tr (treble crochet)
Stitch Abbreviations
- MR = Magic ring (circle)
- ch = chain
- sc = single crochet
- hdc = half double crochet
- dc = double crochet
- tr = treble (triple) crochet
- inc = increase (two stitches in same st)
- sl st = slip stitch
- st(s) = stitch(es)
Special Stitches
- Magic Ring (MR): Wrap yarn around fingers; work stitches into loop and pull tail tight.
- Increase (inc): Work two specified stitches in the same stitch.
- Changing Color: Complete the last yarn over of the previous stitch with the new color for a clean switch.
- Petal Sequence: Combination of sc, hdc, dc, tr, and reverse to shape a petal in one stitch.
The Pattern!
Center Circle
- Round 1:
- Make a magic ring.
- Work 6 sc into the ring. (6 sts)
- Pull tail tight to close circle.
- Sl st to first sc to join.
- Round 2:
- [Sc in next st, inc in next st]—repeat around. (9 sts)
- Pattern: sc, 2 sc in next, sc, 2 sc, ...
- Round 3:
- [2 sc in next st, sc in next 2 sts]—repeat around. (12 sts)
- Pattern: 2 sc, sc, sc, 2 sc, sc, sc, ...
- Sl st to first sc at the end of the round.
- Round 4:
- [Sc in next 3 sts, inc in next st]—repeat around. (15 sts)
- Pattern: sc, sc, sc, 2 sc, ...
If you’re new to reading patterns:
You begin with a magic circle, then each round increases the stitch count by spreading extra single crochets evenly. Slip stitch joins each round for a neat, closed center. If you want a bolder color transition, change yarn here for petals.
Petal Round (Color Change)
Change color at the end of round 4:
- Pick up your new color on the last yarn over of the previous stitch to keep the join invisible.
- Round 5 (Petals):
- [Sc in next 4 sts, inc in next st]—repeat around. (18 sts)
- At end of round, sl st to first sc.
- Round 6 (Begin petals, DO NOT join):
Petal sequence: In same st, work:- 2 sc,
- 1 hdc,
- 1 dc,
- 3 tr,
- 1 dc,
- 1 hdc,
- 2 sc all in the same stitch.
- Skip 1 st, sl st in next st to anchor petal. Repeat this petal sequence around (6 petals per flower).

Instructions:
Each petal will be made in its own stitch, skipping one in between, for a total of 6 full petals (or adjust as desired for a fuller/larger flower). The varying stitch heights make a rounded, natural petal shape.
Petal Tips
If you are new to reading patterns:
Each “petal” is formed by placing multiple stitches (sc, hdc, dc, tr) all in the same stitch. Then you skip one stitch, slip stitch in the next, and repeat for each petal. At the end, you’ll have a circular, dimensional flower.
Assembly & Finishing
- Weave in all yarn tails at the back neatly with a needle.
- Fasten off all colors; trim excess.
- Optional: With contrasting yarn, embroider some “stamens” or add eyes for a kawaii look.
- For keychain: thread a jump ring through one petal/center and attach to a keychain ring.
- If making for a kitchen (coaster, trivet), block flat or starch lightly for shape.
- Add extra details (face, smile, blush) with embroidery thread or felt.
Solution to Possible Problem
- If your petals curl or twist: Block the flower gently by wetting slightly, shaping petals flat, and letting dry. For more definition, use a slightly larger hook for the petal round only.
- If center hole won’t close: Pull magic ring tail tighter, or use a needle to weave and cinch remaining gap.
What You Can Make With These Stitches
- Coasters for the kitchen
- Keychains or bag charms
- Brooches and hair clips
- Decorative garlands
- Scrap-buster appliqués for blankets, bags, or hats
You have successfully created a bright, cheerful flower appliqué with only a handful of basic stitches! This quick, beginner pattern can be adapted for larger or smaller blossoms, multi-layered effects, or additional embellishments—use your creativity to make kitchen décor, cute accessories, or thoughtful gifts.
Leave a Reply