

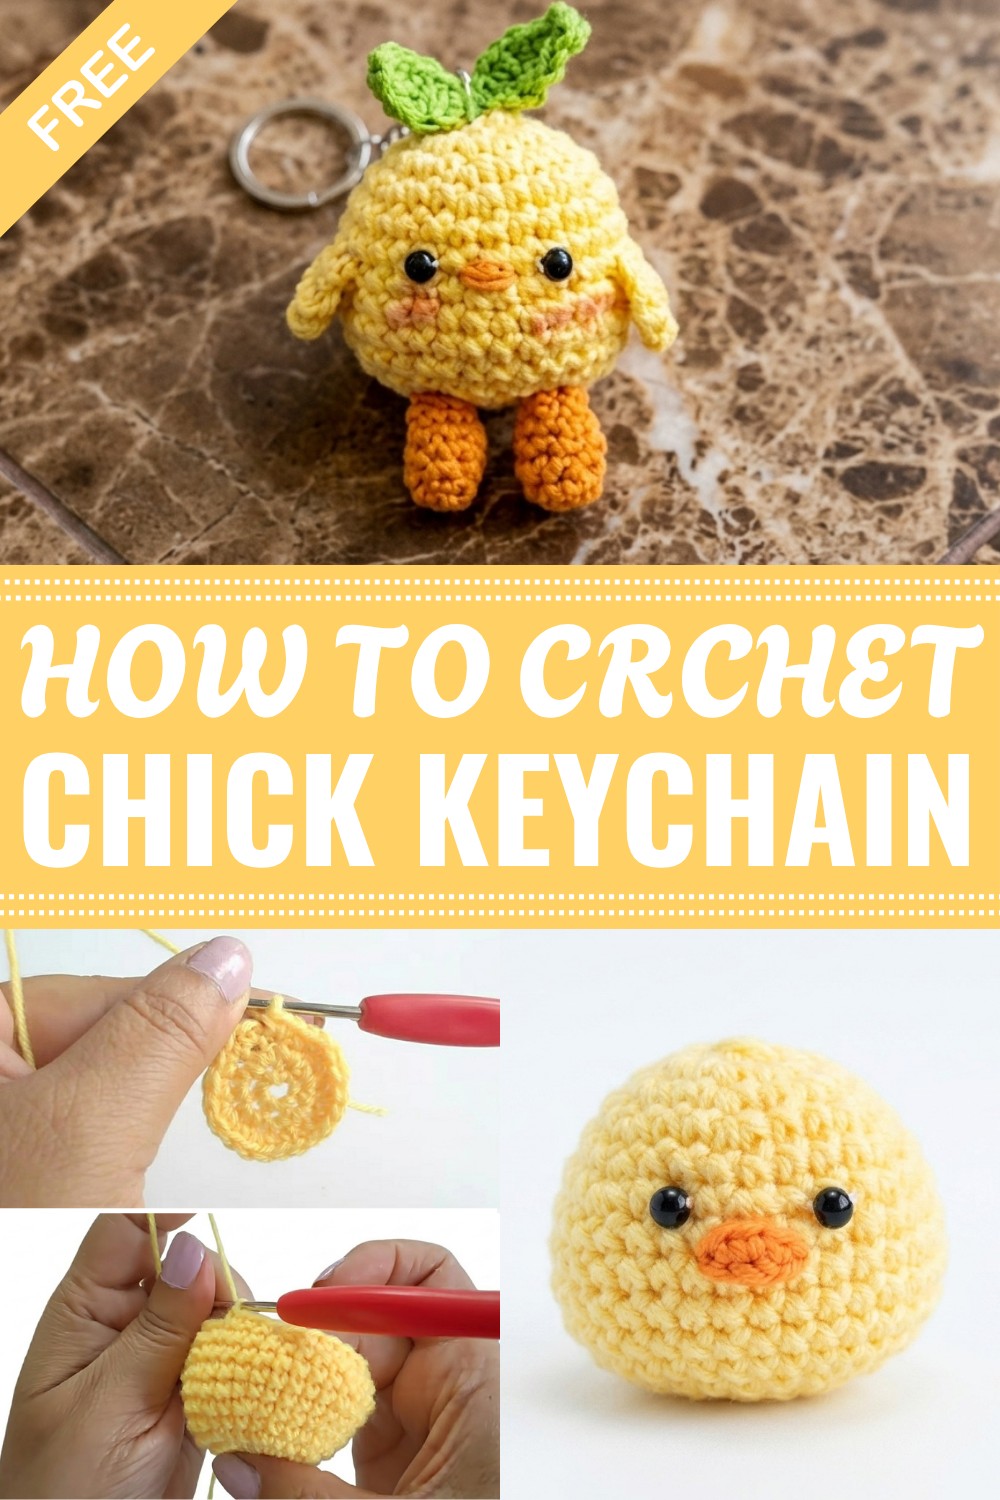
Crochet a charming chick keychain with this simple pattern which is for creating handmade accessories and thoughtful gifts for any occasion.
Small handmade accessories always bring a smile because they add a touch of charm to everyday items. When you follow a free crochet chick keychain pattern, you can create a cute little chick that is fun and colorful. This pattern is perfect for making a tiny, soft decoration that you can carry with you or gift to someone special.
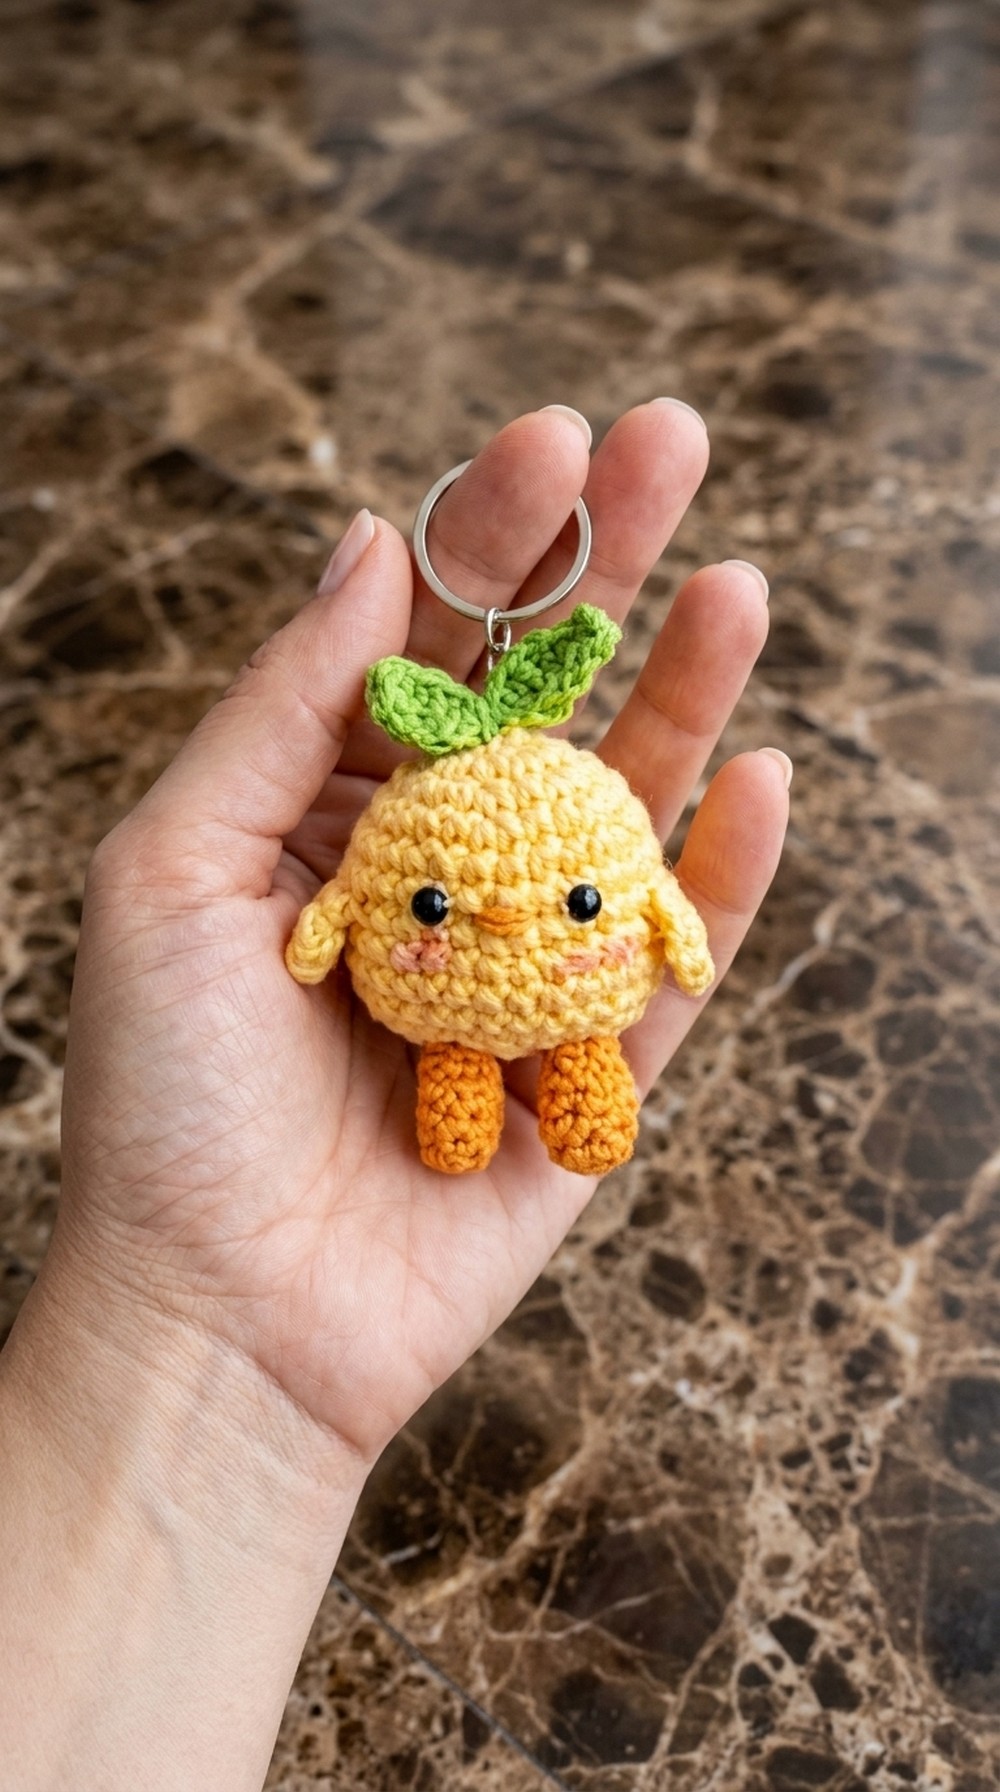
The free crochet chick keychain pattern shows how to make a small bird with adorable details like bright eyes, a tiny beak, and little wings. The texture is soft and fluffy, which makes the chick feel warm and pleasant to touch. Its round shape and bright colors bring a cheerful look that can brighten up your keys, bags, or backpacks. The simplicity of the design is very attractive, it's easy to recognize and just the right size to hold in your hand.
Quick Crochet Chick Keychain Pattern - Free
You can use this cute chick keychain to decorate your house keys, car keys, or even as a bag charm. It also makes a wonderful gift for kids, friends, or family members who like handmade things. This crochet keychain is popular during springtime or Easter, but it’s great year-round because of its playful and friendly look.
People who enjoy quick and easy crochet projects will love making this keychain. It's especially good for beginners because the stitches are simple and the small size means you can finish it quickly. Whether you are a child learning to crochet or an experienced crafter, this project is fun and satisfying. Plus, you can choose any yarn colors you like to create your own unique chick keychain that fits your style perfectly.
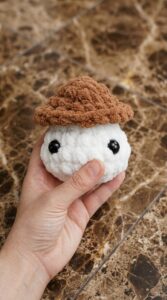
Duck Keychain Amigurumi – Crocheted Step-by-Step Pattern
Create a delightful and huggable little duck keychain with this easy-to-follow crochet pattern! This project is perfect for beginners and amigurumi lovers alike. You’ll enjoy making the playful body, tiny wings, feet, and beak, then assembling your duck with expressive eyes and a whimsical head tuft. Personalize your keychain with your chosen yarn colors!
Skill Level & Terminology
- Skill Level: Beginner
- Terminology: US Crochet Terms
This pattern uses basic amigurumi techniques including single crochet in the round, increasing, and decreasing.
Materials & Tools
- Acrylic yarn – three colors (yellow for body, orange for beak/feet, white or another bright shade for head tuft)
- Keyring – any color (sample gold)
- 2.0mm crochet hook
- Polyfill stuffing
- Tapestry needle
- Scissors
- Two small black beads (or safety eyes)
Gauge
Gauge is not critical for this project (as it’s a toy); use a small hook to make tight stitches and prevent polyfill from poking through.

Abbreviations List
| Abbreviation | Meaning |
|---|---|
| MR | magic ring |
| sc | single crochet |
| inc | increase (2 sc in one st) |
| dec | decrease (sc 2 sts together) |
| sl st | slip stitch |
| ch | chain |
| st(s) | stitch(es) |
| hdc | half double crochet |
| dc | double crochet |
Special Stitch Instructions
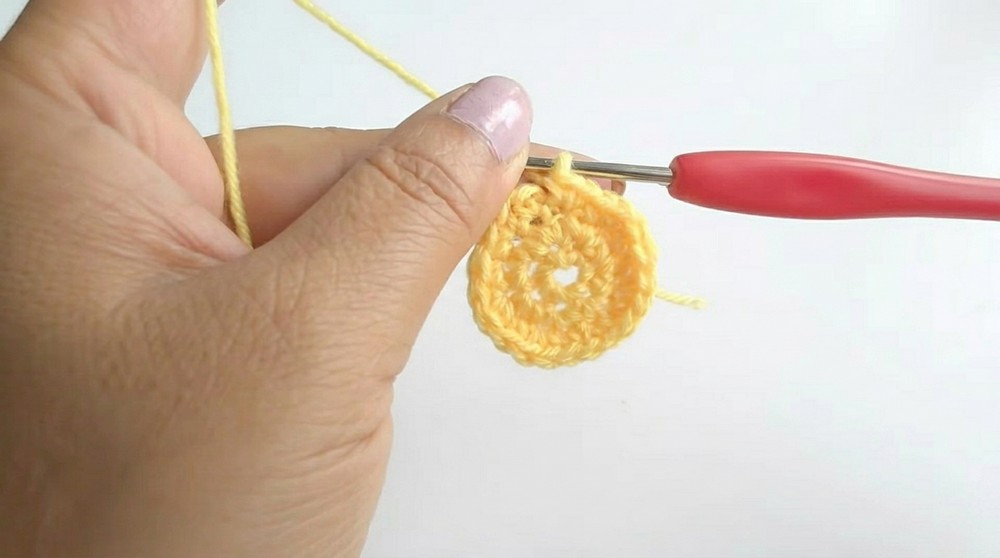
Magic Ring (MR):
Wrap yarn into a loop. Insert hook, pull up a loop, ch 1, then work stitches into loop as directed. Pull tail to close.
Invisible Decrease (dec):
Insert hook into front loop only of next two stitches, yarn over, pull through, yarn over and pull through both loops.
Finished Size
Approximately 5–7 cm tall, depending on yarn and tension; fits easily in a hand as a decorative keyring.
The Pattern
BODY (Yellow)
Round 1:
- Make a magic ring (MR), work 7 sc into ring.
- Pull tight, sl st to first sc, ch 1.
You’ve begun your duck’s main body. The magic ring allows for a tight, gapless starting point.
Round 2:
- Work 2 sc in each st around. (14 sts)
- Sl st to first sc, ch 1.
Round 3:
- (sc in next st, inc in next st) repeat around. (21 sts)
- Sl st to join, ch 1.
Round 4:
- (sc in next 2 sts, inc in next st) repeat around. (28 sts)
- Sl st to join, ch 1.
Round 5:
- (sc in next 3 sts, inc in next st) repeat around. (34 sts)
- Sl st to join.
You now have a nicely growing oval body.
Rounds 6–10:
- Sc in each st around (no increases). (34 sts per round)
- Continue for 5 rounds in total. Sl st to join at end of each round.
This section creates the main thickness and shape. No increases means the duck’s body becomes rounder.
Round 11 (Start Decreases):
- (sc in next 3 sts, dec) repeat around. (27 sts)
- Sl st to join, ch 1.
Round 12:
- (sc in next 2 sts, dec) repeat around. (20 sts)
- Sl st to join, ch 1.

Round 13:
- (sc in next st, dec) repeat around. (14 sts)
- Sl st to join.
Begin stuffing the body with polyfill here—adjust the amount for a soft or firm duck. After stuffing, continue to close tip.
Round 14:
- (dec) repeat around until closed (approx. 7 sts).
- Fasten off, leave a long tail.
- Close any small hole with a few stitches using tapestry needle. Weave in end securely.
By this stage, you should have a sturdy, round little duck body. If you don’t follow the pattern, simply make a round ball—start with 7 sc, increase to 34, work 5 rounds even, then decrease to close, stuffing before the final round.
EYES
- Using small black beads (or safety eyes), position eyes between rounds 6 and 7.
- Insert thread with needle, go through body, out at marked spot. Thread bead, sew back through body, repeat to secure.
- Skip 4 stitches from first eye to position the second in a cute way. Secure and hide threads inside body.
The eyes give character, so take a moment to make them even. Push them in slightly for cuteness if desired.
WINGS (Make 2, Yellow)
Round 1:
- MR, 6 sc in ring. Close ring, sl st to join.
- Fasten off, leave a tail for sewing.
- Pull starting yarn to the inside; knot to fasten tightly.
Assembly:
- Attach wings symmetrically on each side, one row below the eyes, using the tail yarn and needle.
- Secure with a knot and hide ends inside the duck body.
Wings are simple mini-circles. Attach at slight upward angles for a sweet, waving effect.
LEGS (Make 2, Orange)
Round 1:
- MR, 5 sc in ring. Close ring, sl st to join, ch 1.
Round 2:
- (sc, inc) repeat around. (7 sts)
- Sl st, ch 1.
Rounds 3-4:
- Sc in each st around. (7 sts per round)
- Sl st to join.
Round 5:
- (sc, dec) repeat around. Fasten off, leave a long tail.
- Attach both legs to the base of the body, between rounds 9 and 11, using tail yarn and needle.

Small ovals for feet, sewn directly underneath to help your duck “stand” or “sit.”
BEAK (Orange)
- Attach orange yarn at the center, between and just below the eyes.
- Ch 2, work 1 sc, 1 hdc, 1 sc into first chain for a slightly rounded beak.
- Slip stitch to next body stitch to anchor, fasten off, and weave tail inside.
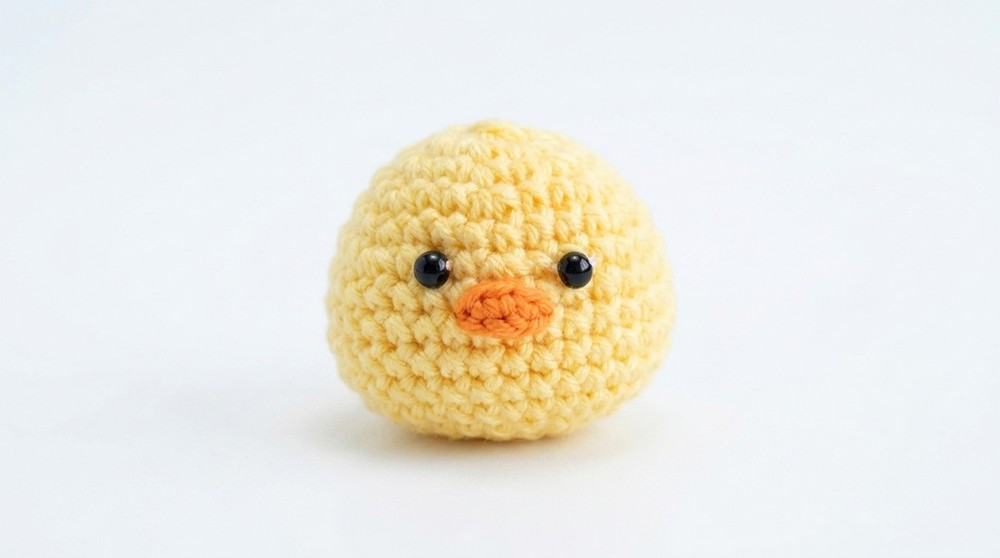
The beak sits low between the eyes. Make a few whip-stitches if you want the beak fuller or more 3D.
HEAD TUFT (“Feather”, White or Accent Color)
- Ch 9.
- Work into chain: sc, hdc, dc, hdc, sl st, hdc, dc, hdc, sl st.
- Fasten off, leave a long tail.
- Curl piece a little. Attach on top of the head, above and between the eyes. Weave in ends securely.
This adds a cute, decorative tuft. Make a simple loop if preferred.
Assembly & Finishing
- Weave in all remaining ends securely.
- Flatten belly gently for a squishier, cuter look.
- Using a tapestry needle, open a gap at the top of the duck’s head. Loop your keyring securely through (using a short yarn chain or jump ring).
- Reshape and stuff as needed.
About the Pattern
You start this amigurumi by crocheting the body in-the-round from a magic ring, steadily increasing then working “even”. Rounds of decrease shape the head, which you stuff with fiberfill. The features—wings, beak, tuft, and feet—are easy, single-piece mini-crochet, sewn on for personality.
What Stitches Are Used In This Pattern?
- Single Crochet (sc)
- Slip Stitch (sl st)
- Magic Ring (MR)
- Chain (ch)
- Half Double Crochet (hdc)
- Double Crochet (dc)
- Invisible Decrease (dec)
Leave a Reply