

Create an adorable free crochet mini bunny charm using this free pattern that's perfect for handmade gifts, decorations, or unique accessories.
Grab your yarn and hook, and start stitching this adorable free crochet mini bunny charm pattern. This tiny bunny pops to life with every simple stitch, bringing a burst of cuteness that's impossible to resist. Made with soft yarn and basic stitches like single crochet, it’s perfect for beginners and seasoned crocheters alike.
The charm of this bunny lies in its small size and sweet shape. You can create it in any color you like classic white, warm brown, or even bright, playful colors like pink and blue. Changing yarn thickness or hook size lets you make bunnies just right for keychains, backpack charms, or small gifts.
Free Crochet Mini Bunny Charm Pattern For Nursery Decor

This mini bunny isn’t just cute, it’s super useful too! Use it to decorate bags, hang it as an ornament, or give it as a heartfelt handmade present. Personalize your creation with tiny beads for sparkling eyes or add a ribbon bow to make it truly unique and special.
Crocheting this bunny is quick and fun, perfect for kids and adults who want a joyful project. The soft texture and loppy ears invite endless creativity and smiles. Make a bunch of them to form your very own little bunny crew that spreads happiness everywhere they go.
With its easy stitches and endless customization options, this mini bunny charm pattern is a delightful way to enjoy crafting. Every stitch brings you closer to a charming, cuddly friend that’s ready to hop right into your heart.
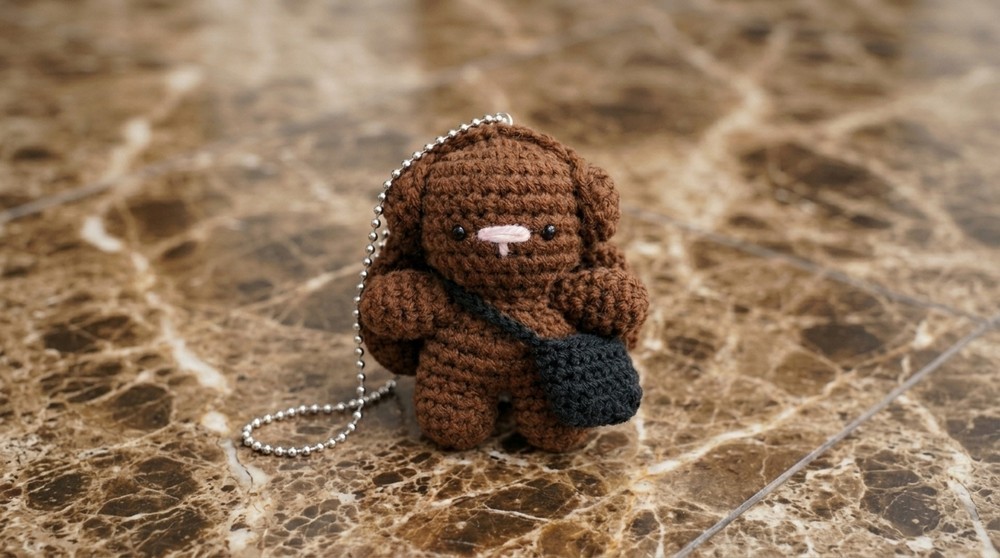
Mini Bunny Charm Crochet Pattern
Pattern Notes
- The mini bunny is crocheted in separate parts: arms, legs, body, head, ears, optional headphones, and backpack.
- Magic ring technique is used to start small circles for limbs and ears.
- The assembly involves sewing limbs to the body and ears to the head with yarn tails.
- Eyes are sewn on after assembly and the nose and mouth are embroidered using yarn.
- Stitches are worked in rounds and joined with slip stitches, stitch markers recommended.
- Decreases are done working in the front loops only to create shaping.
- Optional additions (headphones, backpack) add personality.
- Fiber filling is used for stuffing limbs, body, and head.
Skill Level
Beginner to Intermediate: Requires knowledge of magic ring, single crochet, slip stitch, increases, decreases, stitching in rounds, embroidery basics, and basic sewing.
Materials
- Dark brown, light pink coloured yarn
- Small amount of pink yarn for nose
- Brown yarn for headphones/backpack (optional)
- Crochet hook size appropriate for yarn (recommended 2.5 – 3.5 mm depending on yarn weight)
- Stitch markers
- Yarn needle for assembly and embroidery
- Fiber fill stuffing
- Small black beads or safety eyes (optional)
- Scissors
- Fabric glue (optional for headphone attachment)

Measurements / Sizing
- Approximate finished size of bunny (assembled): 10-12 cm tall
- Legs and arms about 3-4 cm in length
- Head and body proportional to limbs, as per pattern instructions
- Backpack size approx. 6 cm wide and 4 cm tall (optional)
Gauge
Not critical; consistent tension recommended for accurate shaping.
Stitch Abbreviations
- MR = Magic Ring
- ch = chain
- sc = single crochet
- sl st = slip stitch
- inc = increase (2 sc in same stitch)
- dec = decrease (single crochet two stitches together)
- st = stitch
Special Stitches
- Front loop only crochet: Insert hook only under front loop of stitch for shaping/decreases.
- Decrease (front loop only): Insert hook in front loop of next two stitches, yarn over and pull through all loops.
The Crochet Pattern
Arms (Make 2)
- Create a magic ring (MR). Ch 1.
- Work 8 sc into MR. Pull tail to close ring.
- Join with sl st to first sc.
- Ch 1. Work 8 sc around in each stitch. Join with sl st.
- Repeat step 4 for 2 more rounds (3 rounds total of 8 sc each).
- Finish off, leaving a tail for sewing. Tighten ring and weave tail inside.
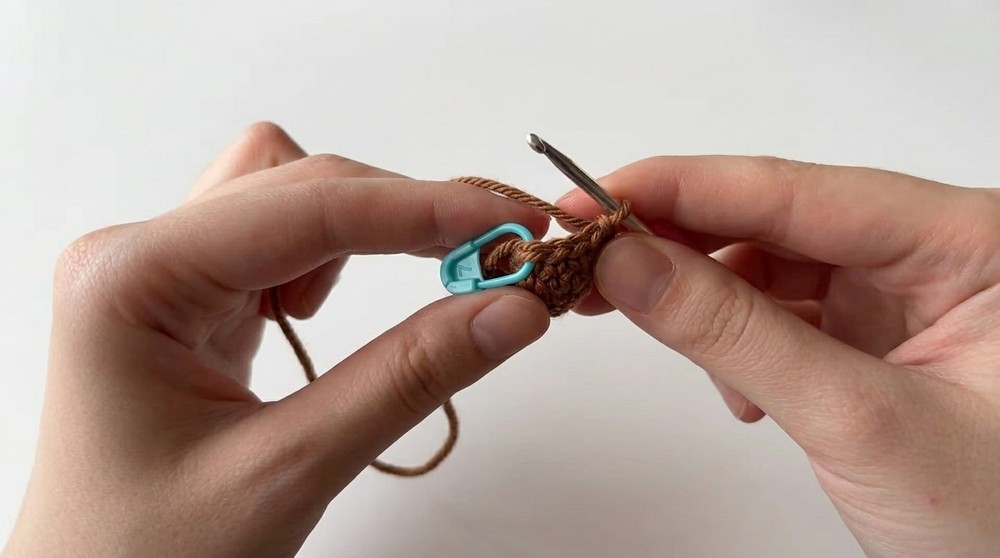
Legs (Make 2)
- Create MR. Ch 1.
- Work 5 sc into MR. Pull tail to close. Join with sl st.
- Ch 1. Inc in every stitch around (2 sc in each st) for total 10 sc. Place stitch marker. Join.
- Ch 1. Work 10 sc in each stitch for next 3 rounds.
- Do not finish off second leg; continue to join legs.
Joining Legs (Row 6)
- Ch 1, sc 10 around first leg.
- Sc 1 in chain between legs.
- Sc 10 around second leg.
- Sc 1 in second chain joining legs.
- Join with sl st (total 22 sc). Place stitch marker.
Body & Attaching Arms (Row 7–9)
Row 7:
- Ch 1, sc 22 around (body + arms attached). Join.
Row 8: - Ch 1, sc 5 across one arm.
- Insert hook into stitch of arm and next stitch on body, yarn over and pull through, complete sc to attach.
- Sc 10 across body.
- Repeat arm attachment for second arm similarly. Sc final 5 stitches. Join.
Row 9: - Ch 1, work 8 sc on each arm, 22 sc across body (total 38 sc). Join.
- If gaps appear under arms, close with sc2tog stitch.

Decrease Body Shape (Row 10)
- Ch 1, working front loops only, sc and dec evenly every two stitches around (count decreases accordingly).
- Place stitch marker after first dec. Join.
- Stuff the body firmly after this row.
More Body Decreases (Row 11)
- Ch 1, continue with front loop decreases till 10 stitches remain. Join.
Head Construction
Row 12:
- MR. Inc in each stitch around for total 20 sc. Join.
Row 13: - 2 sc, inc repeat around (total 26 sc). Join.
Rows 14–19: - Work 26 sc without increases for 6 rounds.
- Stuff head firmly after round 19.
Row 20: - Sc decrease all rounds around to 13 sc total.
Row 21: - 1 sc, dec repeat around to 7 sc remaining.
- Cut yarn, leaving long tail. Thread tail with needle and pull through front loops to close opening. Knot and hide tail inside head

Ears (Make 2)
Row 1:
- MR with 8 sc. Join.
Row 2: - 1 sc, inc around (12 sc). Join.
Row 3: - 12 sc without increases. Join.
Row 4: - 5 sc, inc, 5 sc, dec. Join.
Row 5: - 14 sc without increases. Join.
Row 6: - 5 sc, front loop dec, 5 sc, front loop dec. Join.
Row 7: - 12 sc without increases. Join.
Row 8: - 4 sc, dec, 4 sc, dec. Join.
Rows 9–10: - Sc without changes (10 sc total). Join.
Row 11–12: - 8 sc total. Join.
Row 13: - Fold ear flat, slip stitch decreasing left and right sides to 4 sts, ch 1 and cut yarn leaving tail for sewing.
Sew ears to head, typically near top, slightly towards back starting about fourth row from top.
Facial Features
- Sew or glue small black eyes (optional beads or safety eyes).
- Embroider nose and mouth lightly with pink yarn.
Headphones (Optional)
- Make two pieces: MR, ch 1, 9 dc in MR.
- Join with sl st, ch 1.
- For second piece, repeat but do not cut yarn.
- Chain desired length (e.g., 11 chains) for headband.
- Join to first piece with sl st, ch 1, then cut yarn.
- Attach with fabric glue or sew ears on top of head.
Backpack (Optional)
Row 1:
- Ch 7, starting in second chain from hook, 2 sc, 1 sc in next 4 chains, 3 sc in last chain. Rotate and work down other side of foundation chain with 4 sc, 1 sc in last (same as start) chain. Join.
Row 2: - Inc in first stitch, 6 sc, inc in next, rest 6 sc. (16 sc total)
Rows 3–6: - Work 16 sc in rounds.
- Change to beige yarn for rows 5–6 as desired.
Row 7: - 1 sc, 4 slip stitches, chain 10 for handle, skip 2 stitches, sl st in next, 5 slip stitches, repeat chain 10 and slip stitch for second handle. Join and finish.

Attach backpack with sewing or glue to bunny’s back.
Assembly & Finished Size
- Legs and arms each approx. 3-4 cm long.
- Body about 5-6 cm tall with shaping for waist.
- Head approx. 4-5 cm tall with attached ears approx. 3-4 cm.
- Fully stuffed with fiber for squishy, firm feel.
- Securely sewn arms and legs on body.
- Ears sewn flat onto head near back top row.
- Optional eyes sewn or glued on front face.
- Optional backpack and headphones added with care.
Summary
This beginner-friendly crochet pattern will guide you through creating a delightful mini bunny charm, complete with adorable ears, limbs, and an optional cute backpack and headphones. Worked in the round mainly with single crochet, it involves simple increases and decreases to shape the bunny’s body and head. The pattern also covers assembly tips to sew parts securely with embroidered facial details.




Leave a Reply